
Most 1980s ranch remodels don't get into trouble because one finish looks dated. They get into trouble because the work starts in the wrong place. Somebody paints the garage door before figuring out why the front entry disappears from the street. New counters land on old cabinet boxes nobody bothered to check. The hall bath gets re-tiled before the fan duct, subfloor, or shutoff valves get looked at. And then the flooring gets done one room at a time, and by the end every hallway transition looks patched.
A good remodel of a 1980s ranch starts with the shape of the house, how the floor plan actually gets used every day, the condition of the wet rooms and the exterior, and the order the work has to happen in. Paint colors, cabinet pulls, and light fixtures come later.
Why 1980s Ranch Remodels Go Sideways
A ranch looks simple from the outside because it's one story, but that simplicity gets misleading once the work starts. The roofline is straightforward and the rooms are all on one level, but they connect to each other in ways that don't matter until somebody tries to change one of them. The kitchen usually sits next to the family room. The hall bath serves both the bedroom wing and any guests using the main living area. The garage decides how the front of the house reads. Flooring runs from the entry through the living room, down the hallway, into the kitchen, and all the way into every bedroom — no ranch decision stays inside a single room.
Finish-first remodels tend to punish 1980s ranches specifically because of that connectivity. Painting the brick before checking moisture and drainage can seal in a wall that was already struggling to dry. Replacing the floors before deciding on the kitchen cabinets leaves gaps at the toe kick that never quite close cleanly. Redoing a bathroom vanity without first looking at the shutoff valves, the fan duct, the subfloor, and the tub edge turns a small refresh into a wall repair. The house needs to be worked through in an order, not one room at a time.
Start With the Floor Plan, Not the Paint
Before picking exterior colors or interior finishes, the first thing to understand about a 1980s ranch is how it actually gets used from room to room. Most 1980s ranches have the same general shape: a long, low front with an attached garage, a recessed entry, a kitchen tied to a family room, a bedroom hallway, and one or two compact bathrooms. That layout can work well, but it takes discipline to remodel. If every room gets treated as its own project, the house ends up feeling chopped up even after every finish is new.

Before choosing finishes, it helps to mark the pressure points of the house:
- The front garage and entry.
- The kitchen and family-room connection.
- The hall bath and bedroom hallway.
- The flooring path through the main rooms.
Those are the connection points where the cost and the regret usually start on a ranch remodel.
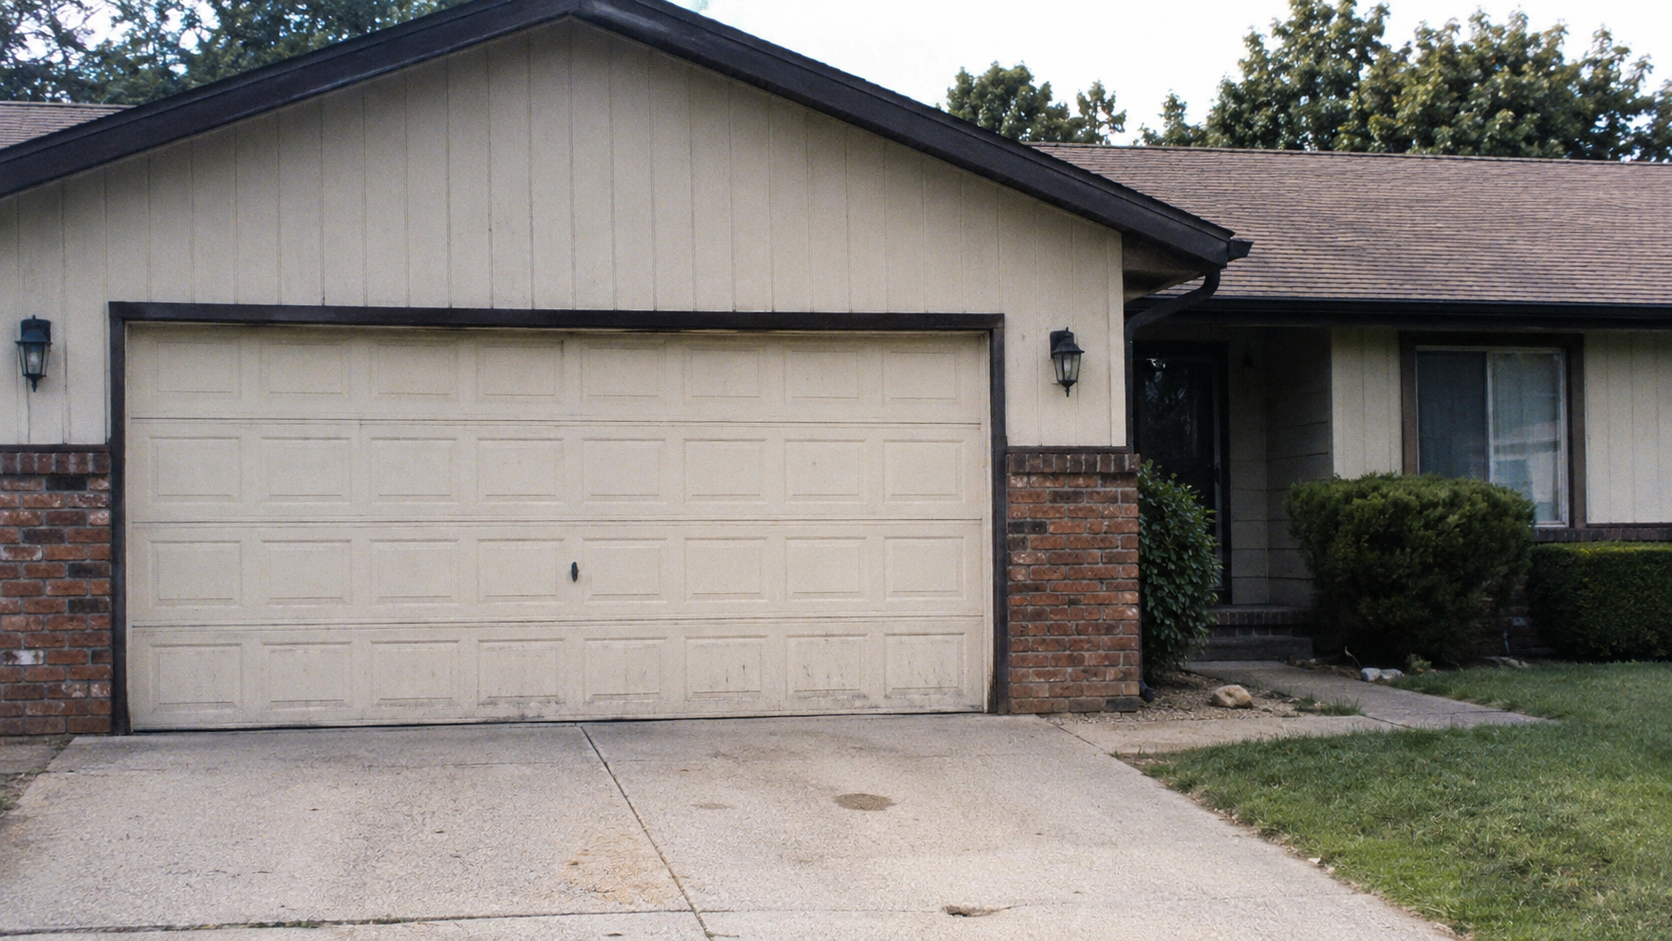
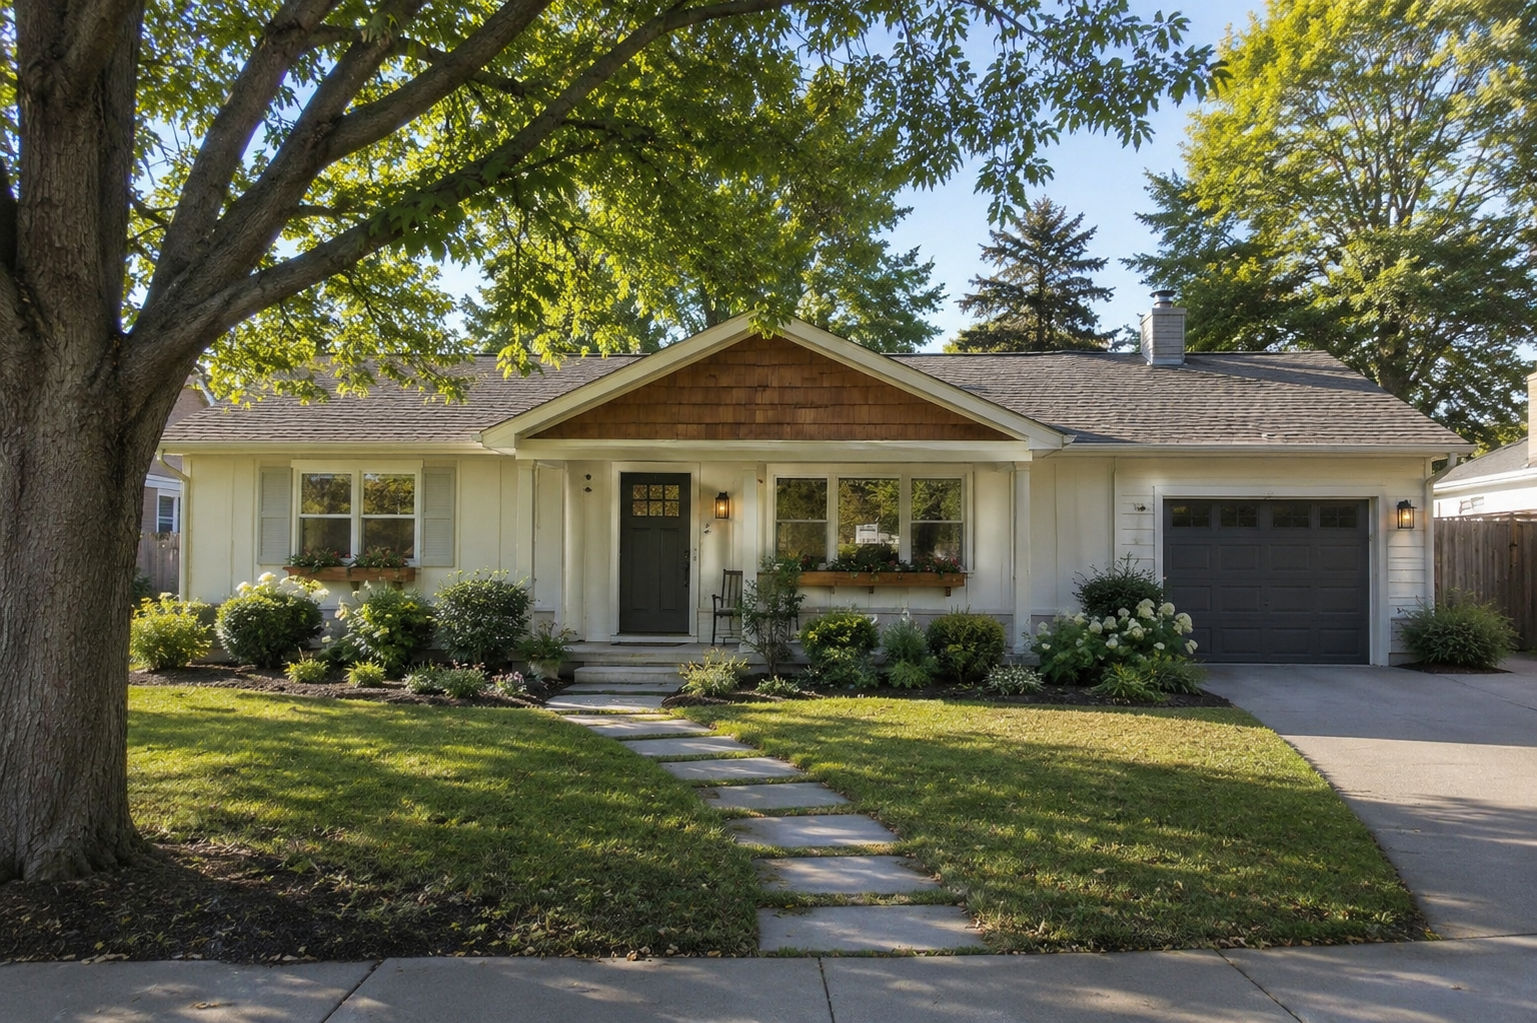
The Garage and Front Entry Usually Control the Whole Front Elevation
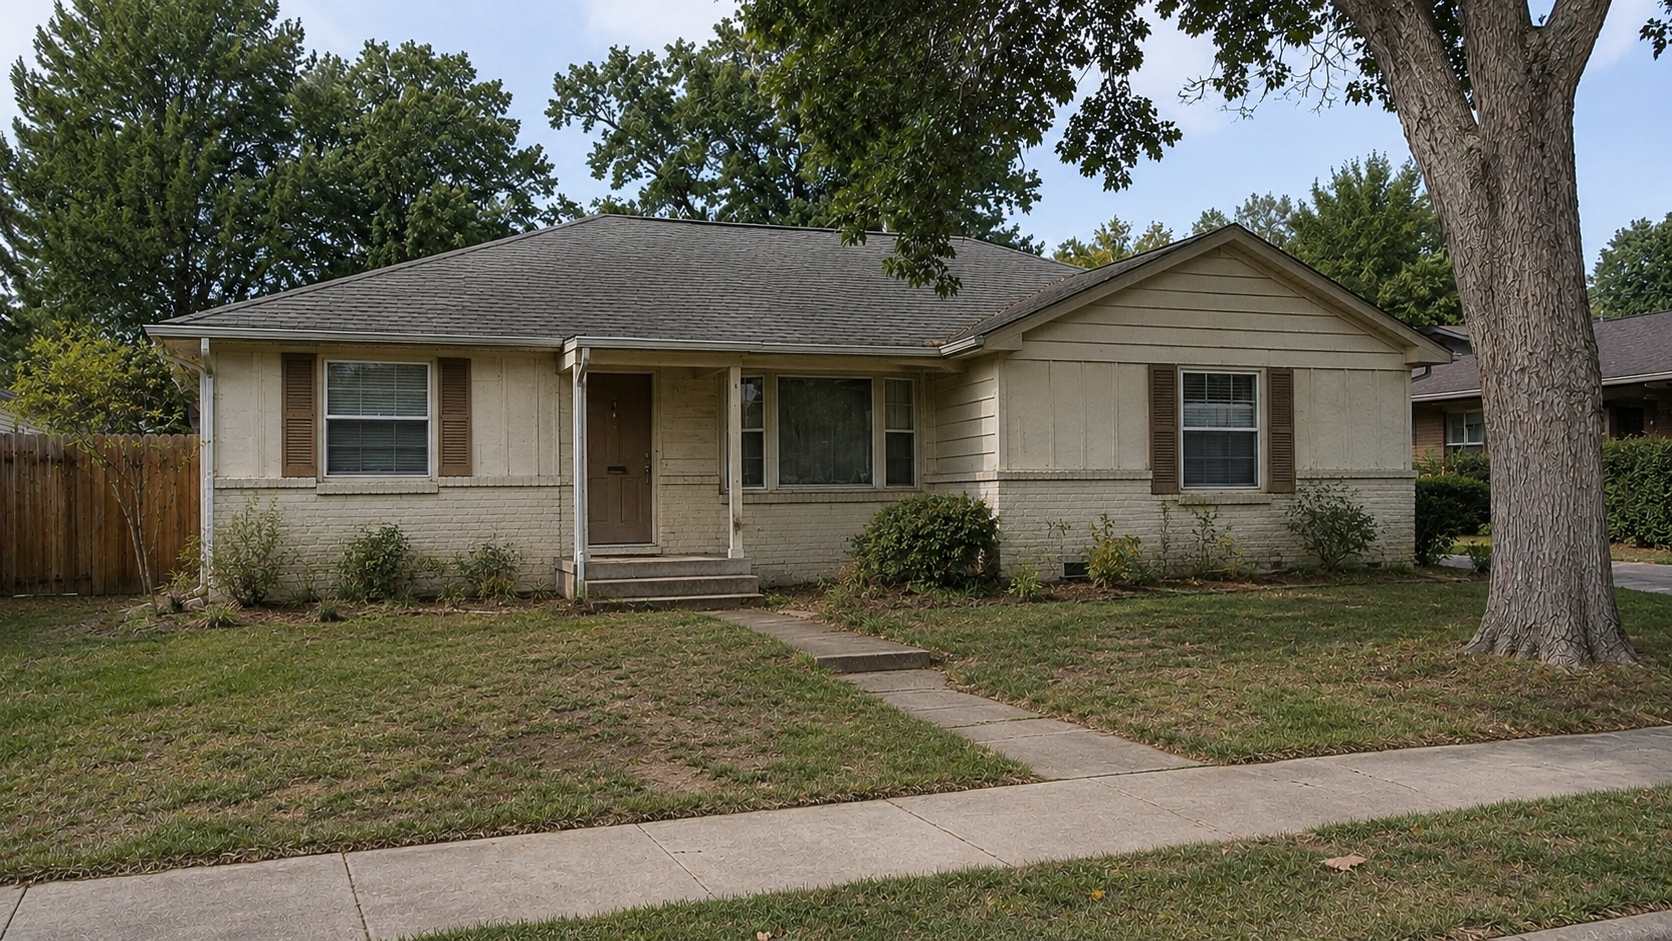
On a lot of 1980s ranch houses, the garage is the first thing anyone sees from the street, and the front door is somewhere behind it. The garage door tends to be wide and flat and close to the curb. The entry sits back under a shallow porch, often behind shrubs that have grown into the porch light. Add dated trim, small coach lights, tired siding, and planting from three decades ago, and the whole front of the house feels heavier than it should.
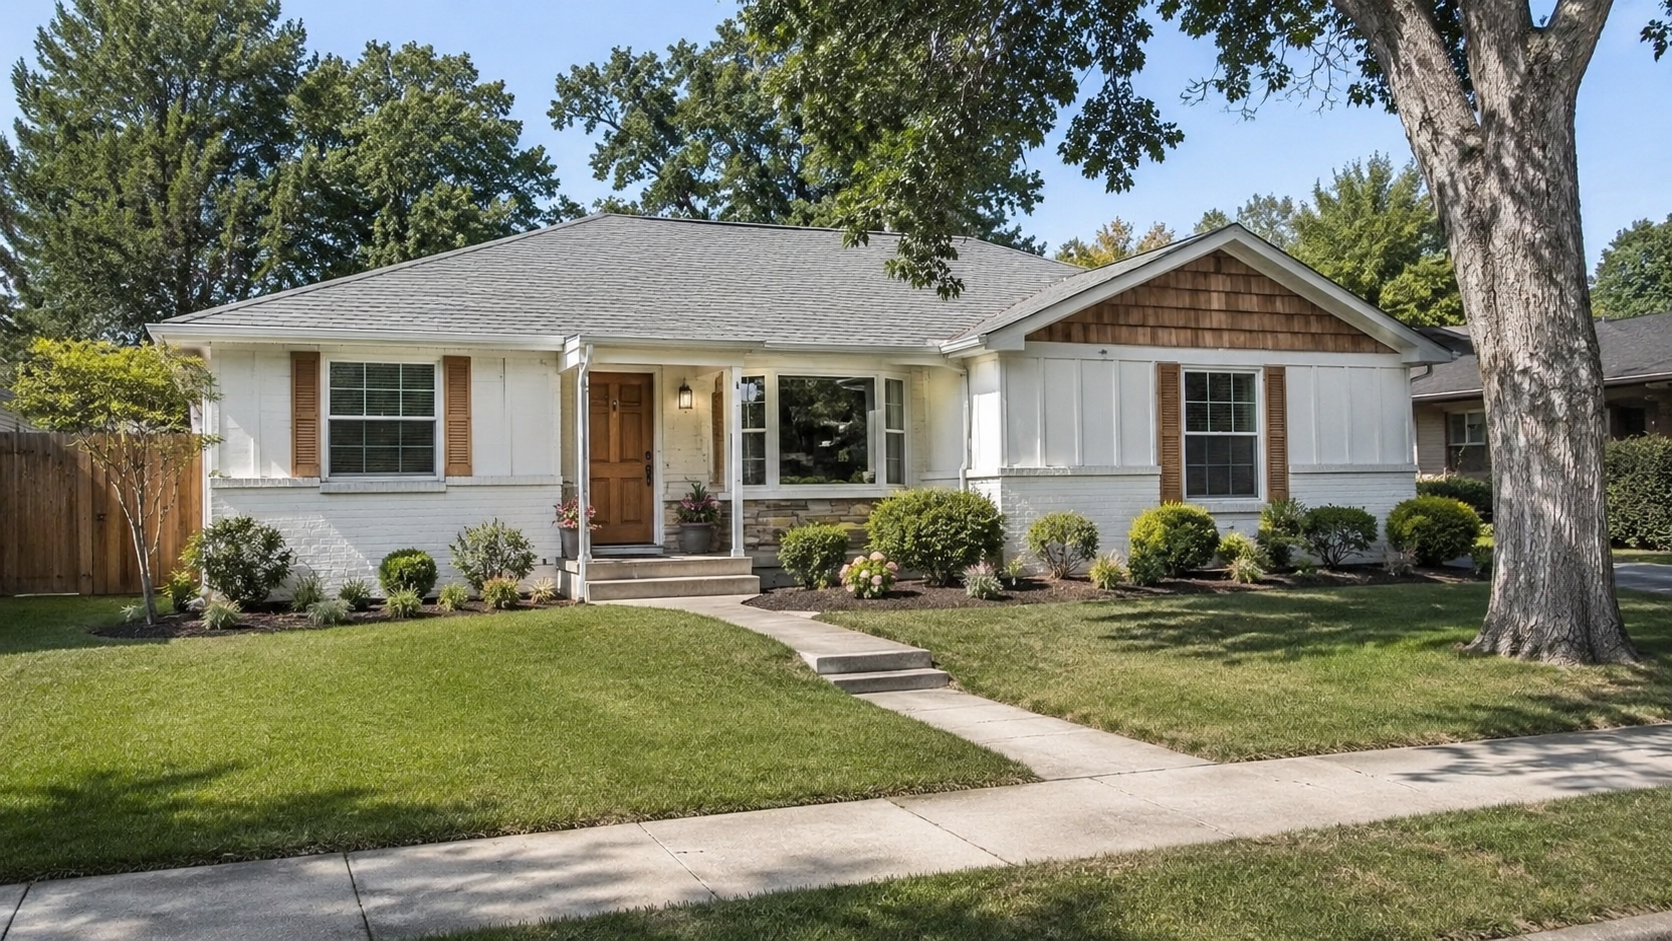
Fixing that doesn't always mean a full exterior redesign. Most 1980s ranches respond well to small, coordinated moves aimed at the entry and the garage together:
- Calm the garage door color so it stops shouting at the street.
- Clear shrubs away from the entry so the door has some breathing room.
- Replace the porch light and house numbers, and check the walking path.
- Repair tired trim before painting over it.
One thing worth avoiding is a new garage door as the only visible improvement. If the entry is still lost in shadow behind it, the front of the house still feels wrong. The exterior work needs to follow a clear sequence, especially when the garage, entry, siding, trim, and planting all affect the same front elevation. See 1980s house exterior update for that outside order.
What Dates a 1980s Ranch Exterior
A dated ranch exterior is rarely about one single material choice. It's usually the whole stack together: a front-facing garage, beige or cream siding, brown brick, small shutters, tired trim, thin coach lights, an underplayed entry, and shrubs planted three decades ago that now block the windows. Some of those items are just cosmetic. Others are condition problems, and that difference determines whether painting will actually help.
Faded siding is one kind of decision. Soft trim at the window corners is a different kind entirely. Brick with blocked weep holes, high mulch piled against it, or splashback staining at the base is a moisture issue that a coat of paint can't fix. Gutters, grading, downspouts, and the planting bed itself may all need to be corrected before anything gets painted. A tired 1980s exterior can look substantially better for a single season under new paint and still hide rot, water staining, and drainage problems underneath.
The Kitchen Usually Controls the Remodel
In a 1980s ranch, the kitchen tends to decide the rest of the interior remodel. It usually connects to the family room, the dining area, the garage entry, the laundry room, and the main hallway, so its flooring meets everything else's flooring, its ceiling light bleeds into the main living area, and every cabinet decision ripples outward to counters, backsplash, appliance openings, and sometimes to wall openings that go with them.
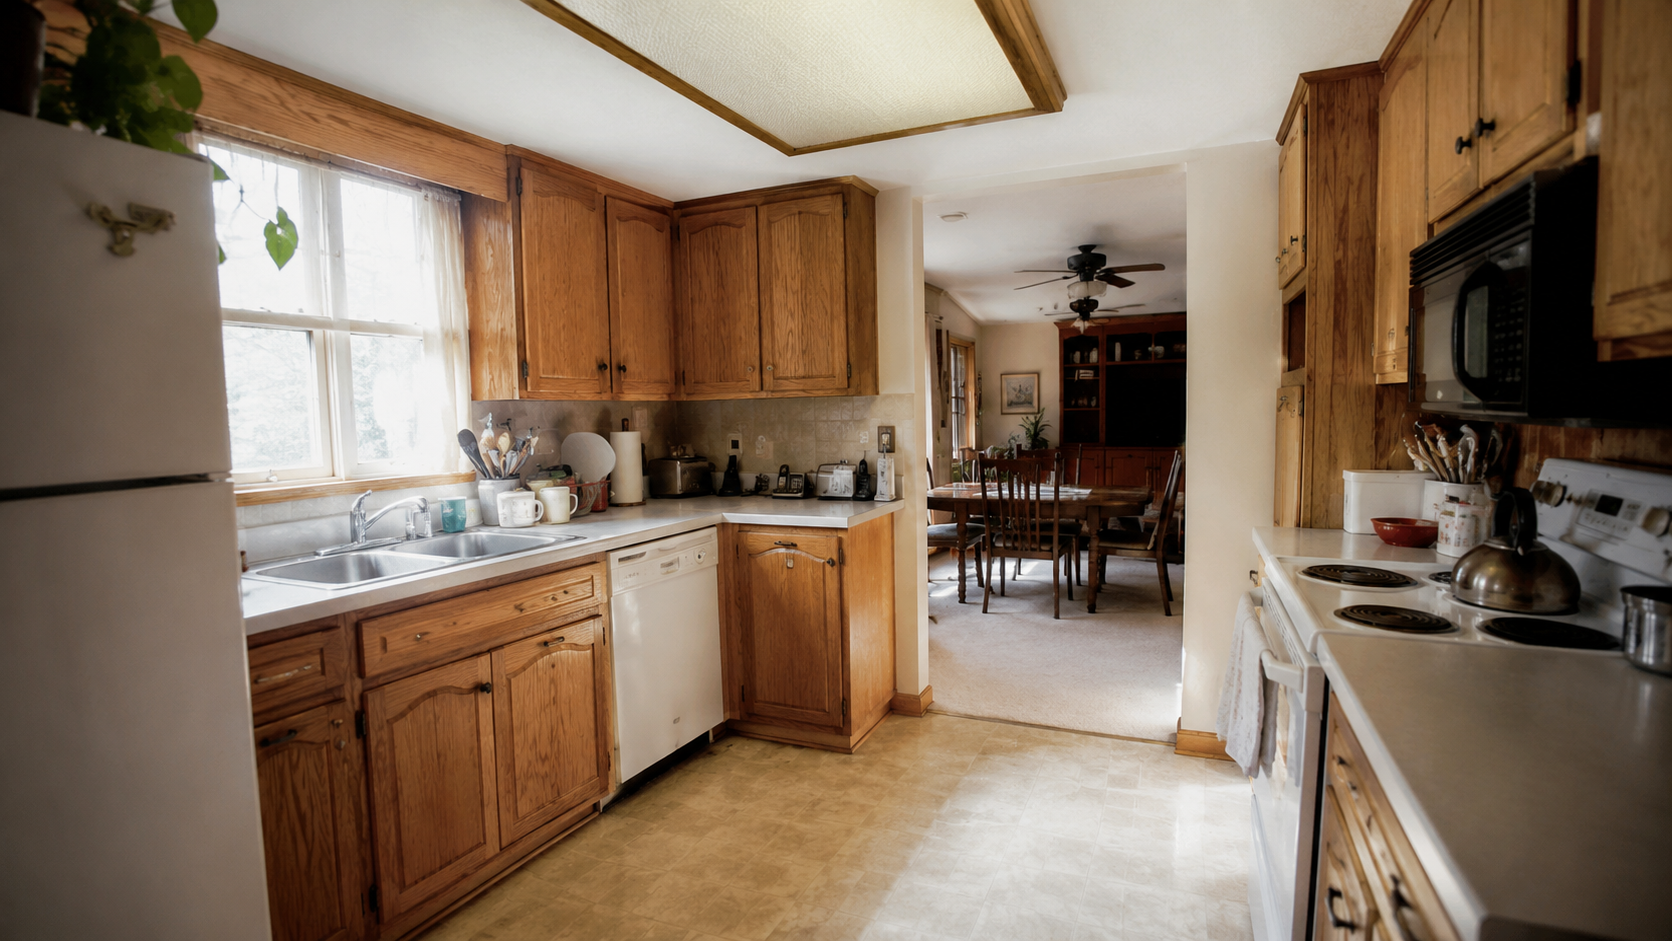
The countertop isn't the place to start. The real starting point is the cabinet boxes, the sink base, the appliance openings, the lighting layout, whether there's a bulkhead or soffit above the wall cabinets, the flooring height at the transitions, and the traffic path through the room. If those boxes are solid and the layout still works, the kitchen may be a good candidate for a same-footprint update. If the sink base is swollen, the drawers are failing, the refrigerator blocks the traffic path, or the soffit above the cabinets is holding cabinet height too low, the project is a deeper remodel than the counters suggest.
If the cabinet boxes are the main question, start with 1980s kitchen cabinets. If the whole room needs sequencing, use 1980s kitchen remodel. For visual comparison, see 1980s kitchen before and after.
Hall Bathrooms Show the Hidden Damage
The hall bath in a 1980s ranch usually looks like a small cosmetic project on paper — vanity, light, mirror, toilet, floor, paint, done. That list is where the trouble usually starts. The vanity comes out and the floor underneath is stained. The shutoff valves don't hold when someone tries to close them. The fan either doesn't vent to the outside at all, or the duct runs into the attic and stops. The tub edge shows failed caulk hiding rotted framing. The old flooring is layered three deep. The wall behind the toilet or vanity is soft when a finger presses against it.
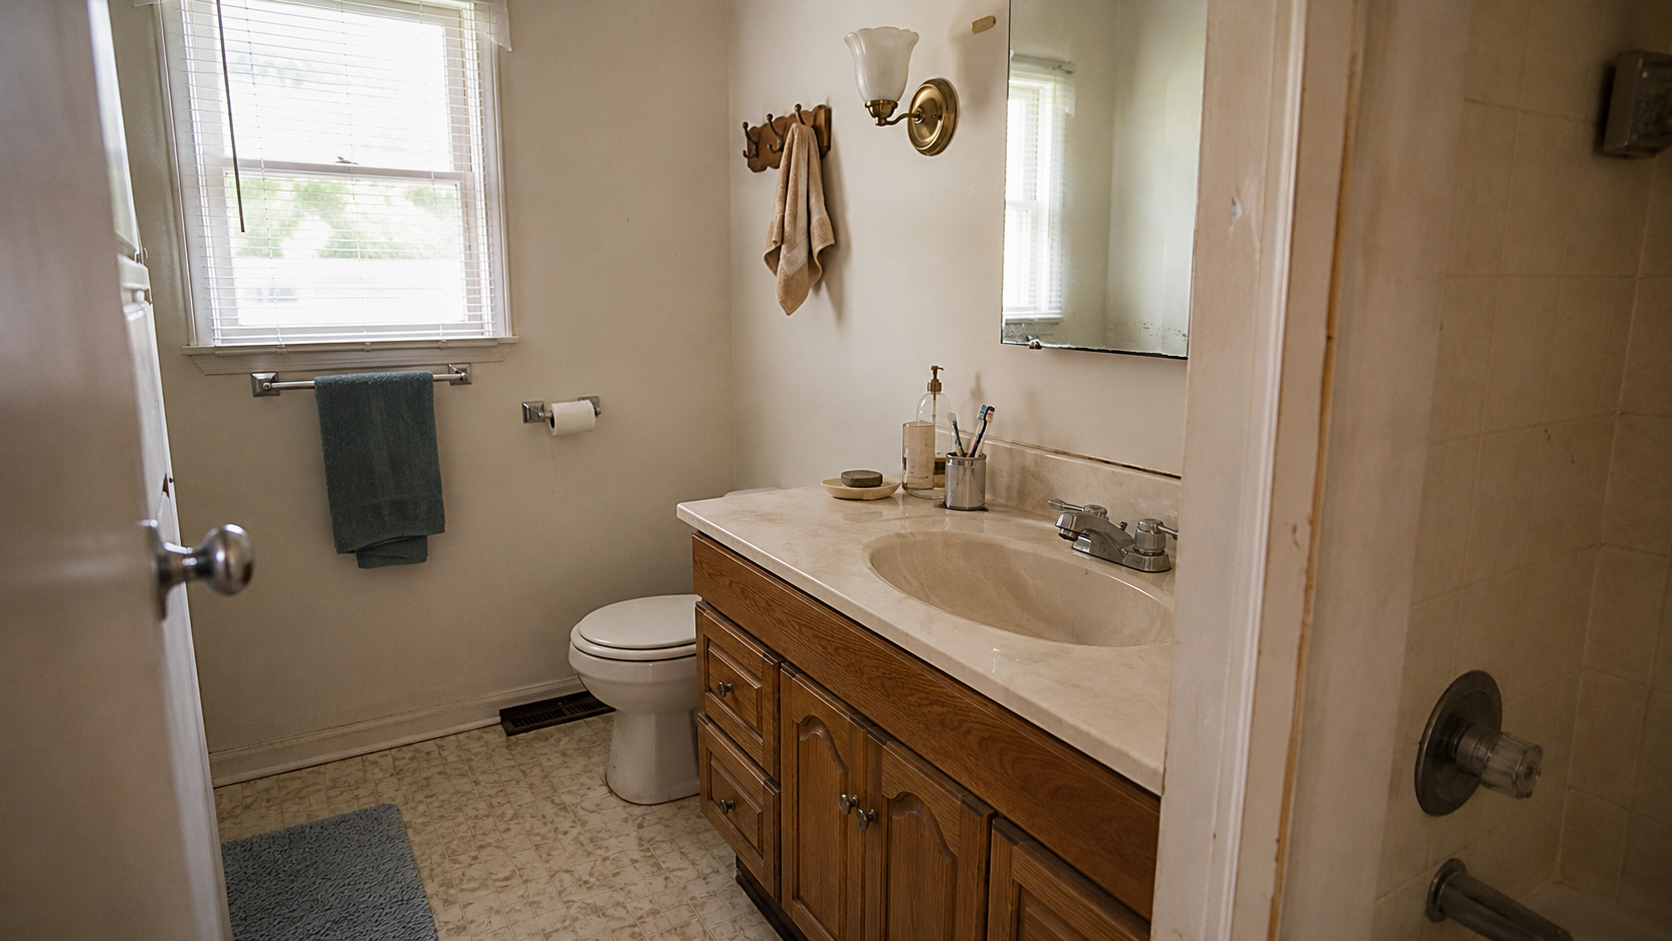
A bathroom has to prove it's dry before anyone spends money making it pretty. That means checking the vanity base, the tub edge, the toilet flange area, the fan and its duct, the subfloor, the grout, the caulk, and the supply valves before anything gets ordered. A modest cosmetic update is fine when those parts all check out. When they don't, the budget belongs in repair, not in new tile, mirrors, and fixtures. For the full bath sequence, see 1980s bathroom remodel.
Flooring Transitions Run Through the Whole House
Flooring is one of the biggest traps in a ranch remodel, because everything is spread out on one level. The living room, hallway, kitchen, bedrooms, and bathrooms all meet each other at doorways and transitions. Change any one of those floors without planning the whole path, and the house ends up with awkward thresholds, height changes, short patches, and different materials fighting each other along the same sightline.

A lot of "simple" ranch remodels turn messy right here. New kitchen flooring lands proud of the hall floor. Bathroom floors end up sitting higher than the bedroom hallway after a tile-over. Old carpet gets pulled up and reveals subfloor water damage nobody knew about. A new dishwasher gets trapped by a taller finished floor and can't slide out for service. Baseboards have to come off in rooms that weren't supposed to be touched.
Plan the flooring path before ordering any flooring. Decide whether the main living areas should share one material, where the transitions should happen, and how the kitchen and bathrooms will meet the rest of the house without leaving a two-inch step-down at the doorway.
Windows, Siding, and Trim Need a Condition Check
Windows, siding, and trim on a 1980s ranch tell you more about the true condition of the house than most of the rest of the exterior does. Corner joints at the windows, lower trim boards, garage return details, siding edges, the joints between brick and siding, and anything downstream of a downspout are the first places to look for real damage. Soft trim, failed caulk, swollen siding edges, or staining below a sill are moisture symptoms. Painting over them can look better for a season while the underlying repair still needs to happen.
The same principle applies to replacement windows. New windows can genuinely help comfort, energy use, and long-term maintenance, but they also touch the trim, flashing, siding repair, interior casing, and interior wall patching once they get installed. A cheap window swap done without a real plan for water management just makes the leak look cleaner from the outside.
Three Hidden Systems That Can Only Exist in a 1980s House
There's a specific category of remodel-killing problems that mostly appears in houses built roughly between the late 1970s and the mid-1990s. Older houses don't have them. Newer houses don't have them either. But 1980s ranches sit right in the middle of the timeline for all three, and any one of them, if present, changes the order of the work and probably the budget.
Federal Pacific Stab-Lok electrical panels. Federal Pacific Electric (FPE) Stab-Lok panels were manufactured from the 1950s through roughly 1990, with some breakers still produced under other names into the early 90s. The problem is that the Stab-Lok breakers have a well-documented history of failing to trip during overload or short-circuit conditions. The U.S. Consumer Product Safety Commission opened an investigation in June 1980 and closed it in March 1983 — but as the CPSC later clarified in 2011, the investigation was closed for budget reasons and without any determination on the safety of the panels or on the manufacturer's position. Independent testing since then has consistently shown breaker failure rates in the tens of percent. In 2005, a New Jersey state court found in a class-action that FPE had knowingly distributed breakers that did not meet UL standards. Many home insurers now either decline coverage on houses with FPE panels or charge higher premiums, and some jurisdictions effectively require a panel replacement before any significant permitted electrical work. If the panel on a 1980s ranch is stamped Federal Pacific, Stab-Lok, or Federal Pioneer, plan the panel replacement into the remodel before spending money on lighting, appliances, or kitchen wiring. Zinsco panels (later branded GTE-Sylvania) share similar failure-to-trip issues in some models and deserve the same look.
Polybutylene plumbing supply lines. Polybutylene was sold as a cheaper flexible alternative to copper and installed as potable water supply piping in an estimated 6 to 10 million U.S. homes between 1978 and 1995. The material reacts poorly with chlorine and chloramine in municipal water supplies, gradually becoming brittle from the inside out and failing without visible warning from the outside. The class-action settlement in Cox v. Shell Oil was announced in 1995 and eventually paid out over $1.14 billion in claims, but the filing deadline expired in 2009 — replacement is now on the homeowner. Many insurance carriers won't underwrite a house with PB supply lines or will exclude water-damage claims traced to them. PB pipe is usually gray, sometimes blue or black, often marked PB2110, and typically joined with copper or plastic (Celcon) crimp fittings. On a 1980s ranch, the runs usually go from a shutoff or water heater through the crawl space or slab and up into the walls at each fixture. If gray plastic supply pipe is visible under any sink, at the water heater, or entering the walls, a whole-house re-pipe should be planned before finishing bathrooms or the kitchen. A leak behind a freshly tiled wall is expensive twice.
LP Inner Seal and other hardboard sidings. Louisiana-Pacific's Inner Seal composite siding was manufactured from 1985 to 1996 and was widely used on 1980s and early 1990s ranches, especially in tract subdivisions. Masonite and Weyerhaeuser sold similar OSB and hardboard composite sidings in the same window. The material absorbs water at the bottom edges, at joints, at nail heads, and around windows, and once it starts swelling and delaminating there's no reliable way to reverse the deterioration — painting it can actually seal moisture in and accelerate the failure. The 1996 LP class action closed in 2002 after paying out roughly $500 million against about 800,000 affected homes, and the Masonite and Weyerhaeuser settlements ran through similar windows. All are long since expired. LP Inner Seal is often identifiable by a distinctive knot pattern with a subtle "LP" traced inside the knot; look also for mushroomed nails, exposed strand fiber at cut edges, dark staining below windows, and swelling along the bottom drip edge of each course. Full replacement with fiber-cement or a modern engineered wood is usually the honest answer, and the work is worth timing with any window replacement so that flashing details get done once, together.
None of these three problems is inevitable in a 1980s ranch — many houses from that era have modern panels, copper or PEX plumbing, and cedar or vinyl siding. But if any one of them is present, the remodel sequence and the budget both need to shift before the finish work is planned. A finish-first remodel that ignores a Federal Pacific panel, a polybutylene manifold, or LP Inner Seal siding is a remodel that gets torn back into six months later.
Confirming any of these findings on a specific house is work for a licensed electrician, a licensed plumber, and a qualified home inspector — not for a homeowner alone.
The Attic Can Change the Comfort Budget
A low ranch roof makes the attic easy to forget, but comfort problems in a 1980s ranch usually start there. Thin insulation, poor air sealing at ceiling penetrations, bathroom fans that dump into the attic rather than through it, blocked soffit vents, overheated attic space, and uneven ductwork can all leave a house drafty, humid, or uncomfortable no matter how fresh the finishes are. Before spending heavily on paint, floors, cabinets, or siding, it's worth checking:
- Attic insulation depth and any gaps.
- Air leaks around ceiling penetrations, recessed lights, and top plates.
- Bathroom fan discharge — into a proper exterior cap, not into the attic.
- Soffit and roof ventilation.
- Duct condition if the HVAC runs through the attic.
None of that is glamorous work, and none of it shows up in listing photos, but it's usually what makes the difference between a remodel that feels good every day and one that just looks good.
What to Keep in a 1980s Ranch
Not every 1980s feature deserves to be ripped out. Plenty of ranches from that era have good proportions, simple rooflines, useful one-level living, decent window placement, workable kitchen layouts, and cabinet boxes that are still solid underneath dated doors. Some brick just needs cleaning and a check on the weep holes. Some siding is repairable rather than replaceable. Oak trim can often be calmed with paint or better lighting before anyone tears it out.
What's usually worth keeping includes:
- A practical one-story floor plan.
- Original cabinets with solid boxes.
- Brick that is dry, stable, and not trapping moisture.
- Simple room shapes that work with better lighting and flooring.
The point of keeping what still works isn't nostalgia. Money spent on replacements the house didn't actually need is money that couldn't go into the parts that did need help.
What to Replace Before Finishes
Some parts of the house shouldn't wait for the finish work. Old shutoff valves that don't seat, failed bath fans, missing range venting, soft trim, damaged siding, water-stained subfloor, weak cabinet boxes, poor flooring transitions, and any unsafe electrical condition all need to be dealt with before the paint, tile, and hardware get ordered. Budget discipline matters most in this phase, because spending money early on hidden repairs is frustrating — the house still doesn't look finished at the end of it. Getting the hidden work out of the way is what prevents the version of remodel where new finishes are sitting directly on top of old failures.
What Gets Missed Three Weeks After Moving In
The most expensive problems in a 1980s ranch remodel aren't always found during demolition. Some of them show up three weeks after everyone has moved back in, once the finished work meets the way the house actually gets lived in. The kitchen still doesn't have a good place for the trash. The front entry is still dark walking up to it after dinner. The bathroom fan is still loud and weak. The living-room-to-hallway floor transition catches shoes and chair legs. The garage door still dominates every photo from the street. The hallway still feels chopped up because the doors, trim, flooring, and light switches were never treated as parts of a single system.
A ranch remodel needs to be planned as a house someone lives in, not as a checklist of rooms to finish. One useful exercise before finalizing a scope is to walk the house in the order it actually gets used every day: driveway, entry, kitchen, living room, hallway, bathroom, bedroom, laundry, back to the garage. The problems that show up during that walk are usually the ones worth fixing before anything cosmetic.
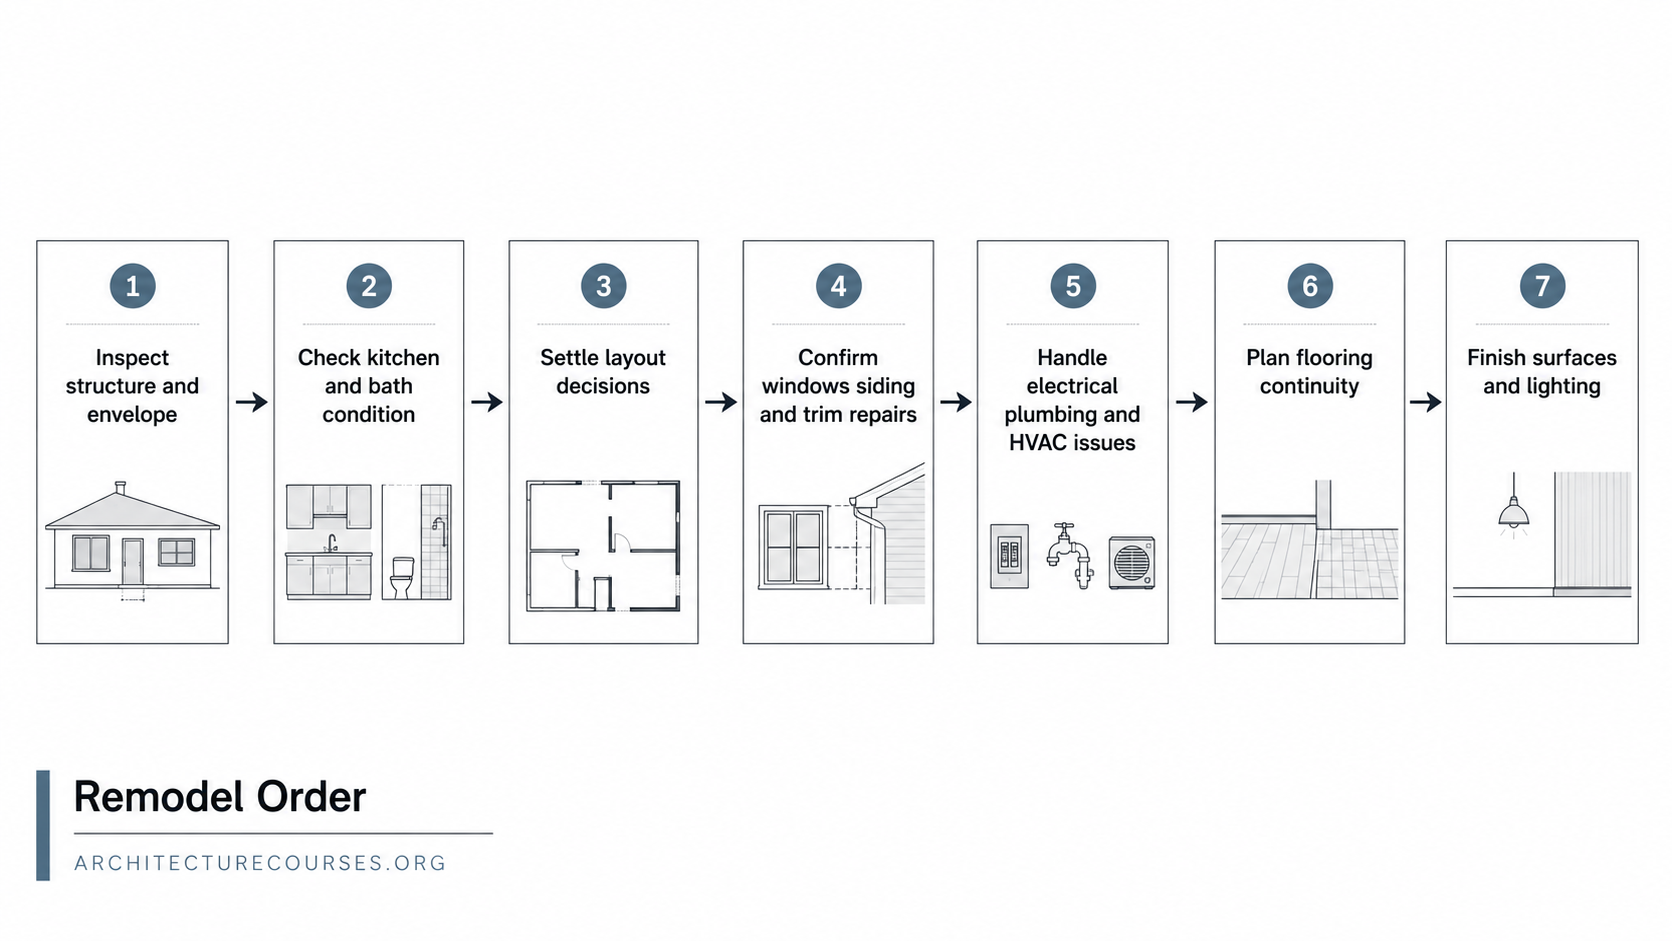
1980s Ranch Remodel Order
The safest sequence for a 1980s ranch remodel starts with condition, layout, and systems, then works outward from there. Finishes come after the house has been made ready to hold them.
| Step | Decision | Why it matters |
|---|---|---|
| 1 | Inspect exterior, roof edges, drainage, windows, and trim | Finds water and envelope problems before paint or siding work |
| 2 | Map the floor plan and main traffic paths | Shows how kitchen, entry, hall, bath, and living areas connect |
| 3 | Check the panel, supply plumbing, cabinets, and bath moisture | Catches Federal Pacific panels, polybutylene, and hidden damage before finishes |
| 4 | Settle layout decisions before flooring and counters | Avoids patching floors, counters, and walls twice |
| 5 | Plan flooring continuity through the main level | Controls thresholds, height changes, and room-to-room flow |
| 6 | Finish with paint, lighting, hardware, trim color, and planting | Lets cosmetic work support the house instead of hiding it |
What Can Wait
Some updates can wait without hurting the overall remodel. Cabinet hardware, wall color, and decorative lighting can generally wait as long as the wiring plan behind the walls is already solved. Landscaping can wait as long as drainage and the walking path to the entry are already handled. Interior doors can wait as long as the casing, flooring, and hallway decisions around them aren't going to move. What "waiting" means here is that the item isn't on the critical path of the project yet — it still gets done, just later.
What Should Not Wait
Water, structure, electrical safety, ventilation, and any trapped hazardous material can't wait. A soft bathroom floor moves the remodel priority to that bathroom. A range that can't vent to the outside changes the kitchen cabinet plan before it's ordered. Old flooring or mastic that might contain asbestos needs testing before any tearout starts, not after — the EPA notes that suspect asbestos-containing material can't be identified by sight alone, and recommends sampling by a properly trained and accredited asbestos professional before the material is disturbed.
Lead-based paint is less likely to be a central issue in a 1980s house than in a pre-1978 house, but the surfaces still aren't automatically safe. Older repairs, reused components from earlier houses, and unknown paint layers all exist in the field. When a suspect painted surface is going to be disturbed, test first, or use a contractor certified under the EPA's Renovation, Repair, and Painting rule.
1980s Ranch Remodel Checklist
| Area | Check first | Do not rush |
|---|---|---|
| Front exterior | Garage dominance, entry visibility, trim condition, drainage | Painting before repairs |
| Kitchen | Cabinet boxes, sink base, appliance openings, lighting, flooring height | Countertops before cabinet decisions |
| Bathrooms | Fan, caulk, vanity base, toilet flange, subfloor, plumbing valves | Tile over moisture problems |
| Floors | Transitions, subfloor, old layers, dishwasher clearance, hallway path | Room-by-room flooring without a plan |
| Attic | Insulation, air leaks, venting, fan discharge, ductwork | Finishes before comfort work |
| Systems | Electrical panel brand, supply pipe type, siding material | Any 1980s-specific hidden system problem |
| Interior finishes | Trim, doors, switches, lighting, repeated oak or brass details | Random updates that do not connect |
FAQ
Is a 1980s ranch house worth remodeling?
Usually yes, if the basic floor plan, structure, and location are good. Many 1980s ranches have useful one-story layouts, but the work should start with condition, layout, kitchen, bath, exterior, and flooring decisions before finishes.
What should I fix first in a 1980s ranch remodel?
Start with water, roof and drainage, kitchen layout, bathroom moisture, electrical safety (including checking for a Federal Pacific panel), any polybutylene supply plumbing, and flooring continuity. Paint and decorative finishes come after those decisions.
How do you update the exterior of a 1980s ranch?
Start by calming the garage, making the front entry easier to see, repairing siding and trim, checking brick moisture issues, improving the walking path and lighting, and simplifying planting. Painting over soft trim or moisture problems doesn't fix them.
Should I paint the brick on a 1980s ranch?
Only after checking moisture conditions. Look for blocked weep holes, high mulch, splashback, stains, cracks, and poor drainage. Painted brick can look cleaner, but it can also reduce drying potential if the wall already has moisture issues.
Should I open the kitchen in a 1980s ranch?
Maybe. Check first whether the wall carries load, and what wiring, plumbing, or ductwork is inside it. Plan flooring, lighting, cabinet layout, and ceiling repair before removing anything.
Can I remodel a 1980s ranch without gutting it?
Yes. If cabinets, walls, floors, and systems are sound, a same-layout remodel can work well. Better lighting, calmer finishes, repaired trim, updated flooring, and a cleaner entry can change a lot without a full gut.
What makes a 1980s ranch remodel get expensive?
Scope chain reactions and hidden systems. A kitchen cabinet decision can pull in counters, backsplash, flooring, lighting, appliances, and plumbing. An exterior paint job can expose soft trim, siding damage, drainage problems, and window flashing issues. And a Federal Pacific panel, polybutylene plumbing, or LP Inner Seal siding can each add a major line item nobody expected.
What should I inspect before buying or remodeling a 1980s ranch?
Check the roof, siding (including for LP Inner Seal), windows, drainage, foundation areas, attic, insulation, electrical panel (specifically for Federal Pacific / Stab-Lok markings), plumbing supply lines (looking for gray polybutylene), kitchen cabinets, bathroom moisture, flooring layers, garage, and signs of past repairs.
Read This Next
- Renovating a 1980s house without making it worse
- 1980s kitchen remodel
- 1980s kitchen cabinets
- 1980s kitchen before and after
- 1980s house exterior update
- 1980s bathroom remodel
- 1980s house interior
- 1980s split-level remodel
Sources used for this article
- U.S. Consumer Product Safety Commission: Closure of FPE Stab-Lok investigation (1983, revised 2011)
- Public Justice: Cox v. Shell Oil polybutylene class action summary
- U.S. Environmental Protection Agency: Remodeling and asbestos-containing building materials
- U.S. Environmental Protection Agency: Protect your family from exposures to asbestos
- U.S. Environmental Protection Agency: Lead Renovation, Repair and Painting Program