
Before you rip out the old cast-iron sink, find out what it is worth. In a 1930s kitchen, a sound original sink is often better than the farmhouse sink people replace it with.
It is deeper, tougher, and far better matched to the room. The original sink sets the tone of the sink wall, controls the cabinet run, shapes the counter plan, and is usually one of the strongest period features left in the kitchen. Replace it badly and the whole room starts feeling newer, flatter, and less connected to the house.
The question is not whether the sink looks tired. It is whether to keep it, restore it, or accept that it has reached the end.
That comes down to condition, fit, weight, plumbing, support, and how the kitchen is used now. For the broader room logic, read 1930s kitchen design. If the sink decision is tied to cabinets, demolition, plumbing moves, or wall repair, use 1930s kitchen remodel before ordering anything.
What Made 1930s Kitchen Sinks Different
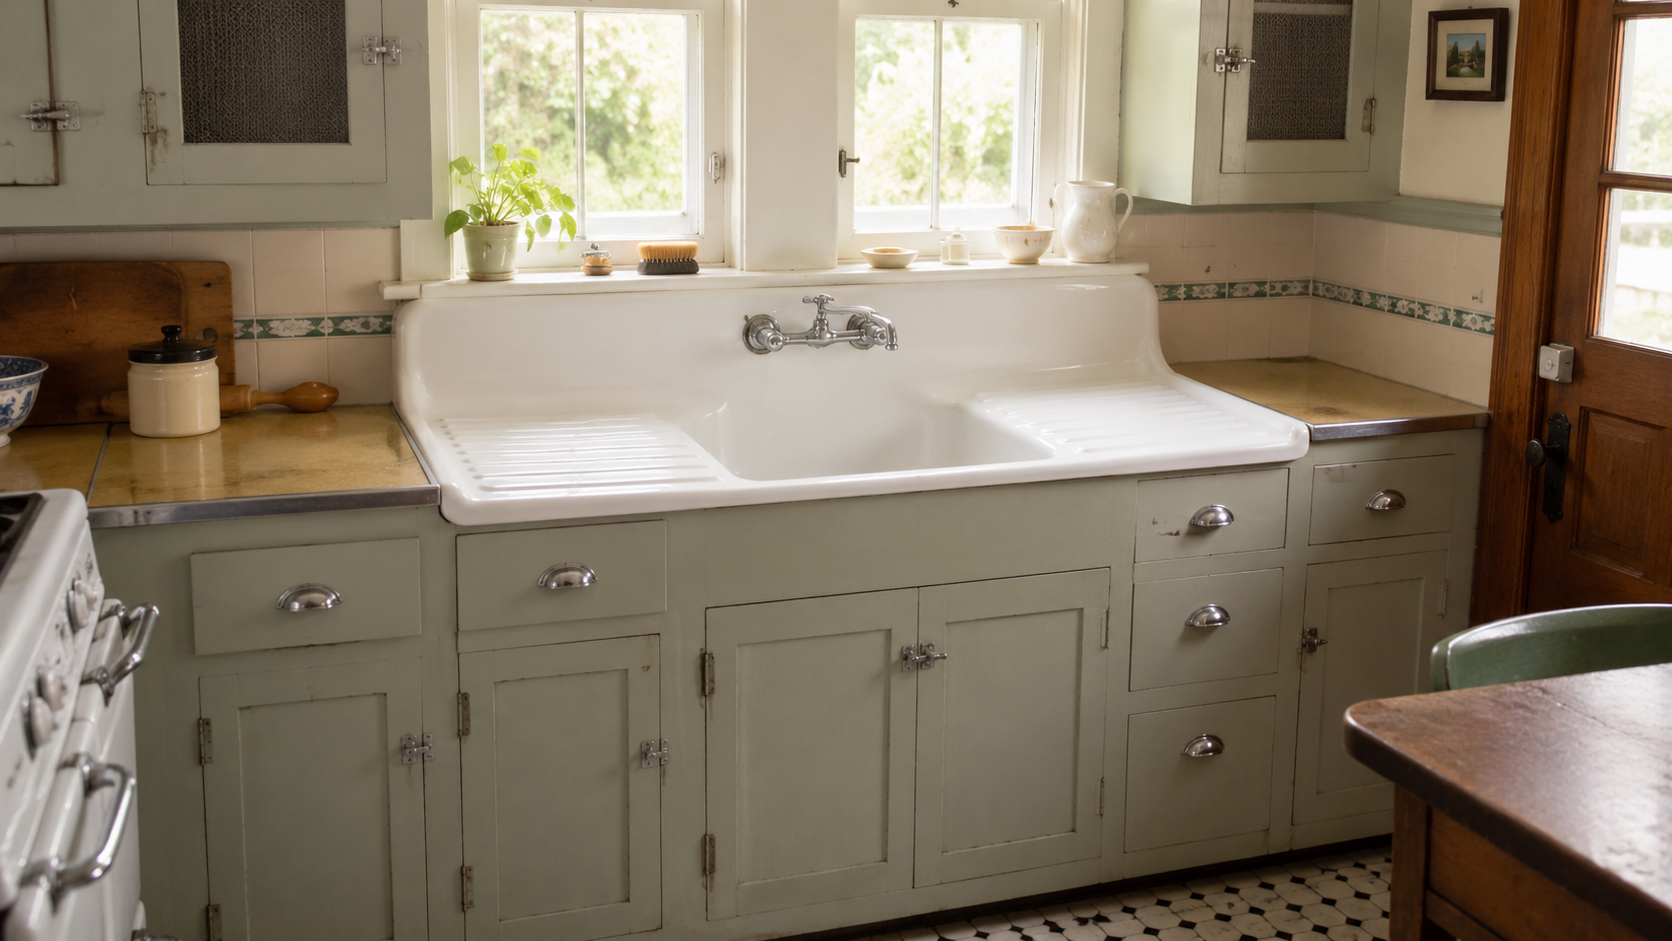
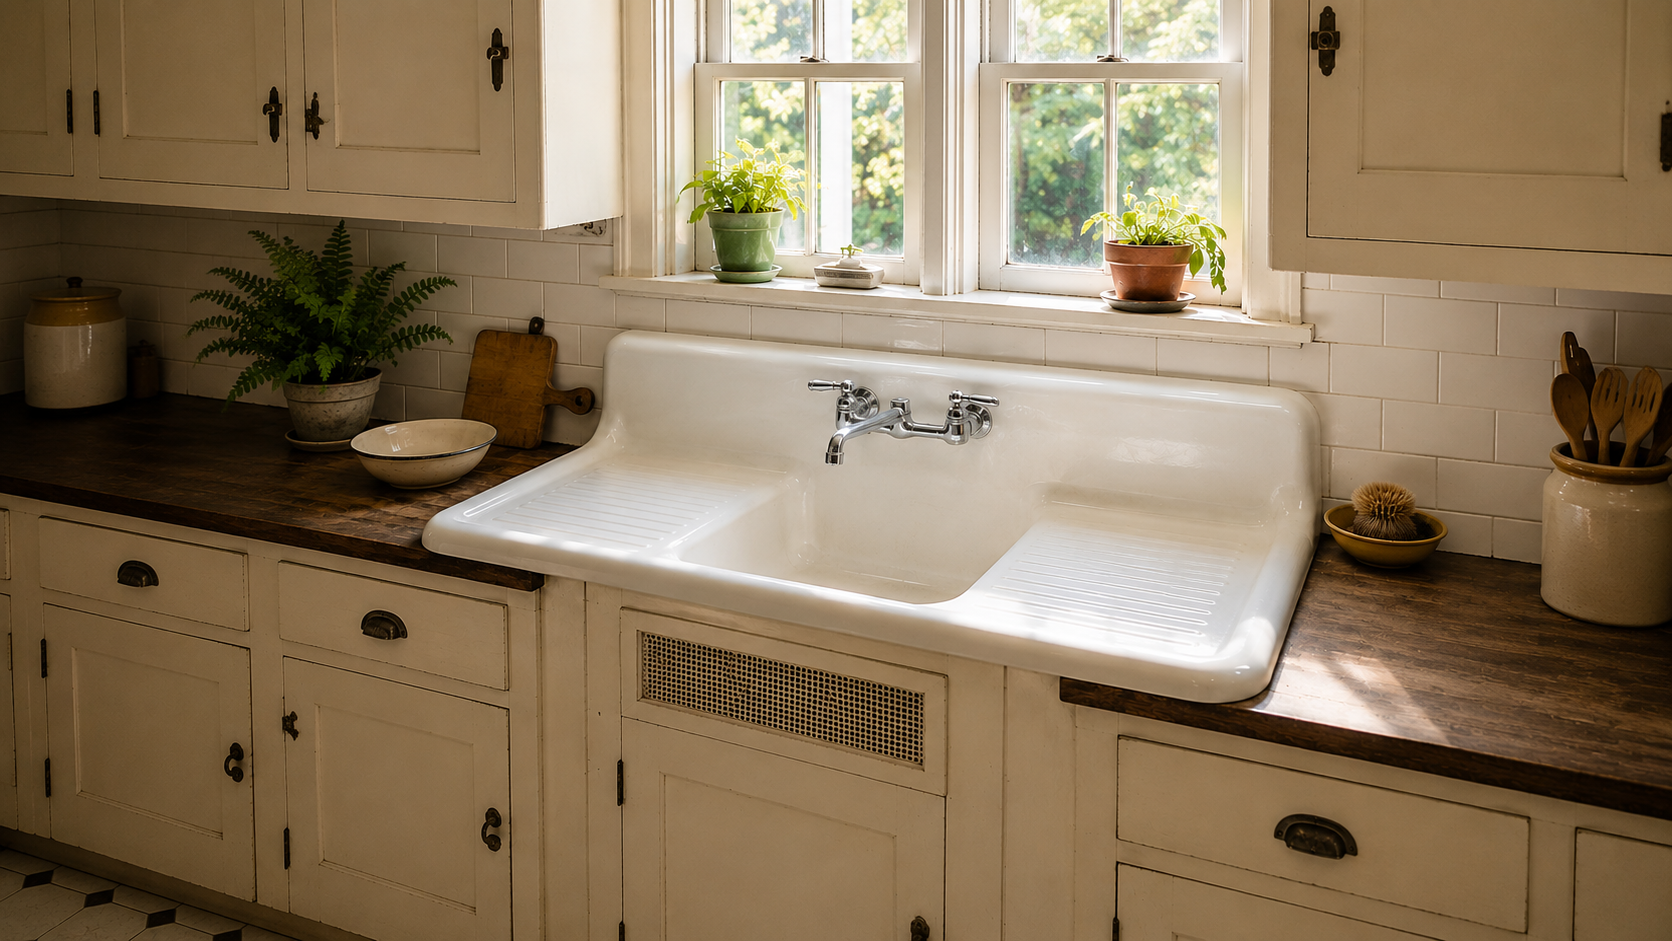
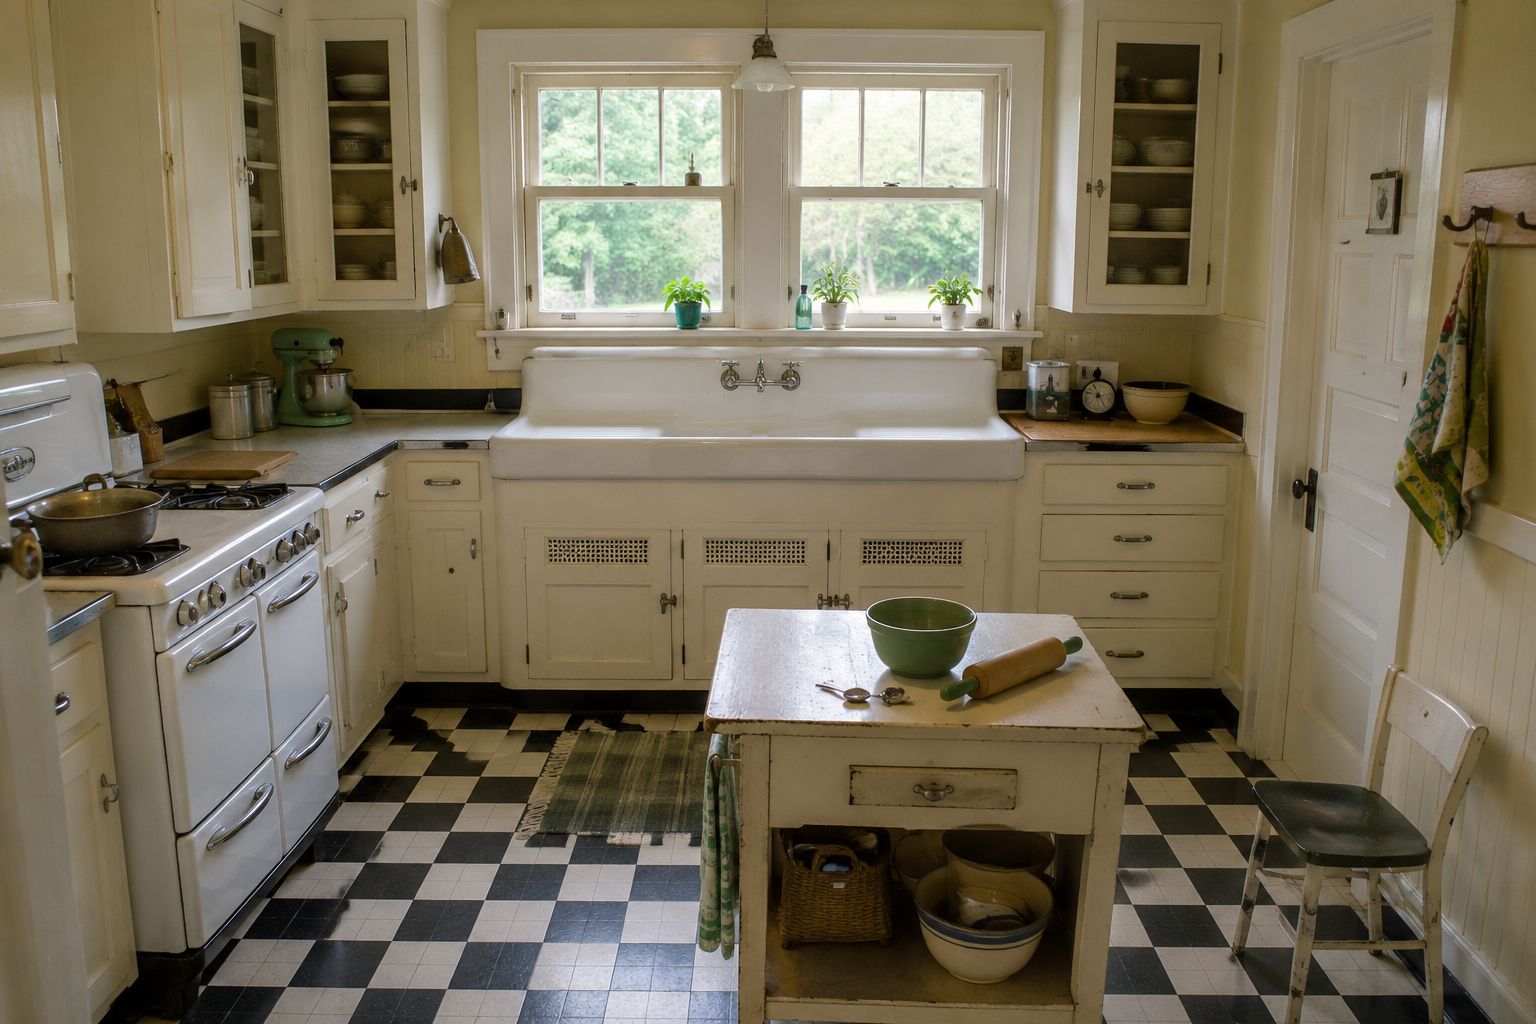
Most 1930s kitchen sinks were made to work hard. A lot of them were enameled cast iron: heavy, durable, deep enough for daily cooking, and visually tied to the room instead of hidden under a slab counter.
Drainboards were common because they saved counter space and pulled washing, drying, and prep into one compact zone. That matters in a small kitchen where every inch has to earn its place.

- Deep enamel bowls: practical for cooking, cleanup, and soaking larger pieces.
- Integrated drainboards: useful in small rooms where counter space was limited.
- Heavy cast iron: harder to move, but far more substantial than most lightweight replacements.
- Simple finish language: white enamel, modest lines, and little visual noise.
That is why a good original sink can still look right today. It has the same practical weight people now chase with farmhouse sinks, but without the oversized styling that makes an old kitchen look staged.
The Sink Wall Decides More Than the Sink
A sink swap can turn into a cabinet, counter, wall, and plumbing job in a hurry.
The sink may be tied into old built-ins. It may sit against plaster that is not flat. It may need wall support, a custom cabinet opening, a specific faucet spread, or a drain location that does not line up with modern assumptions. Once the sink moves, the whole run tends to move with it.
Judge the sink together with the cabinet run, not as a loose fixture. If the original cabinets are still part of the room, read 1930s kitchen cabinets before tearing out the sink base.
When It Makes Sense to Keep the Original Sink
Keep the original sink when it is sound, useful, and still anchors the room.
Chips are not automatic failure. Surface wear is not automatic failure. A little staining around an old drain does not mean the sink has to go. The real line is the sink body, the support, the plumbing, and whether the layout still makes sense.
| Condition | Best Move | Why It Matters |
|---|---|---|
| Sound enamel sink with light chips | Clean, repair, or touch up | The sink may still have decades of useful life |
| Good sink, bad faucet or drain | Replace fittings carefully | The fixture can improve without losing the original sink |
| Good sink, weak cabinet support | Repair the base and support | The sink may be worth saving, but only if it is held correctly |
| Original sink fits the window and cabinet run | Keep if possible | That fit is hard to recreate with standard replacements |
Keeping the sink can also simplify the job. If the layout stays mostly in place and the plumbing can be updated cleanly, restoration can avoid a chain reaction of new counters, cabinet changes, wall repair, and floor patching.
When Replacement Is the Better Move
Some old sinks should not be saved.
If the enamel has failed badly, the cast iron is cracked, the body is rusting through, or the sink forces the whole kitchen into an awkward layout, replacement can be the right call. Keeping a failing sink only leads to leaks, cabinet rot, mold, wasted money, and a second round of repairs.
- Replace it when there is rust-through. A surface chip is one thing; structural failure is another.
- Replace it when the sink leaks from the body. Bad fittings can be fixed, but a compromised sink body is a bigger problem.
- Replace it when the layout is changing completely. If cabinets, counters, and plumbing are all moving, the old sink may no longer fit.
- Replace it when daily use is poor. Some vintage sinks are excellent; some are too shallow, too narrow, or too awkward for the kitchen now.
Replacement is fine when the old sink has reached the end of its useful life. The mistake is replacing it with a sink that belongs to a different kitchen.
Choose a Replacement That Does Not Flatten the Room
A replacement sink should respect the room’s scale before it tries to look vintage.
Oversized farmhouse sinks can overpower a compact 1930s kitchen. Deep apron fronts can force cabinet changes. Thick modern counters can leave the sink looking stranded. The safer path is a sink with quiet proportions, practical depth, and a finish that works with painted cabinets, tile, old trim, and modest hardware.
- Good direction: enamel, cast iron, fireclay, stainless only when the room can handle it, simple forms, restrained faucet style.
- Risky direction: oversized apron sinks, deep contemporary basins, black statement sinks, glossy modern fixtures, heavy luxury styling.
- Check first: cabinet opening, support framing, faucet holes, drain location, counter thickness, backsplash height.
The goal is not to fake age. It is to keep the sink wall settled.
The Hidden Work Behind the Sink
The sink is where the wall tells the truth.
Old kitchens often hide repairs behind the base cabinet: damp plaster, patched pipes, weak shutoff valves, floor damage, old drain lines, and cabinet rot. The sink can look like a clean design decision while the wall behind it quietly turns the job into plumbing and repair work.
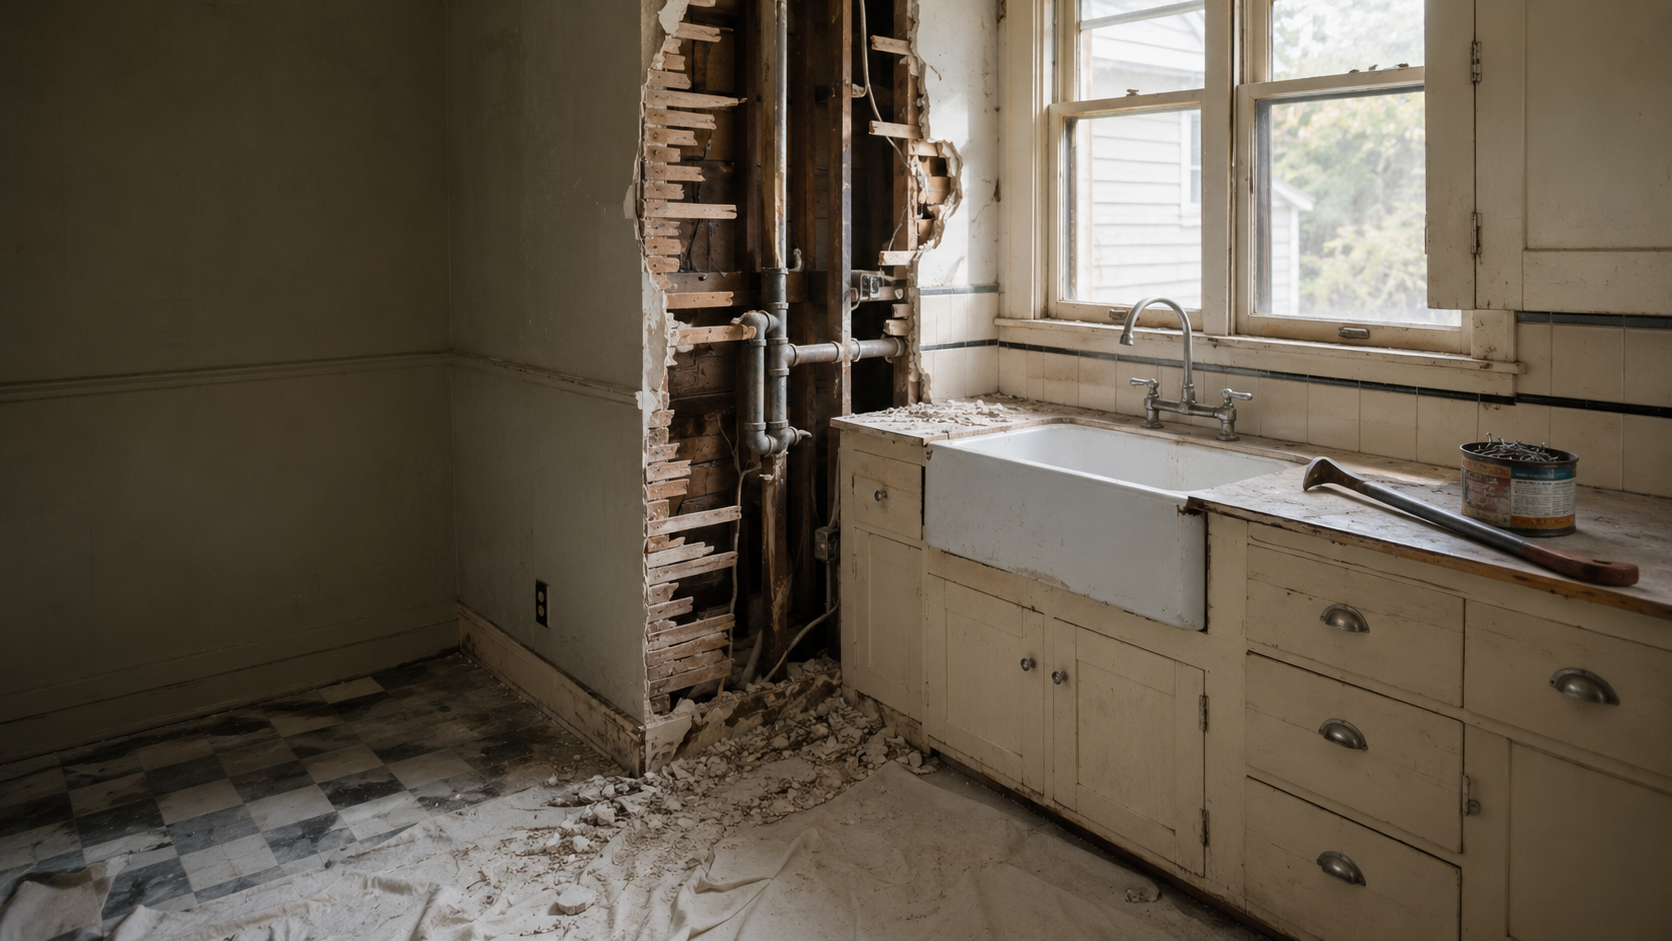
Check the sink base before ordering counters. Look for swelling, dark staining, soft cabinet bottoms, a musty smell, loose flooring, rusted piping, poor shutoffs, and patched wall surfaces.
If the wall does get opened, fix the plumbing and support before the finish layer goes back on. Burying weak pipes behind new cabinets is how a good-looking renovation turns into a callback.
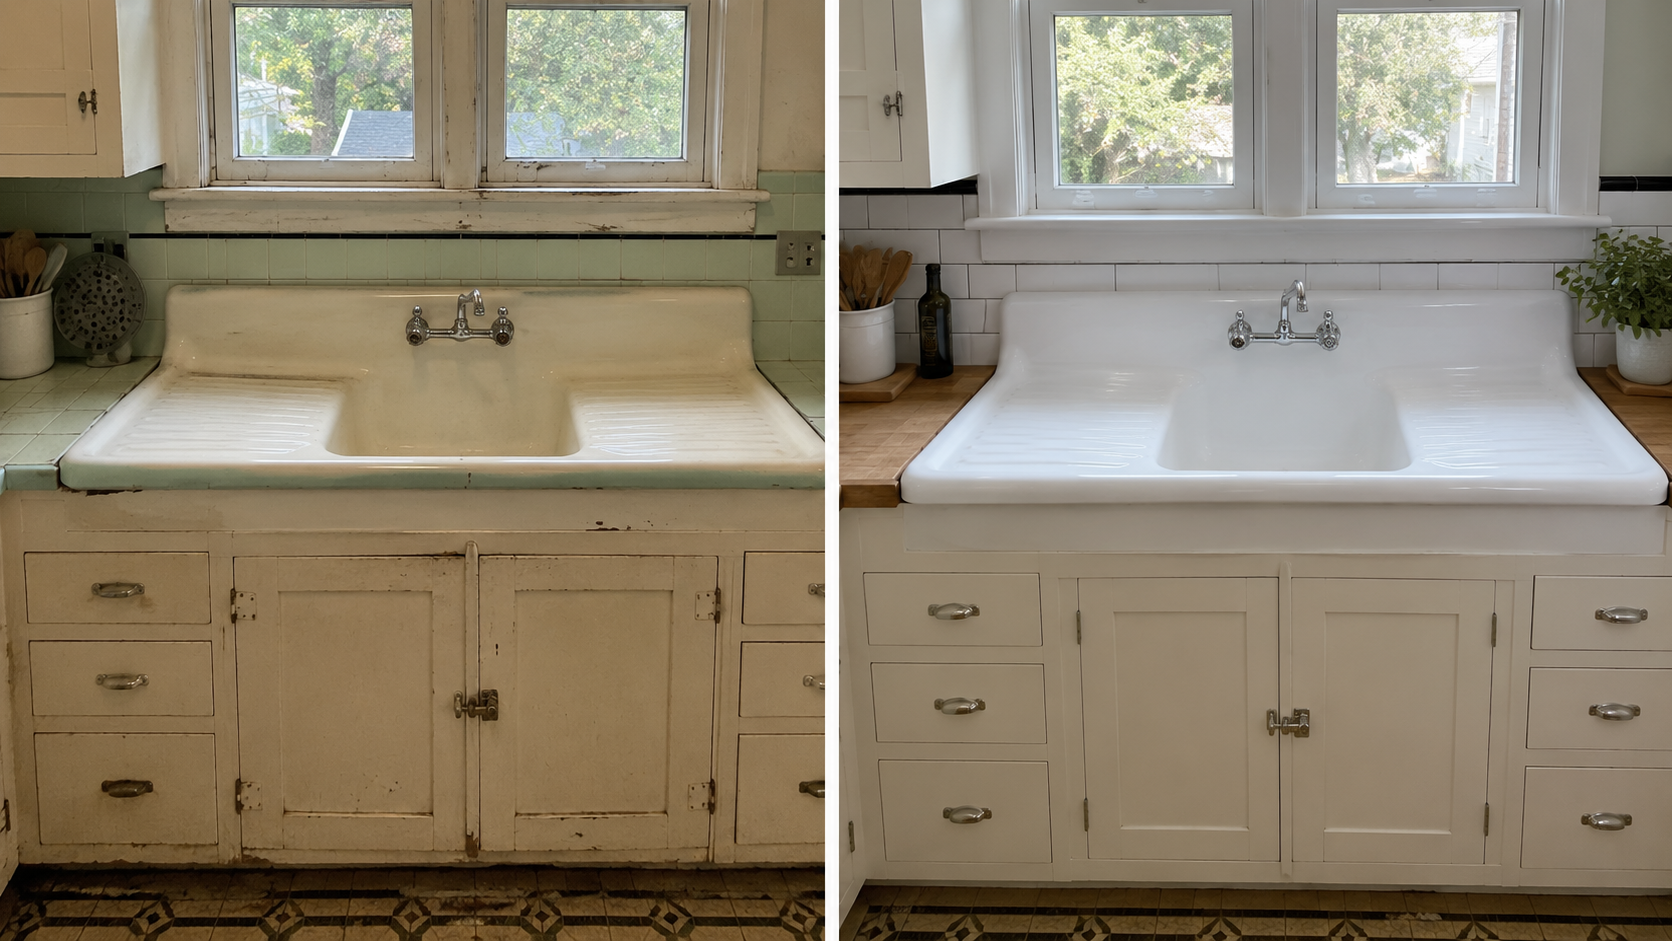
How to Restore a 1930s Sink
Restoration starts with the sink’s condition, not with the finish you want.
Clean it first, because many old sinks look far worse than they are under mineral buildup, grease, scuffs, and old caulk. Once it is clean, judge the enamel, body, drain, faucet, support, and wall connection honestly.
- Clean gently. Start with non-abrasive cleaners, soft cloths, and patience. Do not grind through old enamel.
- Map the damage. Separate light chips from deep corrosion, rust-through, cracks, or failed support.
- Check the drain and faucet. A tired fitting can make a good sink look worse than it is.
- Inspect the support. Heavy sinks need proper backing, brackets, cabinet support, or framing.
- Decide on touch-up or refinishing. Small chips are often manageable; a full refinish is a bigger decision, and the next section explains why it is not always the lasting fix people assume.
Do not spend money on a finish before you know whether the sink and the wall can carry the next 10 years.
Reglazing a Kitchen Sink Is Not What Most People Think
The word “reglazing” covers two different things, and that can decide the whole keep-or-replace question.
The first is spray-on refinishing: an epoxy or acrylic coating sprayed over the old enamel, similar to the service sold for bathtubs. It can look excellent on day one. A kitchen sink is not a bathtub, though. It takes hot pans, knives, scouring, dropped pots, and standing water every day. On that kind of surface, a sprayed coating can wear, chip, or peel much sooner than a homeowner expects.
The second is true re-porcelaining: stripping the piece and firing on new porcelain enamel. That is closer to how the sink was finished originally. It is also harder to find, more expensive, and usually means the sink has to be removed and shipped to a specialty shop.
Before budgeting a refinish, be clear about which one you are buying. If the enamel is worn and stained rather than structurally failed, the smarter move may be the cheapest one: clean it well, accept some age, and keep using a sink that has already lasted close to 90 years.
DIY or Hire a Pro?
The sink can look simple, but the weight changes the job.
Enameled cast-iron sinks are extremely heavy. A wide drainboard sink can run well over 200 pounds and damage cabinets, floors, tile, or backs if it is handled casually. The work gets more serious the moment wall support, plumbing, or refinishing is involved.
- DIY can make sense for cleaning, polishing, caulk cleanup, small chip repair, and simple faucet changes when the plumbing is accessible.
- Hire a plumber when drains, shutoffs, supplies, traps, or wall plumbing need more than a basic swap.
- Hire a refinisher for a full refinish or major enamel repair.
- Hire a carpenter or cabinetmaker when the sink base, wall support, or counter opening needs reinforcement.
A sink that cracks a tile counter or collapses a weak base is no longer a small project.
What Restoration or Replacement Usually Costs
These are 2026 planning ranges for typical U.S. conditions, not quotes. Region, labor rates, sink weight, plumbing condition, cabinet repair, and finish quality can move the number quickly.
| Scope | Planning Range | Usually Included |
|---|---|---|
| Light cleaning and small supplies | $25-$150 | Cleaners, caulk, polish, small chip touch-up |
| Faucet or drain work | $150-$750 | Basic fittings, plumber visit, minor parts |
| Professional spray refinishing | $400-$1,000+ | Surface prep and coating, depending on condition and access |
| Sink removal and reinstallation | $500-$1,500+ | Handling, plumbing disconnect/reconnect, support adjustment |
| Replacement with period-aware sink | $900-$3,500+ | Sink, faucet, plumber, support, counter/cabinet coordination |
The hidden cost is usually not the sink. It is the work around it: cabinet repair, counter changes, plumbing correction, wall patching, floor repair, and repainting after the sink wall is disturbed.
The Detail That Shows Up Three Weeks Later
The first week after the job, the sink looks clean.
Three weeks later, the practical mistakes surface: the faucet splashes because the bowl depth changed, the drainboard is gone so dishes pile up on a short counter, the new sink is too deep for the old cabinet, and the dishwasher door fights the sink base. The replacement looks expensive and the kitchen works worse.
That is why a sink decision should be tested with daily movement, not just finish samples. Where do wet dishes go? Where does food prep happen? Can two people pass? Does the faucet reach correctly? Can the cabinet below be serviced later?
A sink that looks right but breaks the room’s workflow is still the wrong sink.
Details That Make the Finished Sink Look Right
A restored or replacement sink can still feel wrong if the surrounding choices fight it.
- Keep the finishes quiet. Loud glossy cabinets and dramatic counters can leave a good old sink looking stranded.
- Watch the faucet style. Bridge faucets, restrained wall mounts, and simple metal finishes usually fit better than sculptural fixtures.
- Respect the drainboard logic. If the original sink had one, think through where dishes, prep, and cleanup will now happen.
- Let the sink lead one zone. It does not need to dominate the kitchen, but it should not look like an apology either.
If the project is part of a larger old-house update, read how to modernize a 1930s home the right way before making the kitchen too smooth for the rest of the house.
FAQ
Can a chipped 1930s sink be fixed?
Small chips can often be repaired with enamel touch-up products. Larger damage, widespread finish failure, or rust-through usually needs professional assessment.
Is it safe to reglaze a vintage sink?
“Reglazing” is really two different things. A sprayed epoxy or acrylic refinish is professional work but can wear or peel on a hard-used kitchen sink within a few years. True re-porcelaining lasts far longer but is costly and done by only a few specialty shops. If the enamel is only worn rather than failed, cleaning and keeping the sink often beats coating it.
Can I use a vintage sink with modern cabinets?
Yes, but the cabinet plan has to support the weight, depth, faucet layout, and drain location. Quiet cabinet finishes and simple hardware usually work better than glossy contemporary cabinetry.
What kind of faucet fits a 1930s kitchen sink?
Bridge faucets, restrained wall-mounted faucets, and simple metal finishes often fit best. The goal is compatibility, not theatrical vintage styling.
Are wall-mounted 1930s sinks still usable?
Yes, if the wall structure can support the sink safely and the plumbing is sound. The support matters as much as the sink itself.
How long do 1930s cast-iron sinks last?
A sound cast-iron sink can last for many decades. The weak points are usually enamel wear, rust around damaged spots, plumbing connections, and support conditions.
Do 1930s sinks work in small kitchens?
Often, yes. Many were designed for compact kitchens, and integrated drainboards can work especially well where separate counter space is limited.
How do I know if my sink is really from the 1930s?
Look for maker marks, drainboard form, faucet holes, mounting style, cabinet context, old catalogs, and surrounding materials. The sink wall often tells part of the story.
Read This Next
- 1930s Kitchen Design: What Modern Updates Ruin First
- 1930s Kitchen Remodel: What a Wall Hides Until Demolition Day
- 1930s Kitchen Cabinets: Why the Originals Are Often Better Than New Ones
- How 1930s Houses Fall Apart Over Time
- What 1930s Houses Really Looked Like