
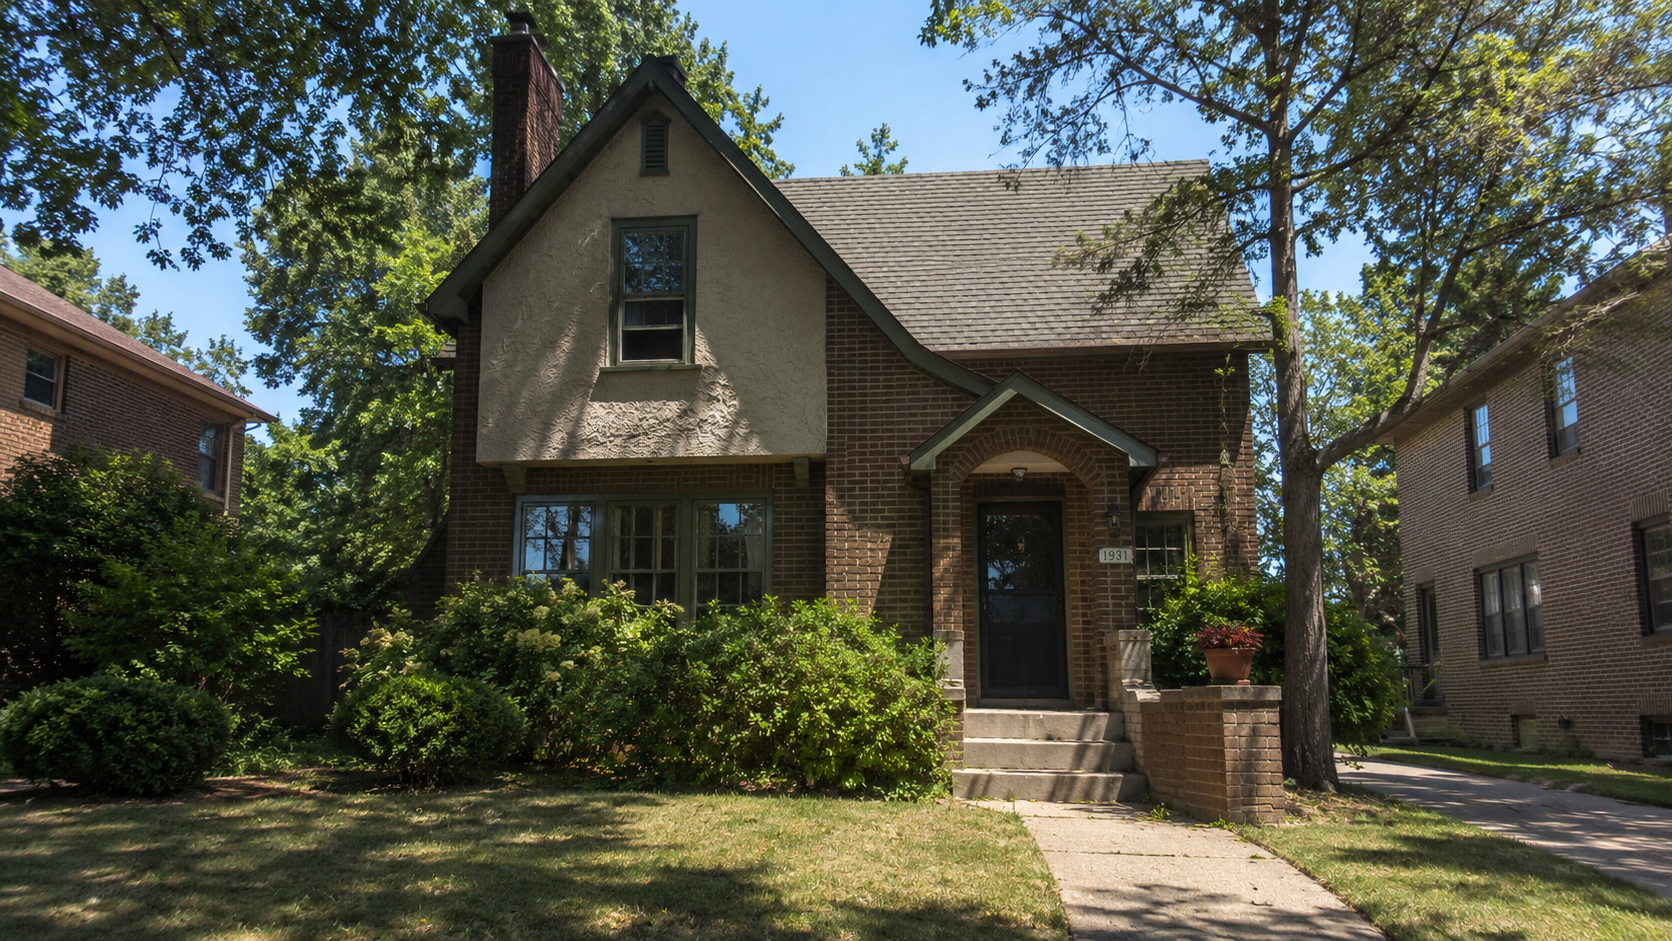
A 1930s house can handle modern life — better heating, safer wiring, better kitchens and bathrooms, better insulation. None of that is the problem.
The problem is doing those upgrades in a way that strips the house down to something flatter and cheaper than it was before. Original windows get replaced with the wrong proportions, brick gets painted when it should have been repaired, kitchens get widened into generic open-plan rooms. The house still stands, but it stops feeling like itself.
The better approach is less dramatic. Keep the parts that give the house its character, upgrade the parts that make daily life harder, and treat the house as a system rather than a blank shell waiting for trends.
If you are still trying to identify the house first, start with what 1930s houses really looked like. This page is for what comes next: the modernization decisions that keep the house useful without erasing it.
What a Good 1930s Renovation Actually Does
A good renovation does not try to make the house feel brand new; it makes it work better. That means the visible work and the hidden work have to agree — new paint will not solve damp, new cabinets will not fix bad wiring, and new windows will not help much if the roof, gutters, and air leaks are still ignored.
- It keeps the bones. Brick, roof shape, window proportions, room layout, trim, and built-ins still do most of the architectural work.
- It upgrades hidden systems first. Wiring, plumbing, insulation, heating, drainage, and ventilation matter more than decorative finishes.
- It avoids trendy shortcuts. The wrong materials date faster in an old house than they do in a new one.
- It lets the house stay recognizable. Modern comfort is the goal; generic replacement is not.
That sounds obvious. It is not how many 1930s renovations are handled.
All at Once, or Room by Room?
Before any of the specific work, there is one planning decision that moves the budget more than any material choice: do you renovate the whole house in one coordinated push, or a room at a time over several years?
Room by room feels safer. You spread the cost, you keep living in the house, and you only open one space at a time. But it is often the more expensive path in the end, and the people who have lived through it say so the loudest. Every phase brings the trades back out, reopens walls and floors, restarts the dust and disruption, and pays again for access you already paid for once. Wiring and pipework that could have been handled in a single open-wall pass get reached for three separate times instead.
The one-push gut renovation is brutal while it happens, and genuinely hard to live through if you are staying in the house — do not underestimate that part. But when the walls are open anyway, that is the moment to do the wiring, the plumbing, the insulation, and the air-sealing together, because opening those walls again later is the part that hurts. The most expensive 1930s renovations I have seen were rarely the ambitious ones; they were the ones done a little at a time, where the same wall got opened and closed three times across a decade.
There is no single right answer. A tight budget, a house you can keep living in calmly, or a plan to stay for decades can all make phased work sensible. Just decide it on purpose, with the real cost of repeated access in front of you, instead of drifting into "we'll do one more room when we can."
Start Outside Before You Start Decorating
If the exterior is failing, the inside usually follows. A 1930s renovation should begin with weather, drainage, and envelope problems before anyone starts shopping for tile, paint, cabinets, or fixtures — because water is the fastest way to turn a cosmetic project into rot, mold, plaster damage, and wasted money.
Brickwork Should Be Repaired Before It Is Painted
Most old brick does not need paint; it needs repair. Repointing with compatible mortar, fixing the gutters, and correcting the drainage usually get you further than a cosmetic cover-up. Hard modern mortar can trap moisture in softer old brick, and paint can hide damage until the wall has already started failing behind the finish.
- Clean brick with masonry-safe methods.
- Repair joints with compatible mortar, not a hard mix that traps moisture.
- Fix gutters, downspouts, grading, and splashback before blaming the wall.
If the wall is already showing open joints, damp patches, or crumbling mortar, read how to know if your brick mortar is failing before painting over the problem.
Original Windows Deserve a Harder Look
Original timber windows are often worth more effort than they get. They may be drafty and they may need repair, but their profiles, sash proportions, and glazing pattern usually fit the house far better than cheap replacements — and a bad replacement window can flatten a facade faster than almost any other exterior change.

- Repair and seal original timber frames where the wood is still sound.
- Use weatherstripping, careful glazing repair, or storm-window strategies when appropriate.
- Avoid chunky replacements that change the shadow lines and deaden the facade.
Replacing every window can be the right move when the frames are too far gone. But it should be a measured decision, not the default first line item.
Roof and Rainwater Work Protect the Rest of the Budget
Roof leaks spread, and so do bad gutters. A slipped tile, a failed flashing detail, an undersized gutter, or a broken downspout can turn into wet plaster, rotten framing, damp insulation, and stained finishes — and once the interior work is done, those repairs become more expensive and more annoying.

- Repair roof coverings before interior water damage spreads.
- Treat gutters and downspouts as part of the building envelope.
- Keep replacement materials close to the original in weight, profile, and appearance where possible.
This is not glamorous work. It is the work that keeps the rest of the renovation from being done twice.
Fix the Systems Before the Finishes
Plumbing, electrical, heating, and insulation are where a 1930s renovation becomes real. The house may still look charming, but that does not mean the hidden systems are ready for another 30 or 50 years — a modern household asks far more of the building than the original systems were designed to handle.
Plumbing Has to Be Checked Before Walls Close
Old pipework is one of the first things worth checking properly. Galvanized lines, old drains, patched supply runs, poor shutoffs, and hidden leaks can turn a kitchen or bathroom update into a repair job in a hurry, and even when the fixture looks good, the pipe behind it may be near the end.
- Replace hidden failing pipework before refinishing floors and walls.
- Keep good visible fixtures if they work, but do not trust old lines blindly.
- Plan pipe routes early if kitchens or bathrooms are moving.
Electrical Work Should Not Be Treated as a Patch
Old wiring is not something to "make do" with forever. A 1930s house was not wired for today's appliances, office equipment, chargers, HVAC loads, kitchen circuits, and bathroom requirements, and adding outlets without understanding the system can create a false sense of safety.
- Rewire properly if the system is outdated, damaged, overloaded, or unsafe.
- Add enough outlets for daily use instead of relying on extension cords.
- Place modern fittings carefully so good rooms do not become visually cluttered.
Electrical work is not the place to preserve old material for character. Preserve the trim, the doors, the built-ins, and the layout — and make the wiring safe.
Heating and Insulation Need a Moisture Plan
A lot of 1930s houses are cold for ordinary reasons: weak attic insulation, drafty windows, unsealed service penetrations, tired heating equipment, and no clear air-sealing strategy. The fix is rarely one expensive mechanical upgrade — comfort usually improves when heat loss is reduced first, and the heating is then sized and upgraded around the improved house.
- Insulate the easiest, safest areas first, often attic or roof spaces.
- Air-seal obvious gaps before oversizing heating equipment.
- Keep ventilation in mind so comfort upgrades do not create damp, condensation, or mold.
The wrong insulation in the wrong place can trap moisture. The right approach depends on climate, wall assembly, roof design, and how much original material is staying.
Kitchens and Bathrooms Need Restraint
Kitchens and bathrooms are where money moves fast. A 1930s kitchen or bathroom does not need to stay frozen in time, but it does need discipline — the best work improves storage, plumbing, lighting, ventilation, and daily use without making the room look like a generic replacement dropped into an old house.

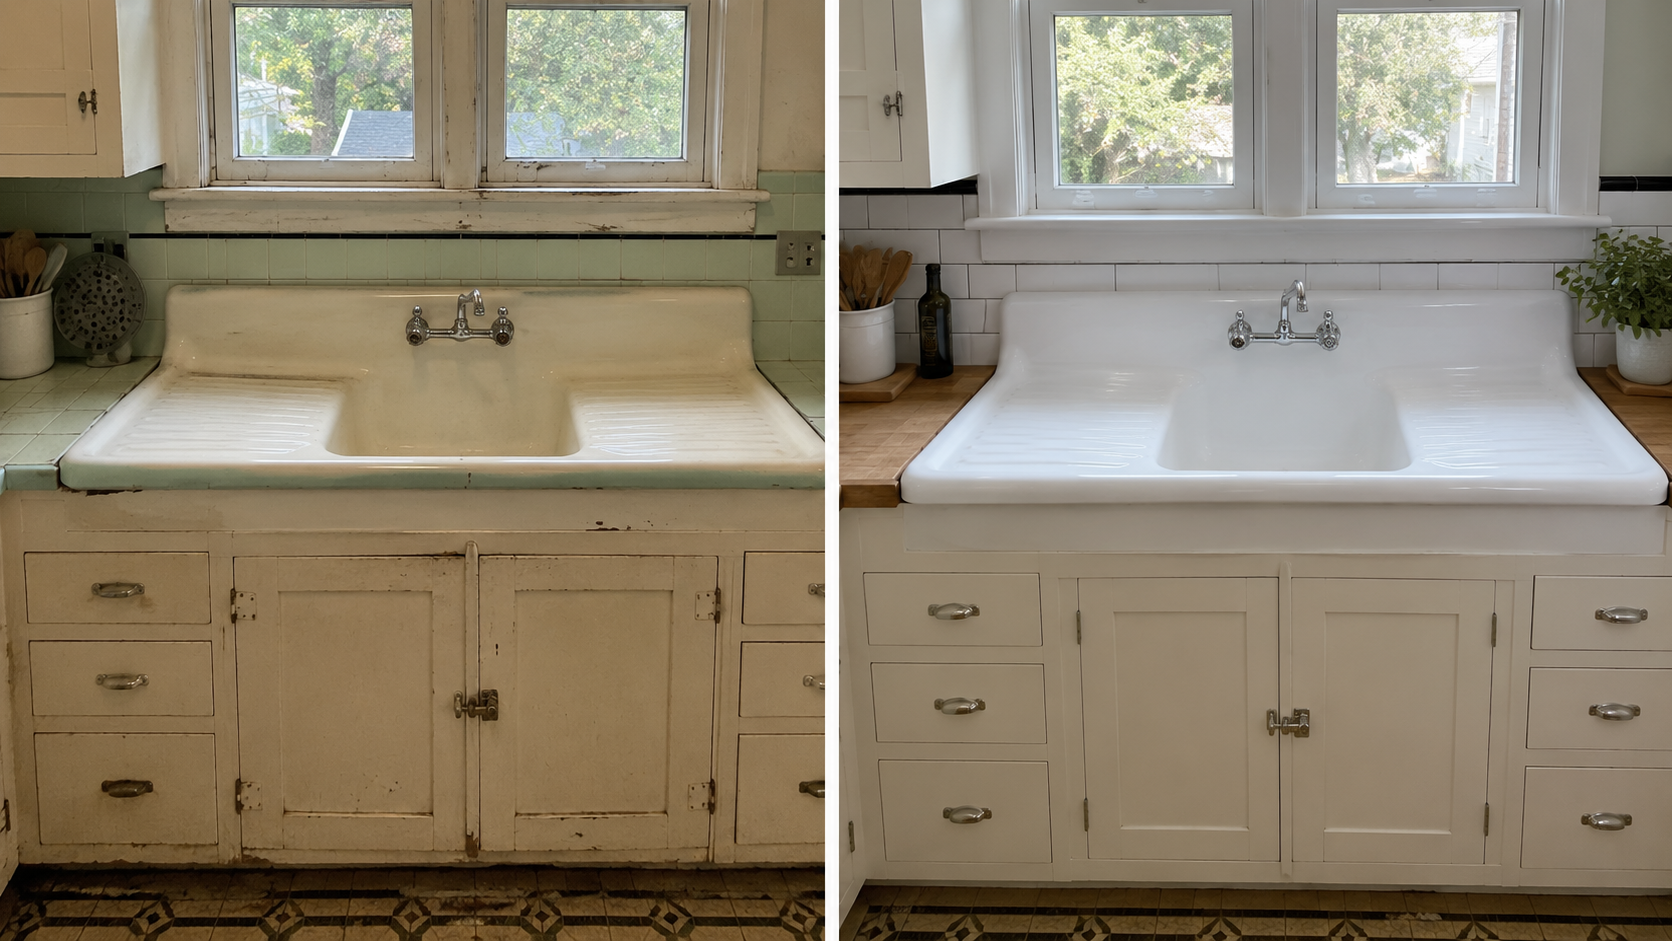
Kitchen Updates Should Protect the Sink Wall and Cabinet Logic
Most 1930s kitchens were compact but well judged, with built-ins, enamel sinks, tile, modest circulation, and practical storage carrying the room. The wrong update trades all of that for a generic room with trendier surfaces and worse proportions.
- Keep the cabinet logic calm and built-in.
- Choose countertops and fixtures that do not overpower the room.
- Improve storage and lighting without making the kitchen bulky.
For the kitchen-specific path, use 1930s kitchen remodel. If cabinetry is the issue, go to 1930s kitchen cabinets. If the sink is still original, read 1930s kitchen sinks before replacing it.
Bathroom Updates Should Keep the Scale
Bathrooms from this period can still feel better than many rushed modern remodels. Tile, porcelain, chrome, and compact planning did a lot of work, and the best updates keep that balance instead of swapping it for a bathroom that could be in any new subdivision.
- Keep good original fixtures when they still work.
- Use period-aware tile and restrained metal finishes.
- Improve storage, ventilation, waterproofing, and lighting quietly.
If the room still has strong tile, old fixtures, or a compact layout that works, do not gut it just because it is small.
Keep These Original Features if You Can
This is where money gets spent badly. Owners remove the parts that gave the house its character, then spend more trying to add that character back with reproductions and styling tricks — I have watched people spend more recreating a lost feature than it would have cost to keep the original. A good renovation identifies what is still doing useful work before demolition starts.

Usually worth keeping:
- timber windows with correct proportions
- interior doors and trim
- wood floors that can be repaired
- built-ins and alcove storage
- period tile, sinks, tubs, and modest hardware when they are sound
Usually worth upgrading:
- hidden pipework and wiring
- insulation and air sealing
- kitchen and bathroom function
- roofing, drainage, and weather protection
The best modernizations are often the ones you notice least: better light, better heat, better storage, safer systems. Same house.
Common Renovation Mistakes
This is where otherwise decent projects start to wobble.
- Replacing windows with the wrong profiles. The facade goes flat fast.
- Painting brick instead of fixing the wall properly. It can trap moisture and age badly.
- Stripping out trim and built-ins too early. The rooms lose their edges.
- Starting with cosmetic upgrades instead of structure and services. That usually turns into rework.
- Mixing styles carelessly. New additions, glossy finishes, and trend-driven materials can make the whole house feel confused.
Modernization is not the issue. Lazy modernization is.
What People Discover After the First Wall Opens
The first surprise in a 1930s renovation is usually not dramatic — it is inconvenient. I have opened a kitchen wall to find the pipe route running the opposite way from every assumption on the plan, and that is a normal kind of surprise here.
A kitchen wall opens and the pipe route is wrong. A bathroom floor comes up and the old leak is worse than expected. A ceiling gets patched, and then the wiring layout no longer makes sense. A window comes out and the surrounding trim turns out to have been doing more visual work than anyone noticed.
This is why the sequence matters. Photograph the room before demolition, measure the original openings, check the systems before ordering finish materials, and keep the old parts that are still sound until you know what the new work actually requires. The expensive mistake is removing character early, then paying to solve problems the original layout was already handling.
How Much It Usually Costs
Renovating a 1930s home is not cheap, and the big costs are often the least photogenic ones. These are 2026 planning ranges for typical U.S. conditions — not quotes. Region, house size, local labor, hidden damage, permit requirements, and the condition of the existing systems can move the numbers quickly.
| Work Area | Planning Range | What Changes the Cost |
|---|---|---|
| Electrical rewiring | $10,000-$25,000+ | House size, access, panel work, plaster repair, number of circuits |
| Plumbing upgrades | $6,000-$18,000+ | Pipe access, kitchen/bath moves, old drains, wall repair |
| Damp and drainage work | $4,000-$15,000+ | Grading, gutters, foundation drainage, wall damage |
| Roof repair or replacement | $10,000-$30,000+ | Roof size, pitch, flashing, decking, material choice |
| Window restoration or replacement | $8,000-$30,000+ | Number of windows, repairability, storms, custom profiles |
| Kitchen renovation | $25,000-$80,000+ | Cabinets, sink wall, plumbing, wiring, layout change, finishes |
| Bathroom renovation | $15,000-$40,000+ | Tile, waterproofing, plumbing, fixture reuse, ventilation |
The part that changes budgets is hidden condition: water damage, old patch repairs, uneven walls, tired services, and surprises once floors or ceilings open up. The safest budget rule is still the boring one — deal with water, structure, wiring, plumbing, and heat loss first, leave contingency money, and then choose finishes.

Who to Hire and When
A 1930s house does not need a mystic. It needs people who understand old buildings.
- Bring in a structural engineer if there is active movement, major cracking, or questionable load changes.
- Use a licensed electrician for rewiring, service upgrades, and old-system assessment.
- Use a plumber who understands older houses and awkward service runs.
- Use a builder or architect with period-house experience if you are changing layouts, windows, exterior openings, or adding extensions.
The danger is not just poor workmanship. It is people who solve every old-house problem with the same new-house answer.
FAQ
Can I modernize a 1930s house without losing its character?
Yes. Keep the proportions, materials, room edges, windows, trim, and original features that do the architectural work. Upgrade wiring, plumbing, heating, insulation, drainage, kitchens, and bathrooms in a way that supports the house instead of replacing its identity.
What should I fix first in a 1930s house?
Start with water, structure, roof, gutters, drainage, wiring, plumbing, and clear safety issues. Cosmetic work should come after the house is dry, safe, and serviceable.
Should I renovate the whole house at once or room by room?
Both can work, but phasing a 1930s house over years often costs more, because the trades return repeatedly and walls get reopened for access you already paid for. When walls are open, do the wiring, plumbing, and insulation together. Choose phasing on purpose if budget or living arrangements require it, not by drift.
Should I replace original windows?
Only when they are too far gone to repair sensibly. Sound old windows often fit the house better than cheap replacements. Repair, weatherstripping, storms, or careful custom replacement may protect the facade better.
Is painting old brick a bad idea?
It can be. Paint may trap moisture and hide failing mortar or drainage problems. Repair the wall, gutters, and water management before treating paint as a solution.
Are 1930s kitchens worth restoring?
Often, yes. Many were compact but well planned. Original cabinets, enamel sinks, tile, and modest layouts can be updated without turning the room into a generic new kitchen.
Are 1930s bathrooms worth keeping?
If the tile, fixtures, layout, and waterproofing are sound, they can be worth preserving. If plumbing, leaks, rot, or ventilation are failing, repair comes before style.
How much should I budget for a 1930s house renovation?
Small updates may stay in the tens of thousands. Whole-house work can move well past $100,000 when wiring, plumbing, roof, windows, kitchens, bathrooms, and hidden damage are involved. Keep a contingency because old-house work changes after walls and floors open.
Read This Next
- What 1930s Houses Really Looked Like
- 1930s Kitchen Design: What Modern Updates Ruin First
- 1930s Kitchen Remodel: What a Wall Hides Until Demolition Day
- 1930s Kitchen Cabinets: Why the Originals Are Often Better Than New Ones
- How 1930s Houses Fall Apart Over Time
References
Sources used for this article
- National Park Service: Preservation Briefs
- National Park Service Preservation Brief 18: Rehabilitating Interiors in Historic Buildings
- EPA: Lead Renovation, Repair and Painting Program
- EPA: Protect Your Family from Sources of Lead
- Angi: Cost to Rewire a House (2026 data)
- Angi: Cost to Repipe a House (2026 data)
- HomeAdvisor: Roof Replacement Cost