
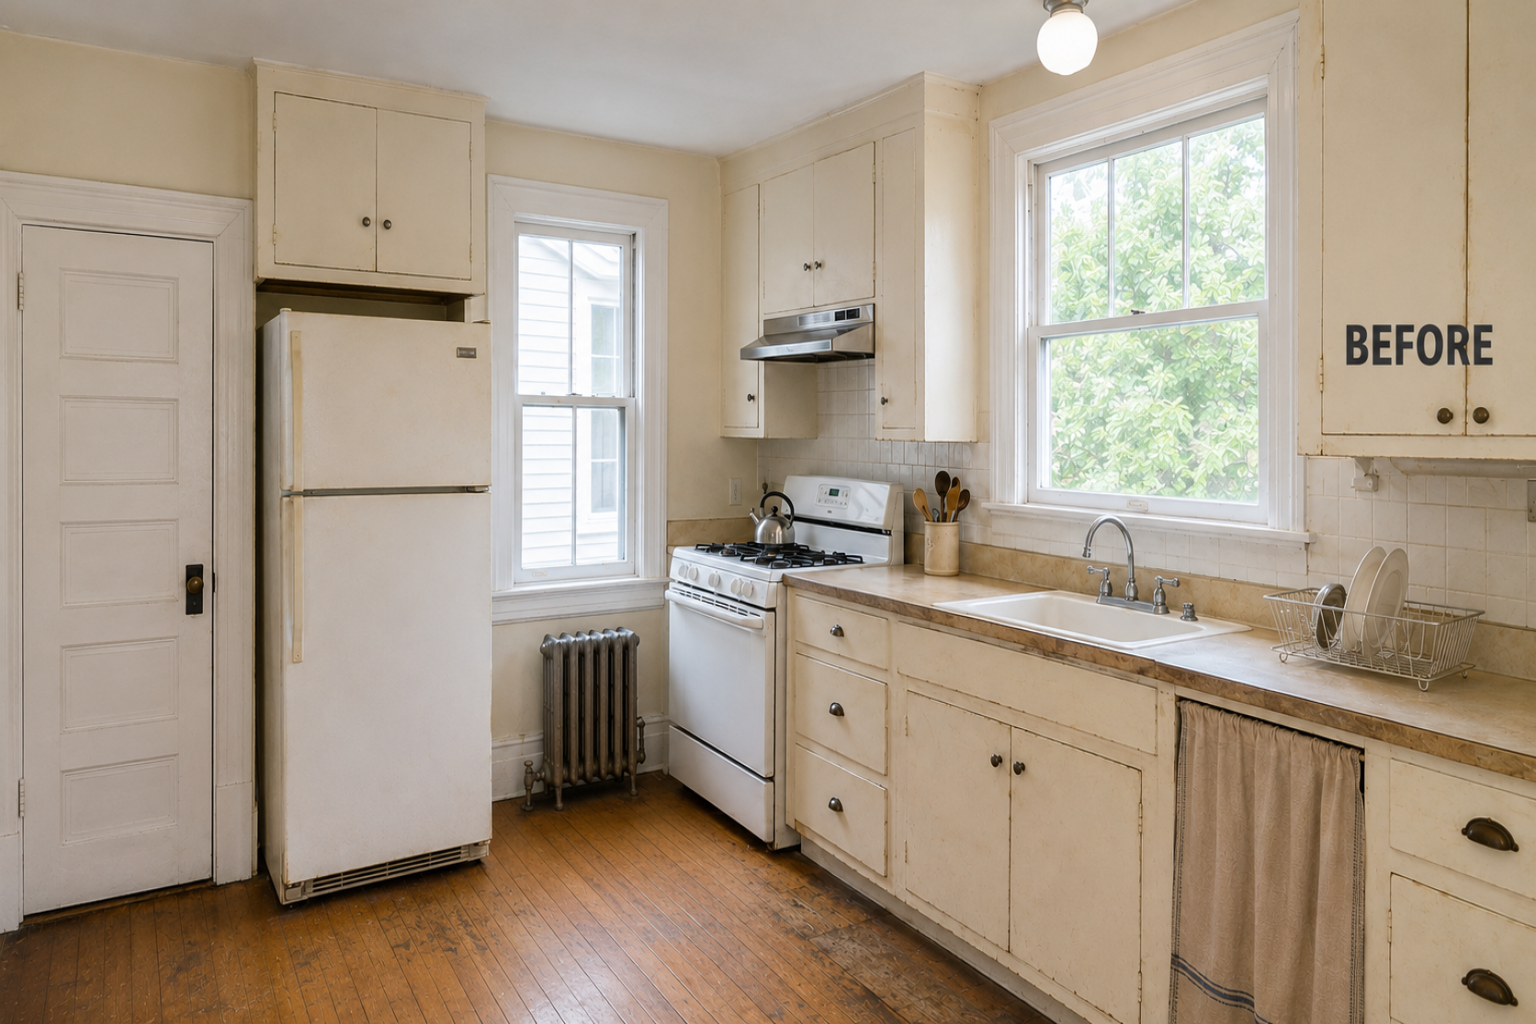


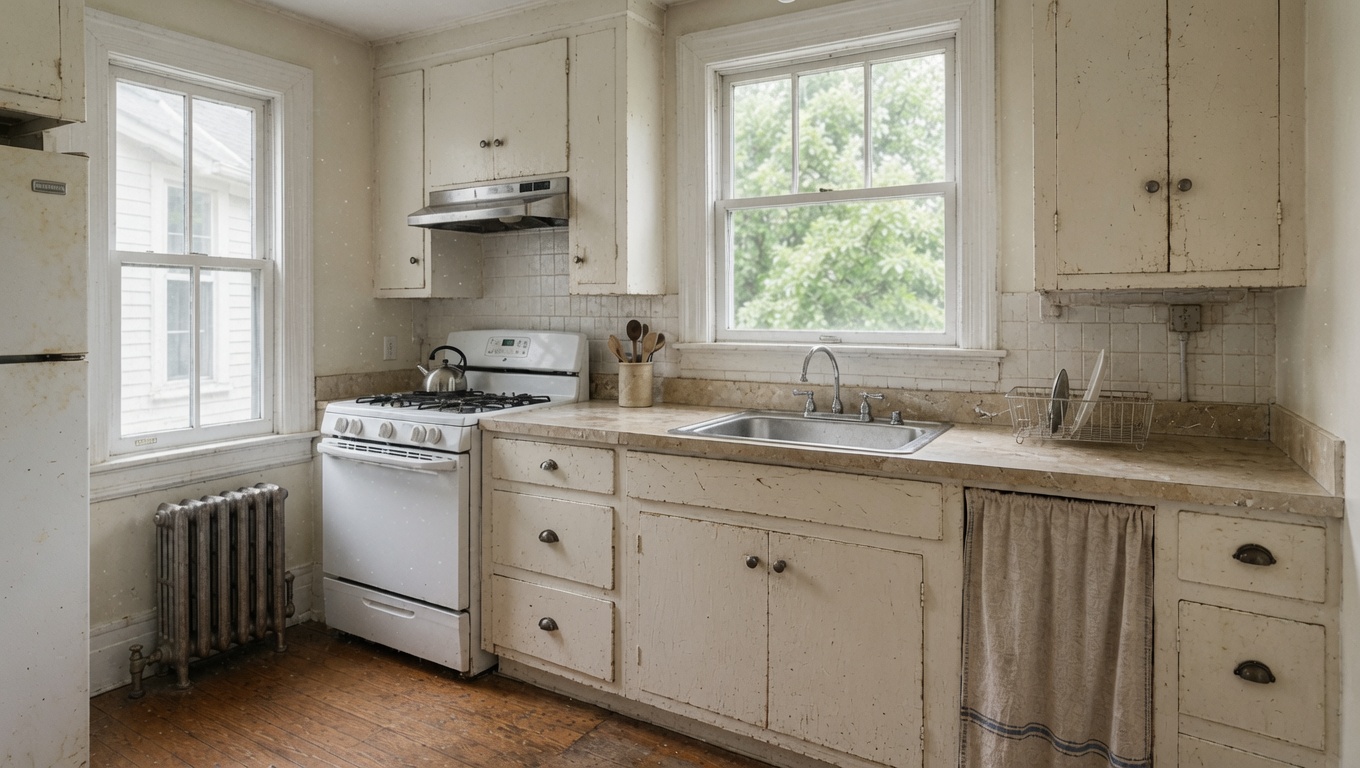
Most 1910s kitchens have already been remodeled more than once. When the cabinets come out, it is common to find old flooring, patched plaster, abandoned pipes, or wiring left behind from an earlier renovation.
Do not finalize the new layout until you know what is behind the cabinets and walls. Check the floor, plumbing, windows, wiring, and heating first. It is much easier to adjust the plan now than after the cabinets have been ordered.
Most 1910s Kitchens Were Changed Long Ago
There is no single 1910 kitchen waiting under the later finishes. By the time a kitchen is 100 years old, it has usually changed several times. Cabinets wore out. Plumbing leaked. Refrigerators grew. Electrical service was added. Families changed how they cooked and stored food. Some of those changes helped the room and some slowly worked against it.
So the useful question is not "is this original?" It is "does this still help the house and the way the room needs to work?" An old pantry may beat another wall of cabinets. A later sink spot may be more practical than the first one. Mid-century cabinets may be worth pulling out while the original windows and trim are worth repair. Keeping everything old can be as wrong as replacing everything old.
If the kitchen is part of a larger renovation, work out how the room fits the rest of the plan first. The links between kitchen, dining room, pantry, stairs, and rear entrance are covered in 1910s house floor plans.
The Kitchen Was Part of a Working Sequence
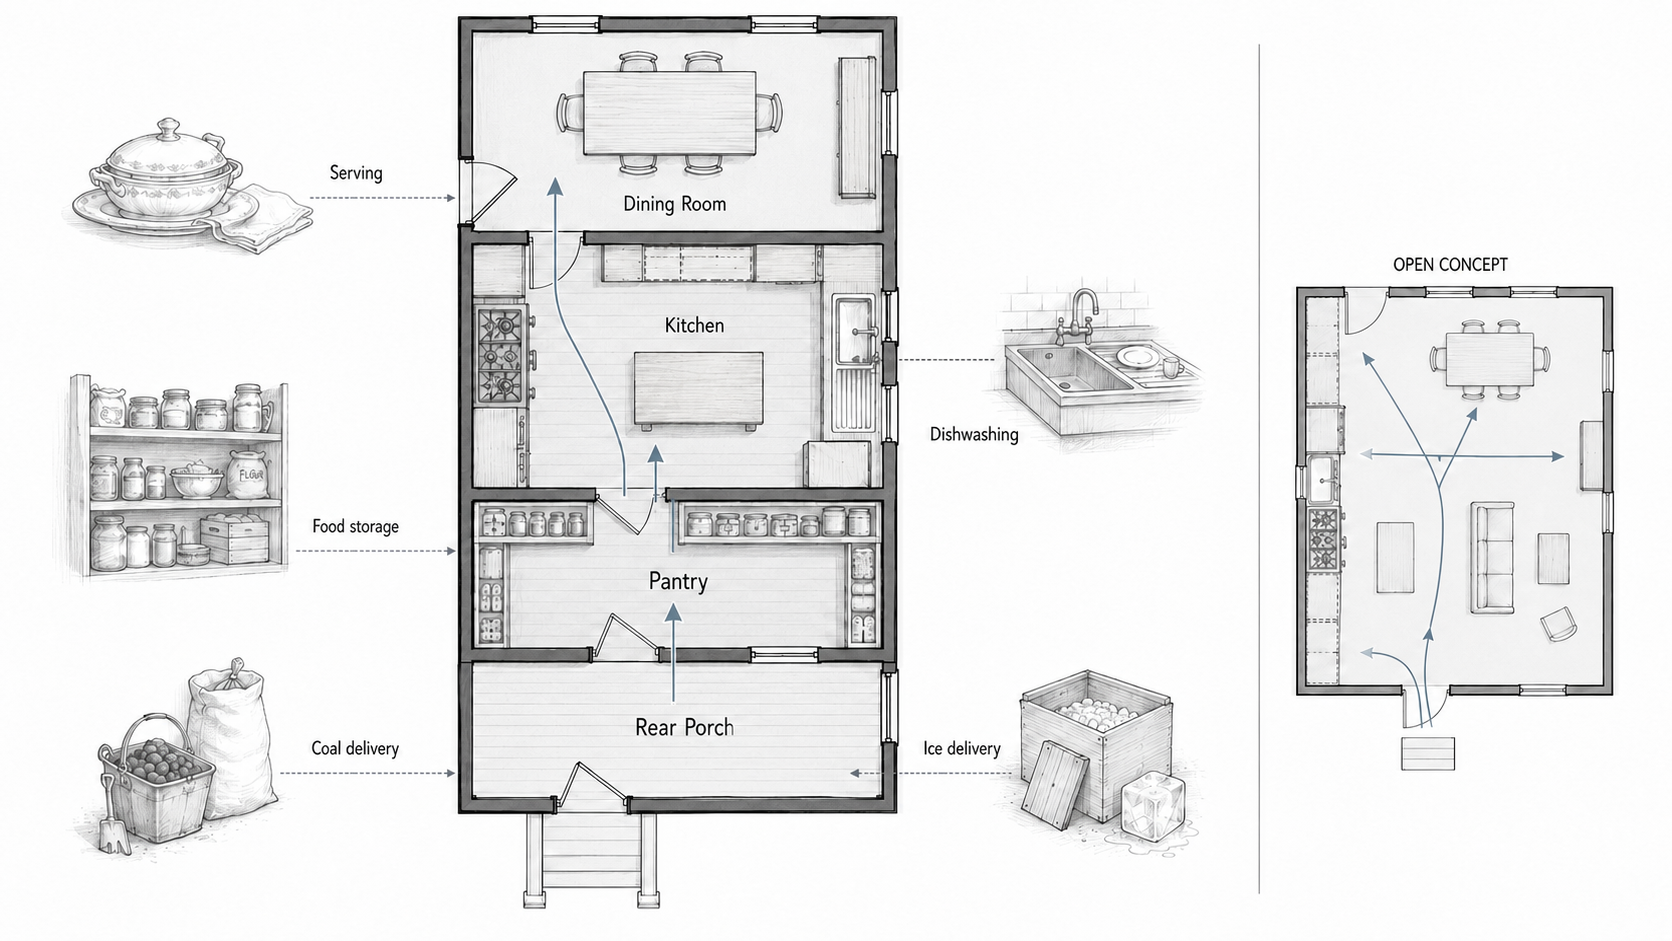
A modern kitchen has to handle cooking, dining, homework, guests, and storage in one room. A 1910 kitchen had a narrower job, and it sat in a service chain. Food came in the back of the house, went into a pantry, passed into the kitchen to be prepared, and reached the dining room. Dirty dishes ran the other way. The plan cut wasted steps and kept service work out of the formal rooms.
Many remodels break that sequence without noticing. A new island blocks the shortest route to the pantry. The refrigerator lands across the room from the sink. A range sits in the main walking path. The person carrying groceries from the back door crosses behind the cook every time. None of that looks serious in a cabinet drawing. It gets serious after a few months of living with it.
Plan Around the Existing Room
Kitchen companies usually start with cabinet runs. Old houses reward the opposite order. Measure the room first. Record the windows, including sill height and trim depth. Check each door swing. Note the radiator, pantry opening, floor slope, chimney mass, plumbing wall, and any access panels that need to stay reachable.
Then watch how people move through the space. The route from the rear entrance to the pantry matters, and so does the path between refrigerator, sink, and range. A dining-room doorway that looks inconvenient on paper may be the opening that keeps people out of the cooking area.
If the room already has good daylight, useful circulation, and a strong pantry relationship, those qualities are worth protecting. New cabinets can fit around them. Rebuilding them after they are gone is much harder.
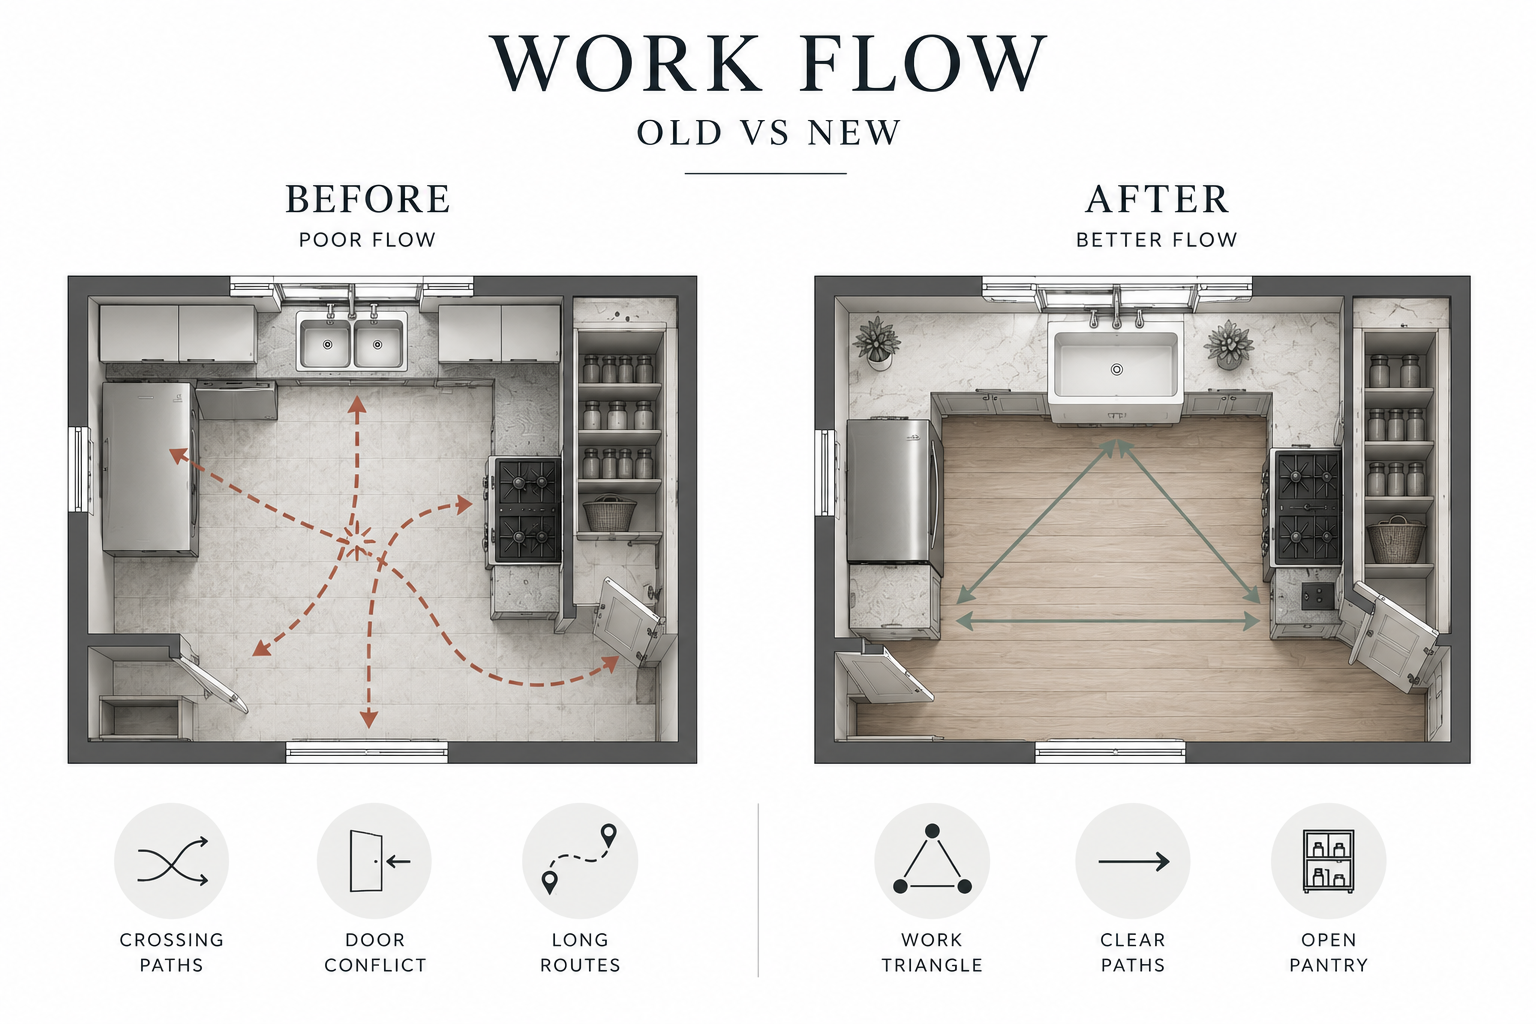
Keep the Parts That Still Make the Kitchen Work
Not everything old deserves to stay, and not everything new deserves to replace it. Original trim, windows, pantry doors, room proportions, and circulation often add more to the kitchen than the cabinets do. The light comes from the windows. Comfortable movement comes from clear paths. The sense that the room belongs to the house comes from the openings, ceiling height, woodwork, and proportions that survived the earlier renovations, and those are hard to recreate once they are gone.
Original woodwork in decent shape can often be patched, filled, and refinished or repainted. Swapping it for narrow stock trim may leave the kitchen cleaner on install day and weaker as a room. The same goes for plaster. Hairline cracks do not mean you strip every wall. Work out whether the movement is old and stable or still active. Repair follows diagnosis.
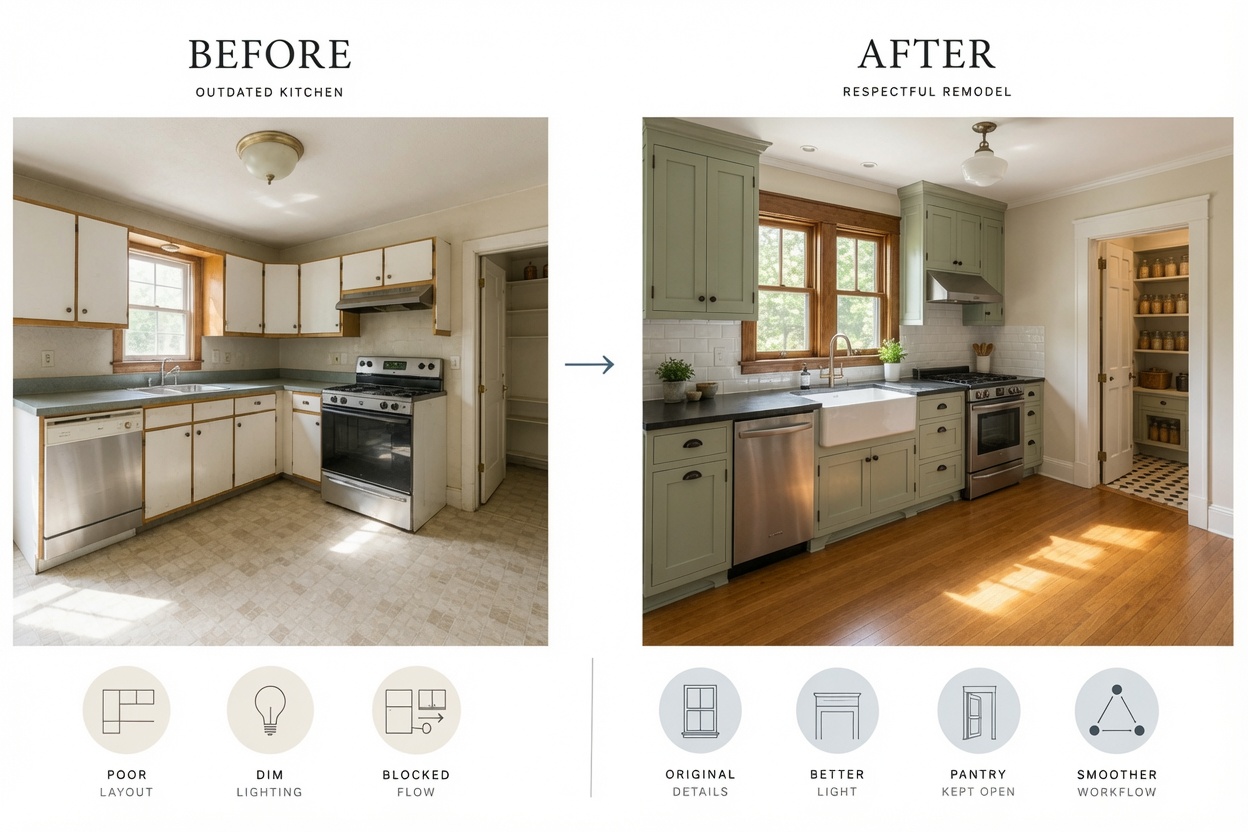
Design Cabinets Around the Room, Not the Other Way Around
Resolve the windows, the doors, the radiator, and the pantry before any cabinet sizes are final. That may produce fewer cabinets on paper and a better kitchen in use. Tall windows keep bringing light into the room. Original casing stays visible instead of vanishing behind filler panels. A radiator can keep heating the cold exterior wall instead of being pulled out and replaced with something undersized.
Early kitchens leaned on efficiency rather than cabinet quantity. The pantry carried much of the storage, which left the working room relatively open.
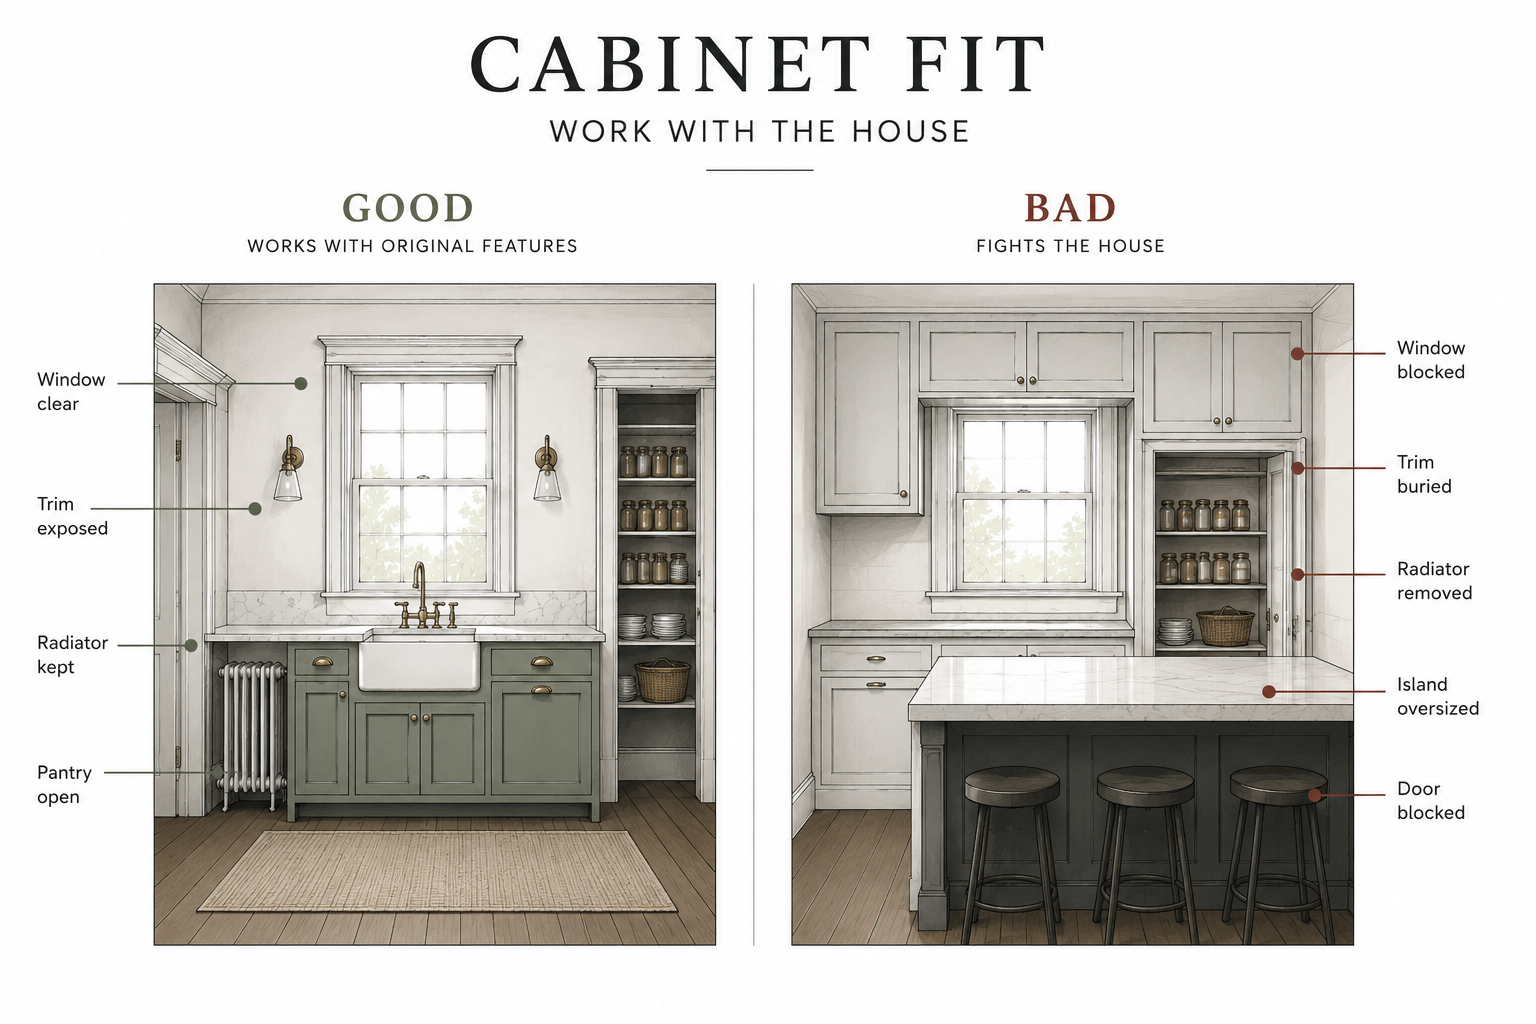
If the design has to cover a good window, narrow a walkway, or remove an original opening just to gain one cabinet, the room is telling you the plan carries too much. More storage does not help when it makes the kitchen darker, tighter, or harder to move through.
What Opening the Walls Will Expose
Cabinets get most of the attention because they are the largest visible purchase. The expensive surprises start after they are gone. Behind one wall there may be old wiring mixed with newer repairs. Another may hide galvanized supply pipe, an aging cast-iron drain, old venting, or water damage around a window. Pull the sink base and the subfloor may be soft from a leak that never reached the ceiling below. The remodel did not create those problems; it exposed them.
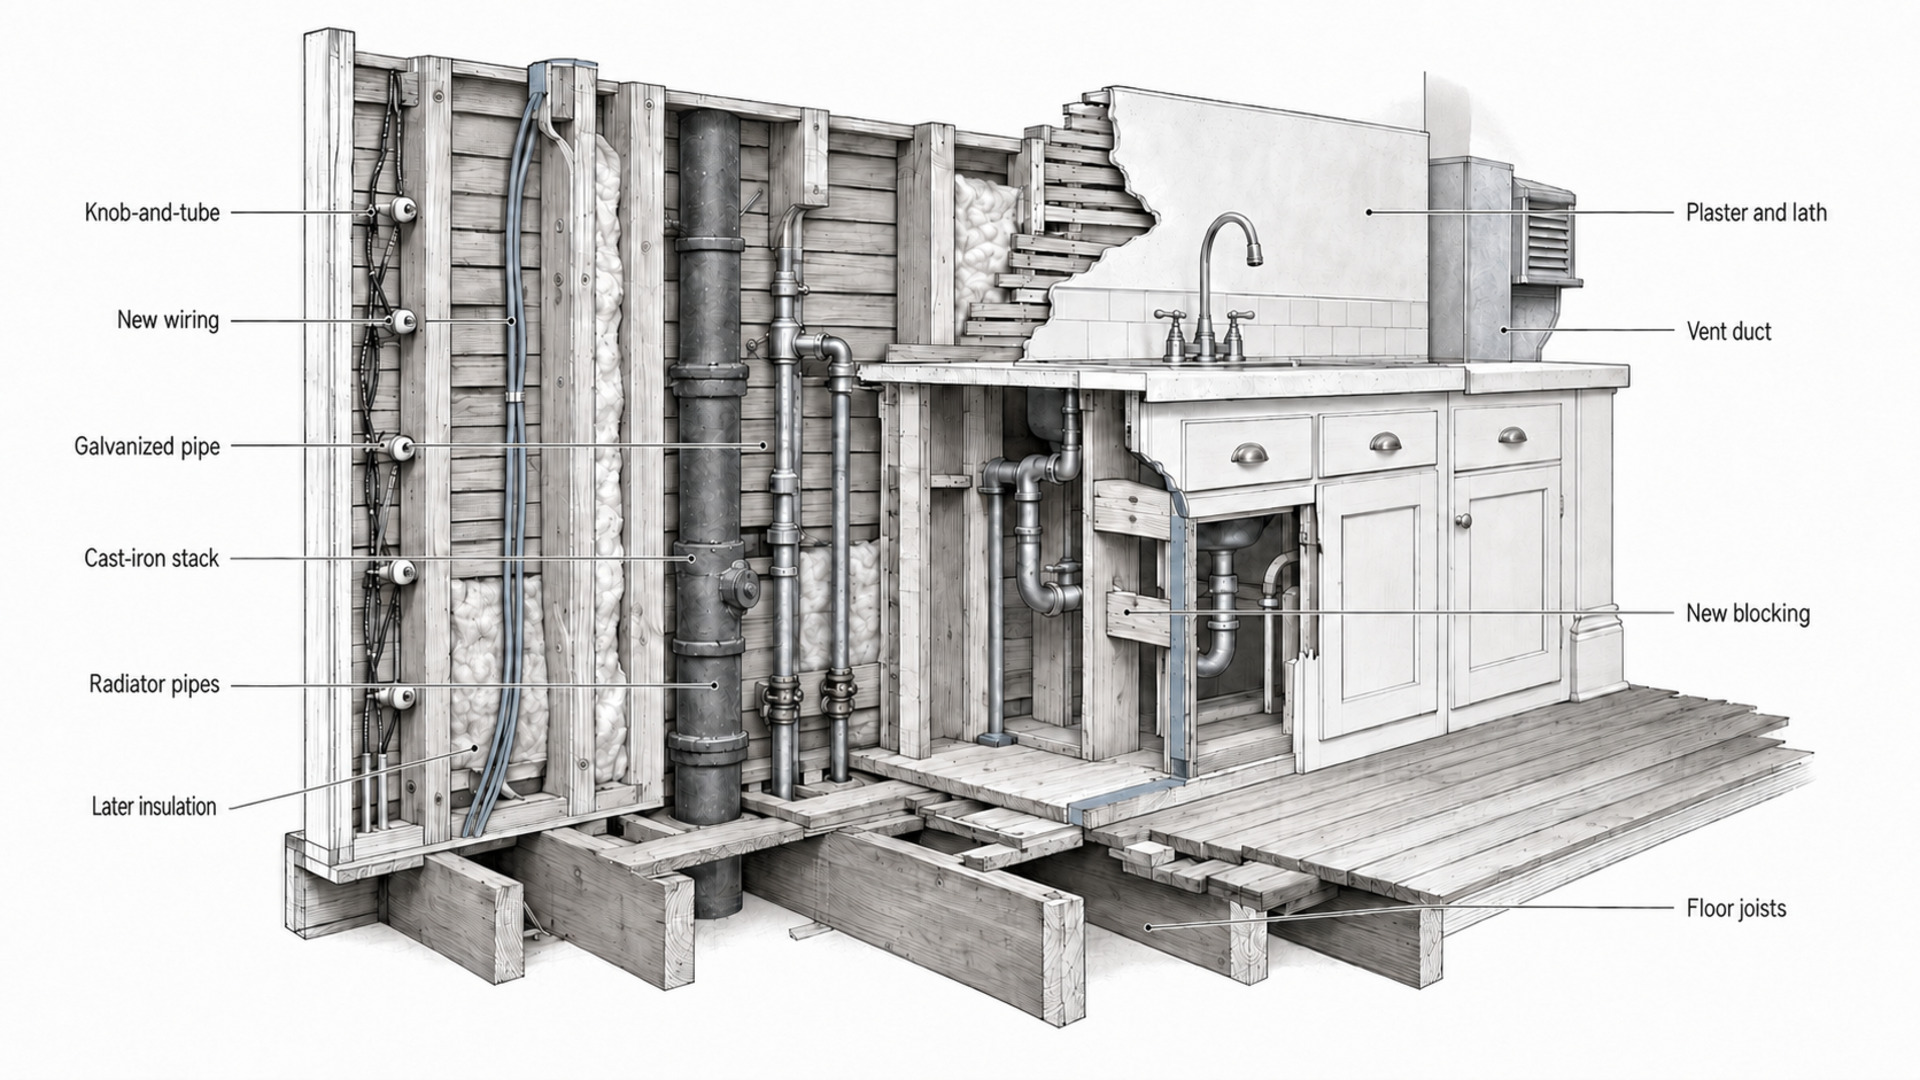
This is why exact old-house pricing is hard before some demolition. Until enough of the room is open, nobody can confirm the state of the framing, wiring, drains, insulation, or earlier repairs. A budget with no room for hidden work is exposed from the first day of demolition.
Moving the Sink Changes More Than Plumbing
Cabinets can usually move wherever the layout allows. The sink cannot, at least not easily. Moving a sink is more than extending two water lines. The drain has to keep enough fall toward the stack. The vent has to reconnect properly. The new route may cross floor joists, need openings in the ceiling below, or run into ducts and wiring already using that space. The dishwasher, disposal, countertop, flooring, and cabinet plan all move with it. One fixture relocation can pull in plumbing, framing, electrical work, plaster repair, flooring, painting, and inspections.
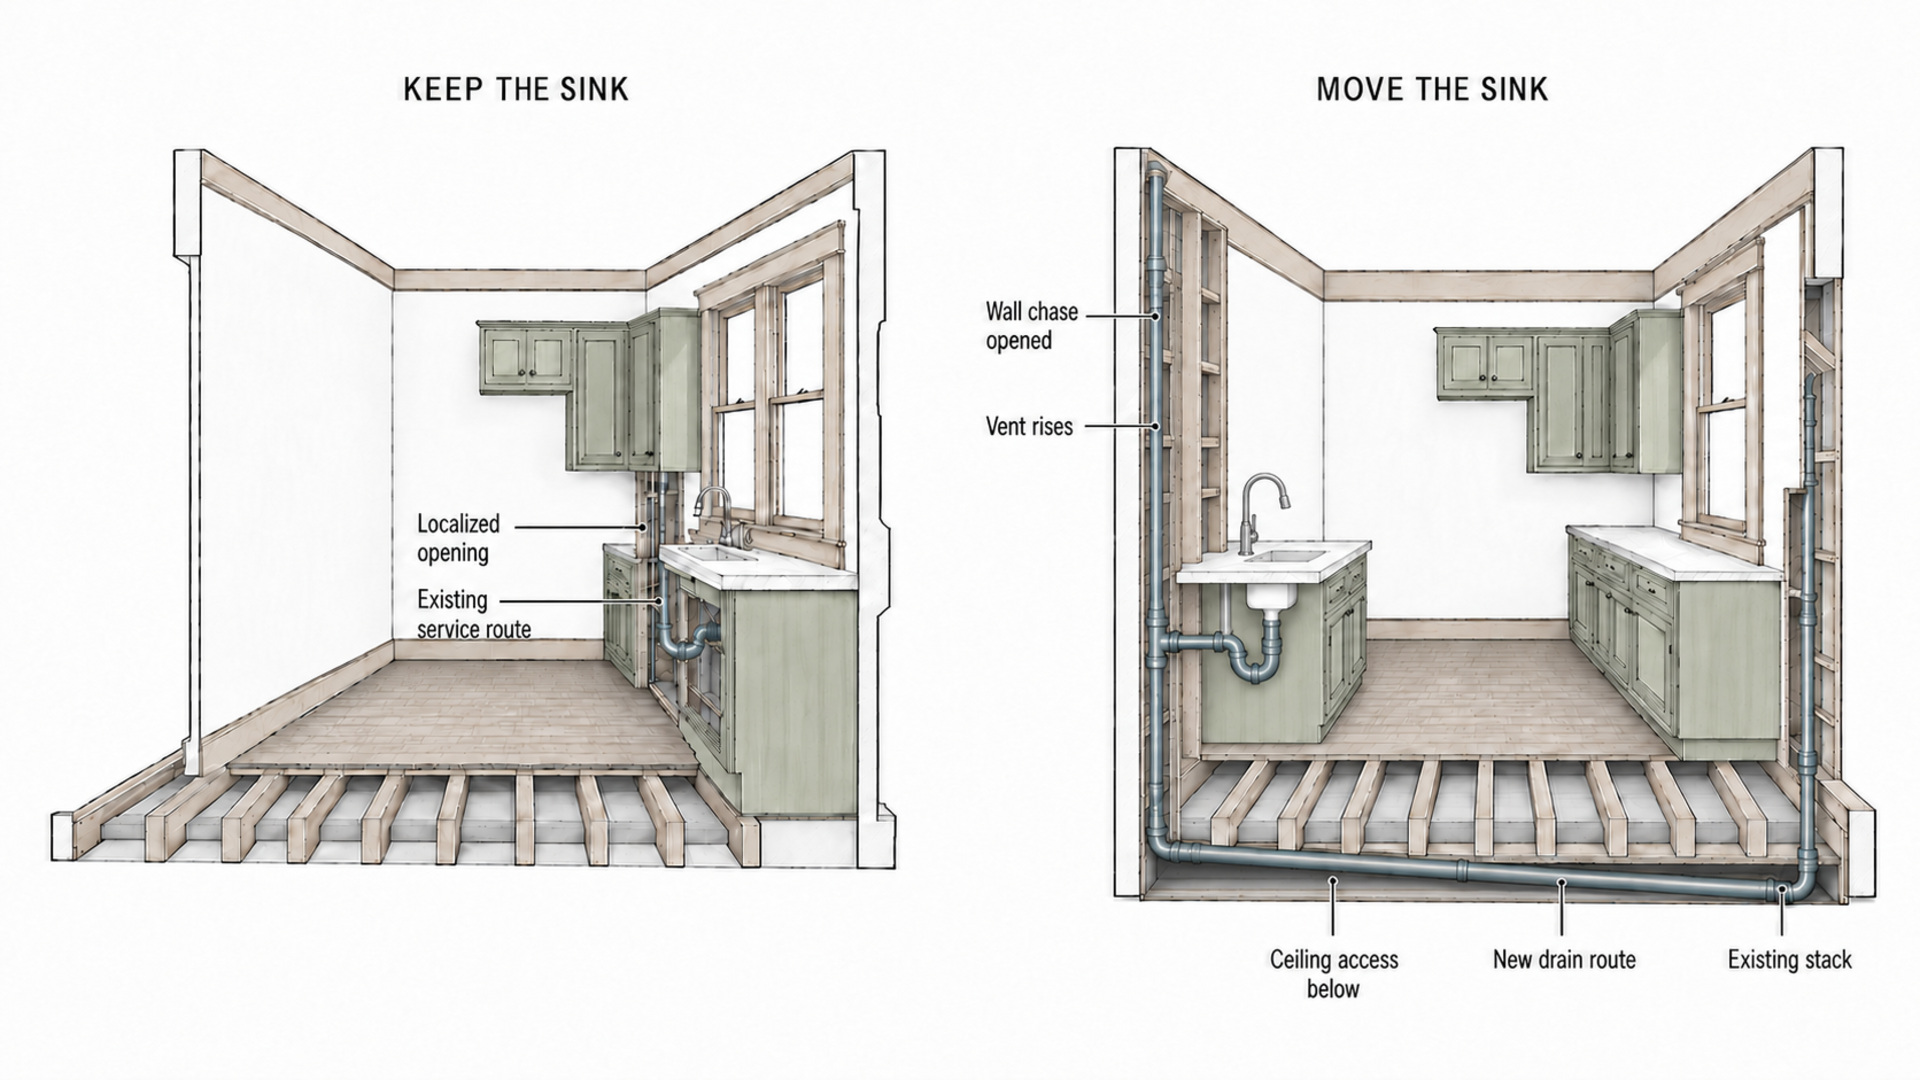
Keeping the sink close to the existing stack is one of the simplest ways to control cost. That does not mean it has to stay in the exact same spot; it means the move should solve a real problem. Relocating the sink to fix a poor workflow, clear a blocked window, or make the room accessible can be worth the added work. Moving it only to center it under a different window can cost more in demolition than the visual change is worth.
Do Not Rush to Remove the Pantry
Many twentieth-century remodels treated the pantry as wasted space. It often handled jobs that a modern cabinet wall struggles to replace. A pantry keeps groceries together, hides small appliances, stores bulk items, and clears the main counters. It can cut the amount of cabinetry needed in the kitchen and leave more room for windows and circulation.
Homeowners sometimes spend thousands building tall cabinet banks to replace storage that already existed behind one simple door. If the pantry survives, measure what it holds before deciding to remove it. Rebuilding the same storage elsewhere can eat more floor area than expected.
Confirm these conditions before ordering cabinets
Kitchen showrooms want cabinet dimensions early because manufacturing takes time. Older houses do not always cooperate. The safest point to lock the order is after enough demolition to confirm the conditions that could not be seen beforehand. That does not mean waiting until every wall is rebuilt; it means opening the areas needed to understand what the cabinets, plumbing, wiring, flooring, and ventilation will have to work around.
- Where does the main plumbing stack run? Keeping the sink and dishwasher close to it can cut drain, vent, framing, and ceiling work.
- Which direction do the floor joists run? A drain crossing several joists may be impractical, or require a specially designed route, access from below, and structural review.
- Is there hidden water damage? Leaks around sinks, windows, refrigerator lines, and exterior walls can damage the subfloor or framing with no obvious stain.
- What wiring is still active? A 1910 house may hold several generations of electrical work. The final layout has to account for what can stay, what must be replaced, and where new circuits can run.
- How far out of level and square is the room? Floors slope, plaster walls bow, and corners run wider or tighter than 90 degrees. Installers need room for shims, scribes, fillers, and level countertop support.
These findings do not force a redesign. They set the limits of the room before deposits are paid and cabinets arrive at sizes that cannot change. This is also the time to confirm appliance specs. Refrigerator depth, dishwasher clearance, range width, hood duct size, electrical load, and door swings all affect the final order.
Fit Cabinets and Materials to the Room
Make modern cabinets look like they belong
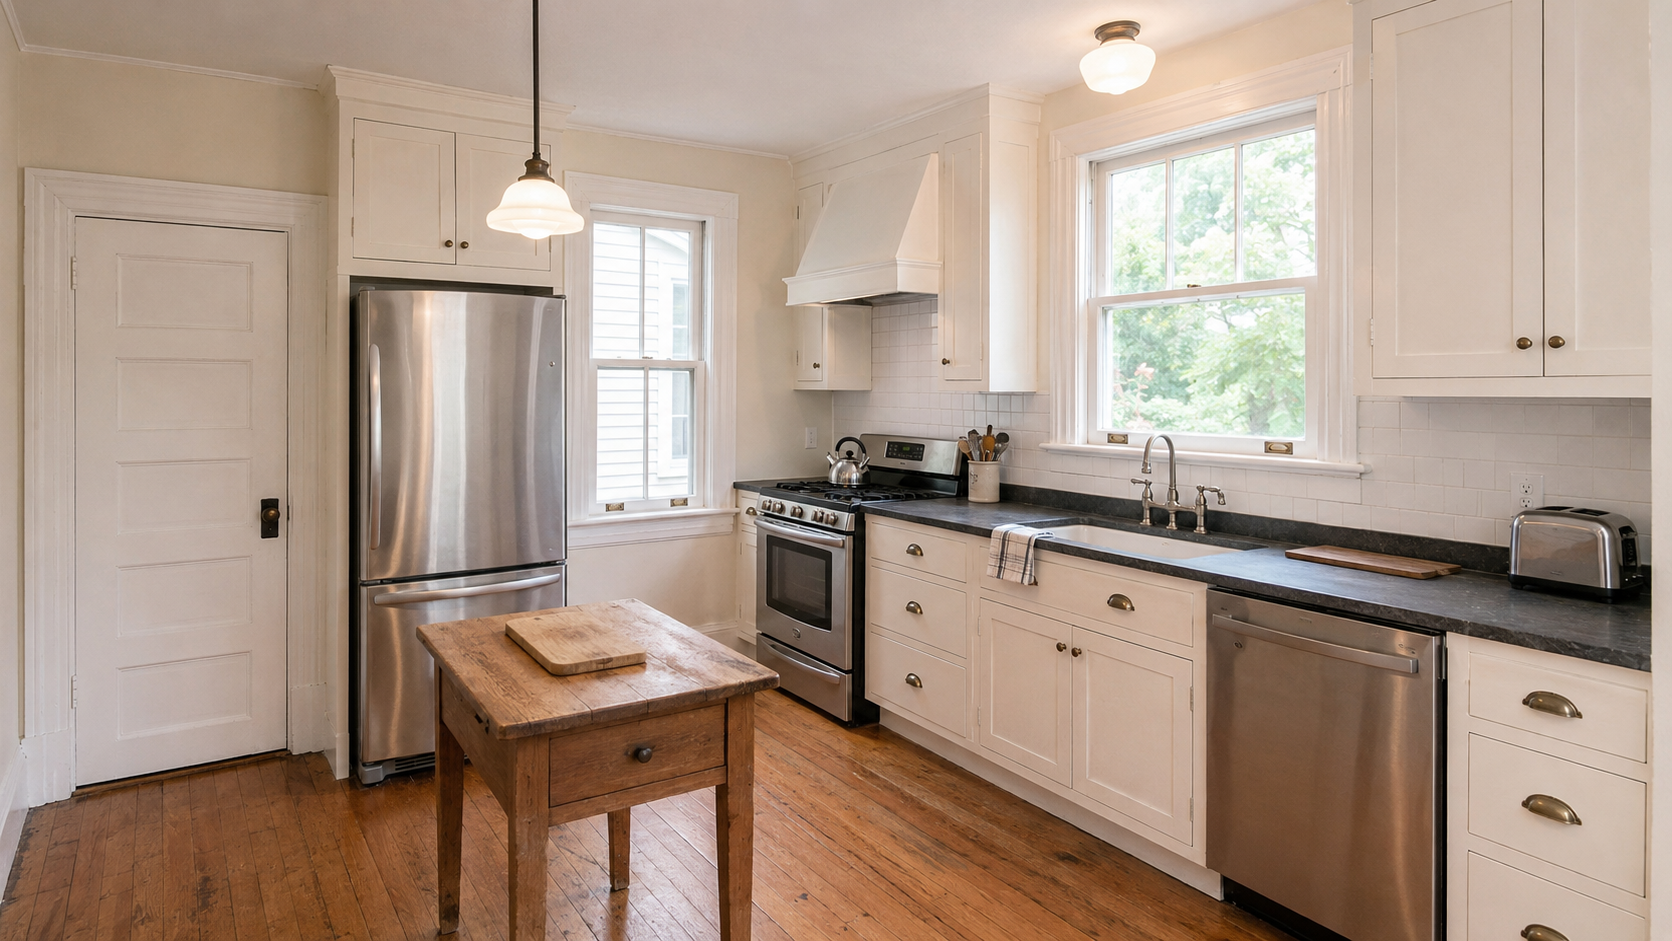
A 1910s kitchen does not need reproduction cabinets or antique appliances. Modern storage, deep drawers, induction cooking, quiet dishwashers, pull-outs, and under-cabinet lighting can all fit the room. The original architecture just has to stay stronger than the new products.
Cabinet proportions matter more than period nostalgia. Inset or plain framed doors sit better beside early-1900s trim than broad glossy slab fronts. Painted cabinets let the original wood windows and doors stay the focus instead of filling the room with competing grain. Hardware should match the size of the doors, because oversized pulls make small cabinets look heavy. Counters feed the balance too. Honed stone, soapstone, butcher block, and quieter engineered surfaces suit an old room better than loud patterns that pull the eye off everything around them.
The goal is not to fool anyone into thinking the kitchen is original. It is to keep the renovation from feeling detached from the rest of the house.
Choose Materials That Can Tolerate an Old Room
Old kitchens are rarely level, square, or perfectly dry at every edge, and the materials and installation details have to account for that. Rigid finishes laid over a moving or poorly prepared base will crack. Tight cabinet scribes against uneven plaster can open as the house moves through the seasons. Wood flooring trapped under a leaking appliance can darken and rot before the leak becomes visible. Preparation matters more than the label on the finish.
Check the subfloor for movement before installing tile. Repair loose boards before adding another layer. Confirm the transitions into adjoining rooms before increasing floor thickness. Make sure the finished floor will not trap the dishwasher under the countertop, because a floor that blocks appliance removal is a callback waiting to happen.
Think Twice Before Building a Giant Island
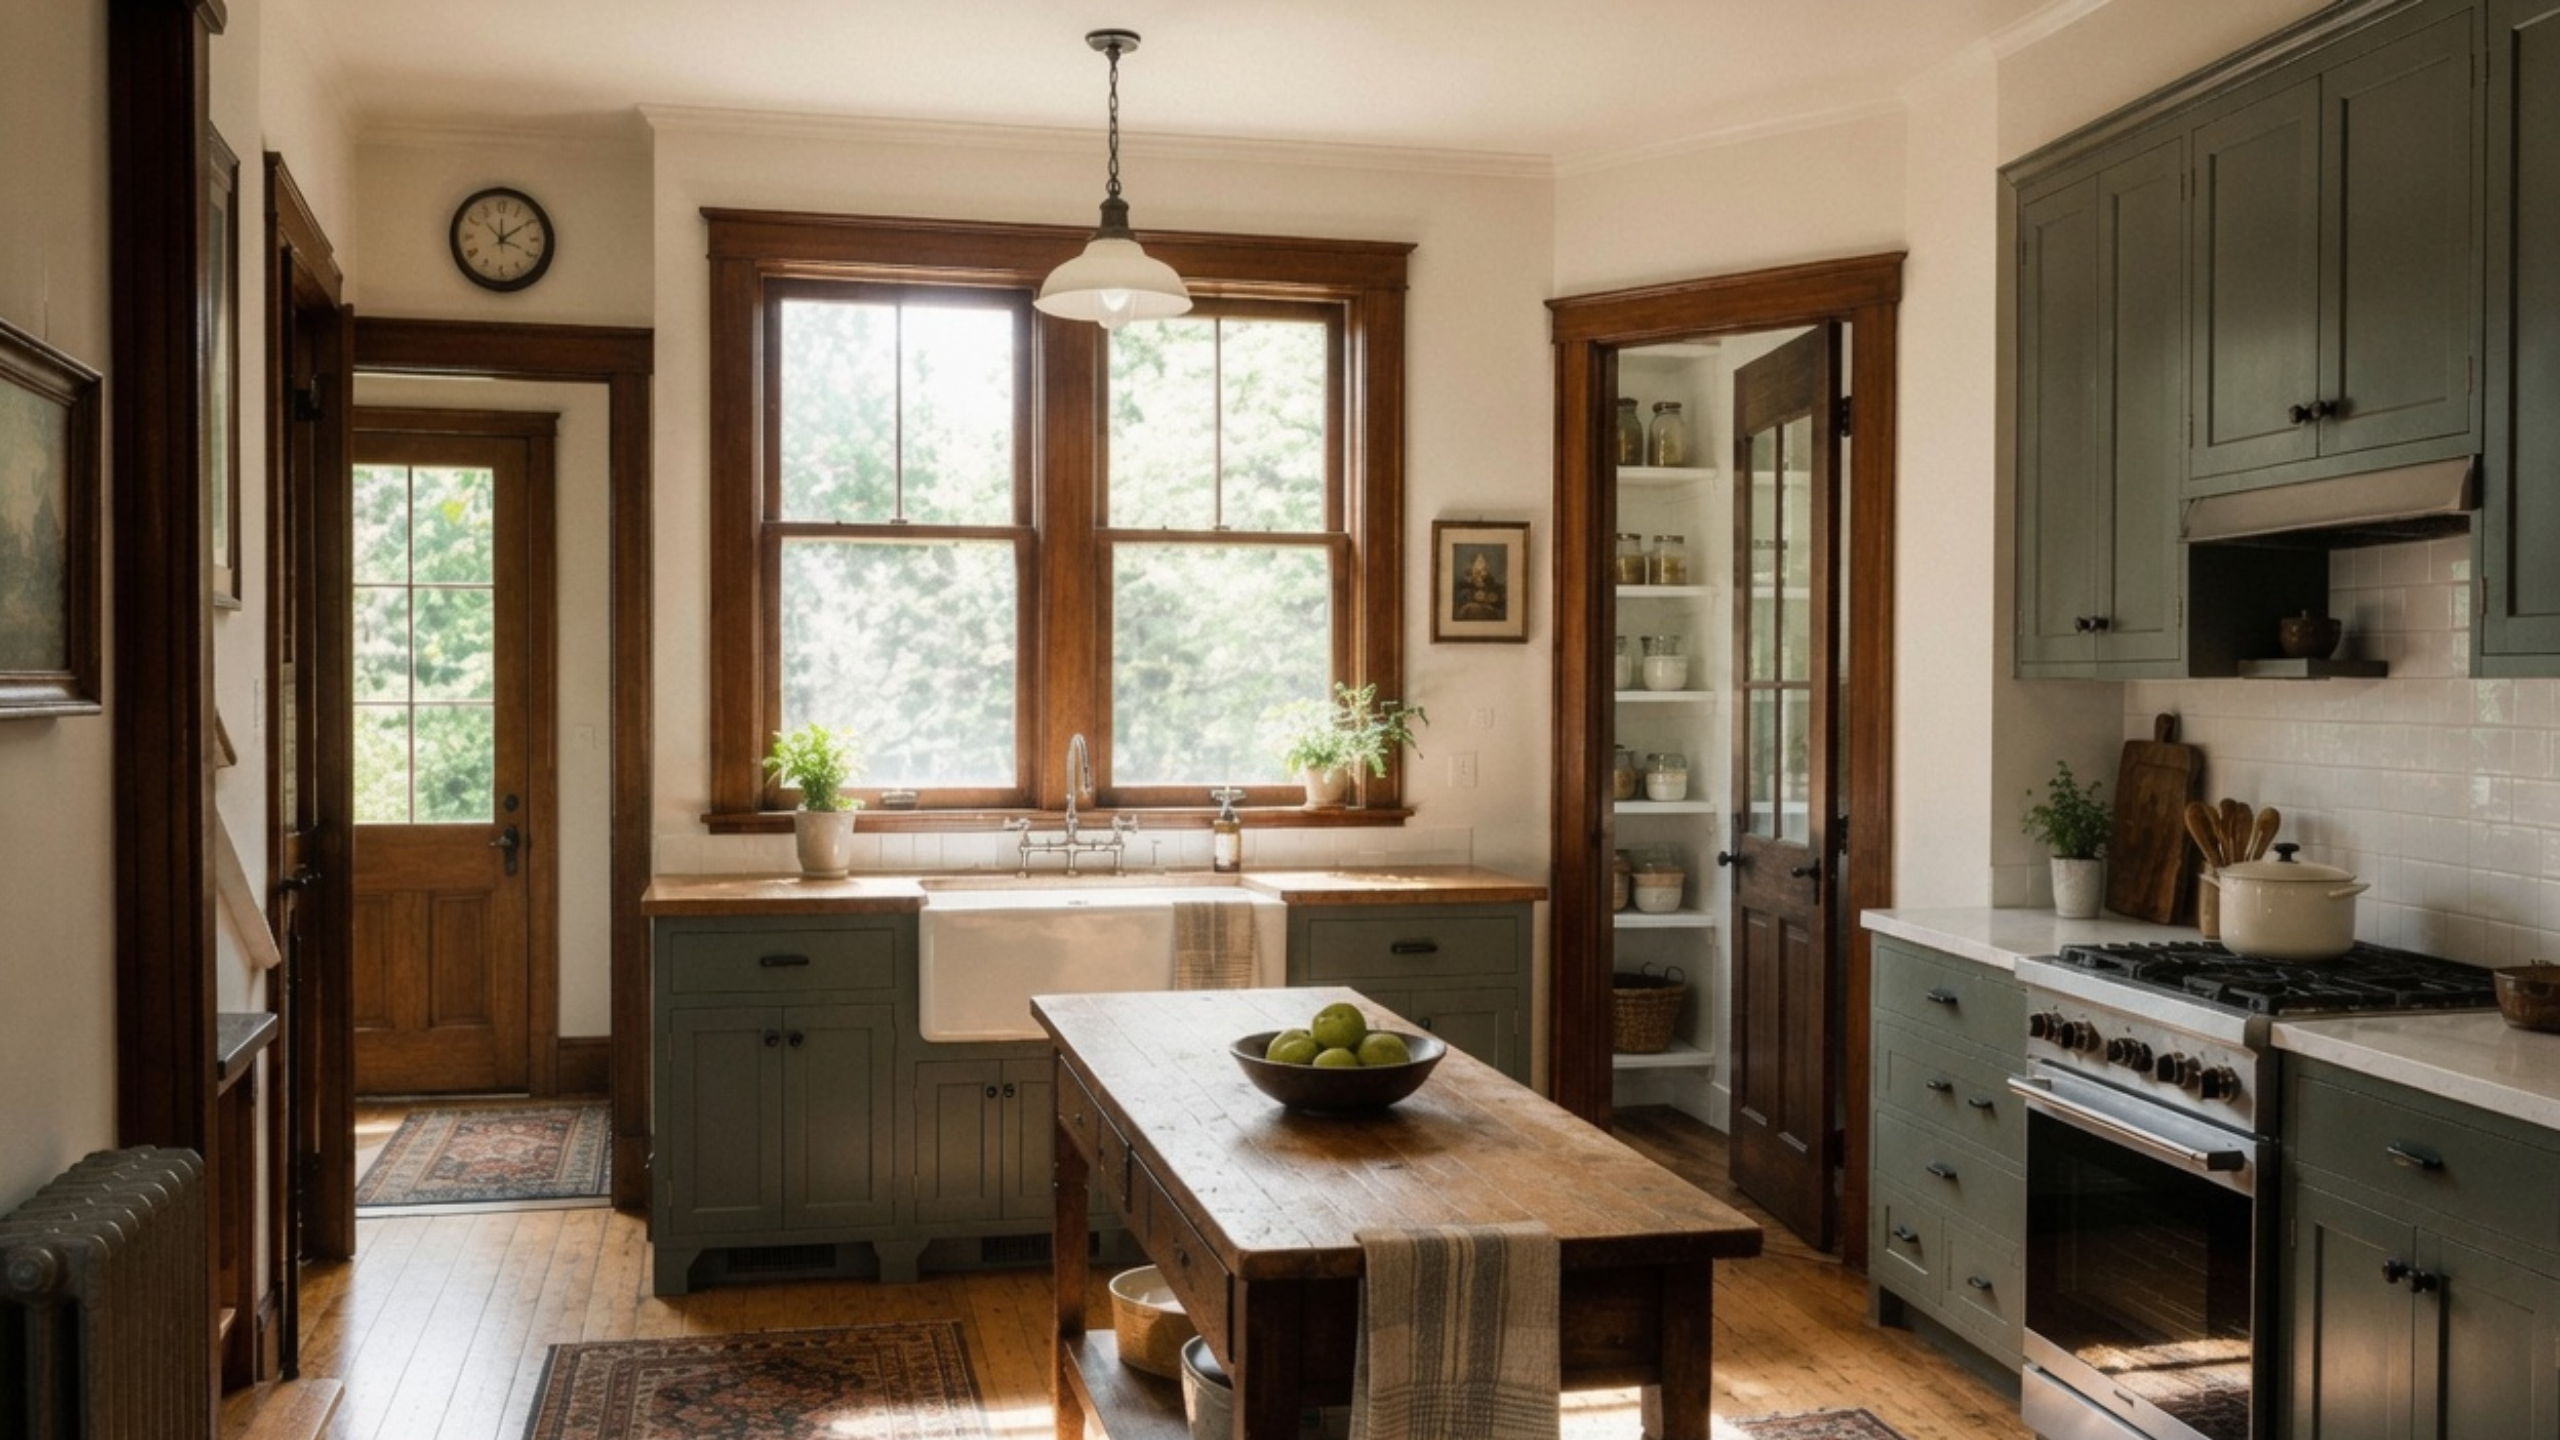
The oversized island has become almost automatic in new kitchens, and many 1910 rooms do not have the width for one. An island should improve movement and work space, not become the thing everyone walks around.
Mark the proposed footprint on the floor with tape. Open the refrigerator. Pull the dishwasher door down. Stand at the sink while someone carries groceries from the rear entrance. If one open appliance closes the passage, the island is too large. A narrow furniture-style worktable often fits these rooms better: it gives preparation space, keeps the room visually lighter, and can be shifted to move appliances or host a crowd.
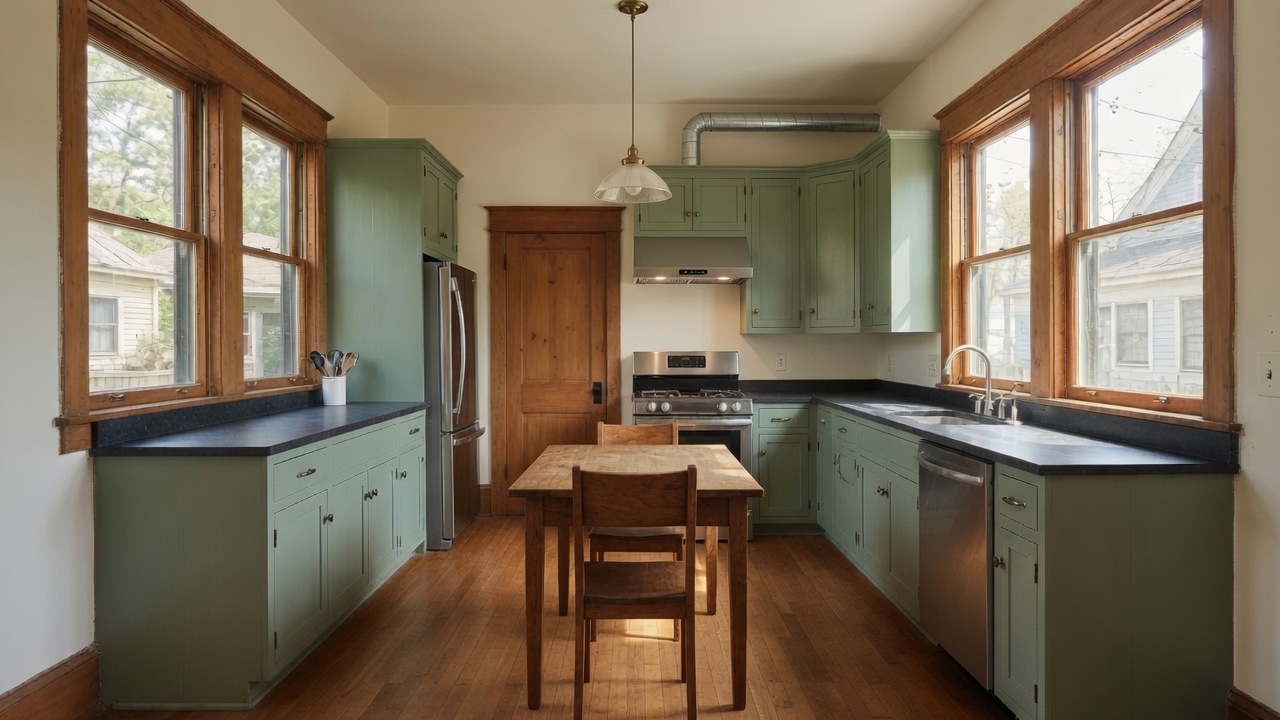
That flexibility is not a compromise. It is often closer to how the room was meant to work.
Plan the Systems Before the Walls Close
Lighting should support the room
Many 1910 kitchens were planned around daylight. Large double-hung windows still give good working light when cabinets have not been pushed across every wall. Artificial lighting should fill the gaps, not overpower the room. Under-cabinet lighting improves food prep without changing the ceiling. A restrained central fixture, modest pendants, or carefully placed recessed lights can cover general lighting without turning every fixture into a focal point.
Plan the switching before the walls close. A kitchen may need separate control for general lighting, task lighting, pendants, and exterior or pantry lights. Adding one forgotten switch after plaster repair and paint means opening finished work for a decision that could have been made weeks earlier.
Vent moisture and grease outside
Range ventilation gets less attention than cabinets and appliances, and it deserves more. Cooking produces heat, moisture, grease, and odors. A recirculating hood filters some grease but does not pull water vapor out of the house.
The best duct run is usually the shortest real path to the outside, through a wall or straight up through the roof, depending on the range and the framing. Do not vent the hood into an attic, soffit, or hidden roof space. Warm cooking vapor lands on colder framing and sheathing and leads to stains, mold, or rot. Plan the hood before the cabinet above it is final. Duct size, route, turns, clearances, and makeup-air needs can change the wall, the ceiling, and the appliance.
Replace wiring based on condition, not age alone
A kitchen remodel is often the point when delayed electrical work can no longer be put off, but that does not mean every wire in the room has to be replaced. Some houses have had careful upgrades over the decades. Others hold original wiring mixed with later additions and improvised repairs. An electrician has to work out what is active, what is abandoned, what can stay, and whether the service has the capacity for the proposed appliances.
A modern kitchen leans hard on the electrical system. The range, fridge, dishwasher, microwave, disposal, lights, and counter outlets may need their own circuits or updated protection, depending on the code and the scope. In the United States, the National Electrical Code generally requires at least two 20-amp small-appliance branch circuits serving the kitchen receptacles, before dedicated appliance circuits are considered. Local requirements and the permitted scope still govern the work. Do that work before insulation, wall repair, cabinets, flooring, and final paint. Running one more circuit after the kitchen is done costs far more than adding it while the walls are open.
What a 1910s Kitchen Remodel Costs
Cabinets may be the largest visible expense, but hidden work often decides whether the project lands on budget.
| Part of the project | Where the cost changes |
|---|---|
| Cabinet installation | Uneven plaster, sloping floors, out-of-square corners, custom fillers, and fitting around original trim. |
| Electrical work | Older wiring, new appliance circuits, outlet placement, lighting controls, and limited service capacity. |
| Plumbing | Aging supply or drain piping, sink relocation, vent routing, framing conflicts, and repairs below. |
| Flooring | Multiple layers, damaged subfloor, floor leveling, suspect materials, and difficult transitions. |
| Ventilation | Creating an exterior duct route and opening walls, ceilings, or roofs around existing framing. |
| Hidden repairs | Rot, leaking windows, damaged framing, abandoned utilities, and previous work that must be corrected. |
Cost depends on where you are, the cabinet grade, the appliances, labor, permits, and how much of the room is moving. For most owners, keeping the existing plumbing layout is the single biggest call. It separates a moderate remodel from a major rebuild. A cosmetic update that keeps the layout is a different project from one that moves plumbing, removes walls, replaces wiring, and rebuilds the floor.
Carry a contingency for hidden conditions. Do not treat it as money for a better range or a nicer countertop before demolition is done. Spend it on finishes and there is nothing left for the damaged subfloor you find beneath them.
This is where false economies begin. Someone keeps a failing drain to protect the countertop allowance. Damaged subfloor gets covered instead of repaired. An inadequate recirculating hood goes in because exterior venting means opening the ceiling. Cabinets get ordered before the wall is straightened, and the installer hides the problem with oversized fillers. Each of those choices lowers the first invoice and raises the chance of leaks, cracked finishes, poor ventilation, or another repair after the kitchen is done. Spend first on the work that is hard to reach later.
Use the Right Remodeling Order
A good sequence keeps finished work from being cut open later.
- Document the existing room. Record windows, doors, trim, radiators, floor levels, plumbing, electrical service, and pantry access.
- Complete selective demolition. Open enough of the room to confirm framing, drains, vents, wiring, water damage, and previous alterations.
- Finalize the layout. Lock in appliances, cabinets, ventilation, lighting, and plumbing after the hidden conditions are understood.
- Complete structural and concealed work. Repair framing and subflooring, then install plumbing, electrical, ventilation, insulation, and blocking.
- Close and prepare the room. Repair plaster or install new wall finishes, prime, level cabinet areas, and prepare the floor.
- Install cabinets and countertops. Cabinets must be level even when the room is not. Countertops should not be used to hide poor cabinet installation.
- Finish the working surfaces. Install the backsplash, fixtures, appliances, lighting trim, flooring where appropriate, and final paint.
The flooring sequence depends on the material and the cabinet design. Some finished floors run beneath the cabinets; others stop at the cabinet line. Make that call before calculating finished floor height, dishwasher clearance, countertop elevation, and transitions into adjoining rooms.
Where 1910s Kitchen Remodels Go Wrong
The first error is designing from a blank floor plan. The room is not blank. It holds windows, framing, pipes, floor slopes, trim, and circulation routes, and ignoring those conditions produces a layout that looks efficient on screen but needs expensive compromises during construction.
The second error is moving everything at once. Moving the sink, range, refrigerator, pantry door, and heating system may make a cleaner drawing. Each move also adds another trade, another opening, and another chance of a conflict.
The third error is buying finishes before the hidden work is understood. A stone counter does not fix a weak subfloor. Custom cabinets do not solve poor ventilation. New flooring over a moving base will still crack, separate, or squeak. Diagnose first, repair second, finish last.
FAQ
Should I remove the original pantry?
A working pantry is usually worth keeping. It stores food and small appliances outside the main cabinet runs, which can preserve windows, counter space, and circulation. Remove it only when the gained space solves a larger layout problem that cannot be handled another way.
Can I install an island in a 1910s kitchen?
Yes, when the room is wide enough to keep usable circulation with appliance doors open. Mark the proposed island on the floor before ordering it. A narrow worktable may give the same preparation space without permanently blocking the room.
Should I keep the original windows?
Sound original windows are often worth repairing, especially when their size and sill height support the cabinet layout. Replacement may be justified when frames are badly deteriorated, but shrinking or covering a good window usually damages the room more than it helps the cabinetry.
Is moving the sink worth the cost?
It can be when the existing location creates a serious workflow or accessibility problem. The decision should account for drain slope, venting, joist direction, the plumbing stack, flooring, and repairs below. A run crossing several joists may need a specially designed route and structural review, rather than a longer pipe alone.
Do I need custom cabinets?
Not automatically. Stock and semi-custom cabinets can work when the designer leaves enough space for fillers, scribes, irregular walls, and original trim. Custom cabinetry earns its cost when standard dimensions would block windows, waste substantial space, or create poor transitions.
Can original wood flooring stay in the kitchen?
Sometimes. Check for rot, deep staining, excessive movement, damaged patches, and large height changes between rooms. Old boards can often be repaired and refinished, but leaks from sinks, dishwashers, and refrigerators must be dealt with quickly.
Should a 1910s kitchen have reproduction fixtures and cabinets?
No. Modern fixtures and appliances can fit the house when their scale, proportions, and placement respect the room. A convincing remodel depends more on keeping the openings, trim, light, and circulation than on reproducing every historical detail.