The problems don’t show up in the showroom. They show up when the “antique” brick starts dusting indoors, when the patio pops after the first freeze-thaw, or when you repoint with a hard mortar and the brick face begins to spall.
Antique brick can look incredible. It can also turn into a maintenance project if you buy the wrong stuff or install it like modern brick.
What You’ll Get Here
- How “antique brick” is actually sold (reclaimed vs. tumbled-new vs. thin brick veneer)
- Where each type works (interior walls, fireplaces, patios, exterior veneer) and where it fails
- The decisions that swing performance: frost exposure, mortar choice, moisture control, sealing
- A quick ID chart, a field checklist, and FAQ based on the same questions people repeat
Antique Bricks: Styles, Uses, and Practical Tips.
The Big Misunderstanding
“Antique” can mean three different products. If you don’t pin that down, you’ll compare apples to rocks.
- True reclaimed brick: Salvaged from older buildings. Irregular sizes, old kiln variation, often softer than modern brick. Best “real” look, but it demands the right mortar and moisture strategy.
- New brick made to look old: Tumbled, distressed, or flashed to mimic age. More uniform, more predictable performance. Sometimes sold honestly. Sometimes sold like it’s reclaimed.
- Thin brick veneer: A slice (often ~1/2–1 inch thick) used as a finish on a wall. It’s not structural brick. Great indoors. Outdoors only if the whole wall system is designed for it.
If you’re chasing a specific look, it helps to see how color families behave in real rooms. For quick visual references, start with how antique red reads across styles or where antique white brick actually works.
A Real Project Setup

Common scenario: a 1920s–1950s house in a freeze-thaw climate. The homeowner wants a reclaimed brick patio and an interior accent wall in the kitchen. Budget is real. Time is limited. The bricks are “local salvage,” which usually means mixed batches and unknown history.
Two different exposures. Two different failure modes.
- Patio risk: saturation + freezing = pop-offs, scaling, uneven settlement.
- Interior wall risk: dusting, efflorescence bleed-through, and mortar mismatch that looks wrong or cracks.
Keep this split in your head as you read. It’s the same material, but it’s not the same job.
Pick The Right Brick First
Decision 1: Is it going outside? This is the fork in the road.
Exterior Use
For patios, garden paths, and exterior veneer, reclaimed brick needs to tolerate wetting and freezing. The pretty ones can still be the wrong ones.
- Ask what the brick was used for. Old interior partition brick is a bad candidate for a patio.
- Watch for soft faces and crumbly edges. That’s not “character” outdoors. That’s future debris.
- Plan a real base: a typical paver build-up is on the order of 6–8 inches of compacted granular base (more in deep-freeze areas), then bedding sand, then brick. Short the base and you’ll pay later.
Interior Use
Inside, you can use softer brick safely, but you still need to control dust and salts.
- Expect variation. Reclaimed brick is rarely “one shade.” It’s a blend.
- Think cleaning and sealing early. Some bricks shed grit until they’re cleaned and stabilized.
If your plan is a thin veneer wall (kitchen, fireplace surround, entry), read up on reclaimed thin brick trade-offs before you buy by the pallet.
Thin Brick vs Full Brick
Thin brick is a finish system. Full brick can be a finish, a veneer, or (in specific assemblies) structural masonry. Most residential “brick walls” today are veneer, not structural.
Where Thin Brick Wins
- Interiors: feature walls, backsplashes, fireplaces (with proper clearances and rated assemblies).
- Tight spaces: you get the look without losing inches of room depth.
- Weight management: less load than full brick, but still not “weightless.”
Where Thin Brick Goes Wrong
- Wet areas without a real waterproofing strategy: showers and tub surrounds are where DIY installs fail quietly.
- Exterior installs without drainage planning: trapping water behind veneer is how you get efflorescence and bond failures.
If you want the quick “where it works” breakdown, keep this antique thin brick use map nearby while you’re planning.
Mortar Is Not A Detail
This is where older brick gets damaged. The brick is soft. The mortar is too hard. Moisture cycles hit. The brick loses, not the mortar.
Rule of thumb: mortar should generally be compatible with the brick and the exposure. Historic brick often benefits from a softer, more forgiving mortar than modern high-strength mixes. Exact selection depends on the brick, the wall assembly, and the climate.
What People Mess Up
- Using overly strong mortar “for durability.” On softer brick, that can push damage into the brick face during freeze-thaw or movement.
- Repointing without checking what’s there. Matching color is not the same as matching performance.
- Smearing mortar over antique faces. It’s hard to clean without changing the surface.
If you’re buying reclaimed brick for an older home, add a mortar check to your plan. And if you’re already seeing joint cracking or powdering, start with how to spot failing mortar early before you jump into a full repoint.
Moisture, Salts, and Sealing
The brick itself is rarely the whole story. Water is the story.
Efflorescence
That white bloom is usually salts moving with moisture. Scrubbing the surface can remove it temporarily, but if the wall keeps getting wet, it returns.
- Fix the moisture path first: bulk water, flashing gaps, capillary wicking from grade, or trapped water behind veneer.
- Don’t seal too early: new mortar and wet masonry need time to dry out. Sealing a damp wall can trap problems behind a “clean” look.
Sealers
Sealing can be helpful, but it’s not a default move for every antique brick surface.
- Interior walls: a breathable, matte finish can reduce dusting and make cleaning easier without turning the wall glossy.
- Exterior patios: sealing is about reducing saturation and staining risk, but the wrong sealer can create a film that fails, peels, or changes slip resistance.
If you’re dealing with painted brick, don’t attack it blind. Use a process that won’t chew up the faces: removing paint from brick without damage.
Brick ID Chart
| Brick Type | Best Uses | How To Spot It | Common Problems |
|---|---|---|---|
| True Reclaimed Brick | Interior walls, restoration, some patios (if frost-tolerant) | Size variation, worn edges, old kiln color range, occasional mortar residue | Spalling outdoors if soft/saturated; dusting indoors if not stabilized |
| Tumbled “Antique-Look” New Brick | Exterior veneer, patios, interiors | More uniform sizing; consistent product line; “distress” looks intentional | Can look fake if too uniform; still needs proper base/mortar outdoors |
| Reclaimed Thin Brick | Interior feature walls, backsplashes, fireplace surrounds | Thin slices with real reclaimed face; backing often saw-cut | Bond failures if substrate prep is sloppy; salt bleed if moisture trapped |
| Antique White / Limewashed Look | Interiors where you want lighter mass | Soft whites/creams; often textured; sometimes intentionally “aged” coating | Shows soot and grease; needs the right sealer strategy in kitchens |
| Brick Pavers (Old or New) | Patios, walkways, entries | Often denser; made for wear; consistent thickness matters for flatness | Settlement if base is thin; pop-offs if water sits and freezes |
Install Moves That Matter
Most “antique brick” installs fail for boring reasons: substrate prep, water management, and rushed finishing.
Interior Veneer Basics
- Dry layout first. Mix from multiple boxes/piles to avoid color banding.
- Control dust. Clean the face, let it dry, then choose a breathable finish if needed.
- Respect heat zones. Fireplaces and stoves need rated clearances and materials.
Patios and Paths
- Base depth is the job. Brick is thin; base is thick. That’s how you keep it flat.
- Slope it. A common target is about 1/4 inch per foot away from the house so water doesn’t sit.
- Edge restraint matters. Without it, pavers migrate and joints open.
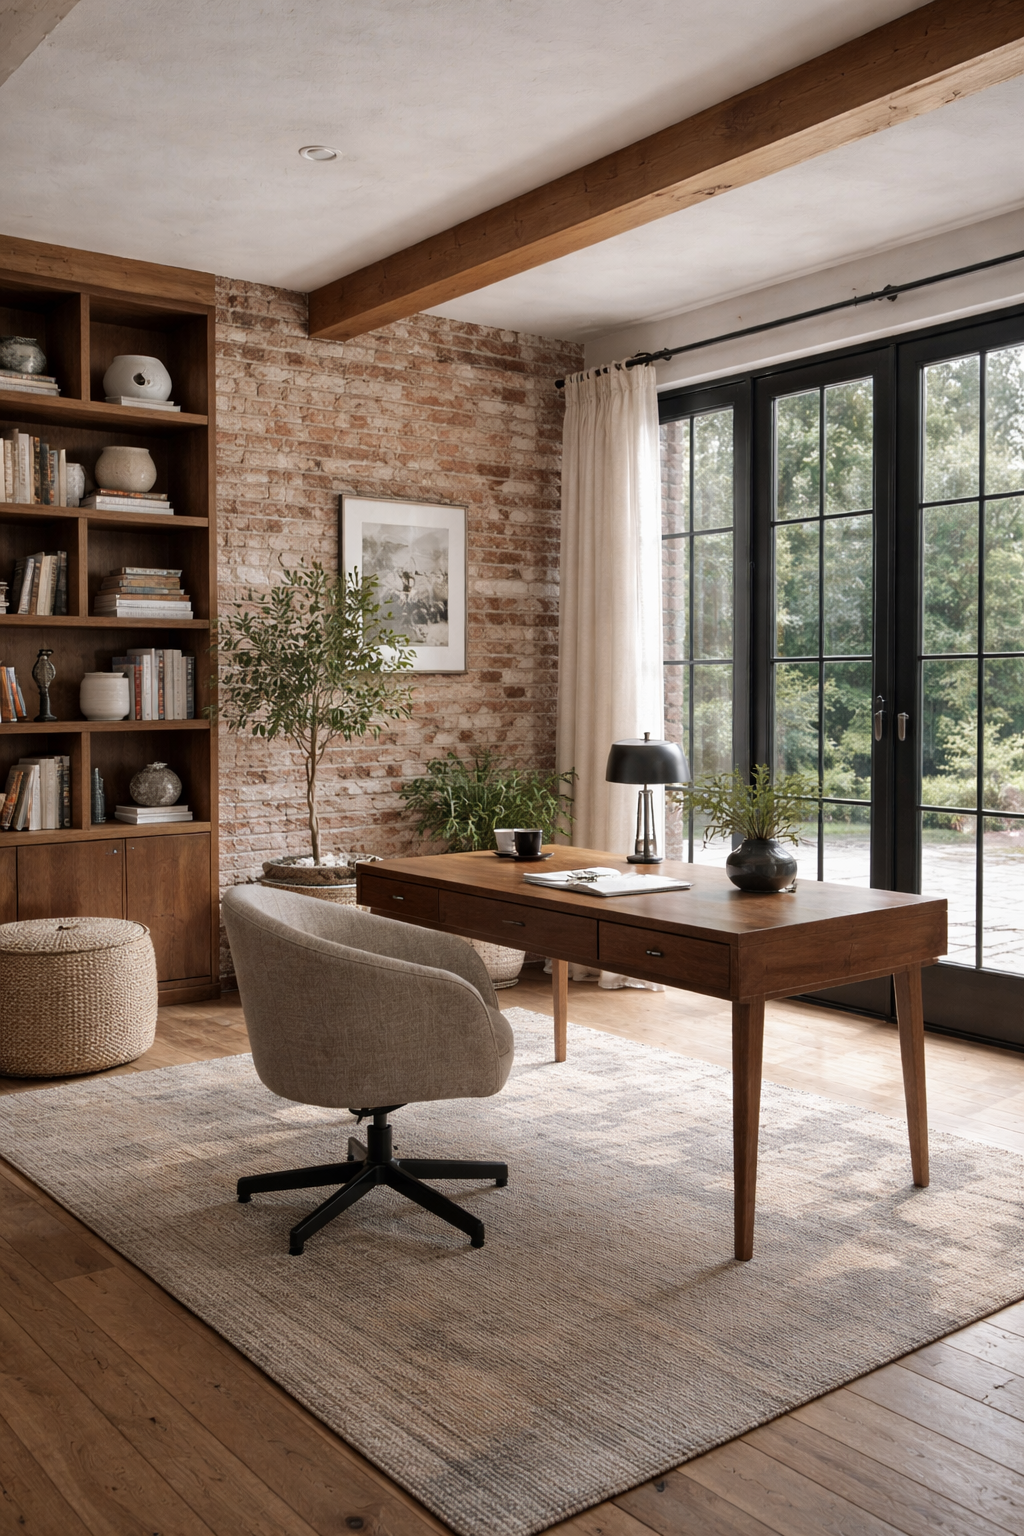
For modern interiors where brick is doing “warmth” without becoming the whole room, it helps to see examples that don’t go full theme-park. This set of brick-in-modern-design moves is a good reference point.
The Quiet Save People Miss
Before you commit, build a small sample panel and abuse it. Not a lab test. A reality test.
- For exterior brick: soak a few pieces, then let them dry. Repeat. If faces start flaking, don’t put that batch in a patio.
- For interior brick: rub the face with a dry hand and a dark cloth. If you get heavy dust transfer, plan on a cleaning + breathable finish.
- For mortar compatibility: test a small repoint area first. If the joint cracks fast or the brick edge spalls, stop and reassess the mix.
This one step catches the “beautiful but wrong” brick before it’s installed across 200 square feet.
Red Flags Before You Buy
- “All antique brick is the same.” It isn’t. Ask where it came from and what it was used for.
- No conversation about frost exposure. If it’s going outdoors, frost performance is not optional.
- A pallet that looks too uniform. Might be fine, but it’s likely “antique-look,” not reclaimed. Price should reflect that.
- Heavy salt staining and powdery faces. Can signal long-term moisture issues and soft material.
- Install plan is “just stick it on.” Veneer systems are assemblies. If nobody mentions substrate prep and moisture, expect callbacks.
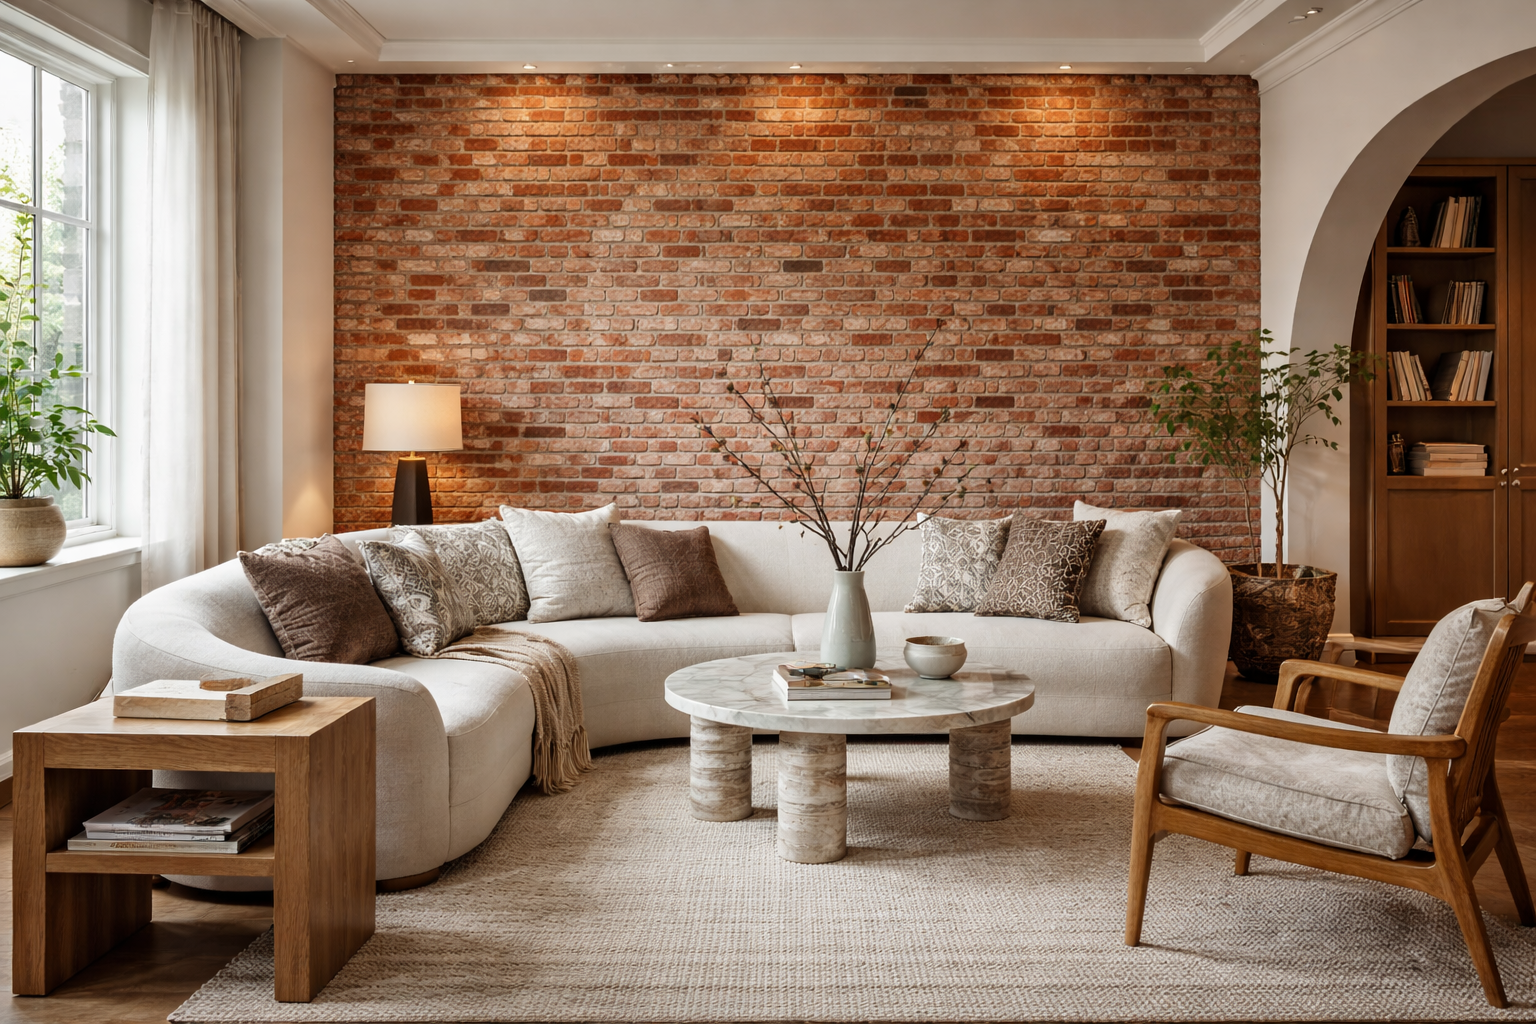
Room-by-Room: Where Antique Brick Works
Antique Brick in Kitchens
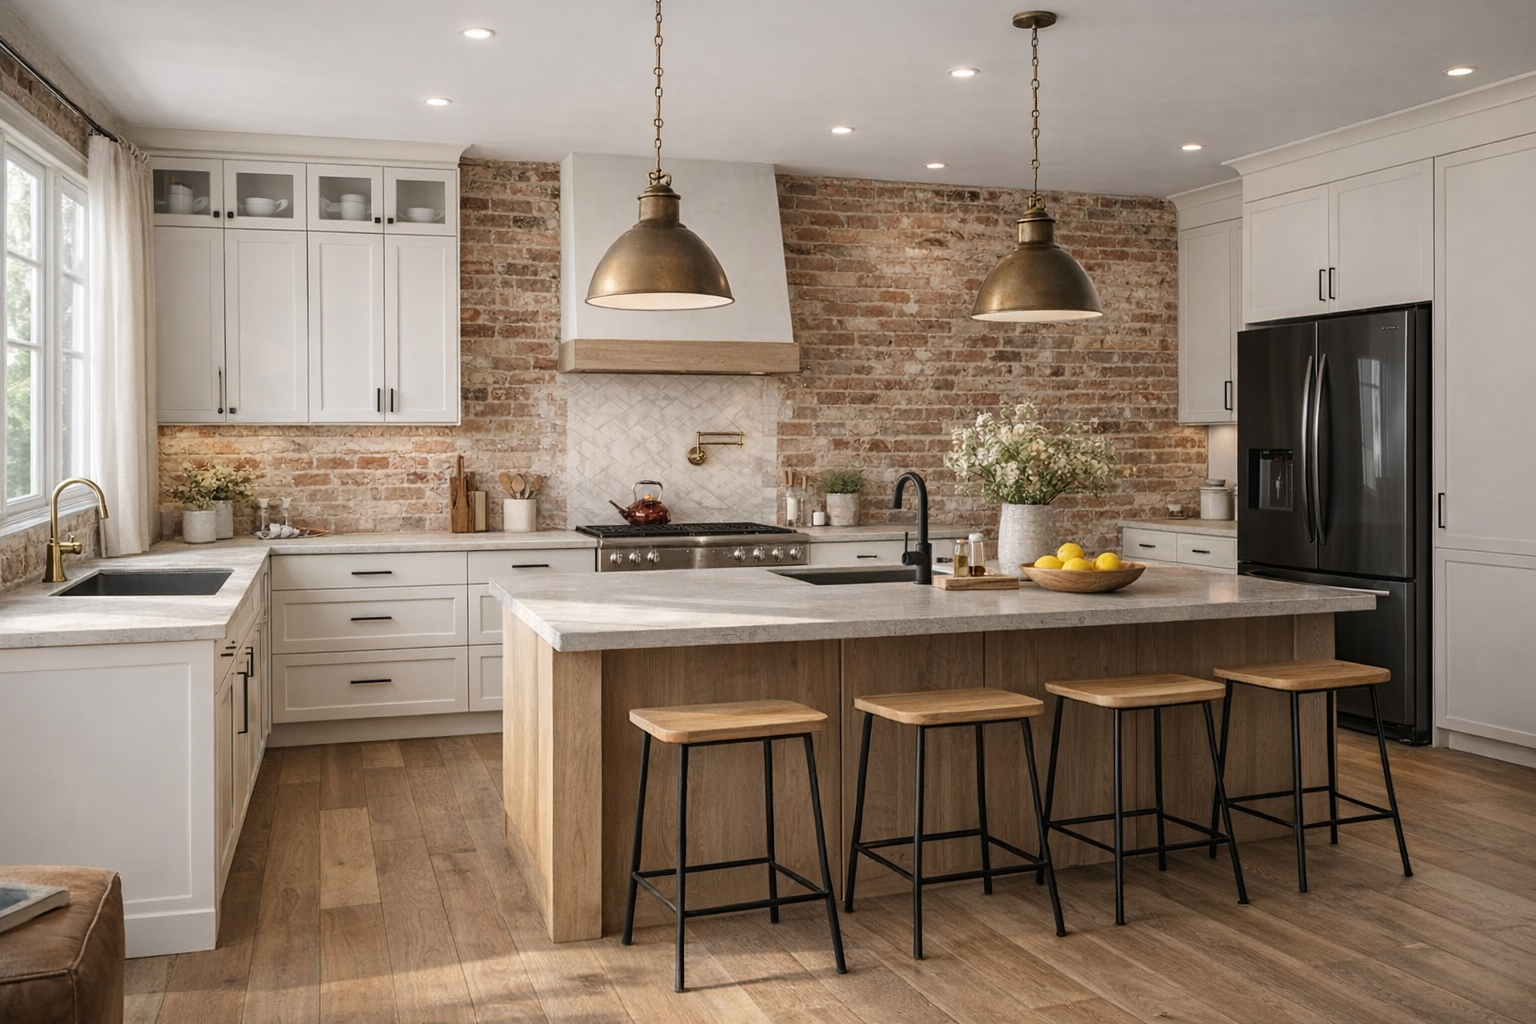
Yes—but only if you treat it like what it is: a porous texture wall in a room that produces grease, steam, and food splatter. Kitchens are where brick looks amazing for six months, then turns into a cleaning argument if the details are sloppy.
No—if you want a wipe-clean, low-maintenance kitchen, or if the wall is in the main “splash zone” and you don’t want to seal it properly.
Where It Works Best
- Feature wall away from the stove (dining nook, breakfast corner, or the wall opposite the cooking line).
- As a fireplace-style focal point if your kitchen opens into a family room and you want one strong material that ties spaces together.
- Behind open shelving (with a realistic expectation: shelves collect dust, brick collects dust—so commit to occasional cleaning).
Where It Usually Fails
- Directly behind a range without a real backsplash strategy. Grease + porous brick = stains that don’t “patina,” they just look dirty.
- Next to the sink where water hits constantly. Mineral spots and darkened joints show up fast.
- On exterior walls that run cold (especially in winter). Condensation and efflorescence can creep in if the wall assembly isn’t right.
Thin Brick vs Full Brick
In kitchens, thin brick veneer is usually the move. It’s easier to detail, easier to keep flat, and you’re not dragging full masonry weight into an interior remodel.
If you’re choosing between veneers, start with antique thin brick options so you’re not guessing what holds up in a real kitchen.
The Three Kitchen Realities
- Grease is airborne. Even if the brick isn’t behind the stove, it will still get a light film over time in smaller kitchens.
- Mortar is the sponge. Stains usually live in the joints first, not the brick face.
- Cleaning has to be planned. If the only way to clean it is scrubbing with harsh chemicals, you’ll hate it.
The Detail That Saves You
If the brick is anywhere near cooking, treat the splash zone like a real backsplash: either keep brick out of that zone (tile/stone/metal where splatter happens) or use a breathable, matte sealer designed for masonry once everything is fully dry. The goal is stain resistance, not a shiny “wet look.”
Skip the lazy approach. A shiny sealer over damp mortar is how you get haze, trapped moisture, and patchy spots later.
Odor and Indoor Air
Old/reclaimed brick can hold smells (smoke, soot, damp storage) if it wasn’t cleaned properly before install. If you’re doing reclaimed, sniff-test the pallet and reject anything that smells like a basement. Sounds basic. It matters.
What to Do If It’s Already There
- Start dry. If it’s damp or salty (white powder), don’t seal yet. Fix moisture first.
- Degrease gently. Use a cleaner meant for masonry, rinse lightly, let it dry completely.
- Stabilize loose dust. If it sheds, you’ll never “clean it clean.” Stabilize, then maintain.
Do / Avoid
- Do keep brick out of the direct splash zone unless you’re pairing it with a real backsplash strategy.
- Do plan ventilation (hood that actually vents outside if possible). Less grease in the air = less grime on the wall.
- Avoid glossy sealers in kitchens unless you like the “wet brick” look forever.
- Avoid pretending brick is maintenance-free. It’s not. It’s just worth it when placed smart.
If you’re matching the brick to a clean modern kitchen, these brick + modern design rules keep it from looking like a themed renovation: one strong surface, calm cabinetry, and let the texture do the heavy lifting.
Antique Brick in Bedrooms
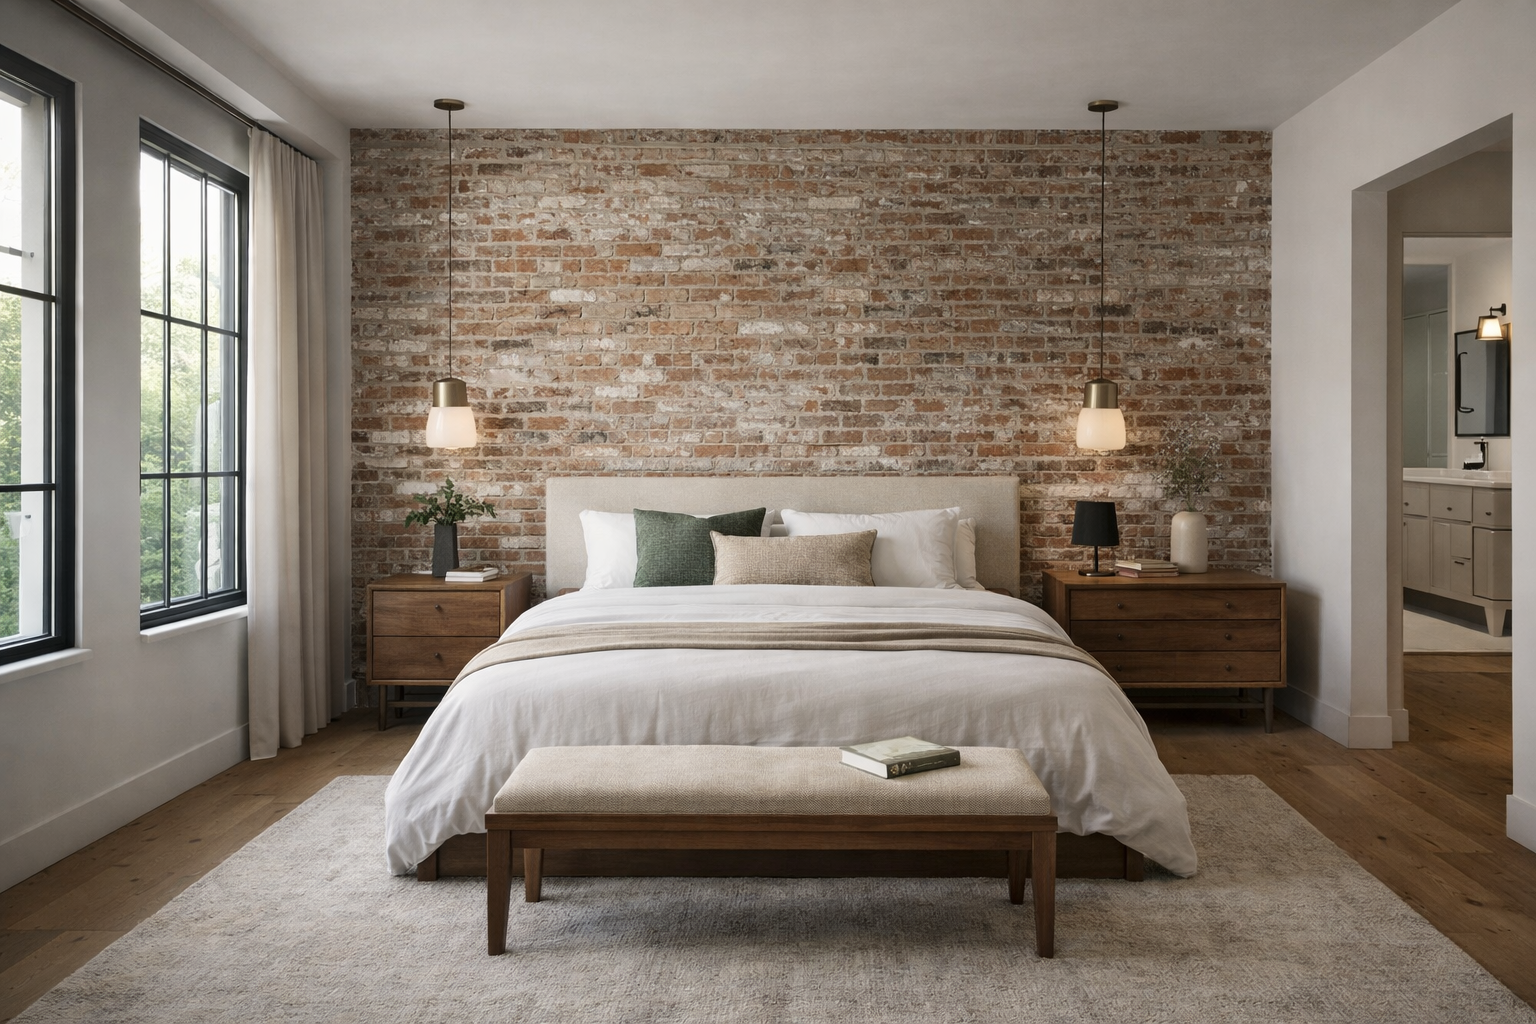
Yes—a lot of the time. Bedrooms are actually one of the safer places to use antique brick because you don’t have the grease, steam, and wipe-down abuse you get in kitchens.
No—when the room has moisture risk (basement bedrooms, cold exterior walls, old leaks), or when you’re sensitive to dust and smell.
When It’s a Good Idea
- You’re using it as a feature wall (usually behind the bed). One wall. Not the whole room.
- The wall stays dry year-round. No damp smell, no efflorescence, no “mystery dark patches” after rain.
- The brick face is stable. When you rub it with your palm, it shouldn’t shed grit like chalk.
- You’re okay with texture doing the work. Brick is visual noise in the best way—so your furniture and decor can stay simpler.
When It’s a Bad Idea

- Below-grade bedrooms (or any room that needs a dehumidifier to survive). Brick can hide a moisture problem until it gets ugly.
- Exterior walls that run cold. In winter, a cold masonry surface can become a condensation magnet if the assembly isn’t handled right.
- Allergy / dust sensitivity. Some reclaimed brick will “dust” unless it’s cleaned and stabilized.
- You want a wipe-clean wall. Brick is not that. It’s a texture wall, not a nursery-clean surface.
Thin Brick vs Full Brick
For bedrooms, thin brick veneer is usually the smarter move: you get the look without the bulk. Full brick is rarely worth it indoors unless you’re restoring an existing masonry wall.
If you’re deciding between options, start with reclaimed thin brick pros/cons so you’re not buying a product that fights your wall assembly.
The Two Bedroom-Specific Issues People Miss
- Dust + bedding. If the brick sheds at all, it ends up on the headboard, pillows, and baseboards. Do the hand-rub test before install. If it fails, plan on cleaning and a breathable, matte finish.
- Sound. Brick is reflective. In a small bedroom, it can make the room feel “sharper” acoustically. Rugs, curtains, and a padded headboard usually fix that.
Placement That Usually Looks Right
- Behind the bed (the classic). Keep outlets and wall plates minimal and aligned.
- Reading corner / desk nook where you want depth without adding furniture.
- Avoid putting it where you’ll constantly brush against it (tight side clearances) if the face is rough or dusty.
Do / Avoid
- Do dry-lay and blend pieces from multiple boxes so you don’t get color banding.
- Do keep lighting soft and angled—brick looks best with shallow shadows, not flat overhead glare.
- Do treat any moisture smell as a stop sign. Fix the source first, then think about brick.
- Avoid sealing a wall that still has damp areas or fresh mortar that hasn’t dried out fully—trapped moisture shows up later as haze, salts, or musty odor.
If you want the “modern bedroom, not theme room” version of brick, these brick-in-modern spaces rules translate cleanly to bedrooms: one strong wall, calm materials around it, and let texture carry the mood.
Field Checklist
- Decide: interior only, or exterior exposure too.
- Confirm what you’re buying: reclaimed vs antique-look vs thin brick.
- Buy enough for blending: pull from multiple pallets/boxes during install.
- For patios: plan the base depth and edge restraint before you order brick.
- For old brick: don’t default to high-strength mortar without checking compatibility.
- Fix water first (grade, downspouts, flashing) before blaming the brick for salts.
- Do a small sample test panel and a simple soak/dry check if it’s going outside.
- Clean gently; avoid methods that grind off the face texture you’re paying for.
FAQ
Are antique bricks strong enough for a patio?
Some are. Some aren’t. The deciding factors are density, absorption, and how they behave when wet in freeze-thaw. If the source can’t tell you what the brick was used for, do a small soak/dry test before you commit to a full patio.
Do I need to seal antique brick indoors?
Not always. If the wall dusts, sheds grit, or will live in a grease/hand-contact zone (kitchens, entries), a breathable, matte finish can help. If the wall is stable and dry, sealing can be unnecessary.
Why is white stuff appearing on my brick?
Usually efflorescence (salts) carried by moisture. Cleaning the surface can remove it, but the real fix is controlling the moisture source so salts stop migrating to the face.
Can I use thin brick outside?
Yes, but only when the full wall system is designed for exterior exposure (substrate, drainage, bond method, and detailing). Exterior veneer failures are usually water-management failures.
Is “antique-look” brick a scam?
No—if it’s sold honestly. Antique-look brick can be a smart choice when you want predictable sizing and performance. The issue is when it’s marketed as “reclaimed” to justify a reclaimed price.
What’s the safest way to clean antique brick?
Start gentle and stay reversible. Aggressive cleaning methods can erase the surface character you bought the brick for, or force water and salts deeper into the masonry.
How do I avoid a patchy, striped brick wall?
Blend from multiple piles/boxes during install. Don’t install “one box at a time.” Reclaimed brick needs mixing to look intentional.
Painted brick: strip it or cover it?
Depends on the paint type, the brick condition, and your tolerance for mess. If you strip, use a method that protects the faces and doesn’t drive moisture into the wall. If you cover, remember you’re changing how the wall dries.
Final Notes
Antique brick looks “easy” because it’s familiar. The hard part is invisible: moisture, mortar compatibility, and exposure. Get those right and the brick reads like it’s always been there. Get them wrong and it becomes a maintenance story you didn’t budget for.