How to Repair Plaster Ceilings with Water Damage or Cracks
Overhead work is brutal. Gravity fights you, dust rains down, and “good enough” looks awful once the paint dries. This is the straight, field-tested way to repair a plaster ceiling with water damage, stop plaster ceiling cracks (hairline and moving), patch holes in plasterboard ceilings, and bring a tired surface back without the telltale ridges and shadows. A clean process you can run in a long Saturday and a week of quick follow-ups.
If your house mixes old plaster and newer gypsum board, read the steps for both. The surface might look similar after paint, but the guts are different.
For a refresher on panel types and thicknesses you’ll see in the wild, skim this quick breakdown of common drywall sheet sizes and then come back. If you’ll be finishing joints or blending patches into large planes, this plain-English overview of drywall finishing and repairs helps you keep edges invisible.
First, figure out what failed (don’t start sanding yet)
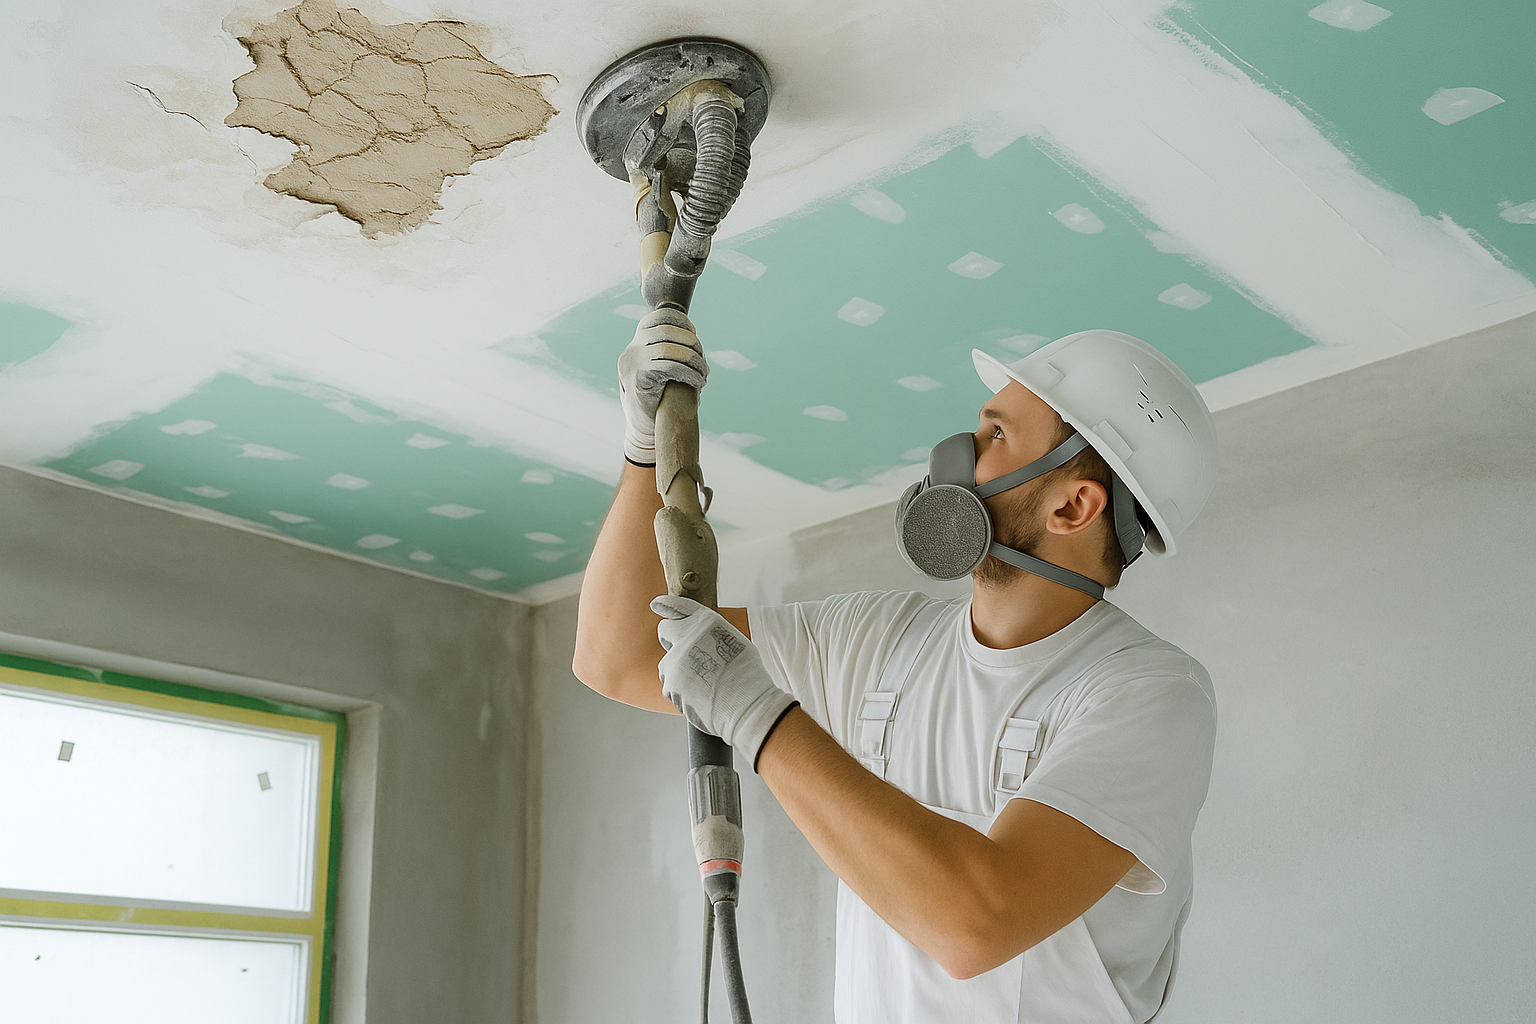
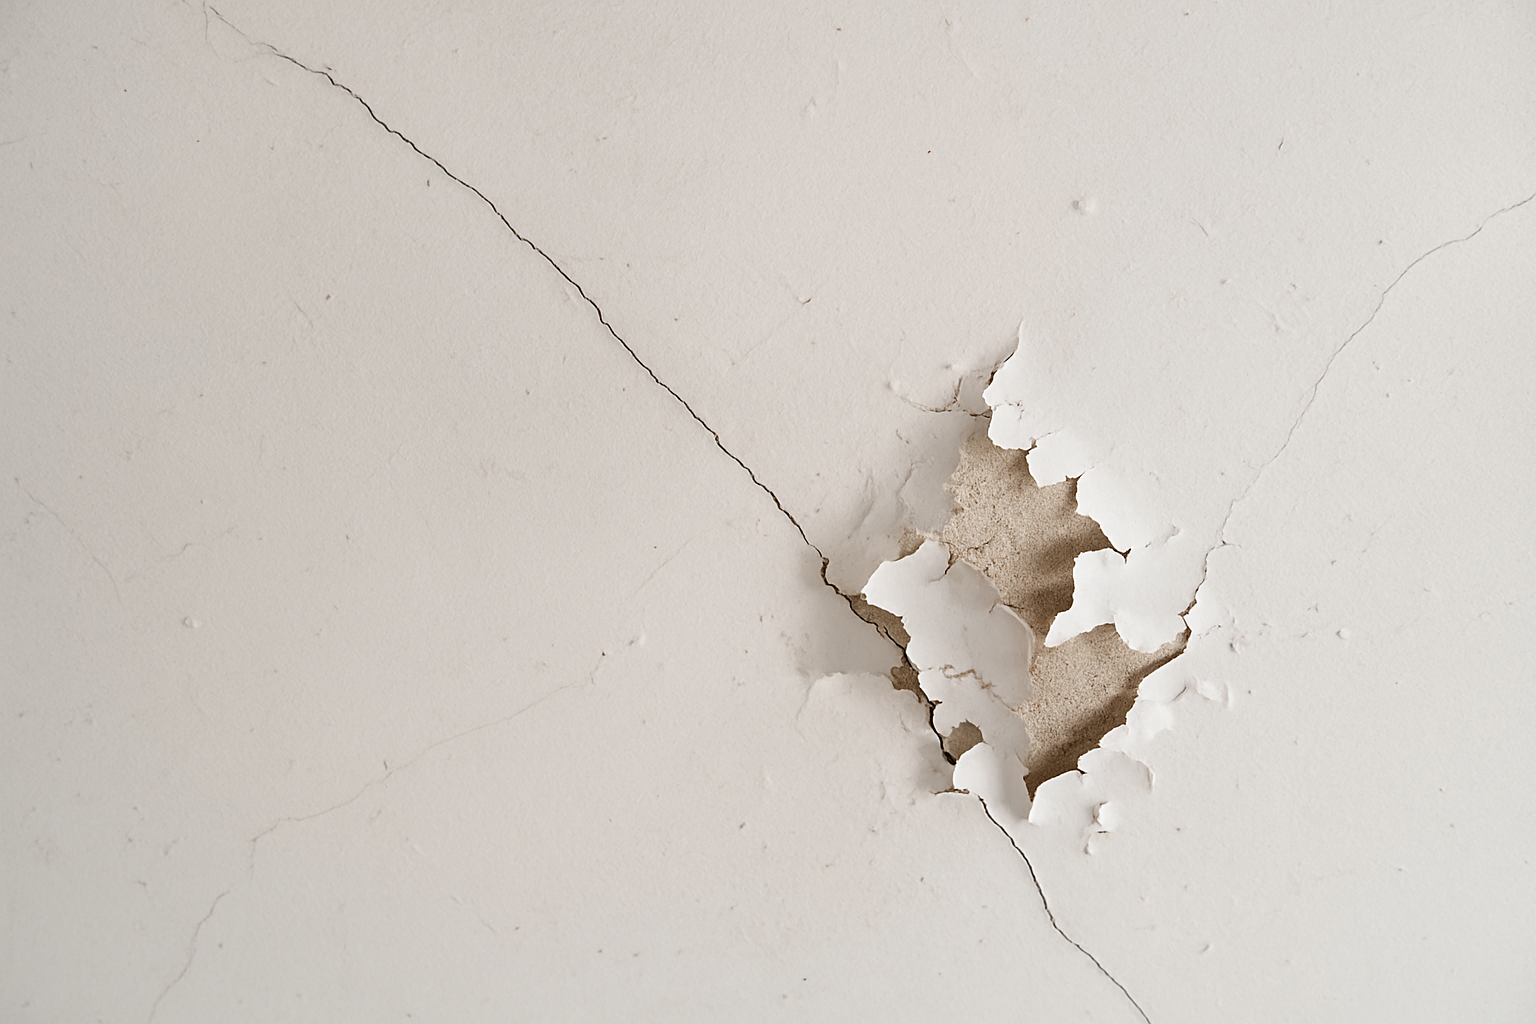
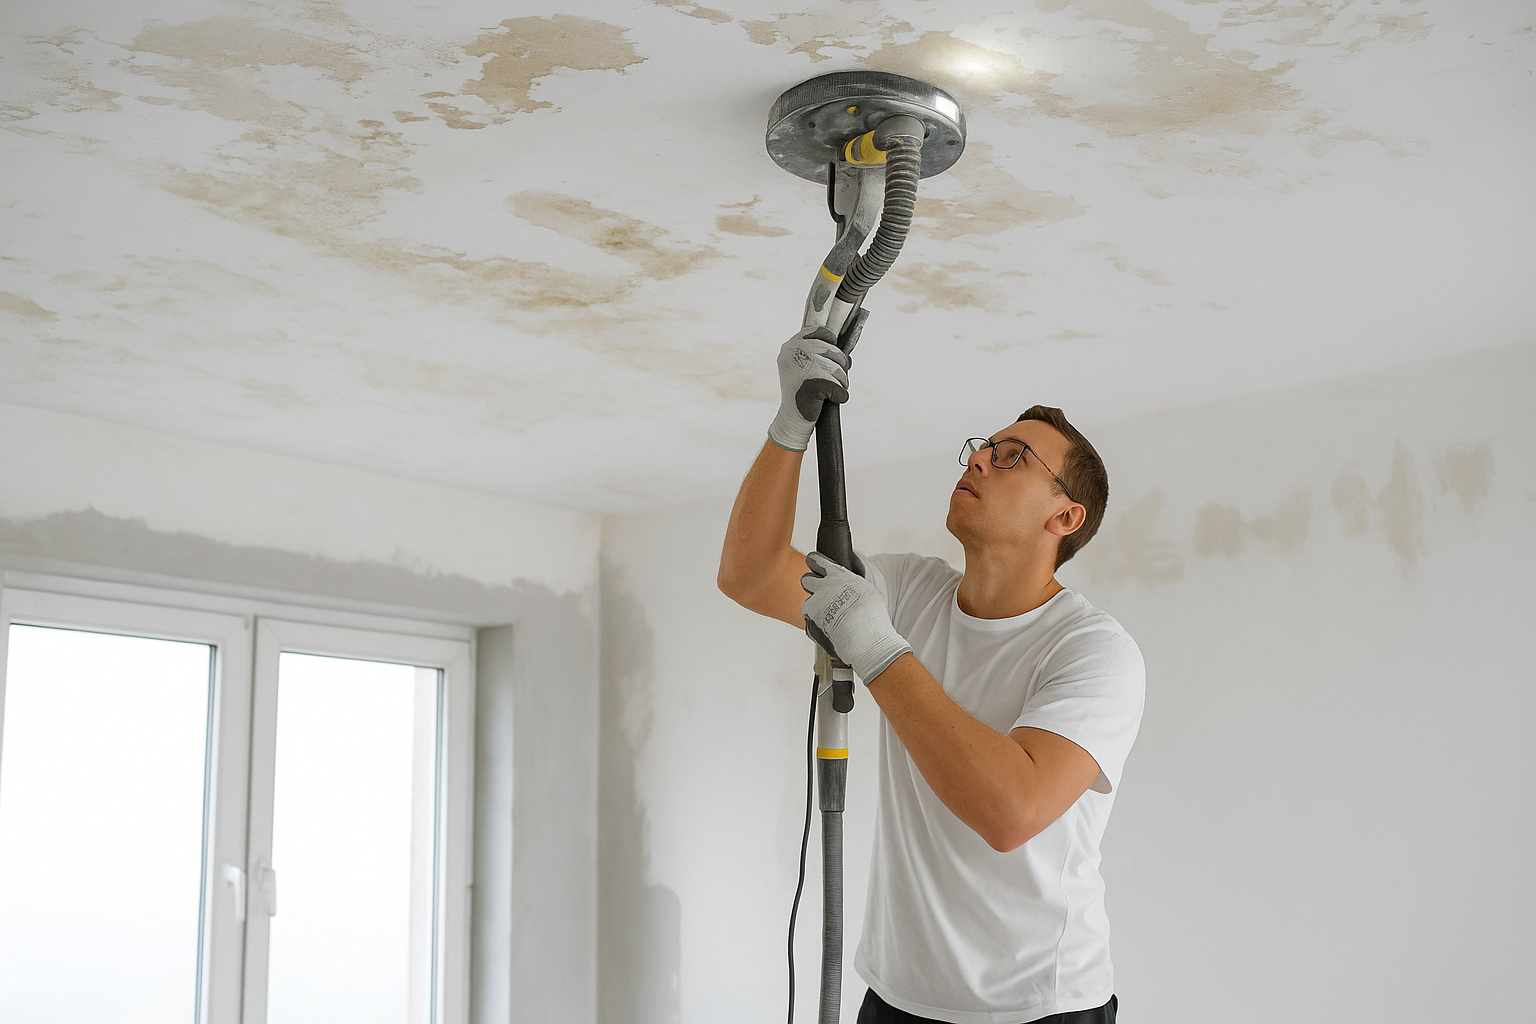
Stand under the worst spot with a bright work light held low and a 6-in. knife in hand. Rake the light across the ceiling and read what it shows you. Stains or bubbling—brown halos, chalky efflorescence, flaking paint—mean the ceiling was wet (maybe still is). Hairline cracks look like a faint map; press nearby and nothing moves—usually cosmetic on older plaster. Active/moving cracks open and close with seasons or flex when you push; that’s movement behind the finish and a simple skim won’t hold. A dull, hollow thud with a soft sag signals delamination—plaster has let go from the lath. And of course there are holes—old fixtures, bad patches, or punctures in plasterboard.
Fix the cause before you touch the surface. If a bath fan dumps steam into the attic, a flashing leaks, or a sweating pipe feeds the spot, any pretty patch will fail. Stop the water, then dry the assembly all the way through (not just the paint) before you come back with knives and mud.
Quick reference
-
Stains / bubbles = water history. Treat the source and plan on a stain-blocking primer.
-
Hairline cracks = cosmetic. No movement when pressed; light skim/feather usually wins.
-
Moving cracks = movement. Reinforce (tape/scrim) before finishing.
-
Delamination = reattach first. Plaster washers or mechanical fix, then patch.
-
Holes = patch by substrate. Plaster vs. gypsum board dictates the method.
Tools and materials that actually help overhead

Tools and materials and how to use them like a grown-up
A steady platform beats a wobbly ladder.
Set a pair of walk boards or a short rolling scaffold so you can stand flat-footed with your shoulders near the ceiling. Overhead mudding is all control; the closer you are—without craning—the cleaner your knife work and the less sanding later. Bonus: you can park your pan, knives, and vac right on the deck instead of climbing up and down.
Light at a rake tells the truth.
Clip a bright work light so it grazes across the ceiling. That low, sideways light throws tiny ridges and hollows into shadow—the same way a window will at 5 p.m. As you pull each coat, pencil-circle flaws you see in that light, then hit just those marks on the next pass. It’s the fastest way to get a dead-flat field.
Three knives, one pan, and a plan.
Run a 6″ knife to bed tape and do tight fills, a 10″ to widen the patch, and a 12″ for the final feather. Keep a hawk or mud pan in your lead hand and clean the knife edge every couple of strokes. A gunked knife makes tracks; a wiped knife disappears into the surface. An angled sanding block finishes edges without gouging—touch, don’t grind. Keep a HEPA vac within reach and vacuum between coats so dust doesn’t seed bumps into wet compound.
Know your substrate: plaster vs. plasterboard.
If it’s true plaster (hard, rings under a tap, often on wood lath), you’re working with chemistry and old keys. First, reattach any loose areas with plaster washers—drive them until the sheet pulls snug to the lath. Brush on an acrylic bonding agent wherever you’ll patch; it gives your repair a bite. Bridge cracks with fiberglass scrim tape, then build with a setting-type patch plaster (20/45/90 minute). Match like with like: if you’re restoring lime, a lime-based patch under a fine finish plaster keeps the look and movement right.
If it’s plasterboard/drywall (paper face, softer feel), think tape and compound. Embed paper tape over joints and most cracks using setting-type joint compound (aka hot mud, 20/45/90). Mesh tape is okay only when you’re embedding it in setting mud; don’t use mesh with premixed all-purpose—mesh plus drying mud loves to crack. After the structural coat, switch to a lightweight finish compound for wide feather coats; it sands clean and won’t sag.
Block stains before you beautify.
Any brown halo from a leak gets shellac or oil primer—no latex here. Shellac locks in the tannins and rust so they don’t bleed through your paint a week later. Prime the stain first, then do your patching and a full-ceiling prime if you skimmed big areas.
Measure moisture, don’t guess.
A pin-type moisture meter tells you when wet plaster is actually dry again (you want it within a couple points of the surrounding ceiling). If it still reads cool and damp, wait—mud over moisture will blister. Use a laser measurer or pencil grid to map the hollow or stained zones so you can feather repairs past the damage, not just to the edge of it. If you want context on how the board layer works with the studs behind it (why cracks form where they do), this quick explainer on how drywall and framing interact is worth a skim.
How it all plays together.
-
Secure the work zone (platform + raking light).
-
Diagnose substrate (plaster vs. board), then reattach anything loose (washers for plaster).
-
Prep the surface (bonding agent on plaster; stain-block where needed).
-
Tape the crack or joint (scrim for plaster, paper for drywall) with setting compound.
-
Widen with 10″ and 12″ knives in thin, overlapping passes—each coat should lap past the last by a few inches so you fade the repair into the field instead of stacking a bump.
-
Light sand, vacuum, spot-prime, then full-plane prime and paint so sheen stays even.
Run that sequence and the tools stop feeling random—you’ll know exactly why each one is in your hand and what problem it solves overhead.
FIELD PICK
DEKEones Drywall Skimming Blade Set — stainless steel blades that actually glide clean. The 6" and 10" handle tight corners, the 24" and 32" smooth out plaster patches fast. The extendable handle saves your shoulders on ceiling runs. Real pros use these for feathering repairs without ridges.
Moisture triage: dry it right or the patch will blister
- Stop the leak. No negotiation. Roof, plumbing, or condensation—fix the source.
- Open trapped wet spots. If the paint forms a “drum,” score a small X in the bubbled paint film to vent it. For soaked plasterboard, cut out mushy gypsum back to firm paper.
- Dry by numbers. Run fans and dehumidifiers until the reading is within ~2–3% of adjacent “dry” areas. For plaster, give it days—not hours. It should feel room-temp, not cool to the touch.
- Treat stains and tannins. Brush off salts/efflorescence. Prime stained areas with shellac or oil stain block. Don’t skip this; latex primer bleeds every time.
Hairline cracks in a plaster ceiling (cosmetic, not moving)
Goal: lock the crack so it doesn’t telegraph through paint and keep the ceiling plane dead flat.
- V-groove the crack. Use a 5-in-1 or utility knife to open a slight V along the line. You’re giving compound a place to live. Vacuum dust.
- Bonding agent for plaster. On true plaster (not gypsum board), brush on a thin coat of acrylic bonding agent and let it tack per label. Skip this on drywall.
- Embed a tape. For plaster: lay down fiberglass scrim in a thin bed of setting patch. For drywall: paper tape in setting mud. Press out bubbles.
- Build in two passes. Knife on a tight first coat (setting compound). Once firm, add a wider second coat. Feather 6–8″ each side for small cracks; more for long runs.
- Skim and sand lightly. A quick skim with lightweight compound blends sheen and texture. Sand with a fine block; keep dust down with a vac.
- Prime, then paint. Spot-prime repairs; then full-ceiling paint so the sheen matches.
Cracks that move (seasonal or structural wiggle)
If the crack opens in winter and closes in summer—or you can flex it by pressing—it needs reinforcement, not just mud.
- Find why it moves. Common culprits: framing shrinkage, undersized spans, roof thrust, or a loose lath field. If a joist is deflecting, repair the structure first.
- Stitch the plaster back to the lath. If the field around the crack sounds hollow, install plaster washers on 8–12″ centers across the loose area. Drive them until snug—don’t crush the plaster.
- V-groove and tape. Same as hairline, but use a wider fiberglass scrim band (4–6″) over the crack. Embed with setting compound.
- Float wide to hide movement. Feather 12–18″ across. The width smooths seasonal micro-telegraphing.
- Prime and paint. Stick with a quality matte or flat; glossier paints flash on repaired ceilings.
Sagging or delaminated plaster (the hollow thunk)
Old plaster keys break off the wood lath and the sheet starts to hang. If you can push it up and it springs back, you can usually save it.
- Map the hollow zone. Rap the ceiling with your knuckles and pencil an outline around the drummy sound.
- Washers to re-key. Pre-drill if needed, then drive plaster washers with coarse screws into the lath (not just the plaster). Start at the perimeter and spiral in, each 8–10″ apart. The surface should pull flat—don’t over-sink.
- Bonding agent. Brush on acrylic bonding agent over the saved area.
- Scratch/brown fill. Pack a setting plaster (or a compatible basecoat) into any voids and over the washer heads. Let it firm.
- Finish skim. Skim the whole mapped area with finish plaster or lightweight compound to one continuous plane. Check with a long knife and correction light.
- Prime and paint. Full-coat the entire ceiling if you touched more than a couple of square feet to keep the sheen uniform.
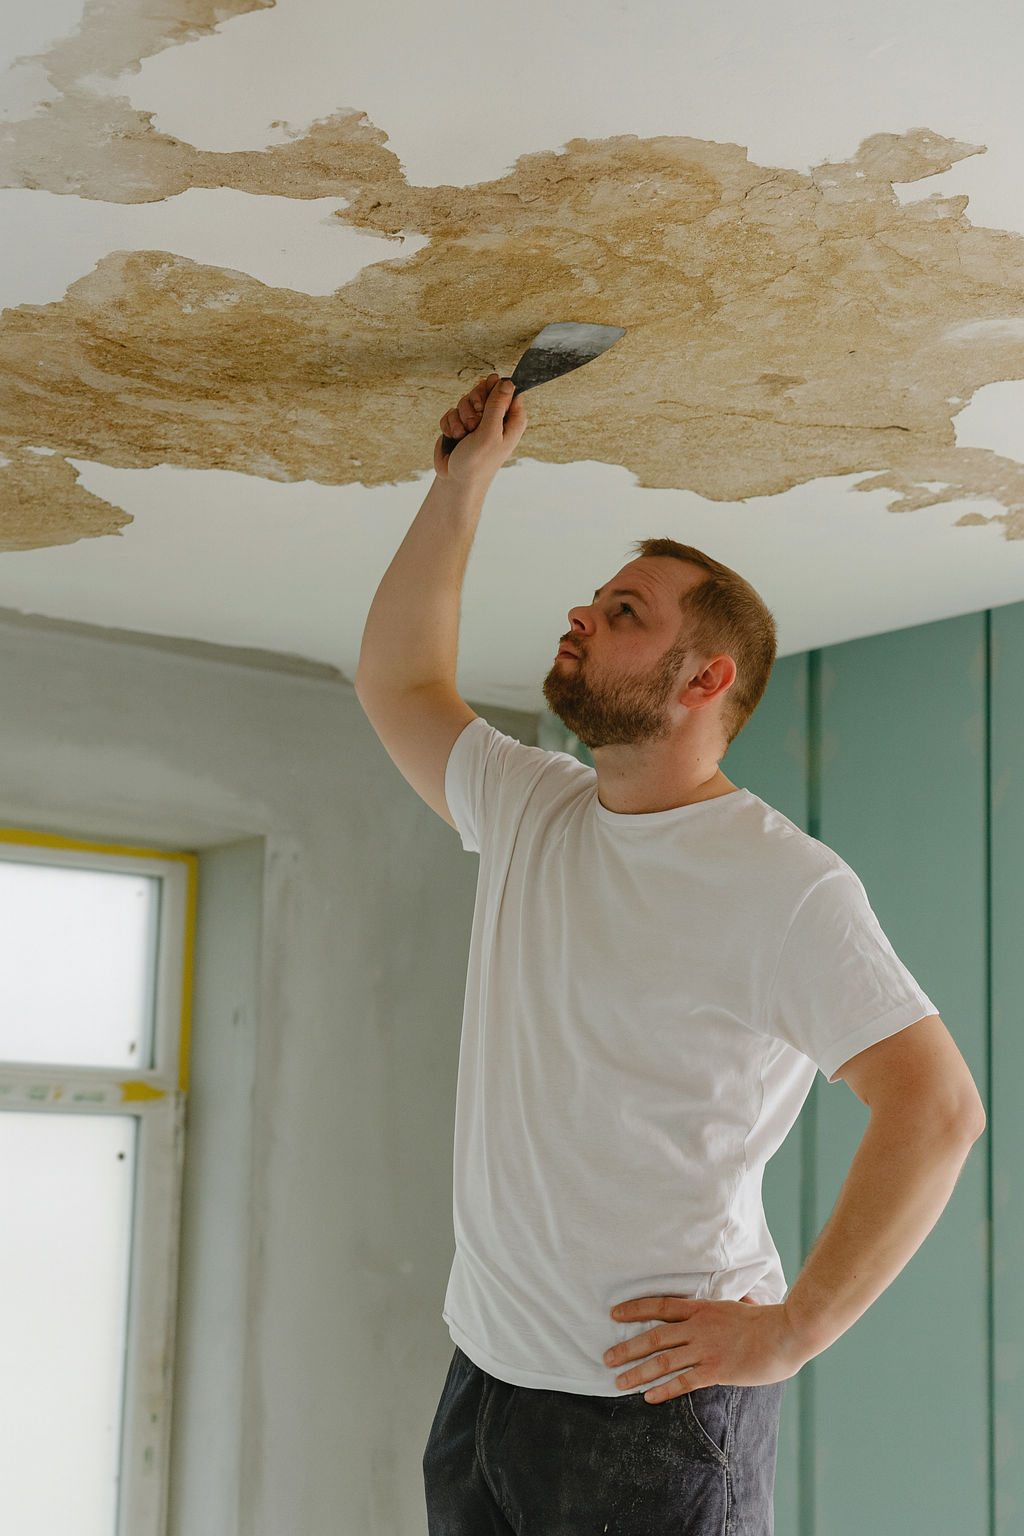
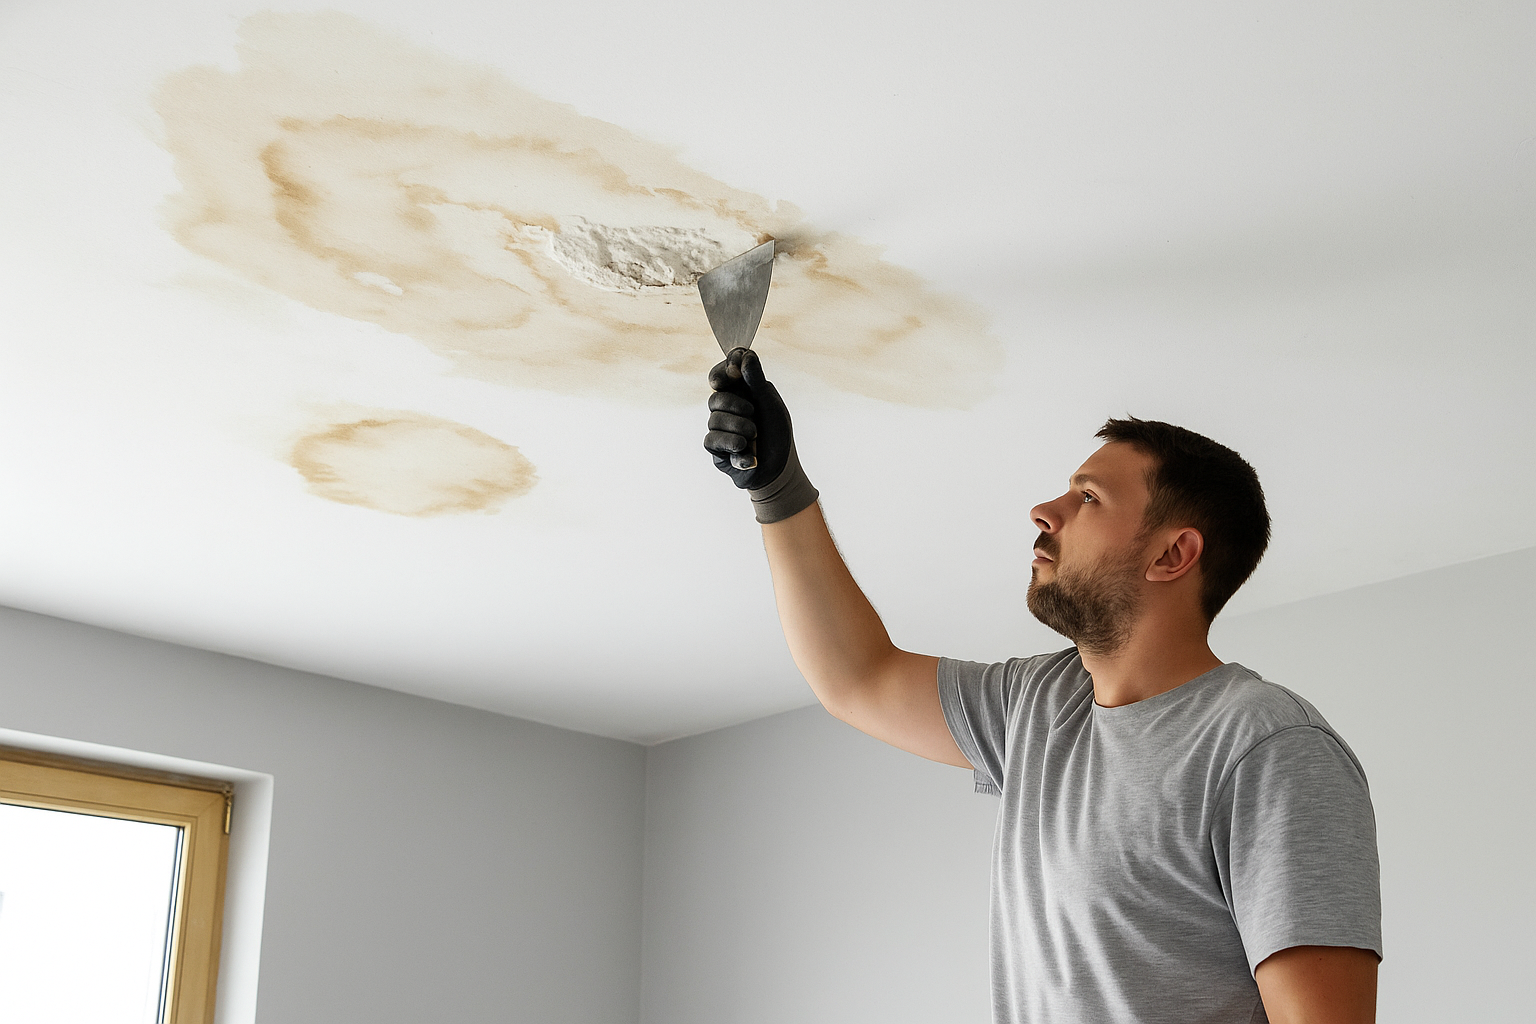
Water-damaged plaster ceiling (stain, flake, sometimes soft)
This is the classic “how to fix a plaster ceiling with water damage” scenario: stained, flaky paint, sometimes powdery plaster.
- Dry it fully. As above: fix leak, ventilate, dehumidify, verify moisture. Plaster can retain moisture deep—give it time.
- Remove the failed skin. Scrape all loose paint; if the lime putty is soft and chalks under the knife, scrape back to firm material.
- Harden if needed. On friable plaster, brush on a consolidant (acrylic bonding agent often doubles for this). Let it cure.
- Stain-block prime. Shellac or oil primer over the entire stained footprint plus a margin. Two coats for heavy tea stains.
- Rebuild the surface. Skim low areas with setting patch, then a broad finish skim to erase transitions. Feather far wider than the stain so the repaired plane disappears.
- Final prime and paint. Spot-prime patches; then full ceiling. A uniform topcoat hides minor texture variation.
Holes in plaster ceilings (small to big)
Small holes (dime to palm size)
- Undercut the edge slightly with a knife so the patch has “tooth.”
- Bonding agent (plaster) or skip (drywall).
- Setting patch compound in two lifts; embed a small square of scrim if larger than a quarter.
- Skim and sand. Prime and paint.
Medium holes (softball size)
- Square up the opening.
- Backer board: For plaster, fasten thin plywood or drywall backing strips behind the hole with screws. For drywall, use a “butterfly” patch or backer sticks.
- Set a plug (drywall disk or plaster basecoat) flush with the ceiling plane.
- Tape seams (paper tape with setting mud; scrim for plaster).
- Build to level, skim, prime, paint.
Large holes (bigger than a dinner plate)
- Assess framing. If the lath is trashed or there’s nothing solid to land on, add a furring strip or 1× cleat across the opening, anchored to joists.
- Hybrid approach: Cut a gypsum plug to fit. Screw to the cleats. Treat perimeter like a giant joint: paper tape + setting mud (drywall) or bonding agent + scrim + basecoat (plaster).
- Skim wide. Feather 18–24″ past the patch to hide the perimeter—especially on low, raking light ceilings.
Plasterboard (gypsum) ceiling cracks and holes—specific notes
- Hairline cracks in plasterboard ceilings: Cut a shallow V, paper tape with setting compound, then two or three wider coats. Mesh tape is fine only with setting mud; don’t use mesh with premixed all-purpose for crack repairs.
- How to repair holes in plasterboard ceilings: backer sticks + plug + paper tape + setting mud. Lightweight compound only for the final skim so it sands like butter.
- Water-stained drywall ceilings: cut out soft gypsum; prime remaining stains with shellac; patch with new board; tape, float, and paint.
Textures and blending (so your repair doesn’t “box out” under light)
Ceilings show everything because light grazes them. Two tricks keep patches invisible:
- Go wide, not thick. Thin coats, feathered far. A 12″ knife is your friend.
- Replicate the field texture. If the ceiling has a light roller stipple, use a microfiber roller on your final skim to mimic it. For sand-float or subtle swirls in old plaster, practice on a scrap and match with the same tool pressure, then prime.
Paint that hides your work
- Prime smart. Stain block where needed, then a drywall/plaster primer over big skimmed areas.
- Finish sheen. Use matte or flat on ceilings. Higher sheen flashes every knife edge.
- Whole-plane coat. If you patched more than a square yard, paint the entire ceiling so the sheen and texture read continuous.
When to walk away from repair and replace instead
- More than 30–40% delamination in a room: reattachment time exceeds skim time—consider overboarding with ⅜″ drywall screwed through to joists, then tape and finish.
- Chronic leaks with mold history: remediate, then replace affected gypsum or plaster sections back to clean framing.
- Structural movement you can see (sagging joist, cracked beam): shore and fix structure first. Cosmetic work comes last.
Exact sequences you can copy (clipboard style)
Sequence A — How to repair water-damaged ceiling plaster (stain + flake)
- Fix leak; dry to baseline.
- Scrape all loose paint; vacuum.
- Bonding agent if plaster chalks.
- Shellac primer on stains.
- Skim low spots with setting patch; let harden.
- Full-area light skim; sand lightly.
- Prime the repair; paint entire ceiling.
Sequence B — How to repair cracks in a plaster ceiling that move
- Map hollow zones; reattach with plaster washers.
- Open crack; embed wide fiberglass scrim in setting compound.
- Float 12–18″ each side; skim the field.
- Prime; paint matte.
Sequence C — How to fix hairline cracks in plaster ceilings (static)
- V-groove; vacuum.
- Embed paper (drywall) or scrim (plaster) in setting compound.
- Two more coats wider each time; light sand.
- Prime and paint.
Sequence D — How to repair holes in plasterboard ceilings
- Square hole; install backer sticks.
- Cut plug; screw flush.
- Paper tape + setting mud; three coats total.
- Prime and paint the room plane if needed.
Little pro moves that make a big difference
- Control your mix. Use setting-type compound (20/45/90). It won’t re-soften with primer and it builds faster overhead.
- Mind temperature and humidity. Cold rooms slow set and can sag the mud; warm, dry air speeds it up. Mix smaller batches than you think you need.
- Knife clean, often. A dirty knife leaves ridges. Wipe between passes—it’s faster than sanding.
- Stop on top. Last pass with the knife should be from the dry side into the wet edge. It leaves fewer tracks.
- Pull the room together. If you do any broad skimming, plan on painting wall-to-wall. Cut-in edges at crowns show lap marks; a full coat reads clean.
Safety and cleanup (you’ll thank yourself later)
- Lead and asbestos: Pre-1978 paint can be lead; old ceiling textures may contain asbestos. If you suspect either, test before sanding or demo. Hand scraping with drop cloths and HEPA vac beats clouds of dust.
- Eye and lung protection: Goggles and a good mask. Overhead sanding dust is relentless.
- Room isolation: Plastic off doorways, cover fixtures, and keep a wet/dry vac at arm’s reach.
Optional: match the old-world look
If you’re working in a true lime plaster ceiling and want to keep it period-correct, run a lime base with hair/fiber, then a lime putty finish. It carbonates slowly, so give it the cure time it deserves. For most mixed houses, a gypsum base + fine finish plaster blends perfectly and paints out the same day.
When you want to learn the bigger picture
Patch work goes easier when you understand what’s behind the finish. If you want a “one sheet” on how panel products behave (and how to avoid telegraphing joints), this straightforward repair and finishing guide is worth ten minutes before you suit up.
FAQ
(the quick answers homeowners look for)
How do I repair cracks in plaster ceilings vs. plasterboard? Plaster: bonding agent + scrim + setting plaster skim. Plasterboard: paper tape + setting compound. Both finish with a light skim and primer.
What about hairline cracks? Open, tape, two coats, sand, prime. If you skip tape, they return through paint.
How to fill cracks in a plaster ceiling without sanding dust everywhere? Use setting compound, keep coats thin, and knock down ridges with a damp sponge right before it sets hard.
How to fix a plaster ceiling with water damage? Dry fully, block stains with shellac, rebuild low areas with setting patch, skim, prime, paint.
How to repair a hole in a plaster or plasterboard ceiling? Backer + plug + taped seams + layered coats. For big spans, add a cleat.
Do I need mesh or paper? Paper is stronger across joints in drywall; fiberglass scrim is great on plaster and over irregular cracks. Either way, use setting mud underneath for crack repairs.
Can I just caulk a ceiling crack? It will move and print through the paint. Caulk belongs at trim lines, not in field cracks.