Ceiling Cracks and Water Damage
How to Diagnose, When to Worry, and How to Fix Them
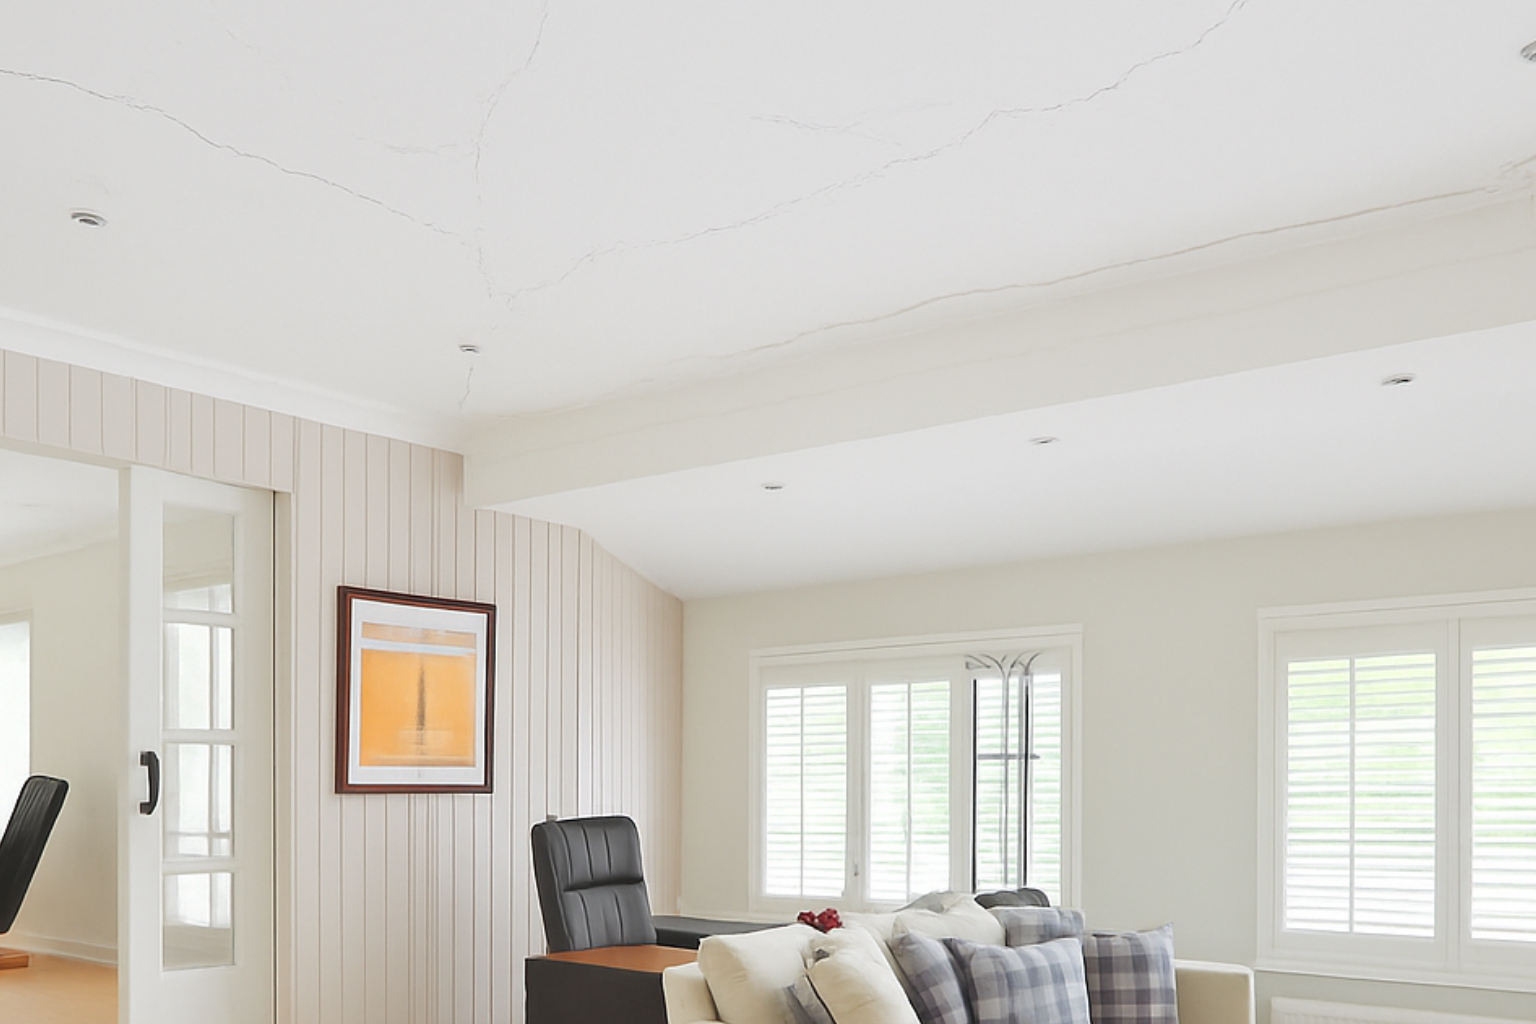
You look up, see a crack in the ceiling and maybe a brown stain or a bit of sagging, and your brain jumps straight to, “How bad is this?” or “Is my ceiling going to fall?” Sometimes it is just tired paint and minor settling. Sometimes it is the first visible sign of a leak or real structural movement.
This hub walks through the full picture: water-damaged ceiling cracks, settling cracks, structural red flags, DIY fixes, and when you need a contractor or engineer.
We will cover everything from a small hairline crack in a bedroom to a big crack with water stains and sagging in the living room.
If you want a bigger structural context while you read this, you can pair it with this plain-language structural design guide for residential projects .
Identifying Water Damage in Ceiling Cracks
The first job is simple: are you dealing with a dry crack in ceiling drywall, or active water damage? Water is the fastest way to turn a small cosmetic issue into a rotten, sagging mess.
What Causes Water Damage to Ceilings?
Most “ceiling cracked and leaking” situations trace back to three things:
1. Roof leaks.
Missing shingles, cracked flashing, bad valleys, failed caulking around chimneys and vents – all of these can let water travel down and show up as a water damage ceiling crack far from the actual leak. Water can run along rafters or joists and then drop onto drywall or plaster, so the stain you see is not always directly under the problem.
2. Plumbing leaks.
Bathrooms above, laundry rooms, kitchen lines, or HVAC condensate drains can all drip into the ceiling below. A crack in bathroom ceiling drywall or paint bubbling near a vent often points to a plumbing or condensation issue above. If you see a crack in ceiling from water with a ring-shaped stain, think plumbing or condensate first.
3. Condensation and humidity.
In bathrooms and kitchens with poor ventilation, hot steam condenses on the ceiling surface. Over time you start to see peeling and bathroom ceiling paint cracking, spider-web cracks in the paint film, and soft drywall joints – even without a “proper leak.”
What Water Damage Looks Like (Versus a Simple Crack)

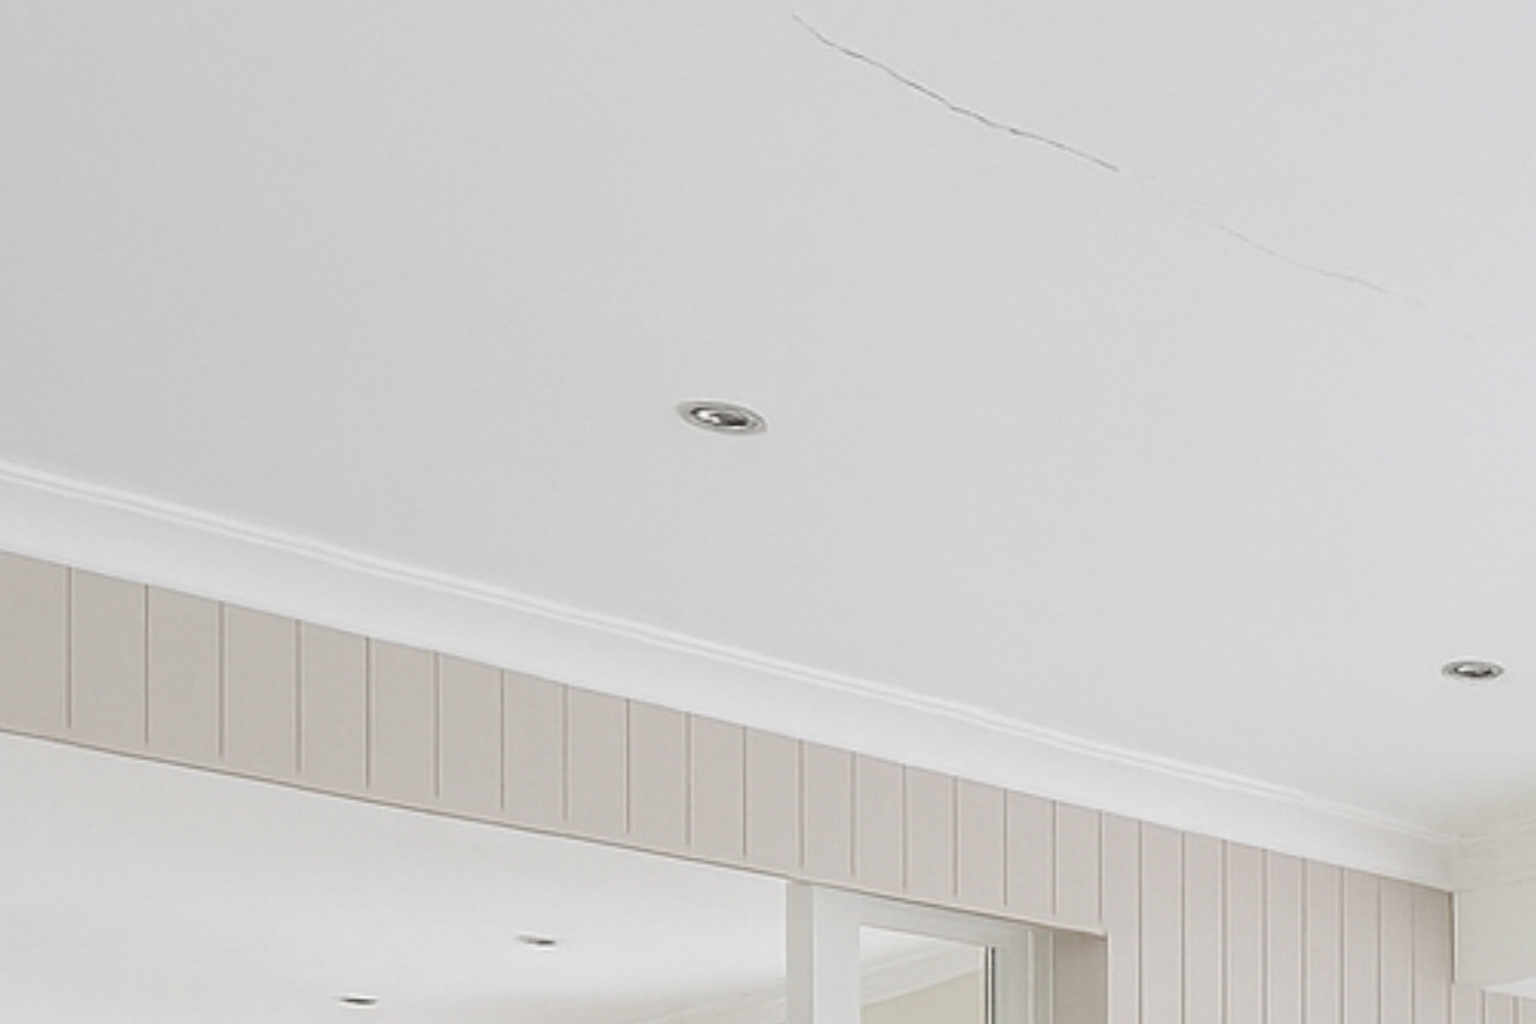
A simple stress crack usually looks like a clean, dry line. No staining, no softness, no flaky paint around it. It will often run straight along a seam where two drywall boards meet or across a long span.
Water damage leaves extra clues:
- Brown or yellow staining around or along the crack.
- Soft or sagging drywall – a ceiling crack with sagging is more serious than a flat hairline crack.
- Bubbling, blistering, or peeling paint where the paint film lifts away from the substrate.
- Musty smell or visible mold, especially near baths or basements.
In older plaster homes, water can cause long, irregular cracks, bulging sections, and flaking plaster that falls in small chunks. In drywall, you will often see tape joints fail and seams open up around the leak, leaving long ceiling sheetrock cracks.
The bottom line: if there is visible discoloration plus any kind of crack or bubble, treat it as water damage until you prove otherwise. For bigger-picture moisture and site issues around the building itself, you can cross-check your exterior and site conditions against this guide on foundations, soil analysis, and site investigation , which explains how water problems at ground level can show up later as cracks upstairs.
How to Diagnose the Problem

A “crack in ceiling leaking water” is a symptom, not the cause. You cannot fix the ceiling properly until you know why it failed. Patching over an active leak or moving structure is just painting over a warning sign.
Inspecting the Source of the Leak
Start above the damage and work outward.
If the damaged ceiling is on the top floor, go to the attic or roof space directly above the stain. You are looking for damp insulation, darkened wood, active dripping, or water trails.
Roof checks:
- Missing, curled, or broken shingles.
- Cracked or lifted flashing around chimneys, skylights, and roof vents.
- Blocked valleys where two roof planes meet.
A crack in bedroom ceiling on the top floor with staining often ties back to details like these.
Plumbing checks:
- Look under tubs, around shower pans, near toilet seals, and under sinks.
- Check supply lines and drain lines for slow seepage.
- Inspect HVAC condensate lines and pans if they run above the ceiling.
A crack in kitchen ceiling or repeated bathroom ceiling paint cracking often turns out to be a slow plumbing leak or trapped moisture from steam.
Condensation and ventilation:
In bathrooms and small enclosed spaces, you may not see a classic “leak” at all. Instead, high humidity condenses on the coolest surface – often the ceiling – and over months you get peeling paint, fine cracks, and mold. Here the “source” is poor exhaust, undersized fans, or fans not vented to the outside.
When to Call a Professional
You can do the basic detective work yourself. But you should bring in a pro when:
- The ceiling drywall sagging is obvious or spreading.
- The crack runs across the entire ceiling or is getting wider.
- You can see or smell mold.
- Water is actively dripping or pooling.
Who to call:
- Roofing contractor for suspected roof leaks.
- Plumber for leaks near baths, kitchens, or mechanical rooms.
- Drywall / plaster contractor for serious ceiling wall repair and repainting.
- Structural engineer or foundation specialist if cracks are tied to obvious settling or you see related foundation cracks in ceiling and walls.
If you need help reading drawings to trace pipes, ducts, or beams above your ceiling, a plan-reading primer like this guide on reading blueprints and sections makes it easier to see what runs where.
See also: Ceiling Troubleshooting: Rapid Checks for Leaks, Stains, Cracks, Mold, and Odors
The Risks of Leaving Ceiling Cracks Unaddressed
It is easy to ignore a small crack in ceiling, especially if it has been there for a while. The problem is that many “small” issues are early warning signs.
Structural and Material Risks
Water and gravity are relentless. When a crack in ceiling drywall is tied to a leak, the moisture slowly breaks down paper, gypsum, plaster, and even wood members. Over time, you can get:
- Ceiling stress cracks that travel along joists and seams.
- Sagging sheetrock ceiling where fasteners rust or pull out of softened framing.
- Ceiling wall separation where drywall pulls away at the joint because framing has moved or softened.
In the best case, ignoring a leak means larger cracks, bigger patches, and more repainting. In the worst case, trapped moisture can compromise framing, insulation, and electrical connections, and you end up with a partial ceiling collapse.
Health and Safety Risks
Chronic dampness is a mold factory. Even if you do not see black spots, damp insulation and paper-faced drywall can host mold and mildew inside the ceiling cavity. That drives musty smells and can impact indoor air quality, especially for people with allergies or asthma.
If you see cracks in walls and ceiling combined with high humidity, staining, and mold smell, treat it as a health issue, not just a maintenance task.
Ceiling Cracks from Settling and Foundation Issues
Not every crack has anything to do with water. Houses move. Soil shifts. Timber shrinks. Over time, ceilings record that movement as fine lines, tape separations, and sometimes full-width cracks.
Understanding Settling Cracks
Settling cracks in ceiling are usually narrow, often as fine as a pencil line, and follow a straight path across a joint or down a corner. They are common in newer homes as the framing dries out and the building “settles in” during the first few years.
Typical “normal” settling signs include:
- Fine hairline cracks in ceiling drywall, usually along seams.
- A straight crack across ceiling along a tape joint.
- Small cracks between ceiling and wall at corners, especially near exterior walls.
These are often called house settling cracks in ceiling. They are usually cosmetic, especially in a new home during the first one to two years.
When Settling Cracks Are a Concern
Settlement becomes a structural story when the cracks:
- Keep getting longer or wider.
- Reappear soon after repair.
- Run as a crack in wall from ceiling to floor.
- Show up alongside doors and windows that stick or go out of square.
A horizontal crack in wall near ceiling, or diagonal cracks that run down from ceiling corners, can signal foundation movement or significant framing shifts. That is when it is worth talking to a foundation contractor or structural engineer, not just a painter.
Ceiling Cracks in Old Houses and Apartments
Ceiling cracks in old house situations can be tricky. Some plaster ceilings have carried the same fine cracks for fifty years with no real change. Others hide slow deflection in undersized joists or old water damage that never fully dried out.
The key is change and pattern. Old, stable hairline cracks that do not grow and do not sit under active leaks are usually cosmetic. New or widening cracks, especially if they follow joist lines or appear alongside bouncing floors and sloping surfaces, need investigation.
In flats, condos, or systems similar to an HDB ceiling crack case, the ceiling might also be the underside of your neighbour’s floor slab. Cracks there can point to reinforcement issues, slab deflection, or leaks from above. Here you may need building management, strata, or housing authority involvement rather than just DIY filler.
Repairing Ceiling Cracks from Water Damage
Repairing a water-damaged ceiling has two parts: stop the water and fix the surface. If you only patch the crack and paint, the problem will be back, often worse.
Step One: Fix the Cause, Then Dry the Area
Repair the roof, plumbing, balcony membrane, or condensation problem first. Until the moisture source is truly dry, any ceiling work is temporary.
For serious water crack in ceiling problems, you often have to cut out the wet, sagging drywall or plaster:
- Remove soaked insulation and saturated gypsum or plaster.
- Check joists and cavities for mold or rot.
- Let the space dry with fans and dehumidifiers.
Only once the substrate is dry and sound do you start rebuilding. Patch over a wet or crumbling base and the repair will fail again, usually fast.
Repairing Ceiling Sheetrock Cracks After a Leak
For standard drywall, ceiling sheetrock cracks and small damaged areas can usually be handled with a cut-and-patch approach:
- Cut out a clean rectangle that removes the crack and any loose paper.
- Screw in backing pieces so you have something solid to attach to.
- Install a new drywall patch, tape the seams, and apply joint compound in several thin layers.
This is classic drywall ceiling crack repair. With water damage, you just have less tolerance: every soft, delaminated, or moldy region has to go.
Drywall Tape Repair at Ceiling Joints
Sometimes the only failure is at the tape. The crack runs along a joint, and you can see tape lifting or bubbling. That is when a focused drywall tape repair ceiling job makes sense.
- Scrape back loose compound and remove any failed tape.
- Re-tape the joint using quality paper tape or fiberglass mesh embedded in fresh compound.
- Feather out the compound wider than you think you need to avoid visible “ridges” after paint.
Filling a Hole in the Ceiling
A hole from a fixture change, accident, or inspection cut-out belongs in the same conversation as cracks. When you are filling a hole in the ceiling you still need backing, a tight patch, proper taping, and careful sanding.
Tiny nail or screw holes can be filled with spackling compound and sanded smooth. Anything larger than a coin is better handled with a small patch rather than just packing filler into the void – otherwise it will slump and crack later.
For context on how ceilings fit into the whole wall/assembly system, a beginner-friendly code and assembly overview like this guide to understanding building codes helps you see layers and materials behind the paint.
When to Worry About Ceiling Cracks
“Cracks in ceiling when to worry” is probably the most common search phrase on this topic. The short answer: you worry when there is growth, movement, staining, or sagging.
Small Hairline Cracks vs Large Cracks
A long hairline crack in ceiling that follows a straight seam, has no staining, and has stayed the same for years is usually a cosmetic or movement issue. These are often caused by framing movement, minor truss uplift, or drying shrinkage.
Large cracks, sudden cracks, or cracks with sagging are different:
- A straight crack all the way across ceiling that widens is a red flag.
- A crack in ceiling getting bigger after each season points to active movement.
- A ceiling crack sagging or “bubble” area where the drywall bows down needs urgent attention.
Warning Signs You Should Not Ignore
Call in help quickly if you see:
- Cracks paired with visible sagging or bulging in the same area.
- Cracks in walls and ceilings when to worry type signs: doors out of alignment, sloping floors, or gaps opening between trim and walls.
- New cracks after a flood, roof failure, or major storm.
- Cracks that reappear quickly after repair, especially along the same seam.
In older homes, ceiling cracks in old house can be completely normal – or a snapshot of long-term movement. The difference is whether things are stable or actively changing. Photos, dates, and regular checks help you see the pattern.
Common DIY Repairs for Ceiling Cracks
If you have ruled out active leaks and structural issues, you can handle a lot of ceiling crack repairs yourself, especially small cosmetic issues in drywall or plaster.
DIY Drywall Ceiling Crack Repair on Flat Ceilings
For flat painted drywall, a basic drywall ceiling crack repair looks like this:
- Open the crack slightly with a utility knife so filler can grab.
- Remove loose material and dust.
- If the crack sits on a joint, embed paper or mesh tape rather than just filler.
- Apply compound in thin coats, let each dry, then sand smooth.
- Prime and repaint the entire ceiling or at least the whole bay to avoid flashing.
Crack Where Wall Meets Ceiling – Joint and Corner Fixes
A crack where wall meets ceiling is common. Different materials meet here: ceiling joists, wall studs, and sometimes trusses that move with temperature and humidity.
There are two typical approaches for this kind of ceiling wall repair:
- If the gap is small and mostly cosmetic, flexible caulk can bridge it and absorb small movement.
- If tape has failed along the corner, remove loose material, install new corner tape, re-mud, sand, then repaint.
In homes with truss uplift, it is sometimes better to detail the joint so the crack is hidden by trim or shadow, rather than fighting the movement every season.
Repairing Plaster Ceilings and Patching a Plaster Ceiling
Old plaster behaves differently than drywall. It is harder, more brittle, and often bonded to wood lath. Repairing plaster ceilings starts with assessing how solid the plaster is.
- For small cracks, open them slightly, brush out dust, and fill with a compatible plaster or filler before sanding and painting.
- For loose or bulging areas, use plaster washers or mechanical fixings to reattach plaster to the lath before skimming over it.
- For larger failed areas, patching a plaster ceiling usually means cutting back to sound material, installing a backing board (drywall), then building up base and finish coats to match thickness and texture.
Crack in Popcorn Ceiling and Other Textured Surfaces
A crack in popcorn ceiling or any textured finish is harder to disguise because the repair has to match the texture, not just the flatness. This is where repairing a textured ceiling gets fiddly.
- Scrape away loose texture around the crack.
- Repair the underlying drywall or plaster as you would on a flat ceiling.
- Prime the area, then use a popcorn/texture patch kit or spray to blend the texture.
- Prime again if needed and repaint.
If the whole textured ceiling is cracking and shedding, many owners choose to remove the texture completely and go back to a flat painted ceiling instead of patching in ten different places.
Hiring a Ceiling Repair Contractor
DIY is fine up to a point. Once you are dealing with multiple cracks in ceiling, repeating cracks, or cracks tied to leaks and sagging, it is smart to bring in a pro.
When to Call a Professional
Consider a ceiling crack repair contractor when:
- You see cracks in ceiling drywall when to worry signs: sagging, staining, or rapid crack growth.
- There is ceiling wall separation or gaps opening up between crown molding and ceiling.
- There has been a major leak and significant demolition is needed.
- The home is older with detailed plaster ceilings you are not comfortable working on.
Look for contractors who are licensed, insured, and experienced with your ceiling type (plaster vs drywall, textured vs flat, vaulted vs standard). Reviews, photos of past work, and clear written estimates matter.
Ceiling Crack Repair Cost – What to Expect
Costs vary by region, access, and finish level, but rough ranges help:
- Minor cosmetic repair of a small crack in drywall ceiling: often in the low hundreds when bundled with painting.
- Larger damaged areas from leaks (cut out, patch, mud, prime, paint): several hundred dollars to over $1,000 depending on size.
- Major structural or widespread damage involving framing, mold remediation, and multiple rooms: easily into the thousands.
If you are already planning broader renovation work, it can be efficient to coordinate ceiling repairs with other tasks, similar to the way complete house planning is approached in this step-by-step house planning guide .
Preventing Future Ceiling Cracks
Once you have fixed a crack, the goal is simple: do not see it again. Prevention is about moisture control, structural stability, and sensible finishes.
Keep Water Out and Humidity Under Control
- Inspect your roof yearly and after major storms.
- Clear gutters and check flashing so you do not get “mystery” stains from slow roof leaks.
- Make sure bathroom and kitchen fans vent outside, not into the attic.
- Use dehumidifiers where basements or lower levels feel damp.
Long showers in a room with no fan are a sure path to recurring bathroom ceiling paint cracking, even if the structure and plumbing are perfect.
Allow for Movement Where the Building Wants to Move
No house is perfectly rigid. Corners, especially where walls meet ceilings, will move slightly. Detailing those joints with flexible caulk or trim can prevent constant re-cracking. In some designs, especially with long spans or truss uplift, builders deliberately leave small gaps hidden by moldings so the structure can move without tearing the finish.
When you renovate or build new, paying attention to framing layout, load paths, and deflection limits goes a long way. If you want a deeper dive into how load paths and design choices affect cracking, a structural overview like this structural analysis breakdown is worth a read.
Use the Right Products in the Right Rooms
In wet rooms, use moisture-resistant drywall or backer board, quality primers, and paints designed for high humidity. Thick, flexible products marketed as anti-crack or “no more cracks” ceiling paints can help hide minor movement and hairline cracking, but they are not a substitute for fixing leaks or structural issues. Think of them as finishing layers, not structural repairs.
If you are redesigning or planning at a bigger scale, tie ceiling details into broader interior planning. A spatial planning overview like this guide on spatial planning and design helps you place wet rooms, service runs, and structural spans in ways that reduce future crack risks.
Conclusion
Cracks, Water, and What They Are Telling You
A ceiling crack is never just “a line in the paint.” It is a signal. Sometimes it is harmless – the house settled a bit, the tape shrank, the paint film got brittle. Other times, it is the first visible sign of a roof leak, a failed plumbing connection, or real structural movement.
The process is always the same:
See it. Diagnose it. Fix the cause. Then repair the surface.
If you catch problems early – a small water stain around a crack, a slight sag, a new line where ceiling meets wall – you can handle them with straightforward repairs. Ignore them, and you are paying for rotten framing, mold remediation, and full-room restoration later.
Use this as your ceiling-crack playbook: from “I have a crack in my ceiling, should I worry?” to knowing when it is just cosmetic and when it is time to call in backup.
FAQ
What should I do first if I notice a crack in my ceiling?
Start simple: note the size, location, and any change over time. Take a photo today, then again in a week or two. If it is a fine hairline crack in ceiling paint with no staining or sagging, it is often cosmetic. If it is growing, paired with a stain, or the ceiling feels soft, you are dealing with more than just a surface issue and should investigate leaks or movement.
How can I tell if my ceiling crack is from water damage?
Water damage almost always brings friends: brown or yellow staining, peeling or bubbling paint, soft spots, or sagging. A crack in ceiling water damage situation often shows a discoloured halo around the crack. If you gently press near the stain and it feels mushy or the surface flakes off, assume there has been moisture in that area.
Are ceiling cracks always dangerous?
No. Normal house settling cracks in ceiling, especially hairline ones along seams, are common and often just cosmetic. What is dangerous are cracks combined with sagging, rapid growth, big gaps, or obvious water damage. When in doubt, treat large or changing cracks as a safety concern until a professional confirms otherwise.
How much does it cost to repair ceiling cracks?
Minor cosmetic repairs can run in the low hundreds when done by a pro, especially if they are already on site for painting. A ceiling crack repair cost jumps quickly when you are dealing with water damage, mold, or framing issues – then you are in the higher hundreds or thousands. The cheapest repair is always the one done early, before the crack turns into a sagging, waterlogged section.
Can I repair my ceiling crack myself?
Yes, if it is small, dry, and clearly cosmetic. Hairline cracks, small gaps where ceiling meets wall, and minor ceiling seam repair jobs are within reach of most homeowners using filler, tape, and paint. If you suspect a leak, see mold, or have a crack across entire ceiling with sagging, that is no longer a DIY job – you need a qualified contractor or engineer.
Do new houses get ceiling cracks?
Absolutely. New builds often develop new build ceiling cracks as materials dry and the structure settles in its first one or two years. These are usually thin, straight cracks along drywall seams and at wall–ceiling joints. Builders in many regions plan a one-year walkthrough to address these settlement cracks as part of normal warranty work.
What about cracks in plaster ceilings in old houses?
Old plaster moves differently than drywall. Cracks in ceiling plaster can be purely cosmetic if they have been stable for years, but loose plaster can eventually drop if it separates from the lath. If you see sagging, hollow-sounding areas, or chunks starting to fall, get it checked and consider a professional plaster ceiling crack repair or a plasterboard overlay system.
References
- FEMA Flood Map Service Center — Check flood zones and water-risk context around your home.
- EPA — Mold and Moisture Guidance for leaks and chronic dampness.
- Home Depot Ceiling Repair Products — Joint compounds, tape, stain-blocking primers, and patch kits for ceiling repairs.
- Polycell Anti-Crack Ceiling Paint — Example of thick ceiling paint formulated to help bridge fine cracks.
- Residential Building Codes Simplified — Plain-English overview of key residential code requirements.
- Foundations, Soil Analysis, and Site Investigation — How ground conditions and foundations can feed into ceiling and wall cracking.