
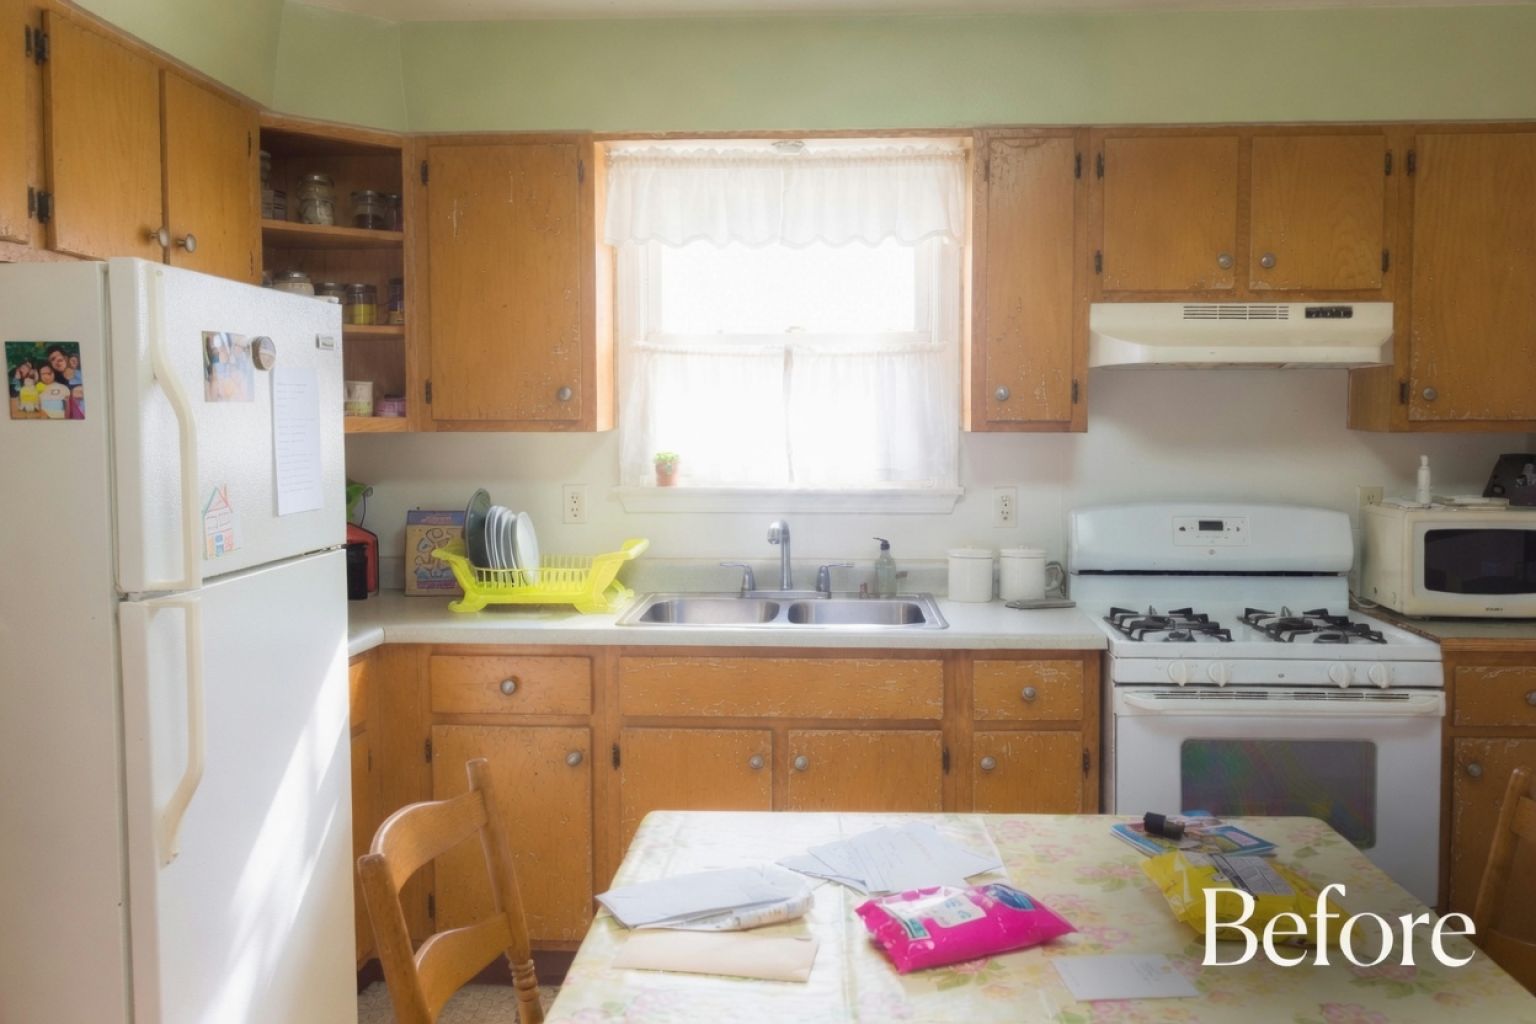

A small 1950s kitchen can get new cabinets, stone counters, and better appliances and still be hard to use.
The problem is rarely style. The refrigerator sticks into the aisle, a chair blocks the doorway, and the range and sink share one narrow work zone — then new cabinets get ordered around the same old conflicts.
I would fix those problems first. The kitchen may not need to be much bigger.
For broader questions about period cabinets, finishes, ventilation, flooring, and what original features may be worth keeping, use the main 1950s kitchen remodel guide.
What I'd Fix Before Buying Cabinets
Start with the objects that take up floor space, not the finishes that cover the walls.
Measure the refrigerator with the handles and doors included. Open the range. Drop the dishwasher door. Pull every dining chair back as far as it goes during a normal meal. Then walk from the hallway or back door to the sink.
That simple test usually exposes the main problem.
| What you find | Best starting path | What not to do yet |
|---|---|---|
| The layout works, but the room is dark and worn | Repair, repaint, improve lighting, and tighten storage | Remove walls or replace sound cabinet boxes |
| The refrigerator or table blocks the main path | Fix appliance fit and circulation first | Order cabinets around the current appliance positions |
| The kitchen needs more light or dining connection | Study a wider doorway or controlled wall opening | Assume the whole wall must disappear |
| Wiring, plumbing, floors, and cabinets all need work | Plan a deeper rebuild with the hidden work included | Price it as a surface-only remodel |
A small kitchen punishes the wrong sequence. Once the cabinets are ordered, the refrigerator opening, counter depth, drawer locations, and walking path become hard to change.
Where Small 1950s Kitchens Usually Go Wrong
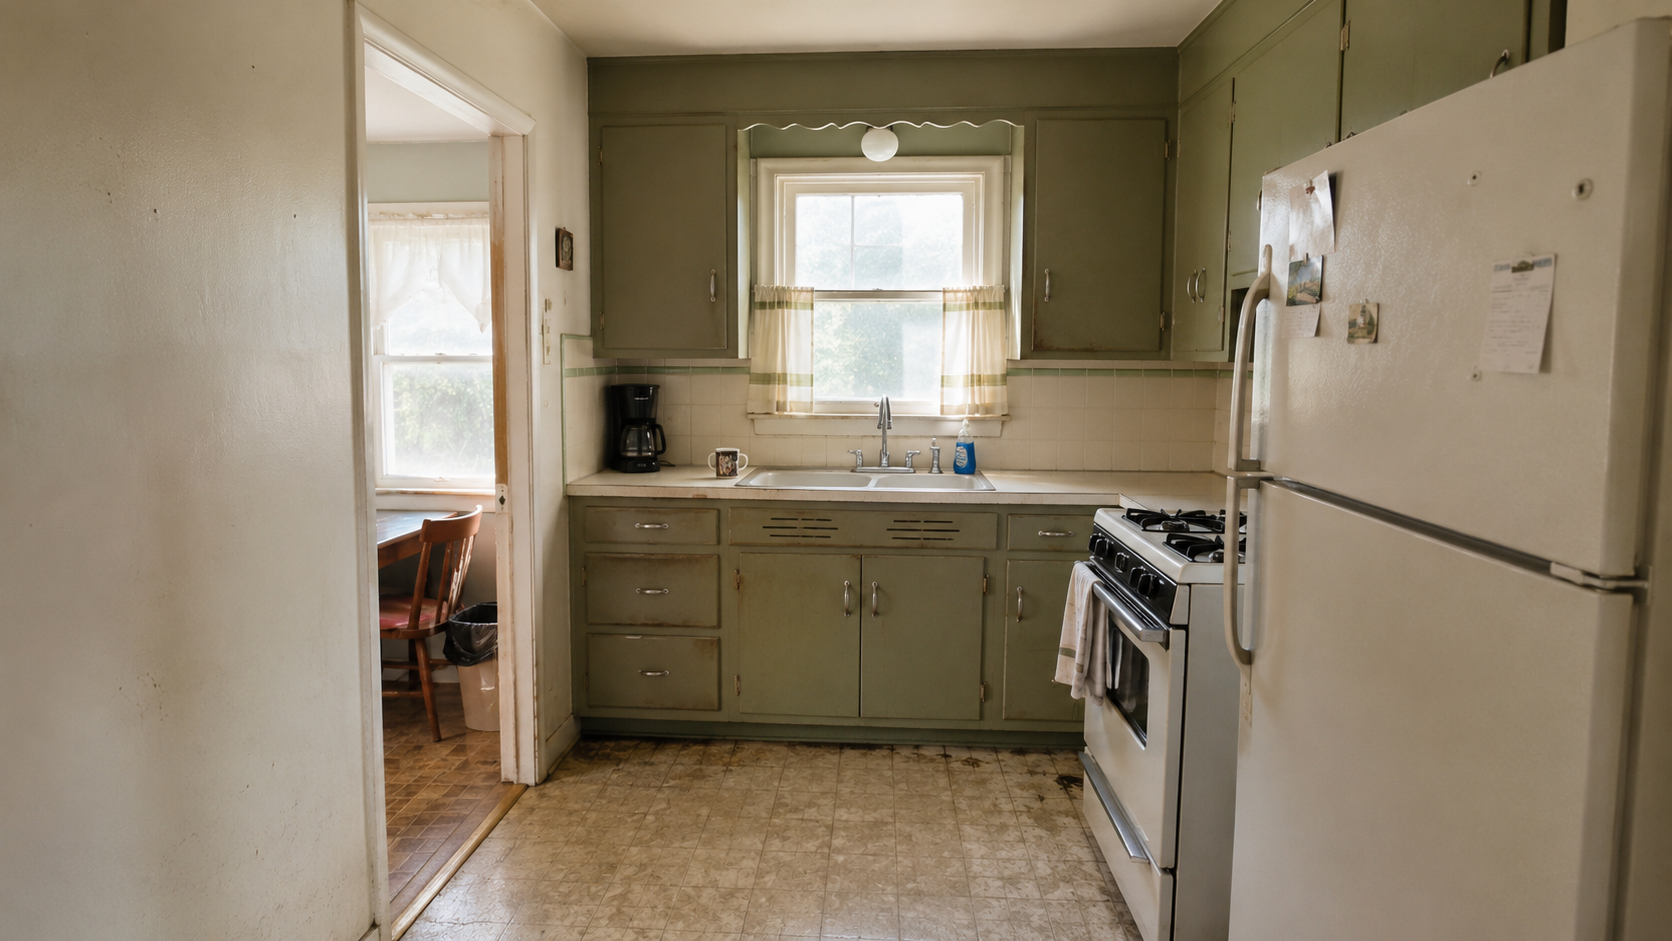
This kitchen is a good example because it is not a wreck. The cabinet boxes still define a usable work wall, the sink has daylight, the range is close to the prep area, and the dining space is nearby.
But the refrigerator projects into the room, the floor is badly worn, and the lighting is weak. The left side is mostly a passage, so anything added there can choke the route between the kitchen and dining area.
That is common in modest postwar houses. A room can be workable and still feel cramped because several small conflicts land in the same six or eight feet. A compact bungalow kitchen often shares its traffic path with the dining room, rear entry, or basement door; the broader 1950s bungalow renovation guide covers how these small rooms affect the rest of the house.
The Kitchen Was Built for Appliances That No Longer Exist
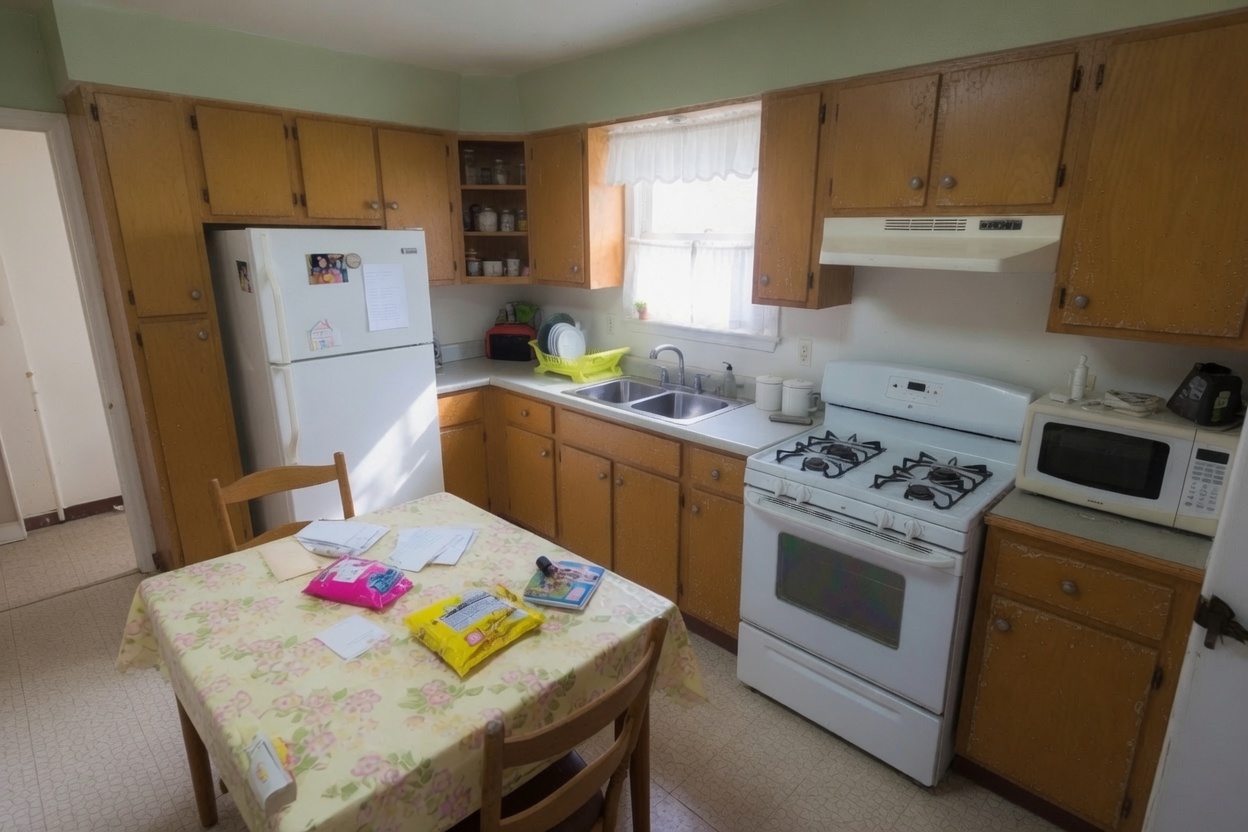
The room traded in opposite directions since 1955, and this is the piece most remodels miss.
Refrigerators grew. A common 1950s fridge ran around 28 to 30 inches wide, shallow, with a rounded body that tucked into its alcove. A modern standard-depth unit is 36 inches wide and, with doors and handles, close to 36 inches deep. Ranges went the other way: plenty of 1950s kitchens carried a 36- or 40-inch range, while today's standard is 30 inches.
So the refrigerator alcove is too small and the range opening is too big — in the same room. The extra range width is an opportunity, not a defect: a 6- or 9-inch pull-out beside the new range absorbs the gap and adds the spice or tray storage the kitchen never had. The refrigerator problem is harder and usually gets solved by stealing the broom closet, the shallow pantry, or a stub of wall the original plan wasted.
Measure both openings before any cabinet drawing exists. The room was dimensioned around equipment that has not been sold in sixty years.
The Refrigerator Can Steal the Whole Aisle
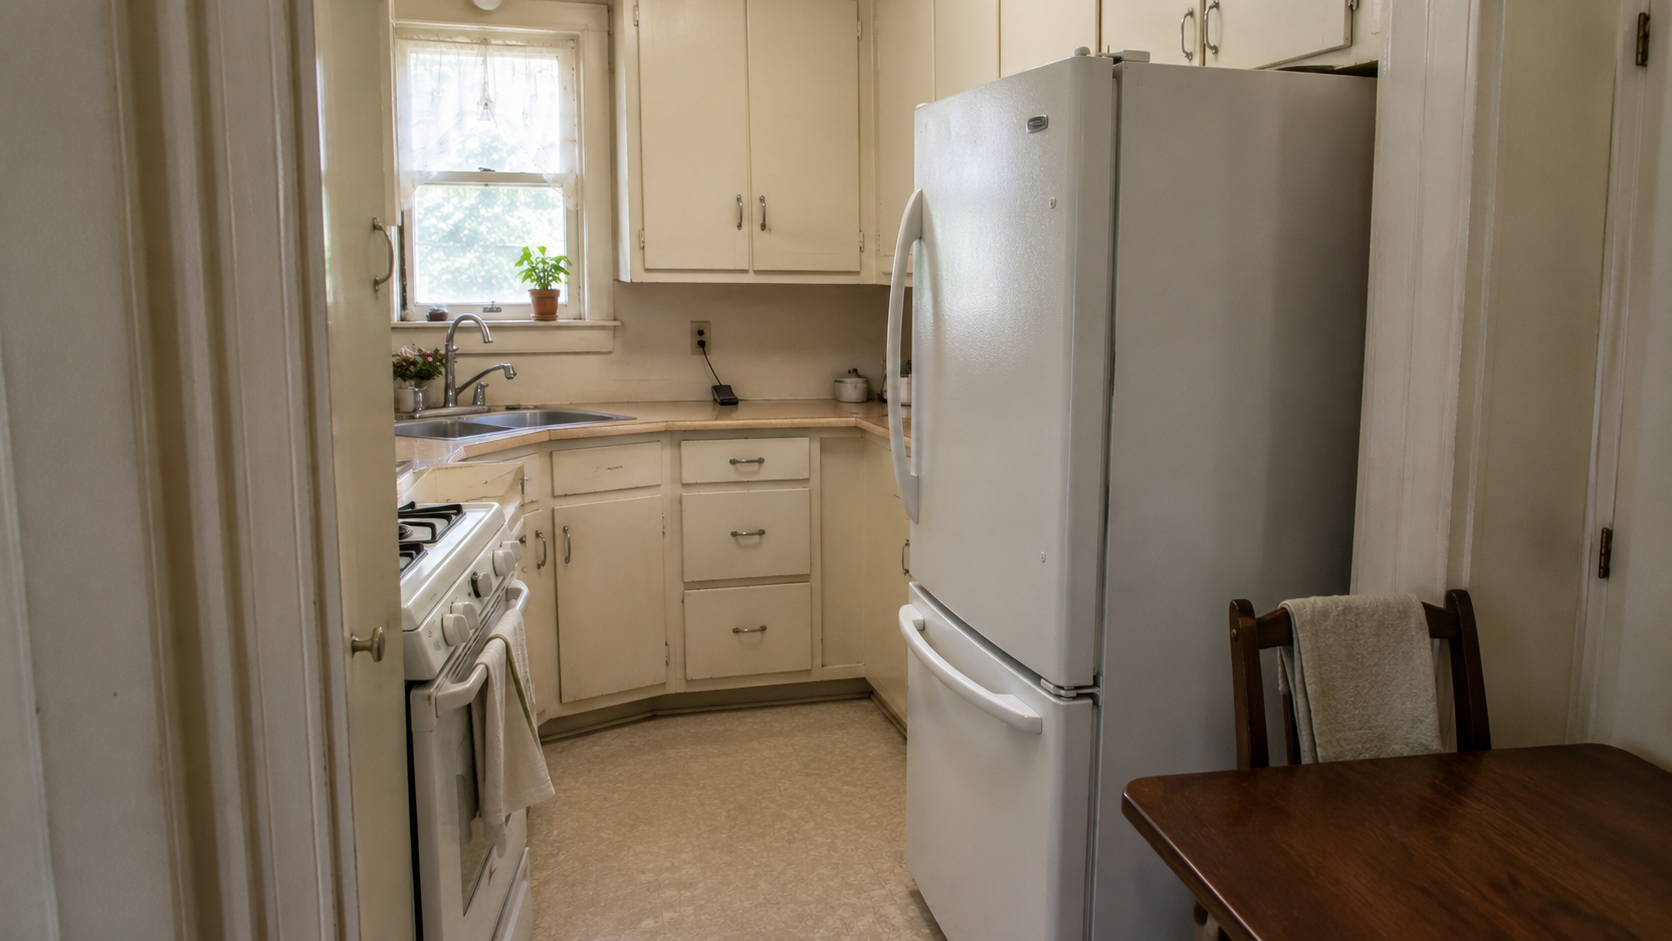
Refrigerator width is only one measurement. Depth can hurt more: a deep refrigerator pushes the handles and body into the walking path, the doors need room to swing, and drawers may need the doors opened past 90 degrees. A nearby wall, range, chair, or doorway can stop that from happening.
Check five things before changing the cabinet opening:
- the full depth, including doors and handles
- door and freezer-drawer movement
- the path between the refrigerator and range
- the space needed to carry groceries into the room
- manufacturer clearance around the appliance
A counter-depth model can help, but the label alone does not settle it. Some still project beyond the cabinet faces once the doors and handles are counted. Measure the exact model, before a cabinet supplier finalizes the drawings — a filler strip or smaller upper cabinet is cheaper to change on paper than after installation.
The Work Aisle Is the Room
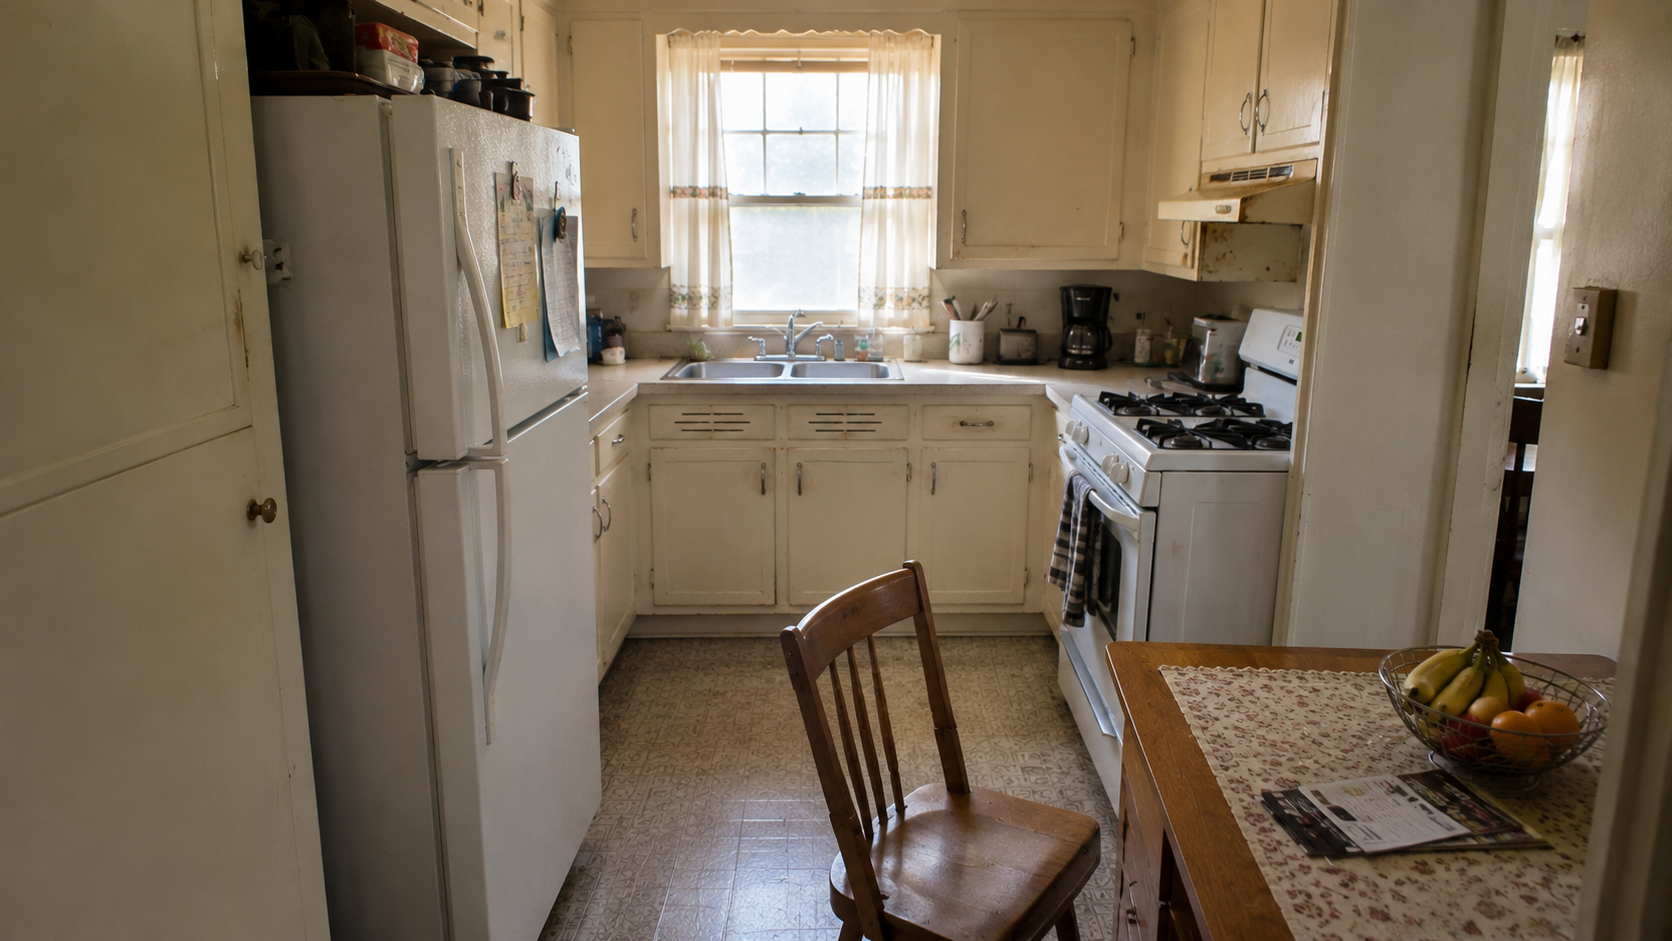
A bad cabinet decision is an annoyance in a large kitchen and a blocked room in a small one.
As a planning check, try to preserve about 36 inches for a basic passage. A one-cook work aisle often needs closer to 42 inches, and two cooks may need around 48 inches. Appliance doors, cabinet pulls, chairs, and local code can change what the room needs.
The numbers are warnings, not guarantees: if the aisle looks acceptable only while every door is closed and every chair is pushed in, it is too tight.
Watch the dishwasher: when its door drops, can someone still get past? Run the same test at the oven — can the cook step back without hitting a chair? — and at the refrigerator, where an open door can trap someone against the table. A small kitchen works when these actions happen without a daily negotiation.
If the house is a ranch and the kitchen sits inside a wider dining or living-room problem, the small ranch kitchen layouts page covers those floor-plan options in more detail.
Tape the Room Before You Order It
Drawings can make a tight plan look cleaner than it will feel.
Use painter's tape and cardboard to mock up the new work before ordering anything. Mark the cabinet fronts on the floor, tape the full refrigerator depth, lay down the dishwasher door footprint, and place a box where a peninsula or pantry would stand. Leave the mock-up in place for two days: cook a meal, bring in groceries, pull out the chairs, empty the dishwasher, and let two people move through the room at the same time.
Every kitchen I have taped out has surprised its owner somewhere, usually at the dishwasher door. A pantry may add storage but block the dining view. A peninsula may add counter space but turn the kitchen into a dead end. A deeper base cabinet may make the aisle feel worse than the old room.
Finding that with tape costs almost nothing. Finding it after installation means wasted money, cut fillers, moved cabinets, or living with it.
When Keeping the Layout Is the Better Remodel
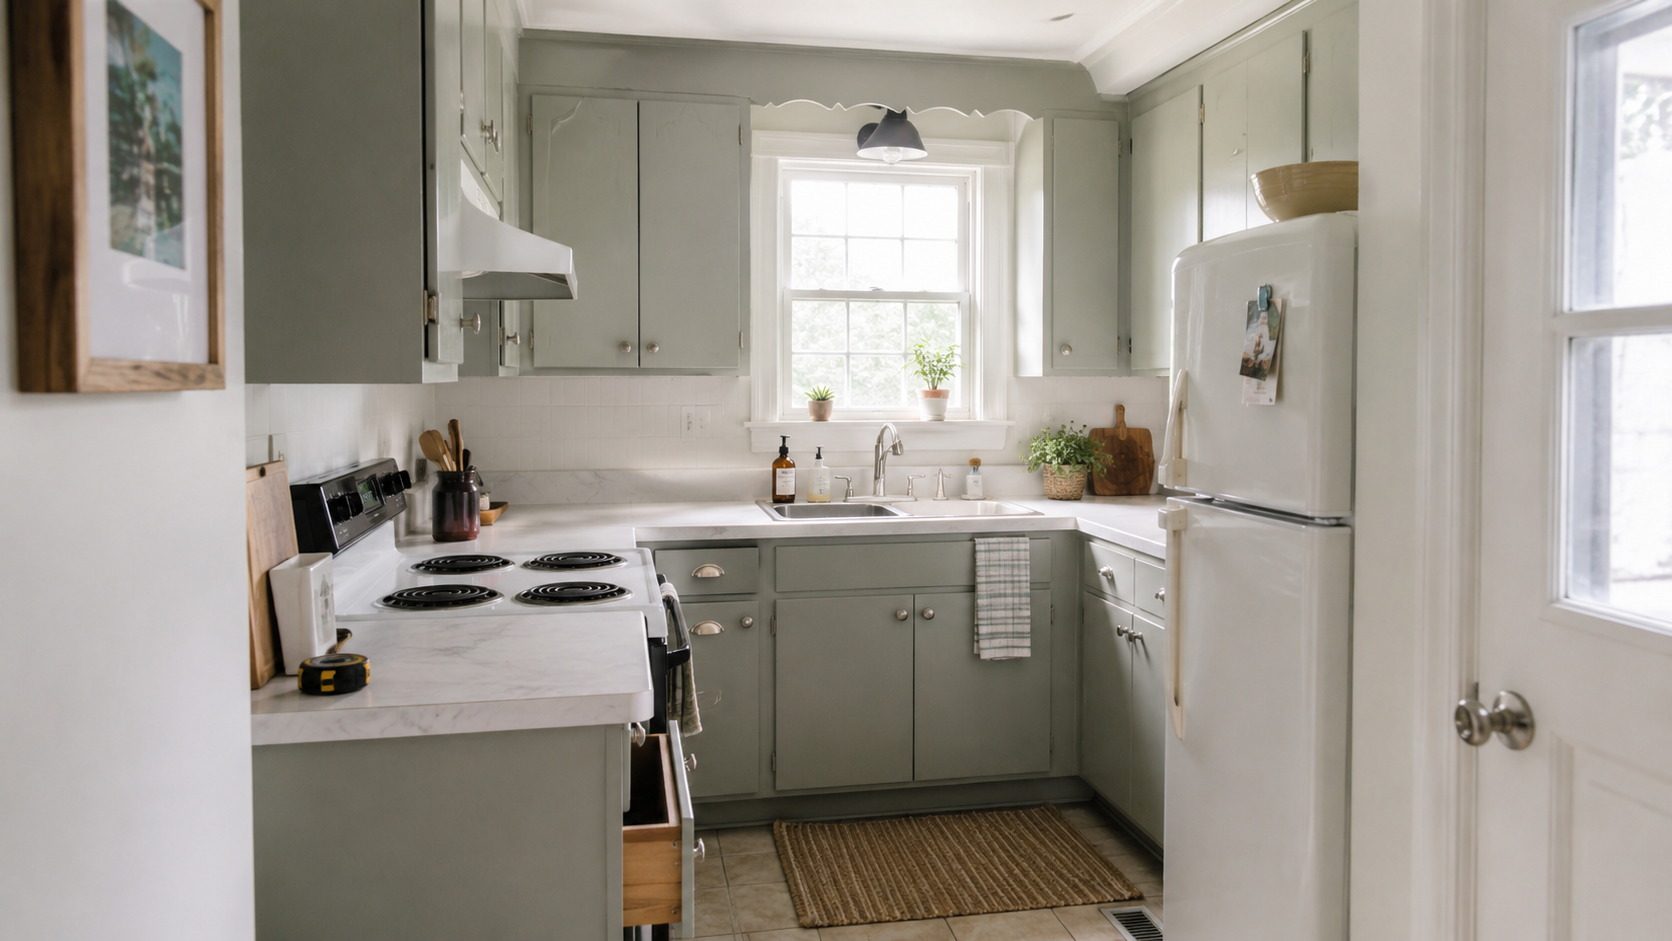
Keeping the layout makes sense when the sink, range, and refrigerator already sit in a workable order and the room has one clear route through it. It also avoids moving the expensive parts: the sink stays below the window, the range keeps its vent route, plumbing and electrical stay controlled, and floor and ceiling repairs stay smaller.
A keep-layout remodel can still make a large difference:
- repair or reface sound cabinet boxes
- replace one failed appliance section instead of every cabinet
- add better drawer storage and interior organizers
- improve task lighting at the sink, range, and prep counter
This path stops making sense when the refrigerator blocks the room, the range has no safe landing area, or the sink and dishwasher create a constant traffic conflict. It can also stop making financial sense when wiring, plumbing, floor repair, ventilation, and cabinet replacement all land in the same project — the 1950s kitchen remodel cost guide explains how those hidden scope changes affect the budget.
Open Less Wall Than You Think
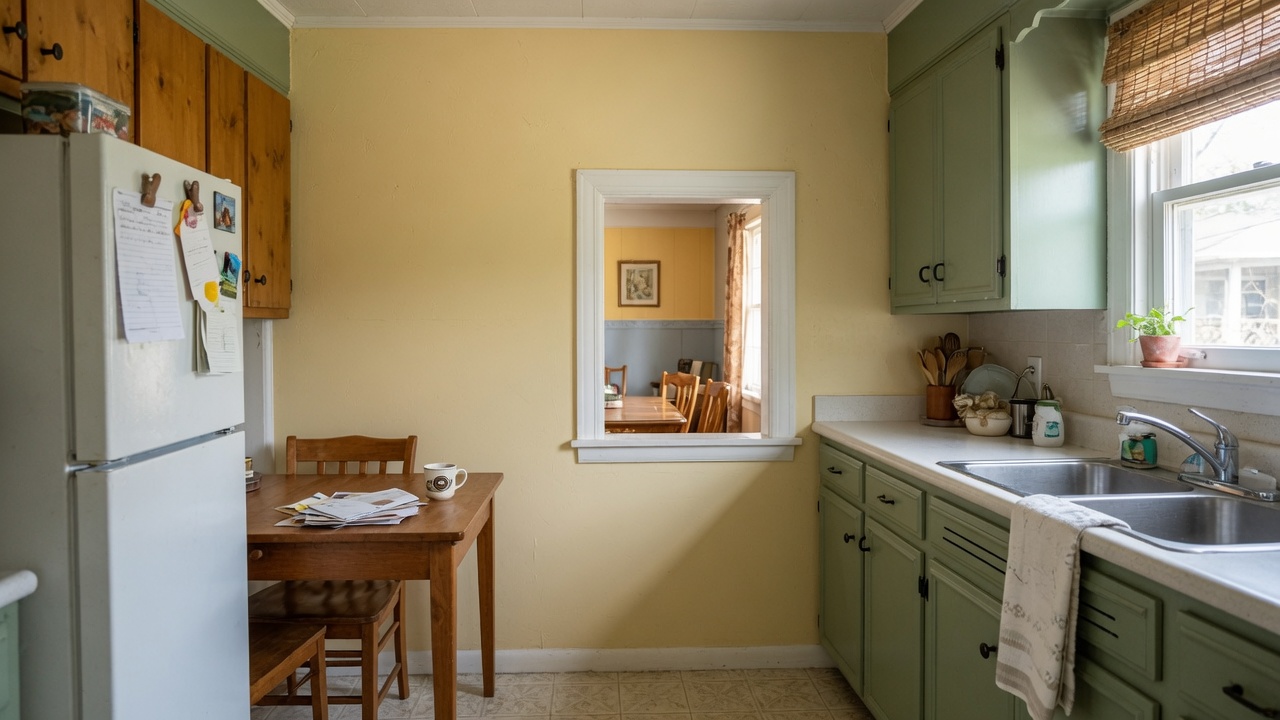
The kitchen may need a better connection to the dining room. That does not mean the whole wall needs to come out.
A wider doorway, short pass-through, or controlled cased opening can bring in daylight and make the room feel less boxed in, while preserving upper cabinets, a pantry wall, or a place for the refrigerator.
Full removal brings more work:
- possible structural framing or beam work
- wiring, switches, ducts, or plumbing inside the wall
- ceiling and wall patching across two rooms
- a floor scar where the wall used to stand
The new opening also changes the dining room. Kitchen noise, dishes, appliance views, and counter clutter become part of that room. Some houses improve. Others lose the little separation that made the plan comfortable.
If this is a ranch house, read removing a wall in a ranch kitchen before assuming the opening is finish work. For the complete ranch-specific kitchen problem, use 1950s ranch kitchen remodel.
Keep Cabinet Boxes Only When They Still Earn the Space
Old cabinets are not valuable just because they are old.
Check the boxes at the sink, dishwasher, range, and floor first. Look for swollen bottoms, loose backs, sagging shelves, broken face frames, failed hinges, and layers of paint that stop the doors from closing. Then check the layout: a solid cabinet box in the wrong place is still a problem.
Cabinets are good candidates for repair or refacing when:
- the boxes are dry and square
- the drawers can be rebuilt or adjusted
- the appliance openings can be corrected
- the cabinet run supports a workable aisle
Partial replacement deserves more attention in small kitchens. One new refrigerator wall or pantry section can solve a modern appliance problem without throwing away every original box. For deeper decisions about original doors, flat-front cabinets, hardware, counters, and period character, return to the broader 1950s kitchen remodel article.
Lighting Has to Reach the Counter
A bright ceiling fixture does not guarantee a bright kitchen. Upper cabinets cast shadows across the prep surface, a window may light the sink well while the range wall stays dark, and a decorative fixture can brighten the middle of the floor without touching the counter.
Plan lighting by task: sink and cleanup area, main prep counter, range, and the table edge. Under-cabinet lighting often does more useful work than another ceiling fixture, and switches belong where someone enters the room, not behind an appliance.
If walls or ceilings are opening, settle the lighting, outlet, appliance-circuit, and ventilation plan before cabinet installation. Local code, the existing electrical service, and the appliances being installed will control the final work.
Old Floors Can Change the Whole Job
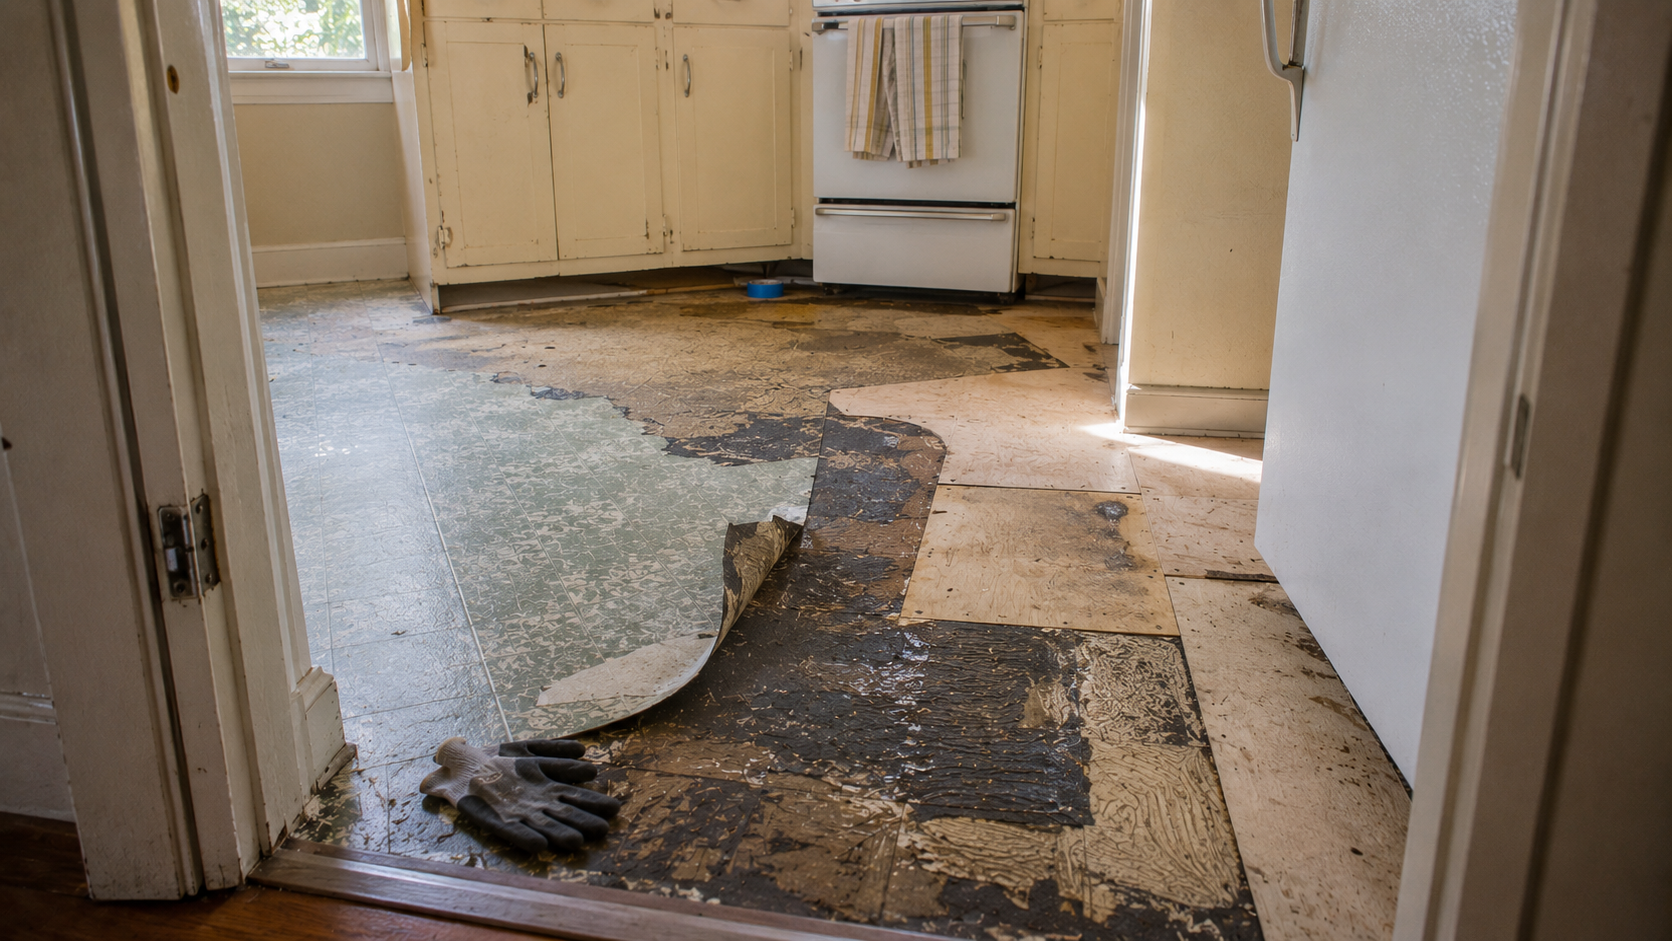
Old kitchen floors are often stacked. A newer finish may sit over underlayment, older resilient flooring, adhesive, patched subfloor, and the original wood deck, and removing one layer can expose another problem.
Floor height matters too. New material may need to meet the dining-room floor, hallway, exterior threshold, and dishwasher opening. Building the floor too high can trap an appliance under the counter or create a raised edge at the doorway. Check around the sink cabinet, dishwasher, refrigerator water line, exterior door, and range — soft spots or staining can mean subfloor repair before the finished floor goes down.
Do not sand, grind, or aggressively scrape unknown older flooring or dark adhesive. Some 1950s materials fall into the suspect-material category and should be evaluated before disturbance. Use the asbestos in 1950s houses guide before demolition begins.
What the After Photo Should Prove
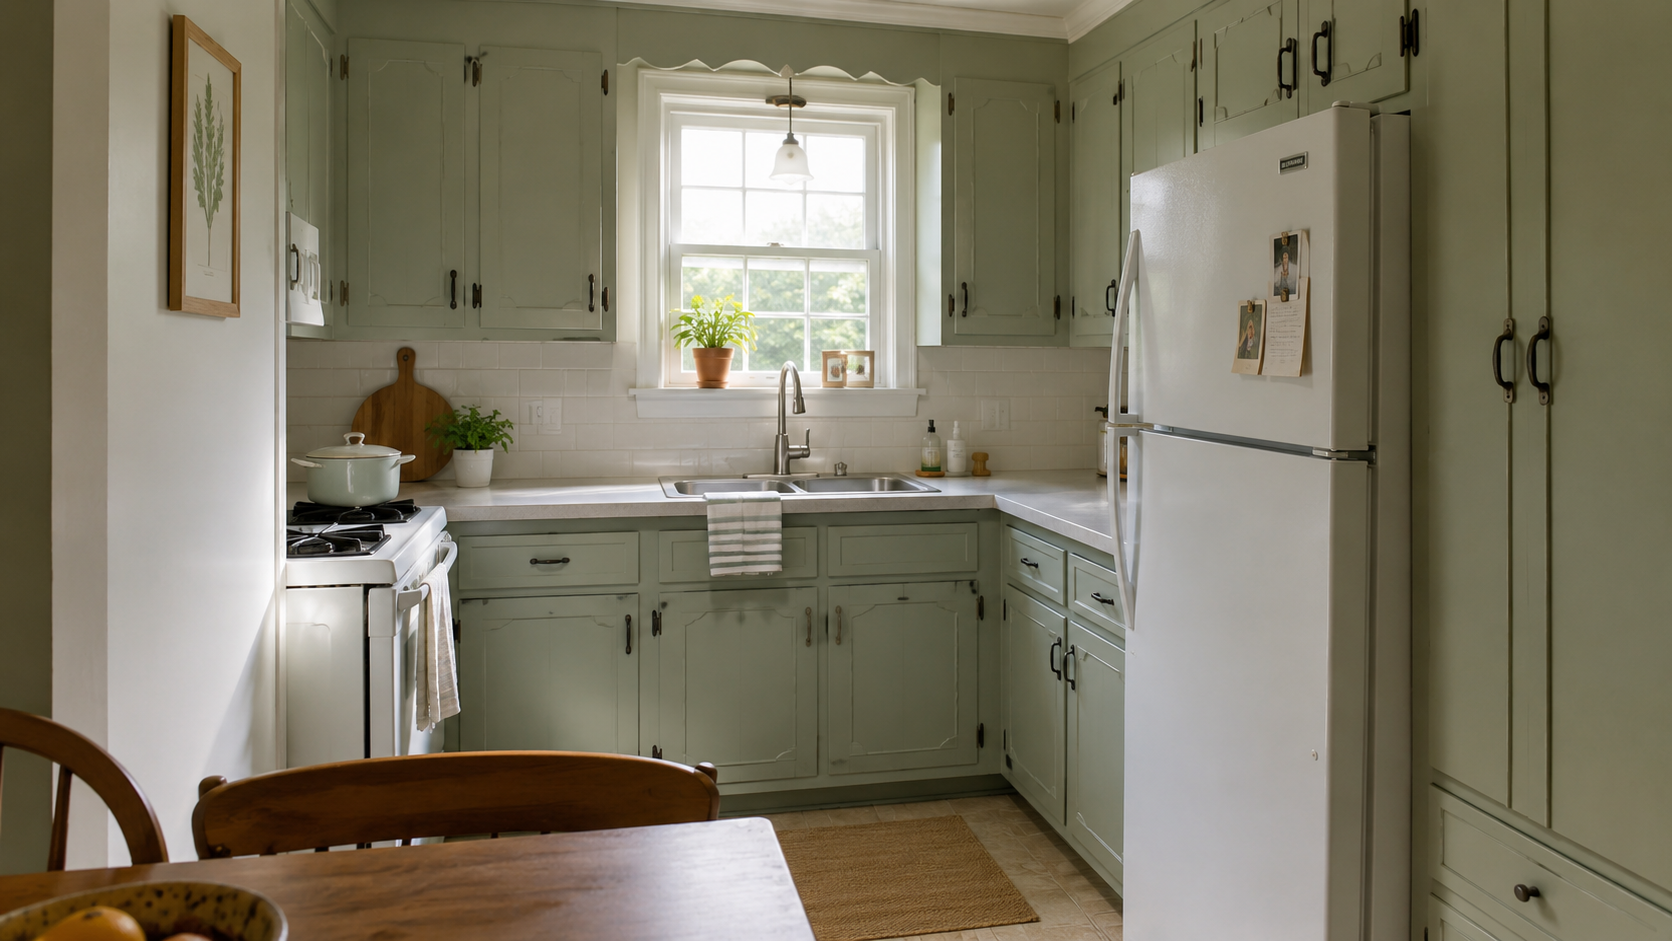
The after photo should prove more than a color change. Look at the aisle. Look at the refrigerator depth. Check whether the range can open, where groceries land, and whether someone can sit at the table without blocking the kitchen.
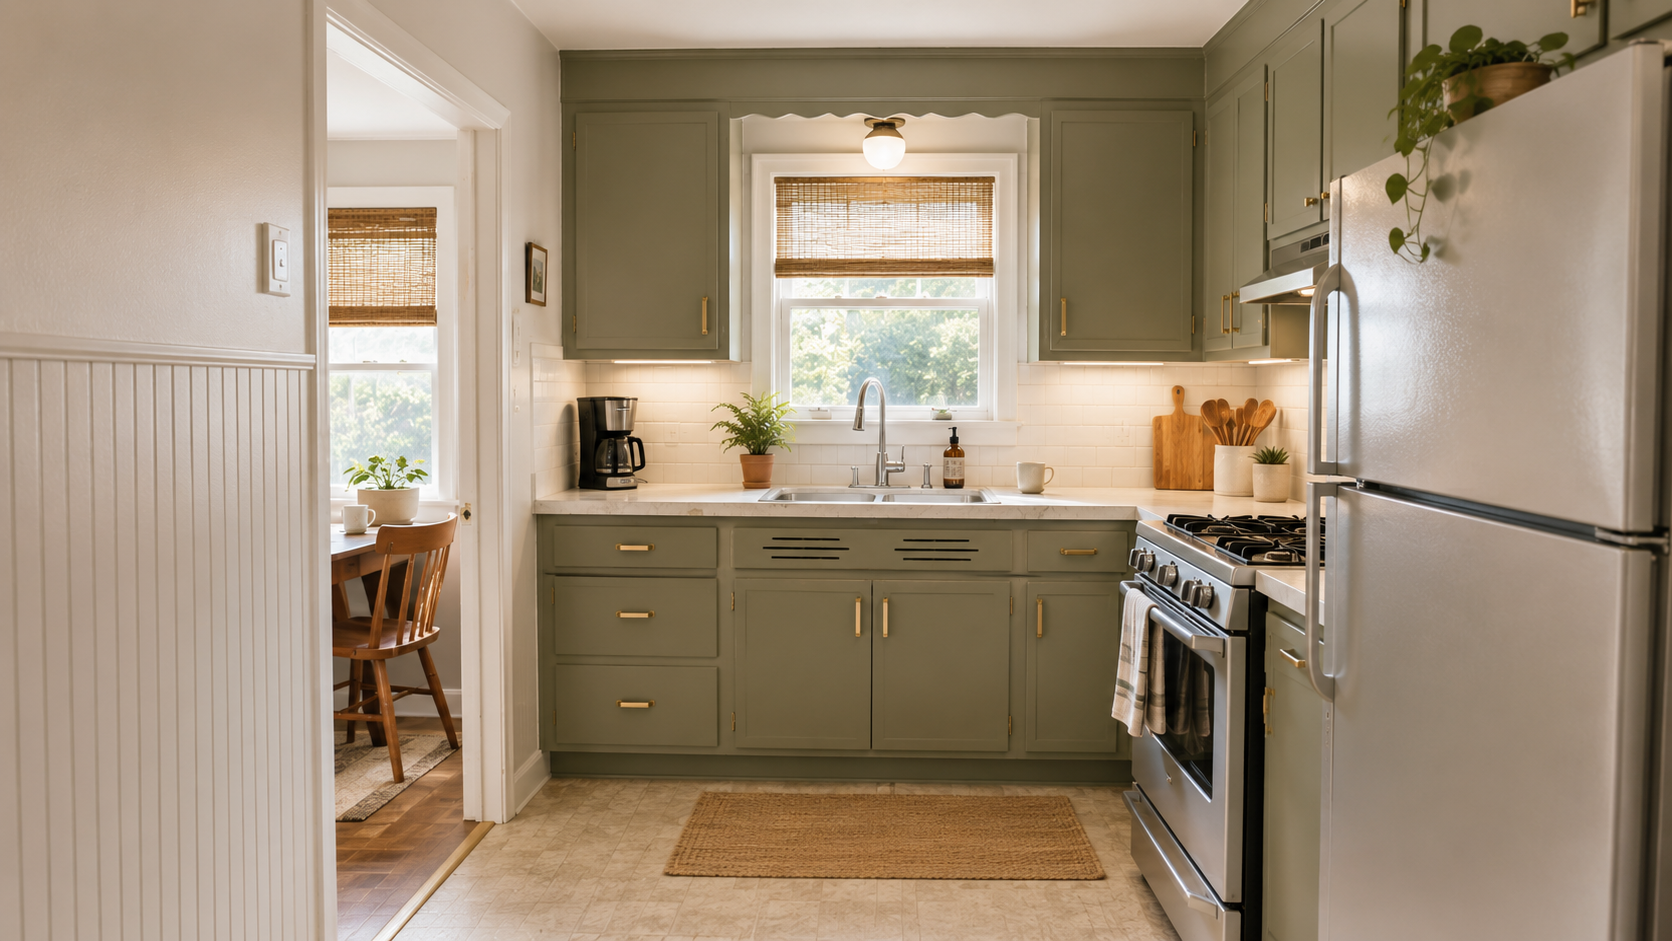
The room above still reads as a small kitchen, and that is fine. The footprint feels controlled, the work wall has better light, storage reaches higher, the dining connection stays open, and no forced island eats the middle of the room. A small kitchen does not have to hide its size — it has to stop wasting it.
The Test Happens After the Kitchen Is Full Again
Empty kitchens photograph well. The harder test comes three weeks later, when the toaster, recycling bin, grocery bags, pet bowl, dish rack, mail, and chairs return. Counter space disappears fast, and the path that looked clear during construction gets narrower.
Plan those ordinary objects before the remodel is finished. Give the trash a location, decide where the microwave goes, leave a landing spot for groceries, and make sure the coffee setup does not consume the only prep counter.
Before final cabinet approval, list the ten items that live on the current counter. The new plan should give each one a home or admit that it will still sit out. Otherwise the finished kitchen looks clean for a week and returns to the same cluttered pressure points.
Mistakes That Make a Small Kitchen Worse
- Forcing an island: It adds a surface but removes the path around it.
- Buying appliances first: The kitchen gets designed around whatever was on sale instead of what fits.
- Removing every upper cabinet: The room looks open in photos and loses the storage it needs.
- Opening the whole wall: The kitchen gains a view and loses its best cabinet or refrigerator location.
The expensive failure is replacing everything while keeping the same bad movement pattern. The room looks newer and still feels tight.
Questions to Ask Before Hiring
- What is blocking the room now: appliance depth, table space, doors, or cabinet placement?
- What stays in the same location, and why?
- Can we improve the dining connection without losing the storage wall?
- What floor layers or suspect materials may appear during demolition?
- Where will the refrigerator doors, dishwasher door, and range door open?
- What electrical, lighting, and ventilation work is included before cabinets go in?
A useful proposal answers those questions instead of jumping from demolition to cabinet color.
Frequently Asked Questions
Should I remove a wall in a small 1950s kitchen?
Only when the opening improves light, movement, or dining connection without removing storage the kitchen still needs. A wider doorway or partial opening is often enough.
Can I keep the original layout?
Yes, when the sink, range, and refrigerator already sit in a workable order. Fixing appliance fit, lighting, drawers, and worn surfaces may give a better result with less disruption.
What should I measure before ordering cabinets?
Measure appliance bodies, handles, door swings, dining-chair pullback, dishwasher drop, range-door clearance, walk paths, window trim, and finished floor height.
Is a counter-depth refrigerator always better?
No. It may improve the aisle, but width, door swing, storage capacity, wall clearance, and the exact handle depth still need checking.
Does a small 1950s kitchen need an island?
Usually not. A clear aisle, useful cabinet run, small table, or restrained peninsula often works better in a tight room.
What can make the remodel cost jump after demolition?
Old floor layers, subfloor damage, wiring, plumbing, ventilation, wall framing, ceiling repair, and suspect materials can all expand the scope.
Read This Next
- 1950s Kitchen Remodel: Layout, Cabinets, Appliances, and What to Keep
- 1950s Kitchen Remodel Cost: What Changes the Price in an Old Kitchen
- 1950s Bungalow Renovation: Fix the Small House Before You Open It Up
- 1950s Ranch Kitchen Remodel: Fix the Layout First
- Small Ranch Kitchen Layouts: What Works When the Room Is Tight
- Removing a Wall in a Ranch Kitchen
- Asbestos in 1950s Houses: Where It Hides Before Renovation