
Timber piling is still one of the simplest ways to get support into soft, wet, or uneven ground. The method is old for a reason. It still works.
But this is where people blur things. A small DIY timber piling job for a dock, light pier platform, or small outbuilding is not the same thing as an engineered pile foundation under serious loads. Once the loads climb, the depths increase, or the water conditions turn rough, this stops being a casual weekend project.
For the smaller jobs, the basics still decide whether it lasts: the right treated timber, enough embedment, straight alignment, clean cuts, and careful detailing at the top and cut ends.
Before you start laying out piles, it helps to understand where timber piling fits among other foundation types and what your soil conditions are doing below the surface.
One more thing people miss: a driven timber pile and a treated wood post dropped into a drilled hole are related ideas, but they are not the same install method. Same material sometimes. Different logic.
Why Use Timber Piling?

It is still one of the most practical foundation options for the right site.
- Good in wet or uneven ground because shallow footings and slabs can get awkward fast on bad surface soils.
- Lower site disruption on lighter jobs where you do not want a large excavation and a lot of concrete.
- Manageable material compared with steel or precast systems, especially on small sites.
- Long service life when the treatment level is right and the detailing is not sloppy.
- Useful for light structures like docks, small platforms, simple piers, and some outbuildings.
It is not the answer to everything. Wrong site, wrong loads, wrong exposure, and the appeal drops fast. But on the right ground, it is simple, proven, and often more forgiving than people expect.
Before You Buy the First Pile

This is the short checklist that saves a lot of dumb mistakes later.
- Know whether you are building a true driven pile system or a drilled-hole timber support system.
- Know what the piles are carrying. A small dock and a cabin are not the same job.
- Know the soil or lakebed conditions well enough to stop guessing about depth.
- Know the exposure. Wet ground, splash zone, and marine conditions do not ask for the same treatment level.
- Know the local rules before you start, especially near shorelines, flood zones, or utility corridors.
That is the part people rush. Then the job spends the rest of the week paying for it.
What You’ll Need to Do Timber Piling Right

Tools
- Post-hole digger or auger for layout checks, starter holes, or predrilled installs where that method makes sense.
- Chainsaw or handsaw for cutting piles to finish height.
- Manual pile driver, sledge, or rented mechanical driver depending on pile size and soil resistance.
- Level and string line to keep layout clean and piles plumb.
- Measuring tape for spacing, cut-off height, and cap layout.
- Drill for hardware and connections at caps or framing.
- Safety gear including gloves, eye protection, hearing protection, boots, and head protection.
Materials
- Pressure-treated timber piles or heavy treated round members rated for the exposure.
- Field treatment for cuts so trimmed ends do not stay unprotected.
- Gravel or compacted stone where the chosen system calls for it.
- Hardware for caps, beams, or bracing rated for exterior or marine exposure if needed.
- Concrete or collars only where the design and local practice call for them. That is not a universal move for every pile job.
Worth slowing down for: buy the right timber the first time. Untreated or under-treated wood can ruin the whole foundation logic before the framing even starts.
Types of Timber Piles (and When to Use Each One)

Not all timber piles work the same way.
Straight Timber Piles
This is the general-purpose version most people picture first. They are used for light foundations, pier work, and support points where treated timber is a practical match for the site.
- Best for: straightforward light-duty support work.
- Why use them: simple material, familiar detailing, and good availability in many markets.
- Watch for: embedment depth, straightness, and treatment rating.
Friction Piles
These rely mainly on contact between the pile surface and the surrounding soil along the shaft, not just on bearing at the very bottom.
- Best for: soils where there is no shallow hard layer below.
- Why use them: they can work in soft conditions when enough length and surface contact are provided.
- Watch for: pile length and soil behavior. This is not a guess-and-hope category.
End-Bearing Piles
These are intended to transfer load to a firmer layer deeper down, such as dense soil or another competent bearing stratum.
- Best for: sites with weak upper soils but a stronger layer below.
- Why use them: they push load past the weak material instead of asking it to do work it cannot do.
- Watch for: installation depth, refusal criteria, and whether the project has moved beyond sensible DIY territory.
Do not skip this step: figure out what kind of ground you are on before you decide what kind of pile you think you need.
Timber Pile Foundations: Simple, Strong, Proven
Timber pile foundations are still used because they solve a specific problem well: weak ground near the surface.
A timber pile foundation uses long treated wood members to transfer load deeper into the ground, where the support conditions are better than they are at the surface. That is the whole idea. Get the load path right, and the system is efficient.
It shows up most often in waterfront work, wet ground, marshy edges, soft fill, and smaller structures where a shallow footing is a bad fit. In broader foundation terms, it sits within the same decision tree covered in this foundation overview, but it solves a narrower site problem.
- Common use cases: docks, piers, small platforms, waterfront structures, and light buildings on difficult ground.
- Why builders still use it: it handles awkward soil conditions without turning the whole project into a major excavation job.
- What decides success: soil conditions, treatment level, pile layout, cap detail, and how cleanly the load is transferred above.
Designing Timber Piles That Actually Hold Up

Most timber piling failures are not mysterious. They usually start with a few ordinary mistakes: bad load assumptions, loose spacing logic, weak treatment choices, or sloppy connection details.
Load-Bearing Capacity
You need to know what the piles are holding. Dead load, live load, snow, water movement, framing layout, and future use all matter. A small dock and a cabin do not ask the same thing from the ground.
- Start with the structure weight.
- Look at soil type, seasonal saturation, and frost behavior.
- Match pile count, size, and depth to the job instead of copying someone else’s layout.
Spacing Between Piles
Too close wastes material. Too far apart overloads the cap, beams, or framing above. Spacing is not just a timber question. It is a structural layout question too.
- Keep spacing consistent unless the load pattern changes.
- Tighter layouts are often needed in softer ground or under concentrated loads.
- Think through the cap and framing system at the same time. That is where structural design principles start showing up even on a small project.
Timber Treatment
Wood below grade or near water needs the right preservative treatment for the exposure. Ground-contact treatment is the minimum conversation. Near water, splash zones and marine conditions raise the bar.
- Use timber rated for the actual service conditions.
- Seal or field-treat all fresh cuts and drilled areas as required by the treatment system.
- Do not assume any pressure-treated wood is fine for every location. It is not.
Pile Length, Caps, and Upkeep
Pile Length and Diameter
Length and diameter are tied to soil, load, exposure, and free height above grade or water. The deeper the weak zone, the more length you may need. The heavier the load, the more section you usually need.
- Softer or wetter ground often pushes lengths up.
- Heavier framing or longer spans usually push diameters up.
- Buy with cut-off, waste, and finish elevation in mind, not just embedment.
Pile Caps and Load Transfer
The pile cap is where a lot of small jobs go wrong. The piles can be fine, but if the cap or beam layout is sloppy, the structure still settles or twists.
- Caps can be timber, steel, or concrete depending on the project.
- All pile heads need to be cut accurately so the cap bears evenly.
- Connection hardware needs to match the exposure and the load path.
Inspection and Upkeep
Timber piles are not install-and-forget forever.
- Inspect for movement, insect damage, decay, abrasion, and split heads.
- Watch the waterline or groundline zone closely. That is often where deterioration shows first.
- Recoat or protect exposed cut areas when needed.
Buying Timber That Is Actually Right for the Job

Specs are where the broad idea turns into a buildable system. This is the part that decides whether you bought the right material or just bought wood.
Material
- Douglas fir and Southern pine are common choices in North America, but local supply often drives what is practical.
- Round timber piling is common in dedicated pile work. Square or sawn treated members show up more often in lighter small-project versions of the same idea.
- The piece needs to be sound, straight enough for the job, and properly treated.
Treatment
- Ground-contact treatment is the baseline for buried or frequently wet conditions.
- Marine or severe-wet exposure may require a higher treatment level.
- Fresh cuts, notches, and drilled holes need follow-up protection.
What Matters Most
- Do not buy by appearance alone.
- Do not assume all treated lumber is rated for piling conditions.
- Do not separate material choice from soil and load. They belong in the same decision.
If you are still sorting out basic support options, pier and footing basics helps show where timber piling stops and other support systems start making more sense.
Timber Piling Sizes: Diameters, Lengths, and What Fits
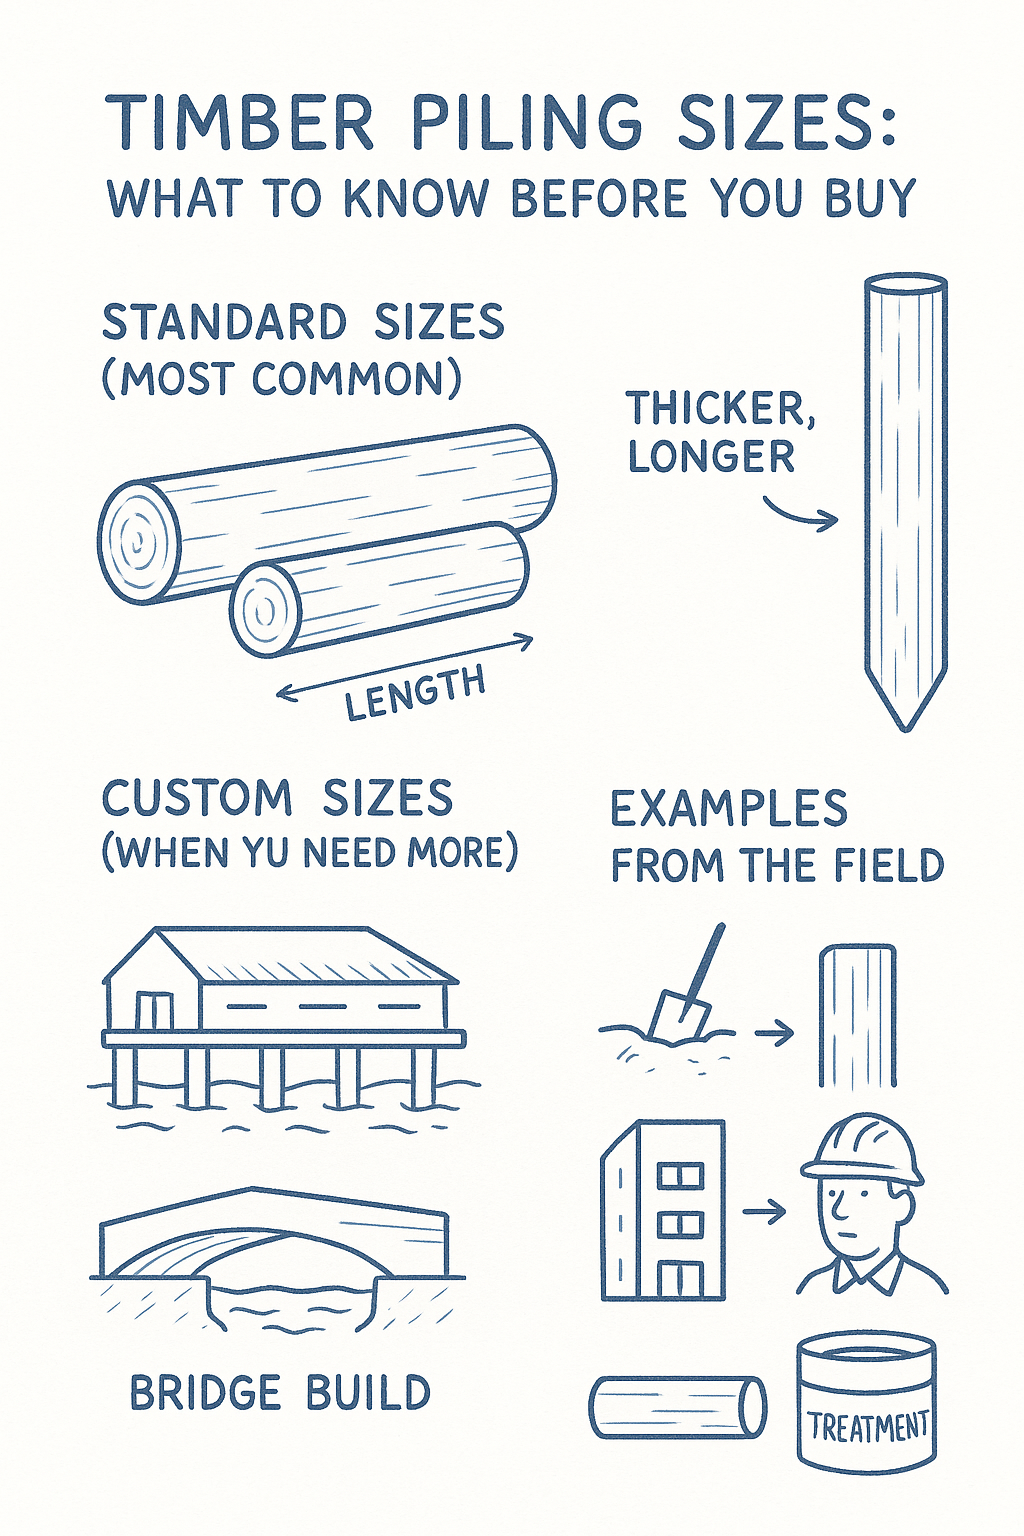
Timber piling sizes vary more than many DIY guides admit. The right size is not just a shelf choice. It is a soil choice, a load choice, and an install-method choice.
Common Sizes for Small Projects
- Light-duty round timber piling often starts around the 6-inch to 8-inch range and increases from there.
- Larger diameters are used where loads increase, unsupported height grows, or the site conditions get rougher.
- Length is usually the bigger decision than people expect because it must cover embedment, cut-off, and the finish height above grade or water.
Questions to Ask Before You Order
- What soil or lakebed depth am I trying to get through?
- Is this a true driven pile, or a predrilled set-in-place timber support?
- What treatment level does this exposure require?
- Do I need extra length for trimming, leveling, and pile cap alignment?
Buying the wrong length is one of the most expensive avoidable mistakes on a small pile job. Too short and the whole system starts compromised.
Timber Pile Installation: Step-by-Step for Small Projects
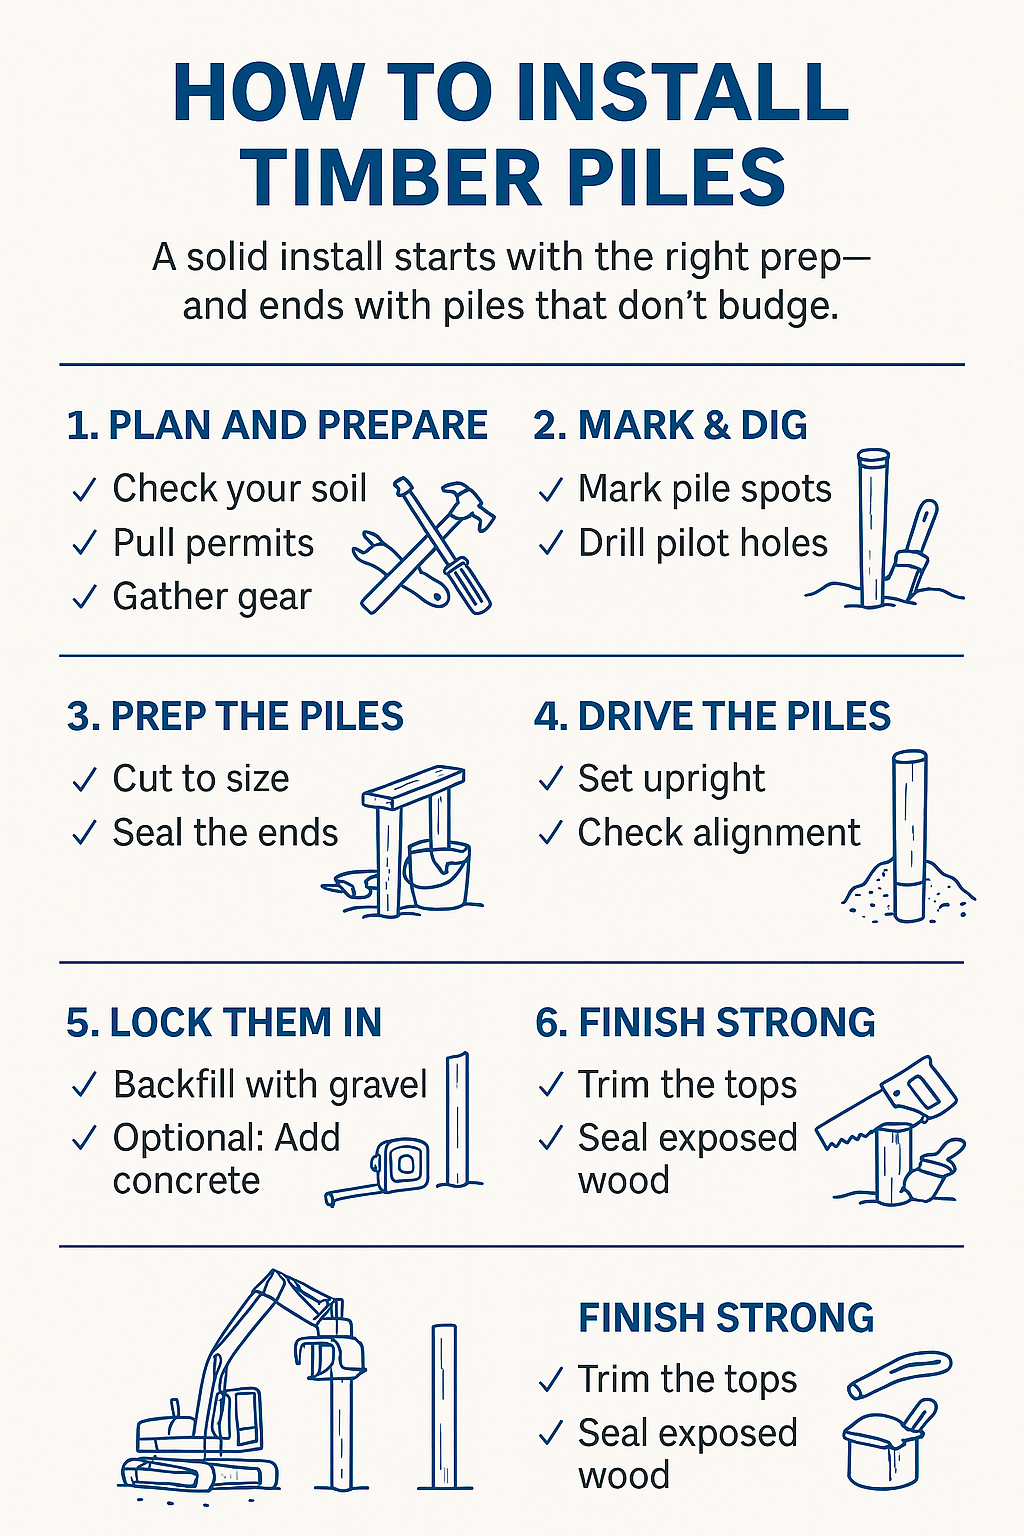
This sequence fits small, practical timber piling work. Once the project needs formal refusal criteria, load testing, deep driving, or large equipment, get engineering and the right crew involved.
Step 1: Verify the System Before You Start
- Decide whether you are driving true timber piles or installing heavy treated members into predrilled holes.
- Check permit rules, shoreline restrictions, setbacks, frost requirements, and utility locates.
- Get the site layout clear before any timber shows up. This site and groundwork guide is useful if your prep work is still loose.
Step 2: Lay Out the Pile Locations
- Use string lines, batter boards, or measured offsets to mark center points.
- Check span direction, cap alignment, and access for driving or handling the piles.
- Do not space by eye. Small layout errors compound fast above the pile line.
Step 3: Prepare the Timber
- Sort out bent or damaged pieces before install.
- Cut only what you need to cut before driving.
- Seal or field-treat cut ends and exposed treated surfaces as required.
Step 4: Set and Drive or Place the Piles
- Start each pile plumb and check alignment often.
- For true driven piles, use the proper driver setup and protect the pile head from splitting.
- For predrilled installs, keep the hole size controlled and follow the chosen backfill or collar method instead of improvising on site.
Step 5: Cut Off, Cap, and Brace
- Trim pile tops to a consistent elevation.
- Install caps, beams, or ledgers so the load bears evenly.
- Brace the system as needed before the full framing load arrives.
Step 6: Final Protection and Check
- Recheck plumb, spacing, and finished cut heights.
- Reseal cut tops and exposed treated areas.
- Inspect all hardware and connections before moving on to framing.
One point that saves trouble: do not mix methods carelessly. A driven pile system and a buried-post system do not behave the same way. Treat them that way.
Tips for a Solid Timber Piling Job

- Use treatment rated for the exposure. Ground contact is not the same as marine splash or constant wet conditions.
- Take layout seriously. Clean geometry at the bottom makes everything easier above.
- Protect the pile head and cut ends. A split top or unsealed cut is easy to create and annoying to fix later.
- Watch the plumb constantly. Small drift during install becomes a bigger framing problem later.
- Know where DIY stops. When the loads, depths, or water conditions get aggressive, bring in engineering and equipment.
Common Timber Piling Mistakes (and How to Avoid Them)

Not Driving or Embedding Deep Enough
Shallow support is one of the fastest ways to get movement later. The fix sounds simple. In practice it is not. Know the soil, know the target depth, and stop guessing.
Crooked or Misaligned Piles
Once the piles drift, the cap and framing start compensating for a problem they should never have had. Check plumb and line often, not just at the end.
Using the Wrong Timber Treatment
Treated wood is not one single category. Use the treatment level that matches buried, wet, splash-zone, or marine exposure.
Skipping Field Treatment on Cuts
Fresh cuts are vulnerable. Trim, seal, move on. Small step. Important one.
Confusing a Driven Pile with a Buried Post
People use the same language for both, then install them as if the details do not matter. They do. Make sure your method, detailing, and expectations match the system you are building.
Worked Example: Small Timber Pier in Soft Lakebed Conditions

Picture a modest lake pier for canoe access and swimming, not a marina job and not a house foundation. The lake edge is shallow, the bed is soft, and the goal is a stable platform that can handle seasonal water movement.
- First move: check the bed conditions and depth instead of assuming the shore tells the whole story.
- Second move: lay out the pier from a clean reference line so the finished deck does not drift off square.
- Third move: use treated timber suitable for constant wet exposure and protect all cuts.
- Fourth move: keep the pile line straight and the cap elevation consistent before framing starts.
- Fifth move: inspect the system after the first freeze-thaw cycle and after high water.
The point is not that every lake pier is easy. It is that small timber piling jobs go better when the site is read properly and the install stays disciplined.
A Few Upgrades That Help

Once the basics are right, a few details can make the system cleaner and tougher.
Driving Caps or Head Protection
Protecting the pile head during driving helps reduce mushrooming and split tops. That matters more than people think because damaged heads make trimming and capping messier later.
Starter Holes in the Right Conditions
On some small jobs, a controlled starter hole can help with alignment or getting through a stubborn upper crust. But it is not universal. Use it only where it matches the method and the soil.
Better Exposure Detailing
Waterline and splash-zone conditions are usually harder on timber than people expect. Better treatment choices, cleaner cut protection, and regular inspection all pay back here.
Stronger Cap and Bracing Logic
A pile job does not end when the wood is in the ground. Good cap connections, lateral bracing, and clean load transfer are what turn installed piles into a stable foundation.
Recommended Books
One compact reading section is enough here. These are the titles most likely to help without turning the page into a store shelf.
MUST READ: Building Decks and Porches For Pros by Pros for small piers, post-and-beam layouts, and pile-supported deck work.
FIELD PICK: Foundations and Concrete Work for site prep, drainage, and how pile work fits into the bigger foundation picture.
WORTH OWNING: The Visual Handbook of Building and Remodeling if you want diagrams and construction logic without fighting through a denser reference manual.
RECOMMENDED TOOL: Practical Engineering: Foundations and Earth Retaining Structures once the job starts moving beyond light DIY work.
FAQ
Is timber piling really a DIY job?
Sometimes. Small docks, pier platforms, and some light outbuildings can be. Deep pile work, heavily loaded foundations, rough marine exposure, or anything requiring engineering is not casual DIY territory.
What timber is commonly used for piles?
Douglas fir and Southern pine are common choices in North America, but local supply matters. More important than species alone is treatment level, straightness, and suitability for the exposure.
How deep should timber piles go?
There is no honest one-number answer. Depth depends on soil conditions, load, water level changes, frost behavior, and whether the pile is working mainly by friction, bearing, or a combination of both.
Can timber piles be used near water?
Yes, and that is one of their classic uses. But treatment level, decay risk, abrasion, and the waterline exposure zone all become more important there.
Can I drive timber piles by hand?
For some smaller jobs, yes. For larger members, greater depth, or stubborn soils, you will want better equipment. There is no prize for wrecking the pile heads and your back at the same time.
Do I always need gravel or concrete around the base?
No. That depends on the system. A true driven pile is not the same thing as a timber support set into a drilled hole. Follow the method you are using instead of mixing details from different systems.
How often should timber piles be inspected?
At least yearly on exterior or waterfront work, and again after floods, storm events, ice movement, or major freeze-thaw cycles.
Do I need to reseal cut tops after trimming?
Yes. Fresh cuts and drilled areas should not be left untreated.
Timber vs. concrete vs. steel: which is better?
There is no universal winner. Timber is often a strong choice for light work in wet or uneven ground. Concrete and steel take over more often when the loads, depth, or durability demands move up.
What’s Next: Not confident in your prep yet? Use the Site & Groundwork Guide to tighten it up.
Resources
Reference material for timber pile design, construction, and maintenance.
- Timber Pile Design and Construction Manual — Timber Piling Council. Download PDF
- Design of Pile Foundations (EM 1110-2-2906) — U.S. Army Corps of Engineers. Download PDF
- UFGS 31 62 19 Timber Piles — Whole Building Design Guide / U.S. Department of Defense. Download PDF
- Pile Foundations - General — California Department of Transportation. Download PDF
- EPA Best Management Practices for Piling Removal — U.S. Environmental Protection Agency / USACE-hosted PDF. Download PDF
- Strength Evaluation of Round Timber Piles — USDA Forest Service. Download PDF
- International Building Code 2021, Section 1809.12 — International Code Council. View Code