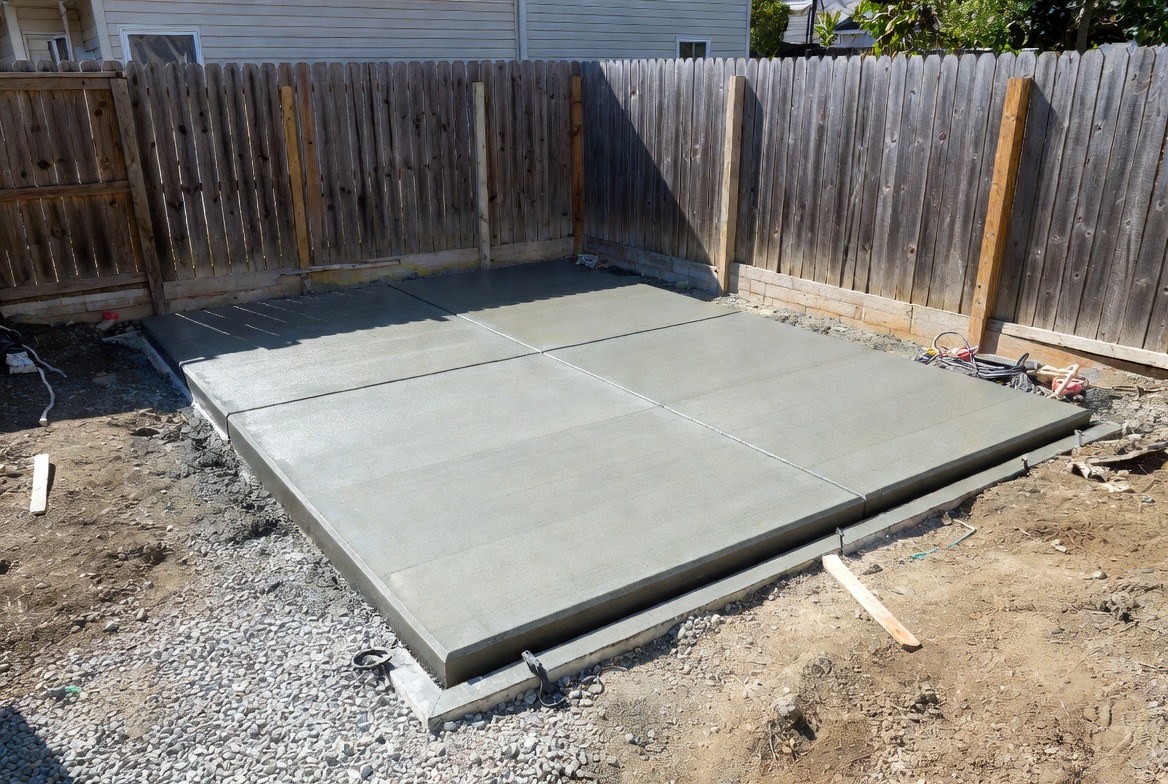
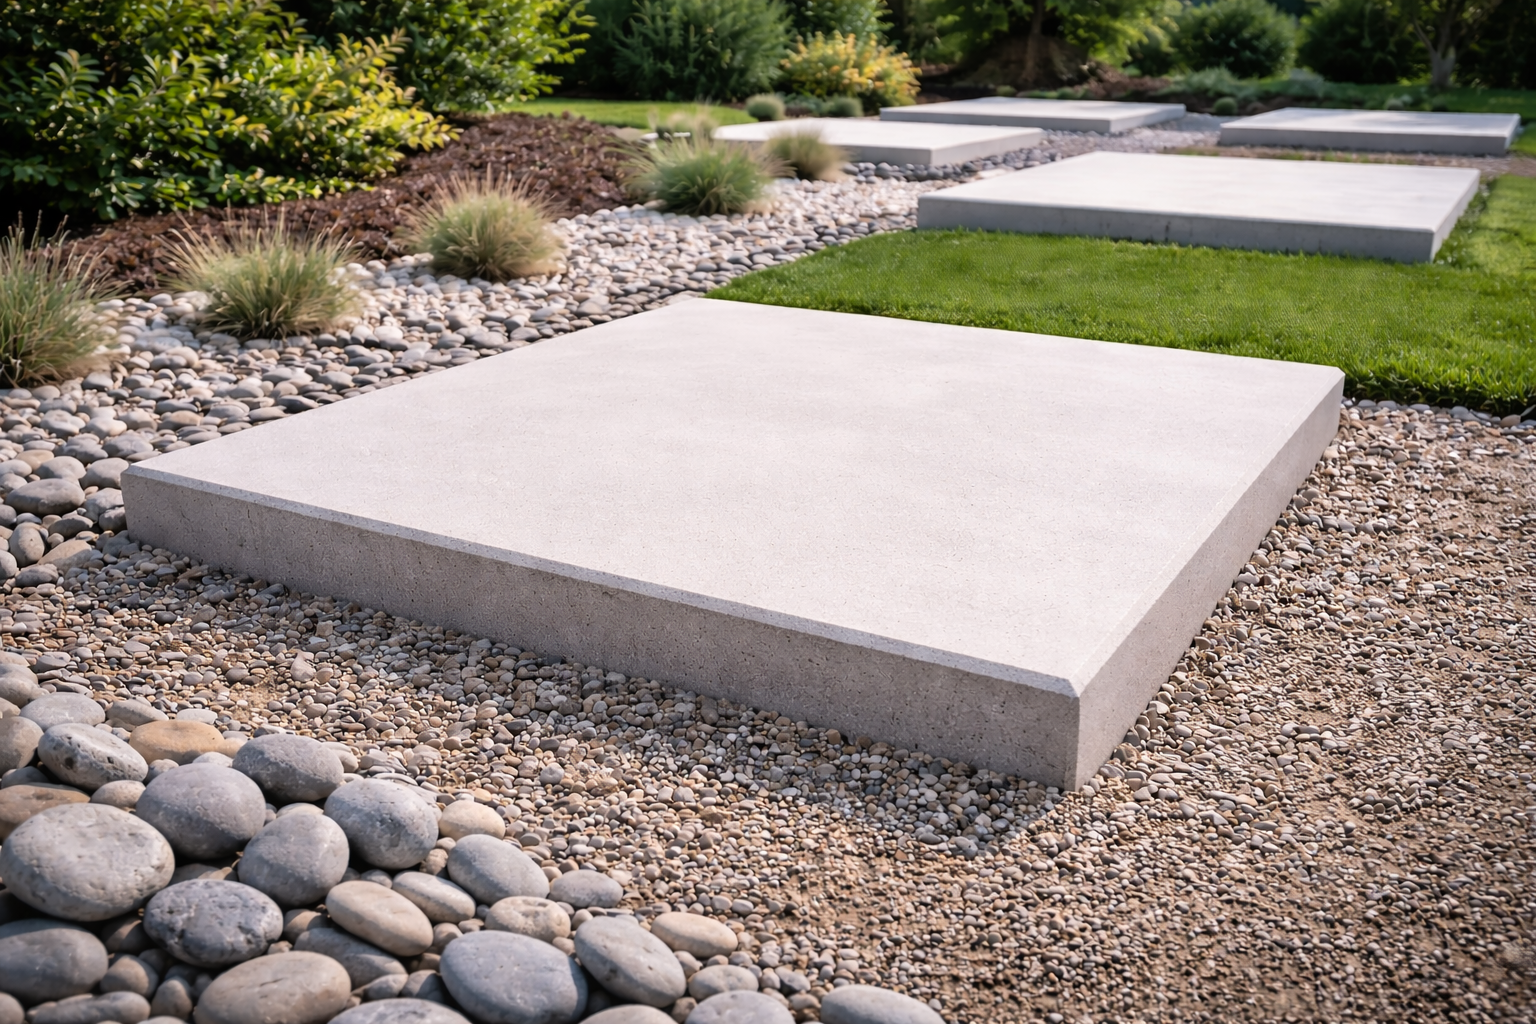
Image by ArchitectureCourses.org. A finished concrete pad in a backyard setting with simple rectangular layout and clean formed edges.
A concrete pad looks simple because it is simple: a small slab on a base. That is also why bad work shows up fast.
The failures are not mysterious. Weak subgrade, thin or poorly compacted base, no drainage plan, reinforcement dropped onto the dirt, joints skipped, and curing treated like an afterthought all show up later as cracks, low spots, pooling water, and corners that start sinking.
What matters is not just slab thickness. It is how the base is built, whether the pad is carrying real load, where water goes, and whether the reinforcement is doing anything useful once the concrete is poured.
Understanding the basics
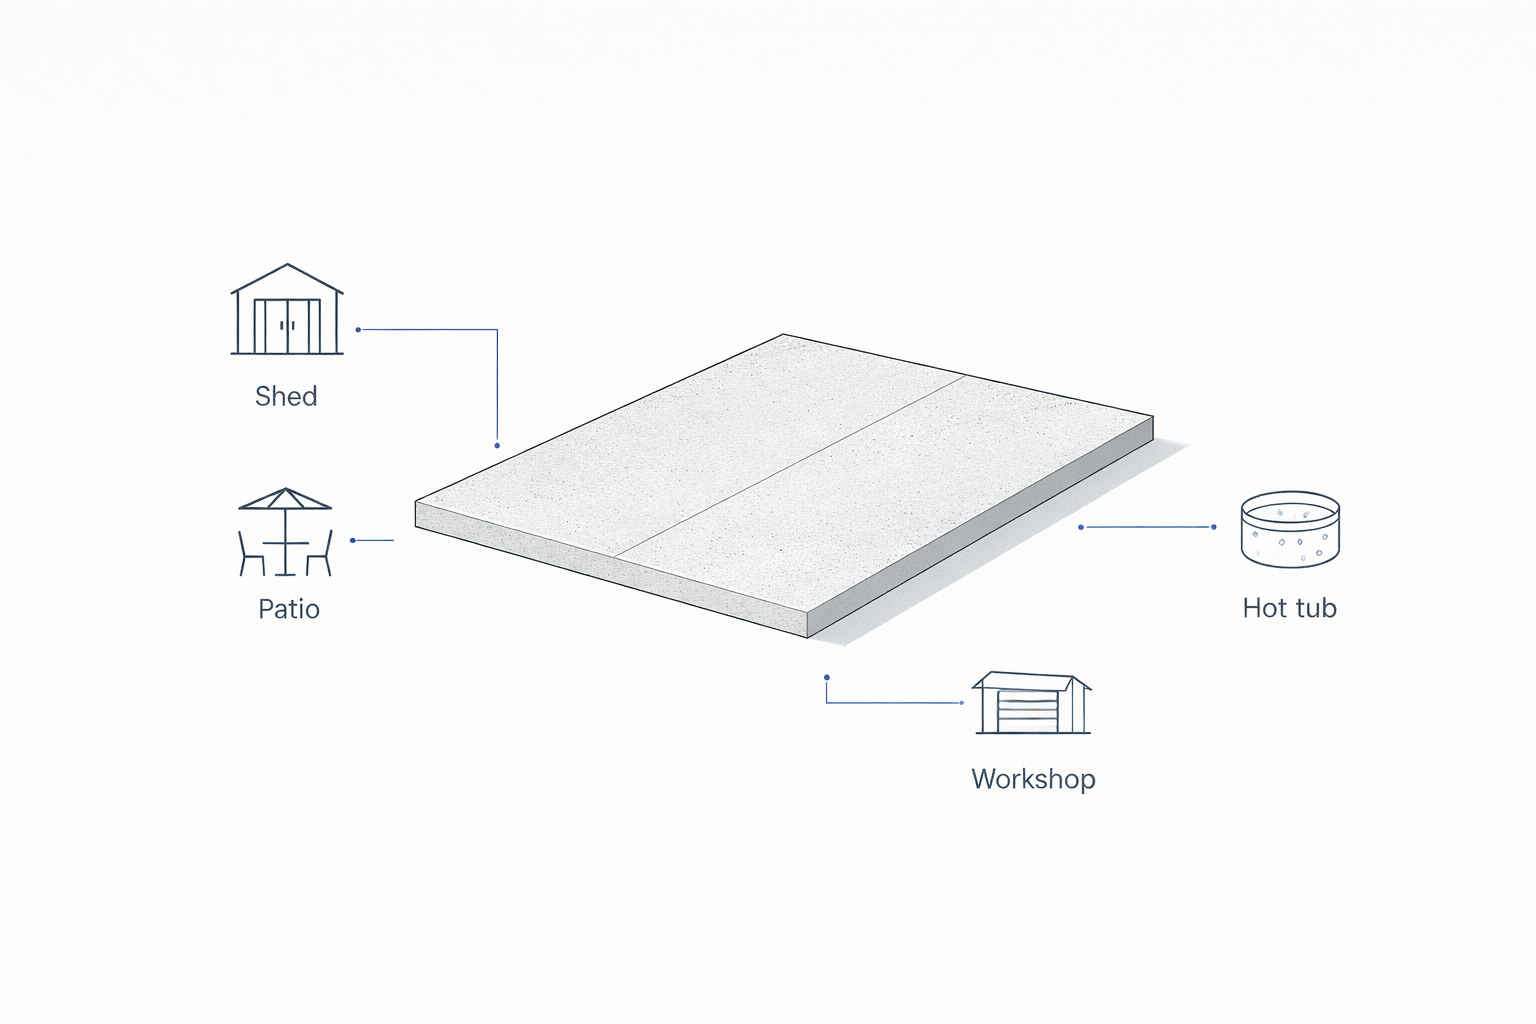
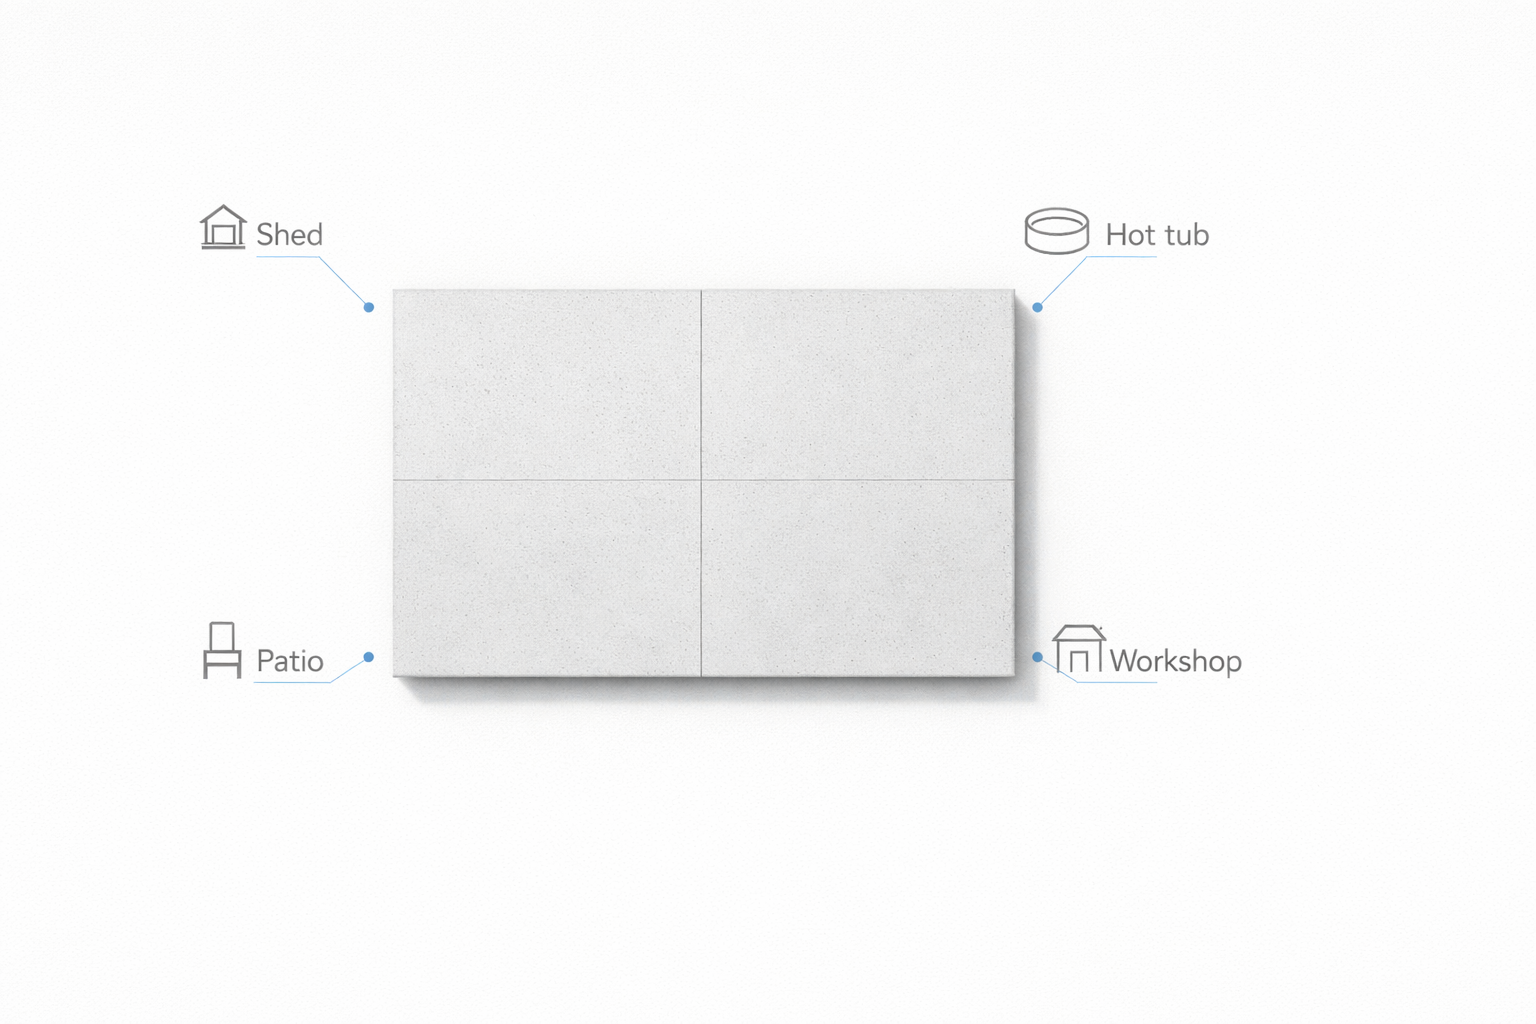
A concrete pad is a standalone slab built to support light-to-moderate loads like patios, sheds, hot tubs, generator/HVAC equipment, or small detached structures. It works when the load is reasonable and the ground underneath is prepared like it matters.
If you’re building something structural (bearing walls, vehicles, frost-sensitive areas), you’re usually drifting into slab + footing territory. If that’s your situation, start with concrete foundation basics so you don’t guess your way into a code problem.
Key characteristics
- Typical thickness: 4–6 inches (thicker when loads concentrate or the base is questionable)
- Reinforcement options: welded wire mesh, rebar grid, fibers (as an assist, not magic)
- What actually controls durability: base prep, drainage, joints, and curing
Quick sizing cheat sheet (what people actually ask for)

This is the “I’m standing at the form boards and I need an answer” section. The safe play is usually thicker + better base, not thinner + more hope.
| Use case | Typical pad thickness | Reinforcement that makes sense | Notes that prevent regret |
|---|---|---|---|
| Shed (small, light) | 4" | Mesh or light rebar (optional) | Base + slope matter more than steel here. |
| Patio / seating area | 4" | Mesh optional | Add joints and a broom finish; plan drainage so water doesn’t sit. |
| Hot tub | 6" (common safe choice) | Rebar grid | Hot tubs are heavy and load is concentrated. Don’t cheap out on base compaction. |
| Trash bins / side yard landing | 4" | None or mesh | Edge support matters; thickened edge is a nice upgrade if soil is soft. |
| Small workshop / detached garage (no vehicles) | 4–6" | Rebar is usually worth it | If you might park inside later, design for it now. |
| Driveway extension / vehicles | 6"+ | Rebar grid | Vehicle loads crack thin slabs fast. This often becomes a local code/permitting question. |
If you want a broader overview (and alternatives when concrete isn’t the best answer), see concrete pad uses and installation basics and cheap alternatives to a concrete slab.
When & why to use a concrete pad
Situations that are ideal for concrete pads
- Sheds & storage
- Keeps the base dry and flat so doors don’t rack and walls don’t lean.
- Prevents “soft corner” settlement when one side sits on loose topsoil.
- Patios & outdoor living
- Clean, durable surface for furniture and grills.
- Easy to maintain if you slope it properly and cut joints.
- Hot tubs & spas
- High, wet loads with no forgiveness for uneven support.
- A thicker pad with a real base prevents the “one corner sank” problem.
- Small workshops / detached structures
- Often acts as both floor and base.
- Consider thickened edges if bearing walls land near the perimeter; if you’re unsure, read how concrete footings actually work.
Concrete vs other options (honest trade-offs)
- Gravel only: cheapest, drains well, but can rut, shift, and get messy fast.
- Pavers: repairable and nice-looking, but maintenance is real (settling, weeds, re-leveling).
- Decking: comfortable underfoot, but rot and maintenance become the long-term cost.
Types of concrete pads

Why people choose each one (and where they usually get burned).
Not all pads behave the same. The “right” one is usually the one that matches your load and your soil.
1) Standard pad
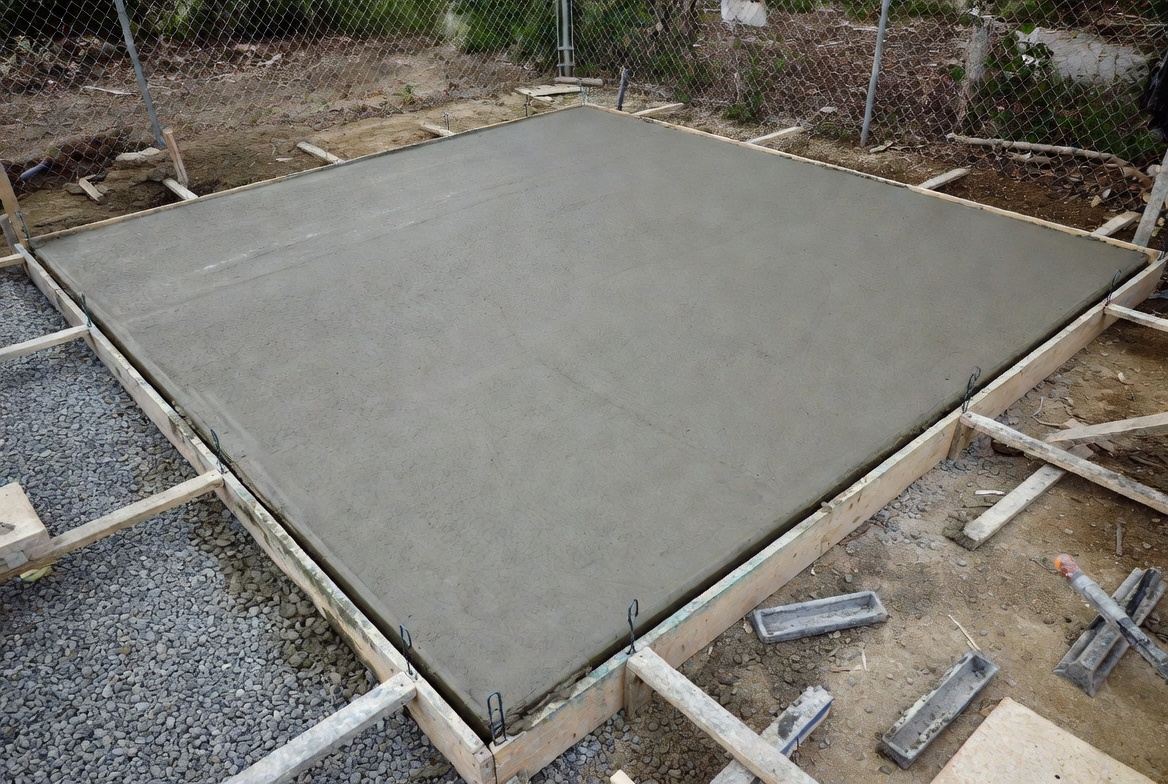
Image by ArchitectureCourses.org. A concrete pad right after finishing, with perimeter formwork and base preparation still visible.
- Typical build: 4" slab over a compacted gravel base.
- Best for: patios, small sheds, light-duty landings.
- Common failure: base wasn’t compacted in lifts, so a corner settles.
2) Reinforced pad (rebar grid)
- Typical build: 4–6" slab with a rebar grid supported on chairs.
- Best for: hot tubs, heavier equipment, small workshops.
- Common failure: steel placed wrong (on dirt), so it doesn’t actually do its job.
3) Thickened-edge pad
- Typical build: slab with a deeper perimeter edge.
- Best for: structures with loads near the edges (bearing walls, posts).
- Common failure: edges weren’t formed cleanly, so you get weak corners and spalling.
4) Floating pad
- Typical build: slab on a well-compacted base with no deep frost footings.
- Best for: small, non-critical structures where local conditions allow it.
- Big caution: in freeze-thaw regions or clay soils, you need to think harder about movement and drainage before you commit.
Key materials & tools
The tool list is boring. The mistakes aren’t. Most pad problems start with base prep and water management, not “wrong trowel.”
Concrete mix
- Strength: choose a mix appropriate for exterior exposure and your loads (bag mixes often land around ~4000 psi; ready-mix varies by spec).
- Freeze-thaw climates: ask for air-entrained concrete if you’re ordering ready-mix; it helps durability where slabs see repeated freezing.
Reinforcement
- Wire mesh: fine for lighter pads, but only if it’s held in the slab (not sitting at the bottom).
- Rebar: worth it when loads concentrate (hot tubs, equipment pads, vehicle areas).
Formwork
- Straight lumber (2x4, 2x6, 2x8), stakes, braces, screws.
- Level and string lines. Don’t eyeball this.
Tools
- Screed board, float, edger, jointer/groover, broom (for traction), finishing trowel if needed.
- Plate compactor (or a serious hand tamper) for the base.
- Gloves, eye protection, boots. Wet concrete is hard on skin.
Site preparation & base layer
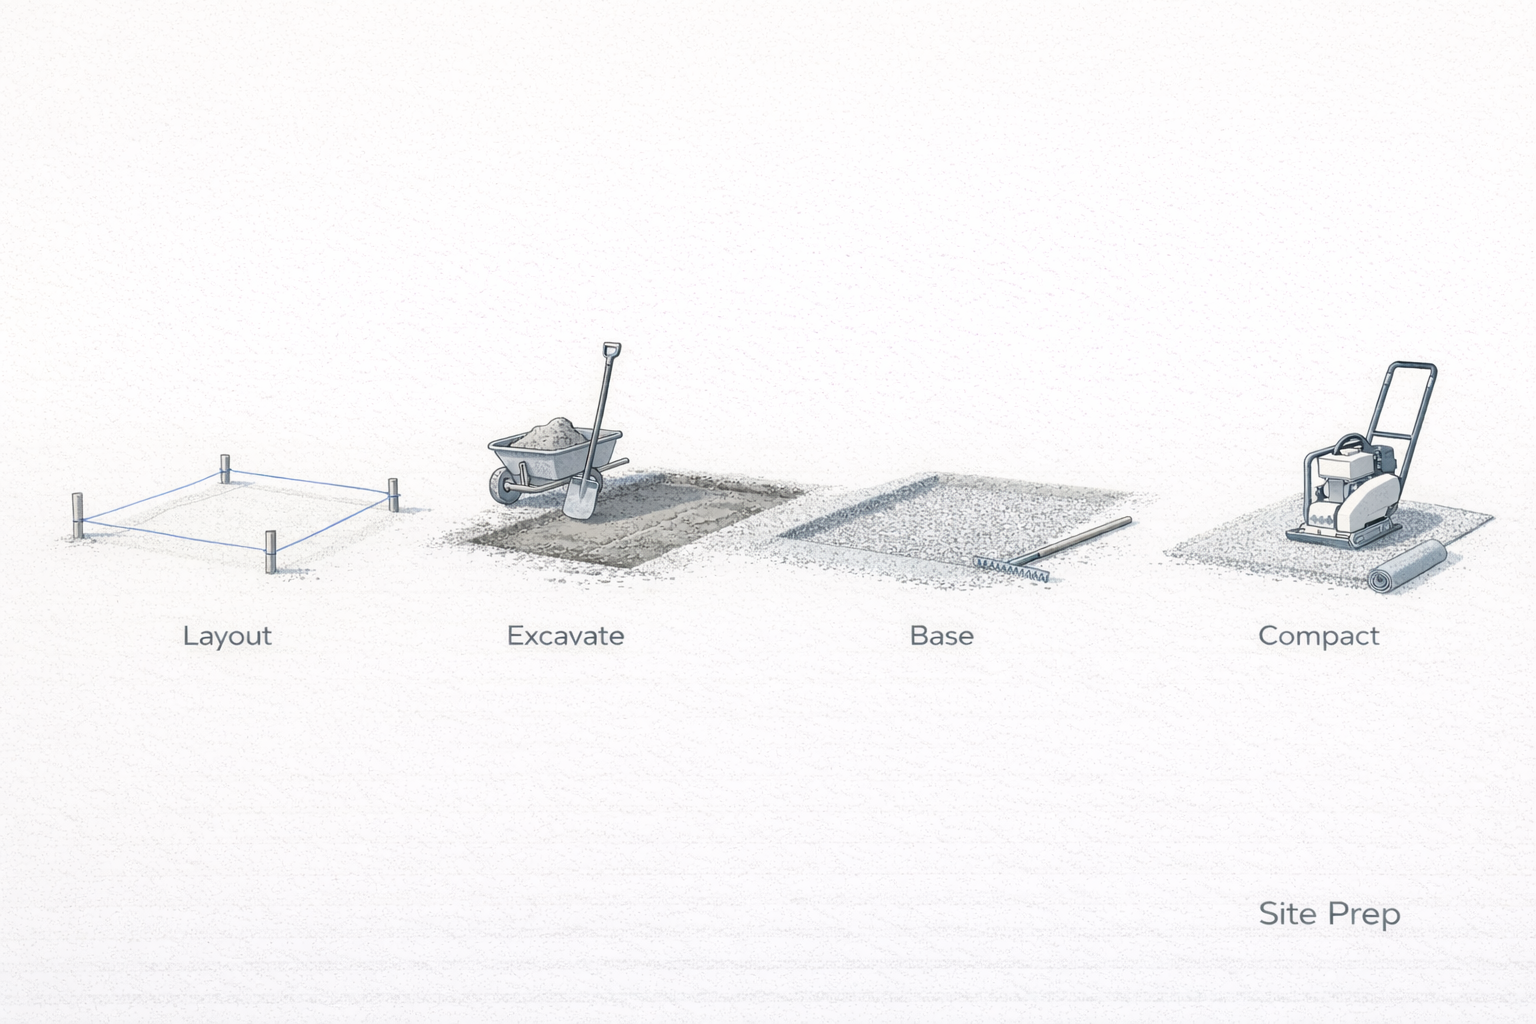
What happens beneath the concrete is just as important as the concrete itself. If you build a pad on topsoil, loose fill, or wet clay without a plan, the pad will eventually tell on you.
Step-by-step site prep (the real-world version)
1) Mark & square the layout
Use stakes and string. Square it with the 3-4-5 method (or check diagonals). Layout errors don’t get cheaper after the truck shows up.
2) Excavate to the right depth
Remove grass, roots, and organic soil. Pads fail when they’re poured on compressible junk. Typical approach is gravel base + slab thickness, plus a bit of working room.
3) Read your soil (quick and dirty)
- Clay: holds water, moves with moisture, hates freeze-thaw. You usually need more base thickness and better drainage.
- Sand/loam: drains better, compacts easier, generally friendlier.
If you’re on questionable soil, a geotextile separator under the gravel can help keep fines from pumping up into the base. If you’re deep into clay problems, it’s worth reading how concrete slabs get leveled after settlement just so you understand the failure modes.
Building a strong gravel base (this is the make-or-break step)

1) Use the right gravel
Use angular crushed stone or road base that compacts and locks together. Avoid round pea gravel under slabs; it moves.
2) Compact in lifts
Compact in thin layers. The “dump it once and tamp the top” approach is how corners settle later.
3) Plan drainage now
Give the pad a slight slope so water sheds away from structures. Flat looks neat on day one; flat becomes a puddle problem on day 30.
Formwork, reinforcement & pouring
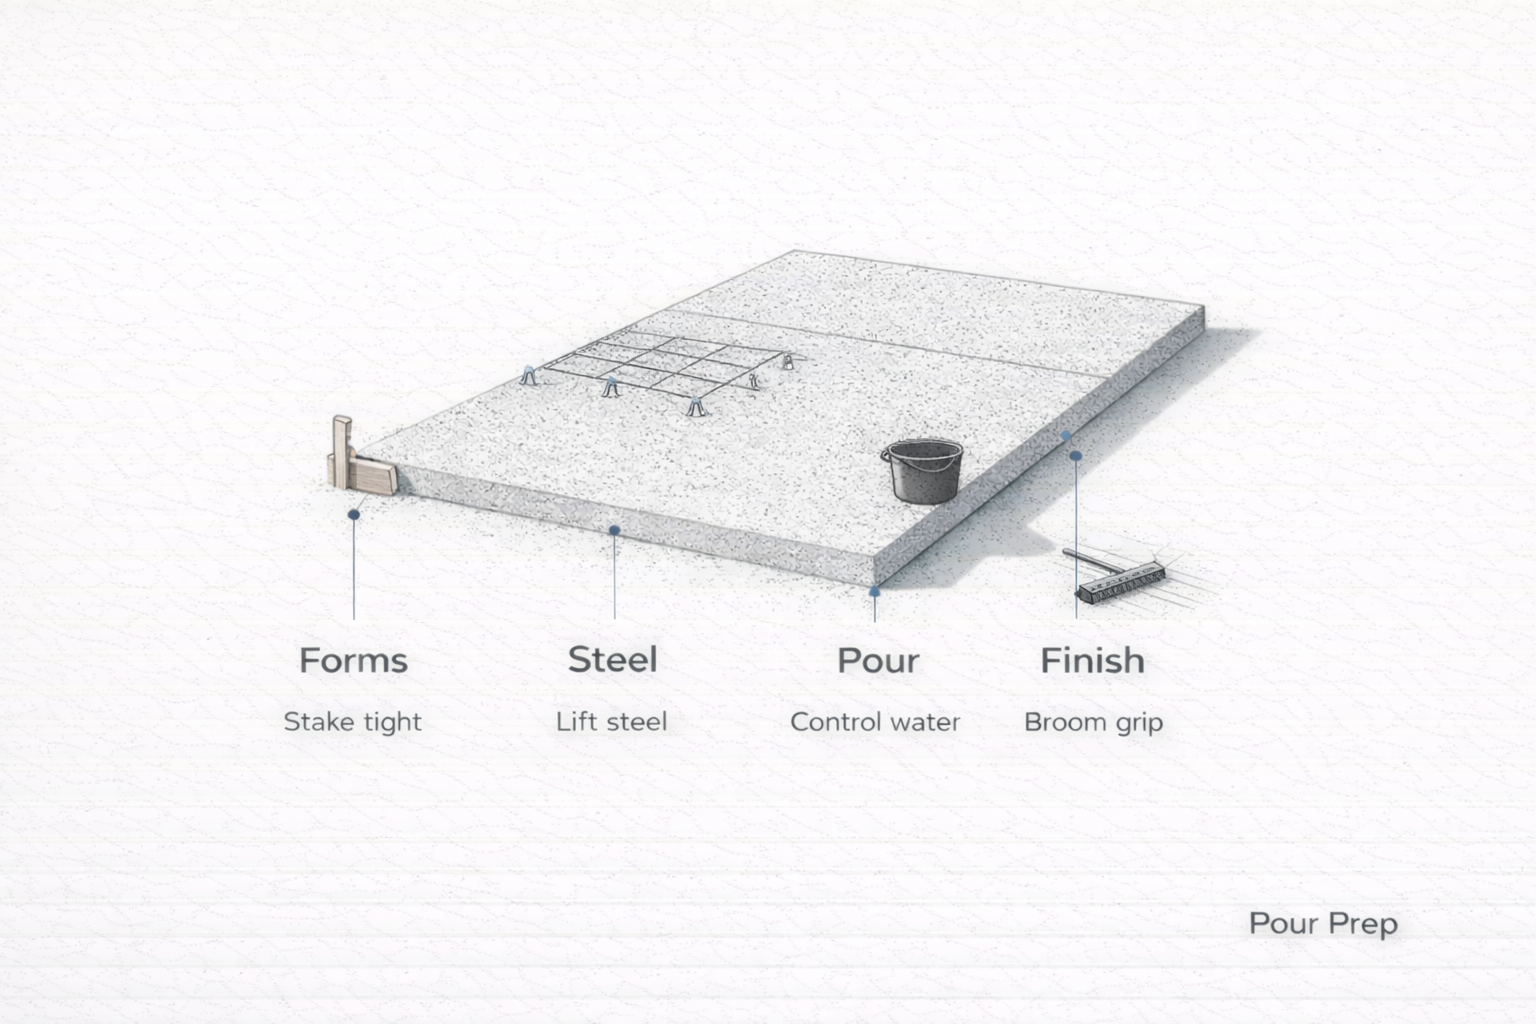
Formwork (tight forms = flat slab)
- Stake forms every 2–3 feet and brace corners.
- Check level and slope with a long straightedge and level. Don’t trust the yard to be “pretty close.”
Reinforcement setup (the mistake everyone makes once)
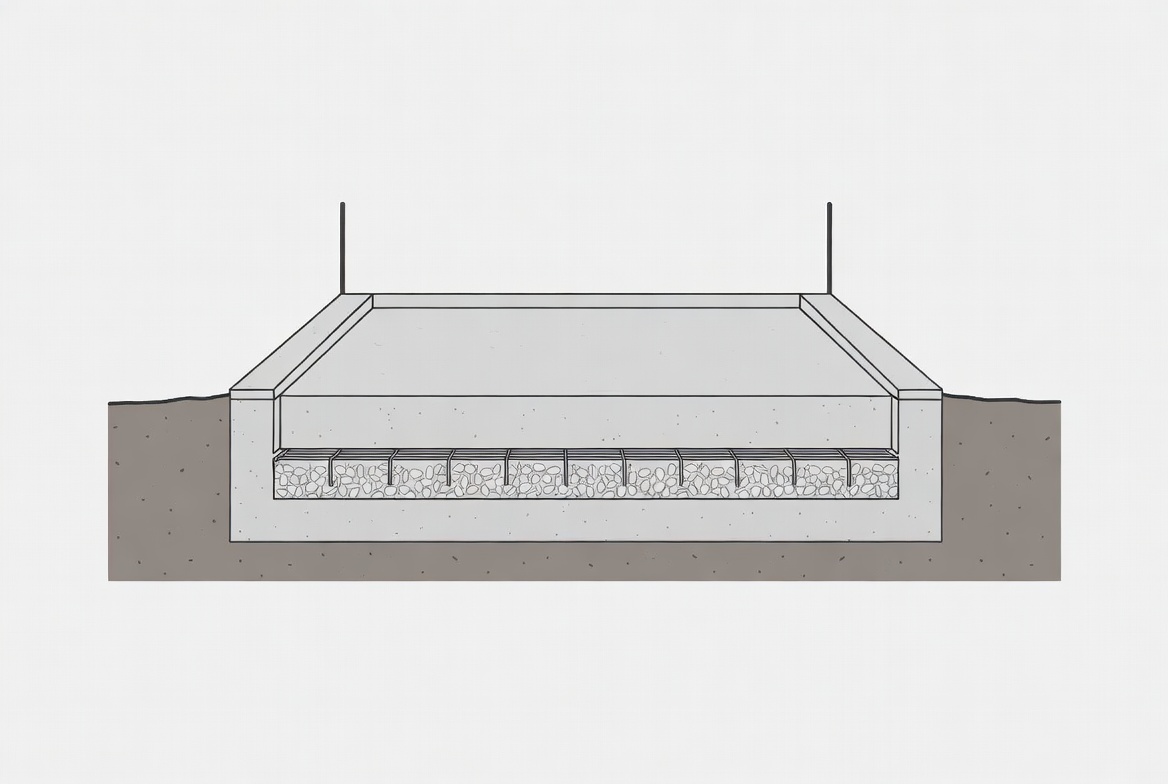
- Mesh: overlap sections and tie. Hold it up in the slab while placing concrete.
- Rebar: tie a grid, set on chairs/blocks so steel ends up near mid-depth.
If your reinforcement is sitting on the gravel, you mostly paid for decoration.
The pour (don’t ruin the mix)
- Bag mix: fine for small pads, but measure water. Too wet is the classic DIY strength killer.
- Ready-mix: worth it once volume gets real. Order what you need, have access clear, and have enough hands to place and finish.
Finishing (traction beats pretty)
- Broom finish: best default for exterior pads; less slip risk.
- Trowel finish: can be slick outdoors; better for sheltered/indoor use.
Joints
(how you control where it cracks)
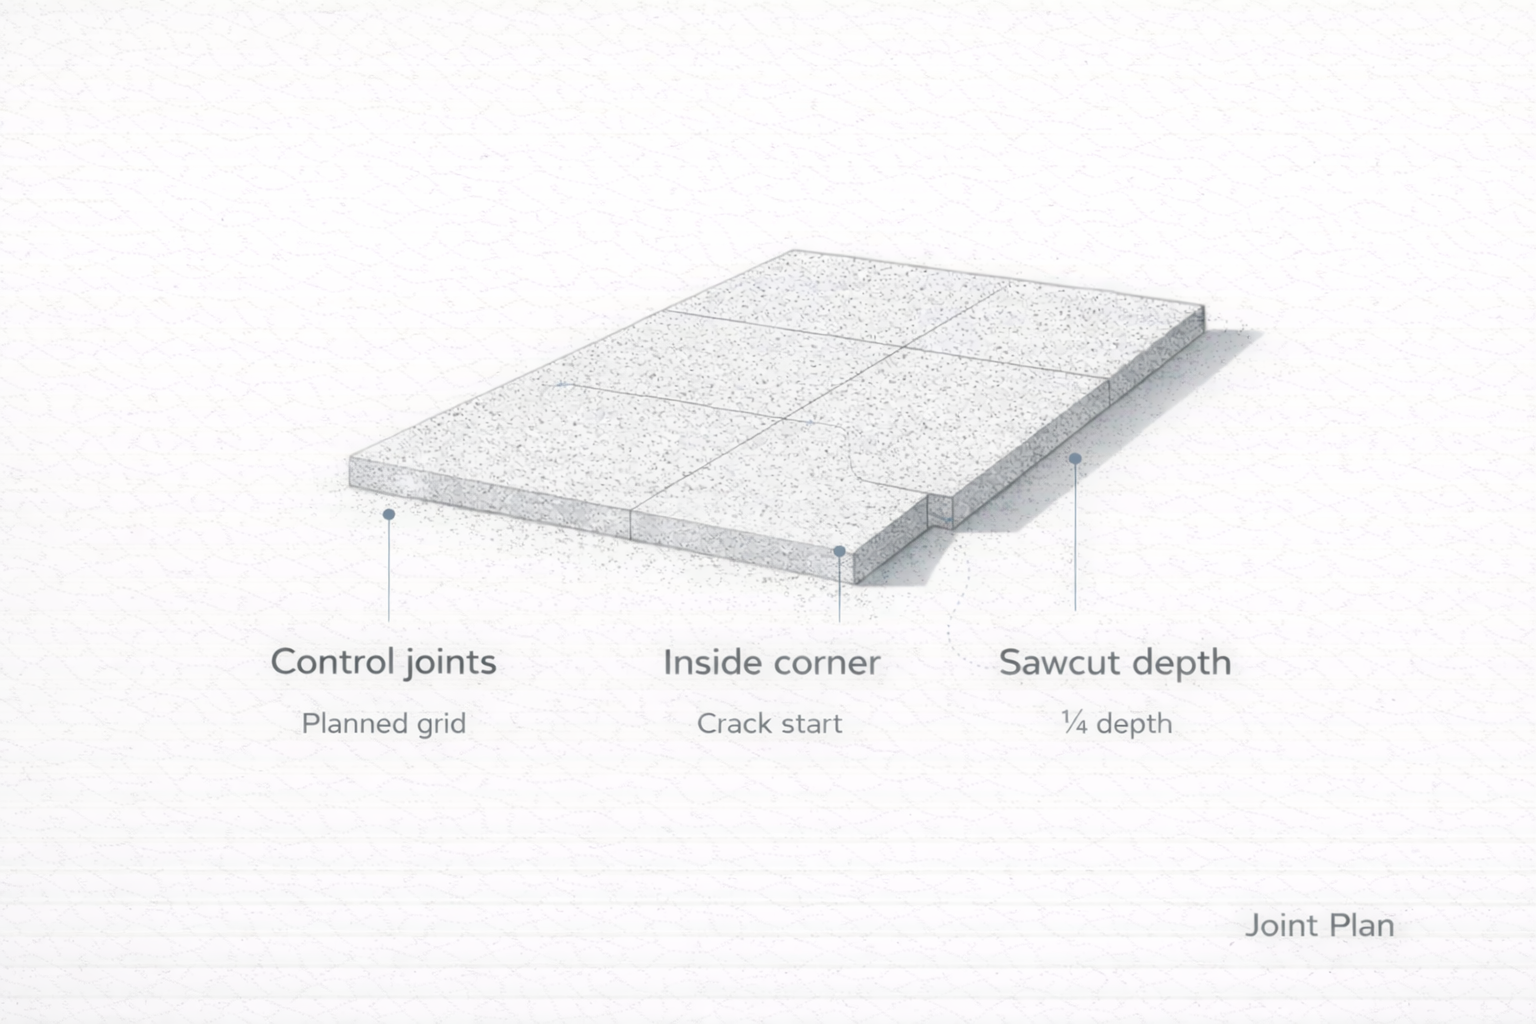
Concrete cracks. The goal is to tell it where to crack so it doesn’t choose the ugliest path through the middle.
- Control joints: cut or tool them in a planned grid.
- Re-entrant corners: inside corners (like around post cutouts) love to crack. Plan joints to “catch” those stress points.
- Joint depth: a good rule is around 1/4 the slab thickness for saw-cut joints.
Curing, finishing & maintenance
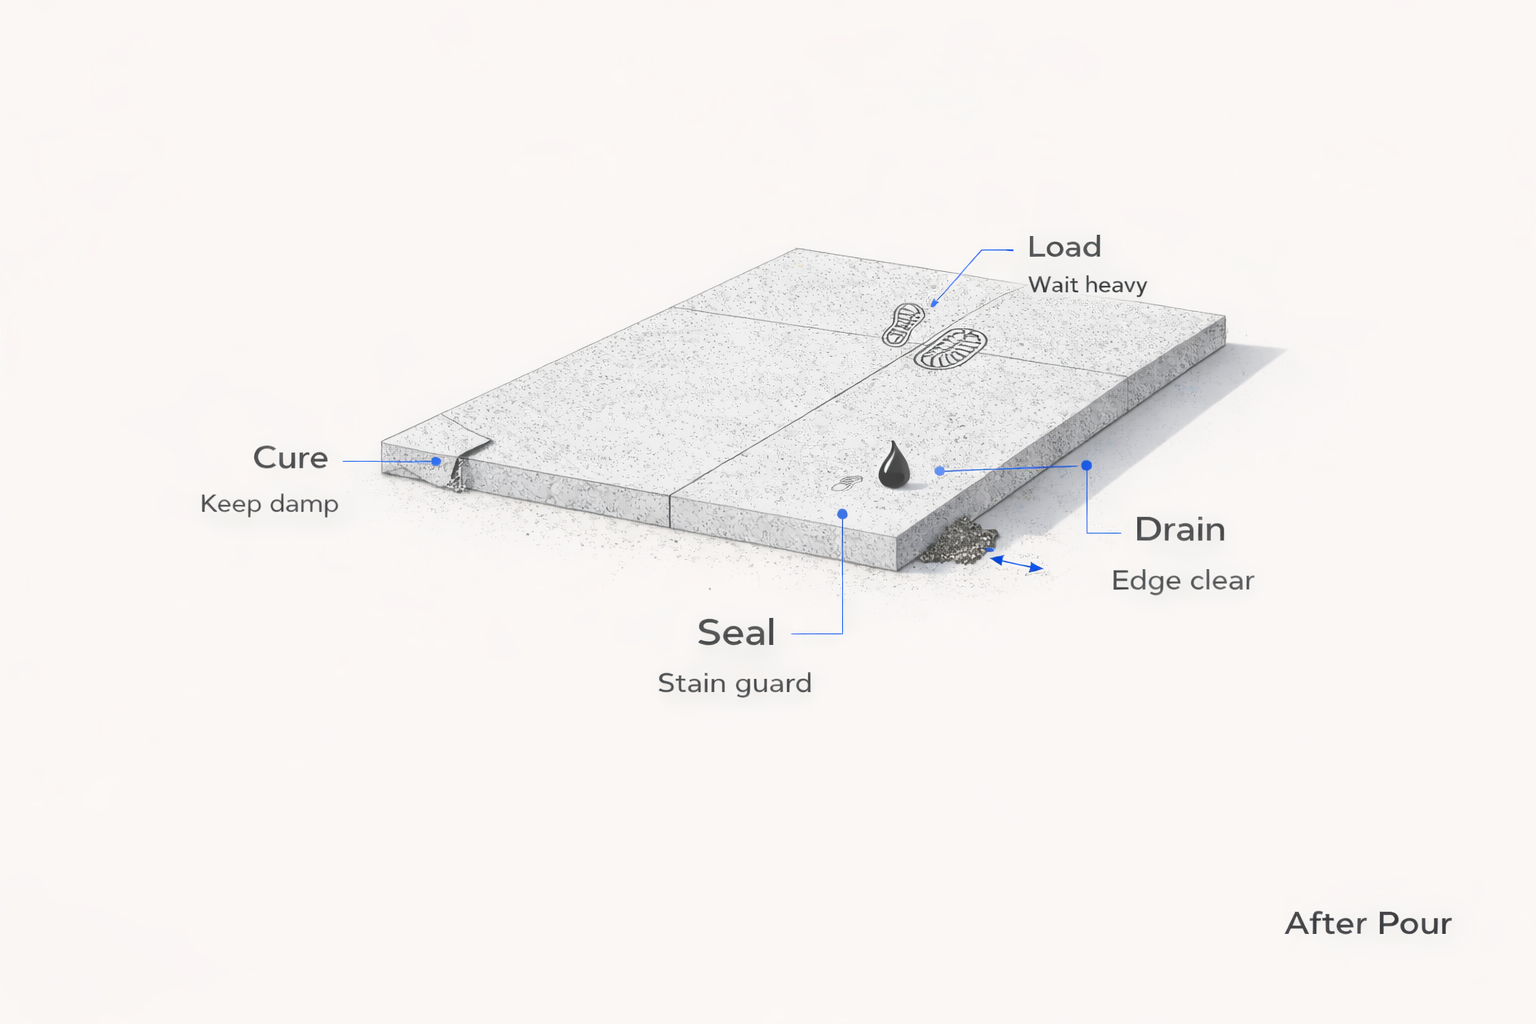
Curing (the part everyone wants to skip)
- Keep it from drying out fast. That’s when shrinkage cracking gets aggressive.
- Protect it from sun and wind if possible (plastic sheeting, curing blankets, misting).
- Plan load timing: walking is soon; heavy loads are later. Don’t park on green concrete.
Maintenance
- Sealer: helps with stains and freeze-thaw durability (especially where de-icers are used).
- Keep drainage working: avoid soil building up against edges and trapping water.
Common problems & repairs
Crack types (what they usually mean)
- Hairline shrinkage cracks
- Often cosmetic. Seal if you’re worried about water intrusion or freeze-thaw.
- Settlement cracks (one side drops)
- Usually base/soil issues. If the pad is rocking or sloping, you’re in leveling territory.
- Read how slab repairs actually work before you pay for a “quick patch.”
Leveling concerns
- Frost heave: shows up as lifted edges or a pad that changes seasonally.
- Roots: can lift corners and create localized cracking.
Repair techniques (what’s real)
- Crack sealing: good for keeping water out, not for fixing movement.
- Patch/skim: cosmetic only unless the base problem is solved.
- Slab jacking: can re-level a settled pad, but it depends on access and how bad the soil is.
Costs & budgeting
(so you can sanity-check quotes)
Costs swing wildly by region, access, thickness, and whether you’re ordering ready-mix. The useful way to budget is by the decisions that drive cost:
- Thickness: 4" vs 6" is a big material jump.
- Base work: excavation + gravel + compaction is often where “cheap quotes” quietly cut corners.
- Reinforcement: rebar + chairs + tying adds labor.
- Finish: broom is quick; decorative finishes cost time and skill.
For more detail, see our guide: Estimating Concrete Slabs: How Much Concrete You Really Need.
Buying concrete for a pad in the U.S.
Minimum Loads, Fees, and Timing
Most people say “cement,” but what you’re actually ordering for a pad is concrete (ready-mix or bag mix).
The small “secrets” that keep your quote from going sideways
Concrete pricing in the U.S. is less about the raw yard price and more about the stuff nobody mentions until the truck is already scheduled. Minimum loads. Time limits. Access. Washout. All the friction.
Ask these three questions before you talk about price per yard
- What’s your minimum load and short-load fee? Small pours are where the fees quietly take over.
- How much on-site time is included? Ask what starts the clock (arrival, first chute discharge, or ticket time).
- What’s your cancellation or reschedule policy? Weather is real. Crew delays are real. That fee can hurt.
Don’t order “exact.” Order for the site you actually have
Plants can’t deliver “2.37 yards” like a deli order. You’ll get rounded batching, slumps vary, and your forms/base aren’t perfect. If you’re truly on the edge, being short is the expensive failure.
- For clean, simple pads: a realistic buffer is often 7–10%.
- For thickened edges, messy shapes, or wheelbarrow placement: assume 10–15%.
Know when a volumetric truck beats a ready-mix ticket
For small to medium pours, the cheapest “yard” is sometimes the one you don’t over-order. Volumetric (mix-on-site) trucks can be a better fit when:
- Your quantity is uncertain (odd shapes, thickened edges, base not perfectly flat).
- Access is slow and you’re worried about timing.
- You want to pay for what you actually place, not what you guessed.
Slump talk: don’t let “make it wetter” be the default fix
A lot of jobsite drama comes from trying to solve placement problems with extra water. It feels helpful, then you get shrinkage and surface issues later. If you need workability, talk in terms of:
- The placement method (chute vs buggy vs pump)
- Finish expectations (broom vs steel trowel)
- Admixtures (if you need them) rather than watering the mix until it behaves
Access is pricing
In the U.S., concrete delivery is priced like a logistics service. If the truck can’t get close, your “cheap” pour becomes a labor project.
- Measure wheelbarrow distance and count the trips before you commit.
- If you need a pump, price it early. Don’t treat it as a last-minute add-on.
- Confirm where washout goes. Some sites get rejected on that alone.
Timing: schedule like you only get one clean window (because you do)
Concrete waits for nobody. The cleanest pours happen when the site is ready before the truck is even dispatched: base tight, forms braced, tools staged, helpers assigned. If you’re “still setting forms when the truck arrives,” you’ll pay for it twice: once in finishing quality, once in time charges.
Sustainability notes
(if you care about carbon, not just cracking)
For small pads, the biggest sustainability win is often durability: build it once, don’t replace it in five years. If you’re exploring lower-carbon mixes or alternatives, start here: sustainable concrete alternatives (cost, carbon, strength). If you want to go deeper, you can compare specific options like LC3 cement explained or geopolymer concrete vs cement.
Codes, permits & official guidance
(use this before you pour)
If the pad supports a structure, carries vehicles, or sits in a frost-prone region, you may be in permit territory. Don’t guess. Check the local building department and then confirm material requirements with standards and manufacturer specs.
- International Code Council (model codes): ICCsafe.org
- American Concrete Institute (standards & guidance): concrete.org
- Portland Cement Association (concrete basics): cement.org
- Ontario-ready guidance (if you’re building in Ontario): RMCAO (Ready Mixed Concrete Association of Ontario)
Cindercrete “Round Slab” Pads

What It Is, When It Makes Sense, and When It’s a Trap
This term gets used loosely. Sometimes people mean lightweight cinder-aggregate concrete (older-school “cinder concrete”). Sometimes they mean a round pad made from cinder blocks + a topping. Same nickname. Different performance.
Here’s the main point: cindercrete is usually about weight and insulation, not high strength or abrasion resistance. If your pad needs to take point loads, frequent wetting, freeze-thaw, or anything that can’t tolerate movement, you don’t pick it because it’s “easy.”
When a round cindercrete pad can be fine
- You’re building a small, non-structural pad where weight matters (think: topsoil over questionable fill, limited access, or you’re trying not to overload something below).
- It’s protected from constant water and not living in splash zone / de-icing salt territory.
- The “round” shape is doing a real job (firepit zone, small tank base, post base layout) and you’re still using a proper compacted base.
When it’s the wrong move
- You need a pad that behaves like a real slab: hot tub, vehicle load, generator, heavy equipment, outdoor steps.
- You’re in freeze-thaw and the base/drainage isn’t dialed in. Lightweight mixes don’t magically fix frost heave.
- Someone is using “cindercrete” as a way to skip steel, skip base, skip joints, and still expect a perfect slab.
The part people miss: round doesn’t stop cracking
A circle reduces sharp corners, so you can reduce stress concentrations at corners. Good. But shrinkage still happens, and the base can still move. If you want a round pad to stay clean, your real levers are still the same: base compaction, drainage, thickness, and curing.
If you’re tempted by cindercrete because you’re trying to keep the pad cheap, there are usually better “cheap but defensible” options (proper base + normal concrete) than betting on an odd mix you can’t control.
Books
(optional, but these save mistakes)
FIELD PICK: Why I recommend it: if you want one reference that explains why concrete cracks and how pros prevent it (without fluffy DIY shortcuts). Working with Concrete (For Pros By Pros)
MUST READ: Why I recommend it: it’s the most readable way to understand load paths and failure, which is the difference between “solid pad” and “mystery cracking.” Structures: Or Why Things Don’t Fall Down
FAQ
How deep should the gravel base be?
For light pads, a few inches of compacted base is common. For heavier loads or poor soils, go thicker and focus on compaction in lifts.
Can I pour concrete directly on dirt?
Not a good idea. Dirt holds moisture, shifts, and turns into settlement cracks later. A compacted gravel base is the normal fix.
Do I always need rebar?
No. Rebar starts making sense when loads are heavy, concentrated, or your soil is prone to movement. For light pads, base quality and joints usually matter more.
How long before I can put weight on it?
Walking happens sooner than loading. Heavy loads should wait until the slab gains real strength. When in doubt, wait longer.
Should I seal an outdoor pad?
If you get freeze-thaw, de-icers, or staining issues, sealing is a good maintenance step.
Final thoughts
A concrete pad lasts when you treat it like a small foundation: remove organics, build a real base, compact it properly, control drainage, place reinforcement correctly (when needed), cut joints on purpose, and cure like you actually want strength.
If you’re comparing alternatives for patios and small structures, it’s worth skimming a real-world look at concrete pad alternatives before you commit to a pour.