
You cannot buy a dozen old kitchens just to study how they age. So we did the next best thing: we started helping people we know update their older kitchens on a tight budget, doing the planning and the hands-on work, in exchange for permission to document the whole thing honestly. The deal was simple. We kept it practical, and if someone wanted upgrades beyond the plan, they paid for the extras.
Not every project stayed on target. Some grew, some owners changed their minds, and some rooms needed hidden repairs before any paint or flooring made sense. That is renovation, and the house always pushes back.
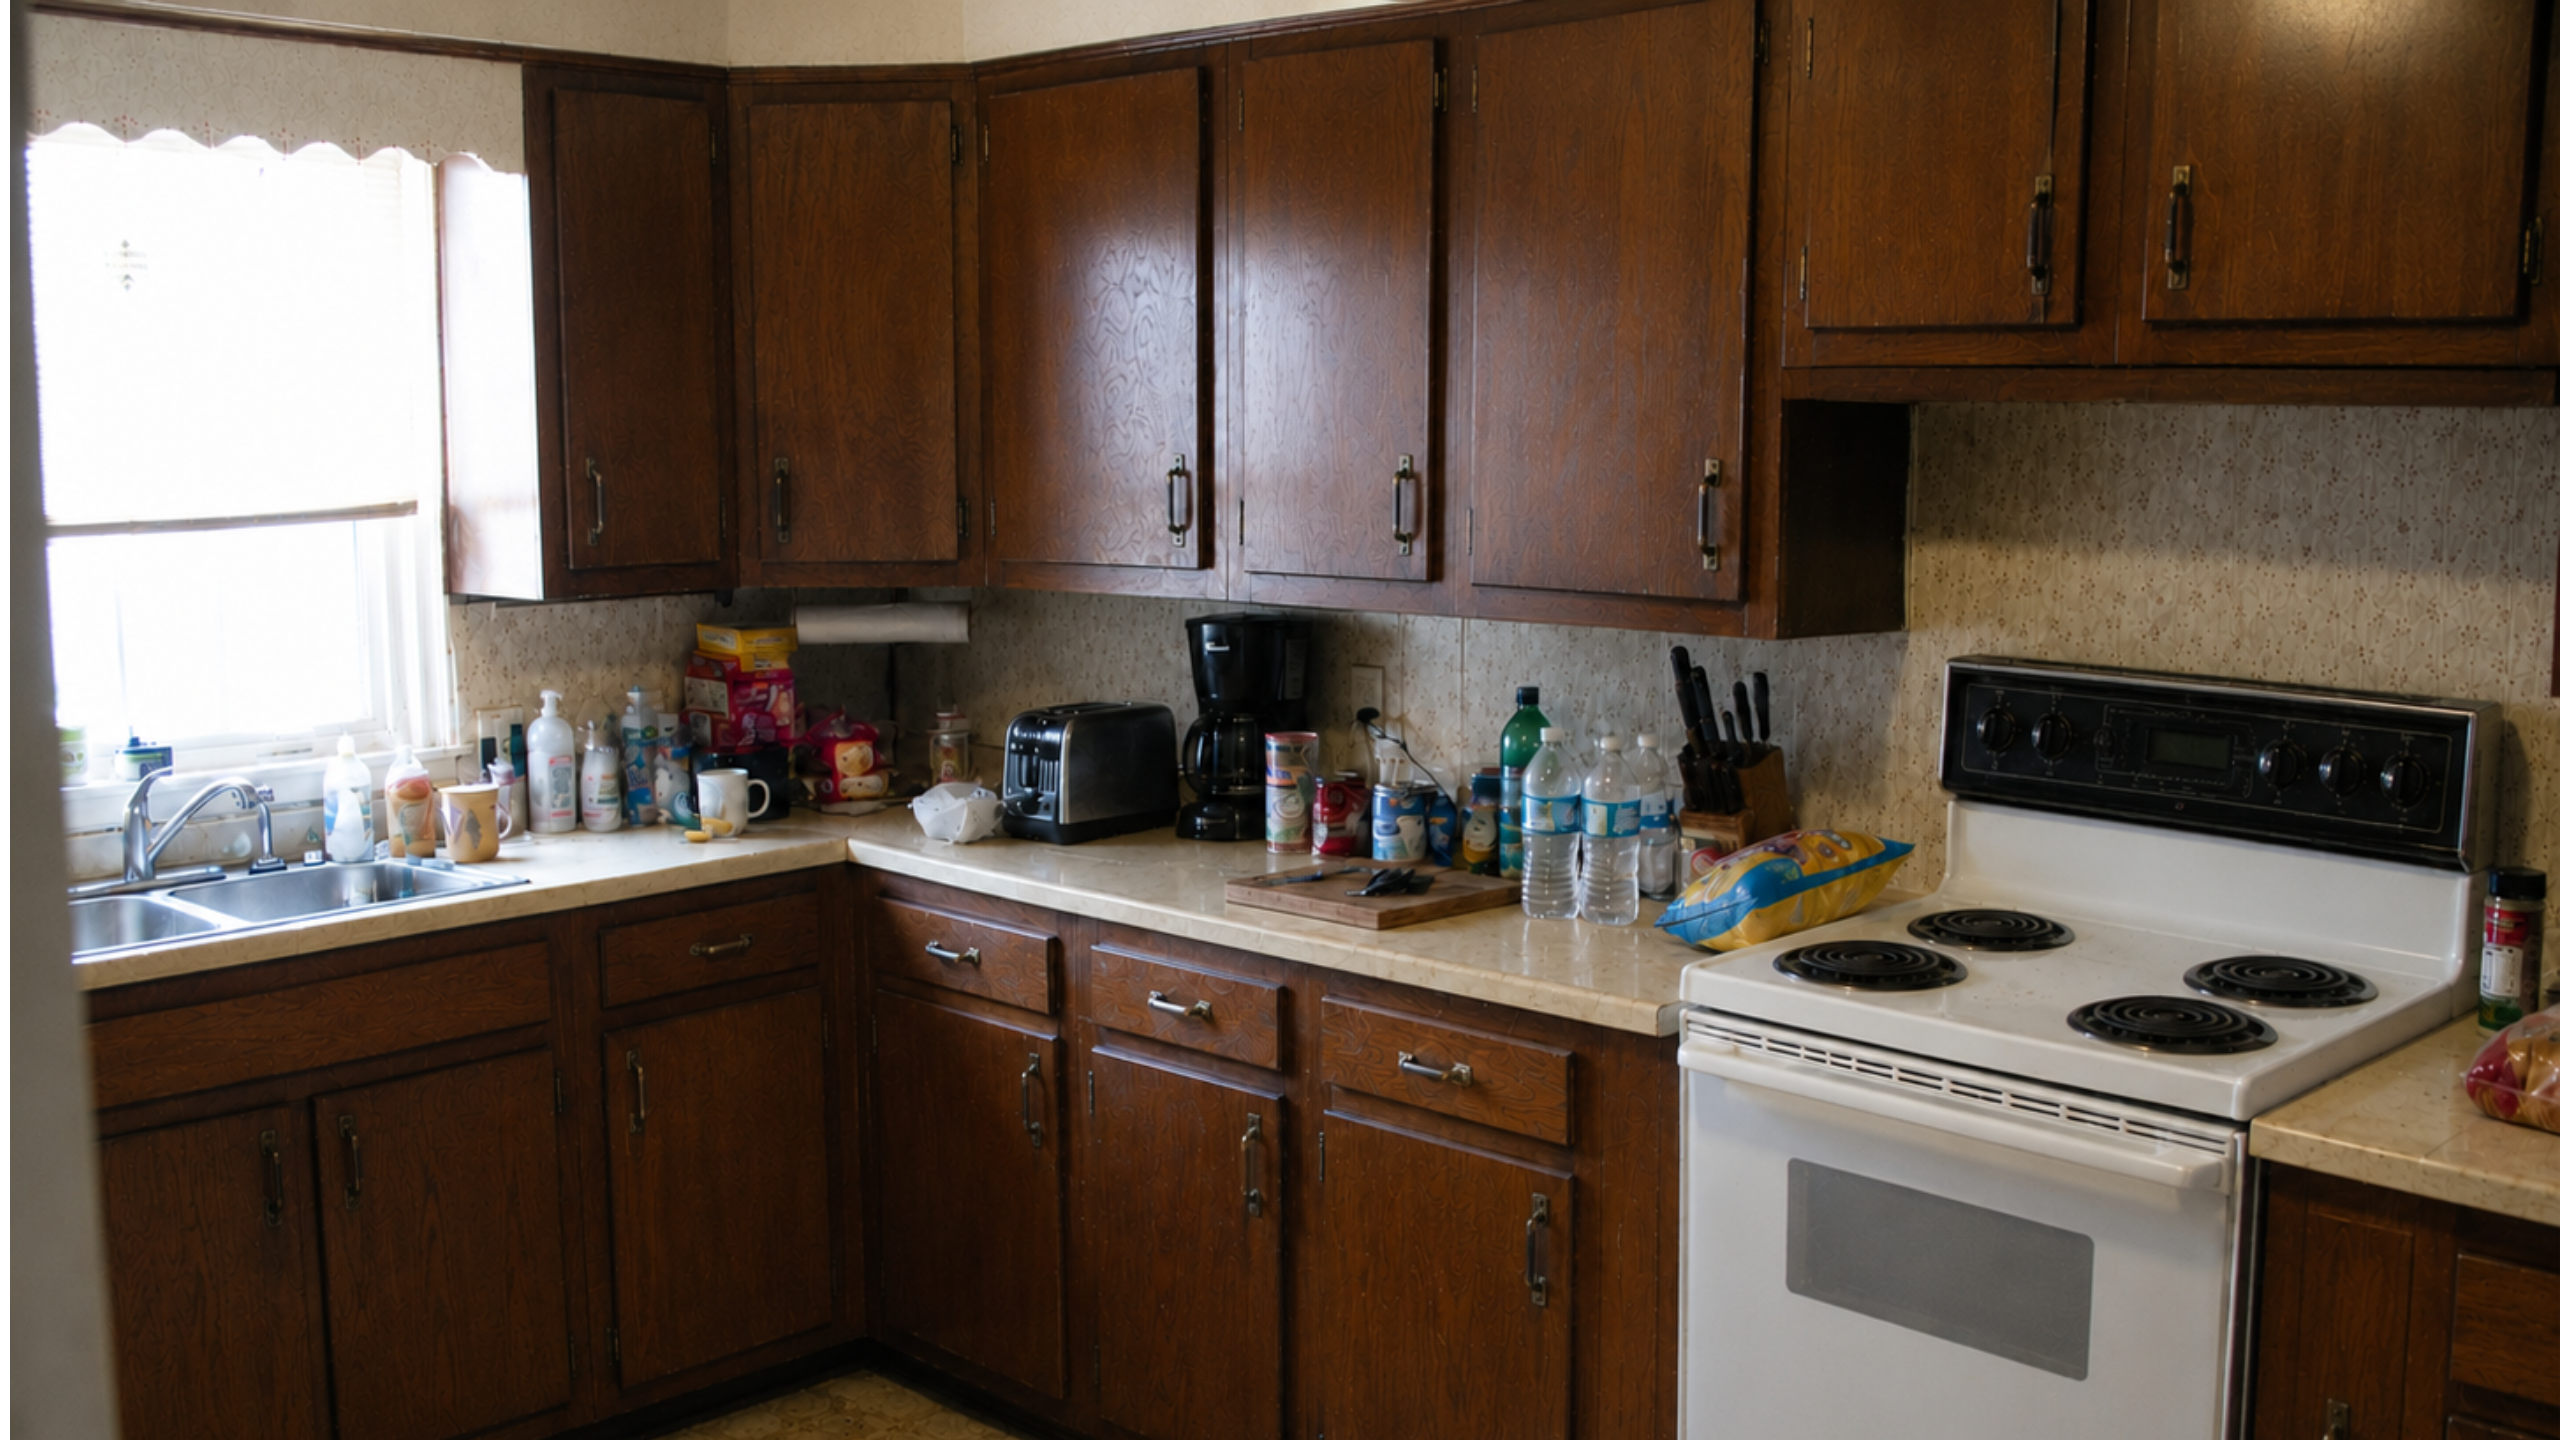
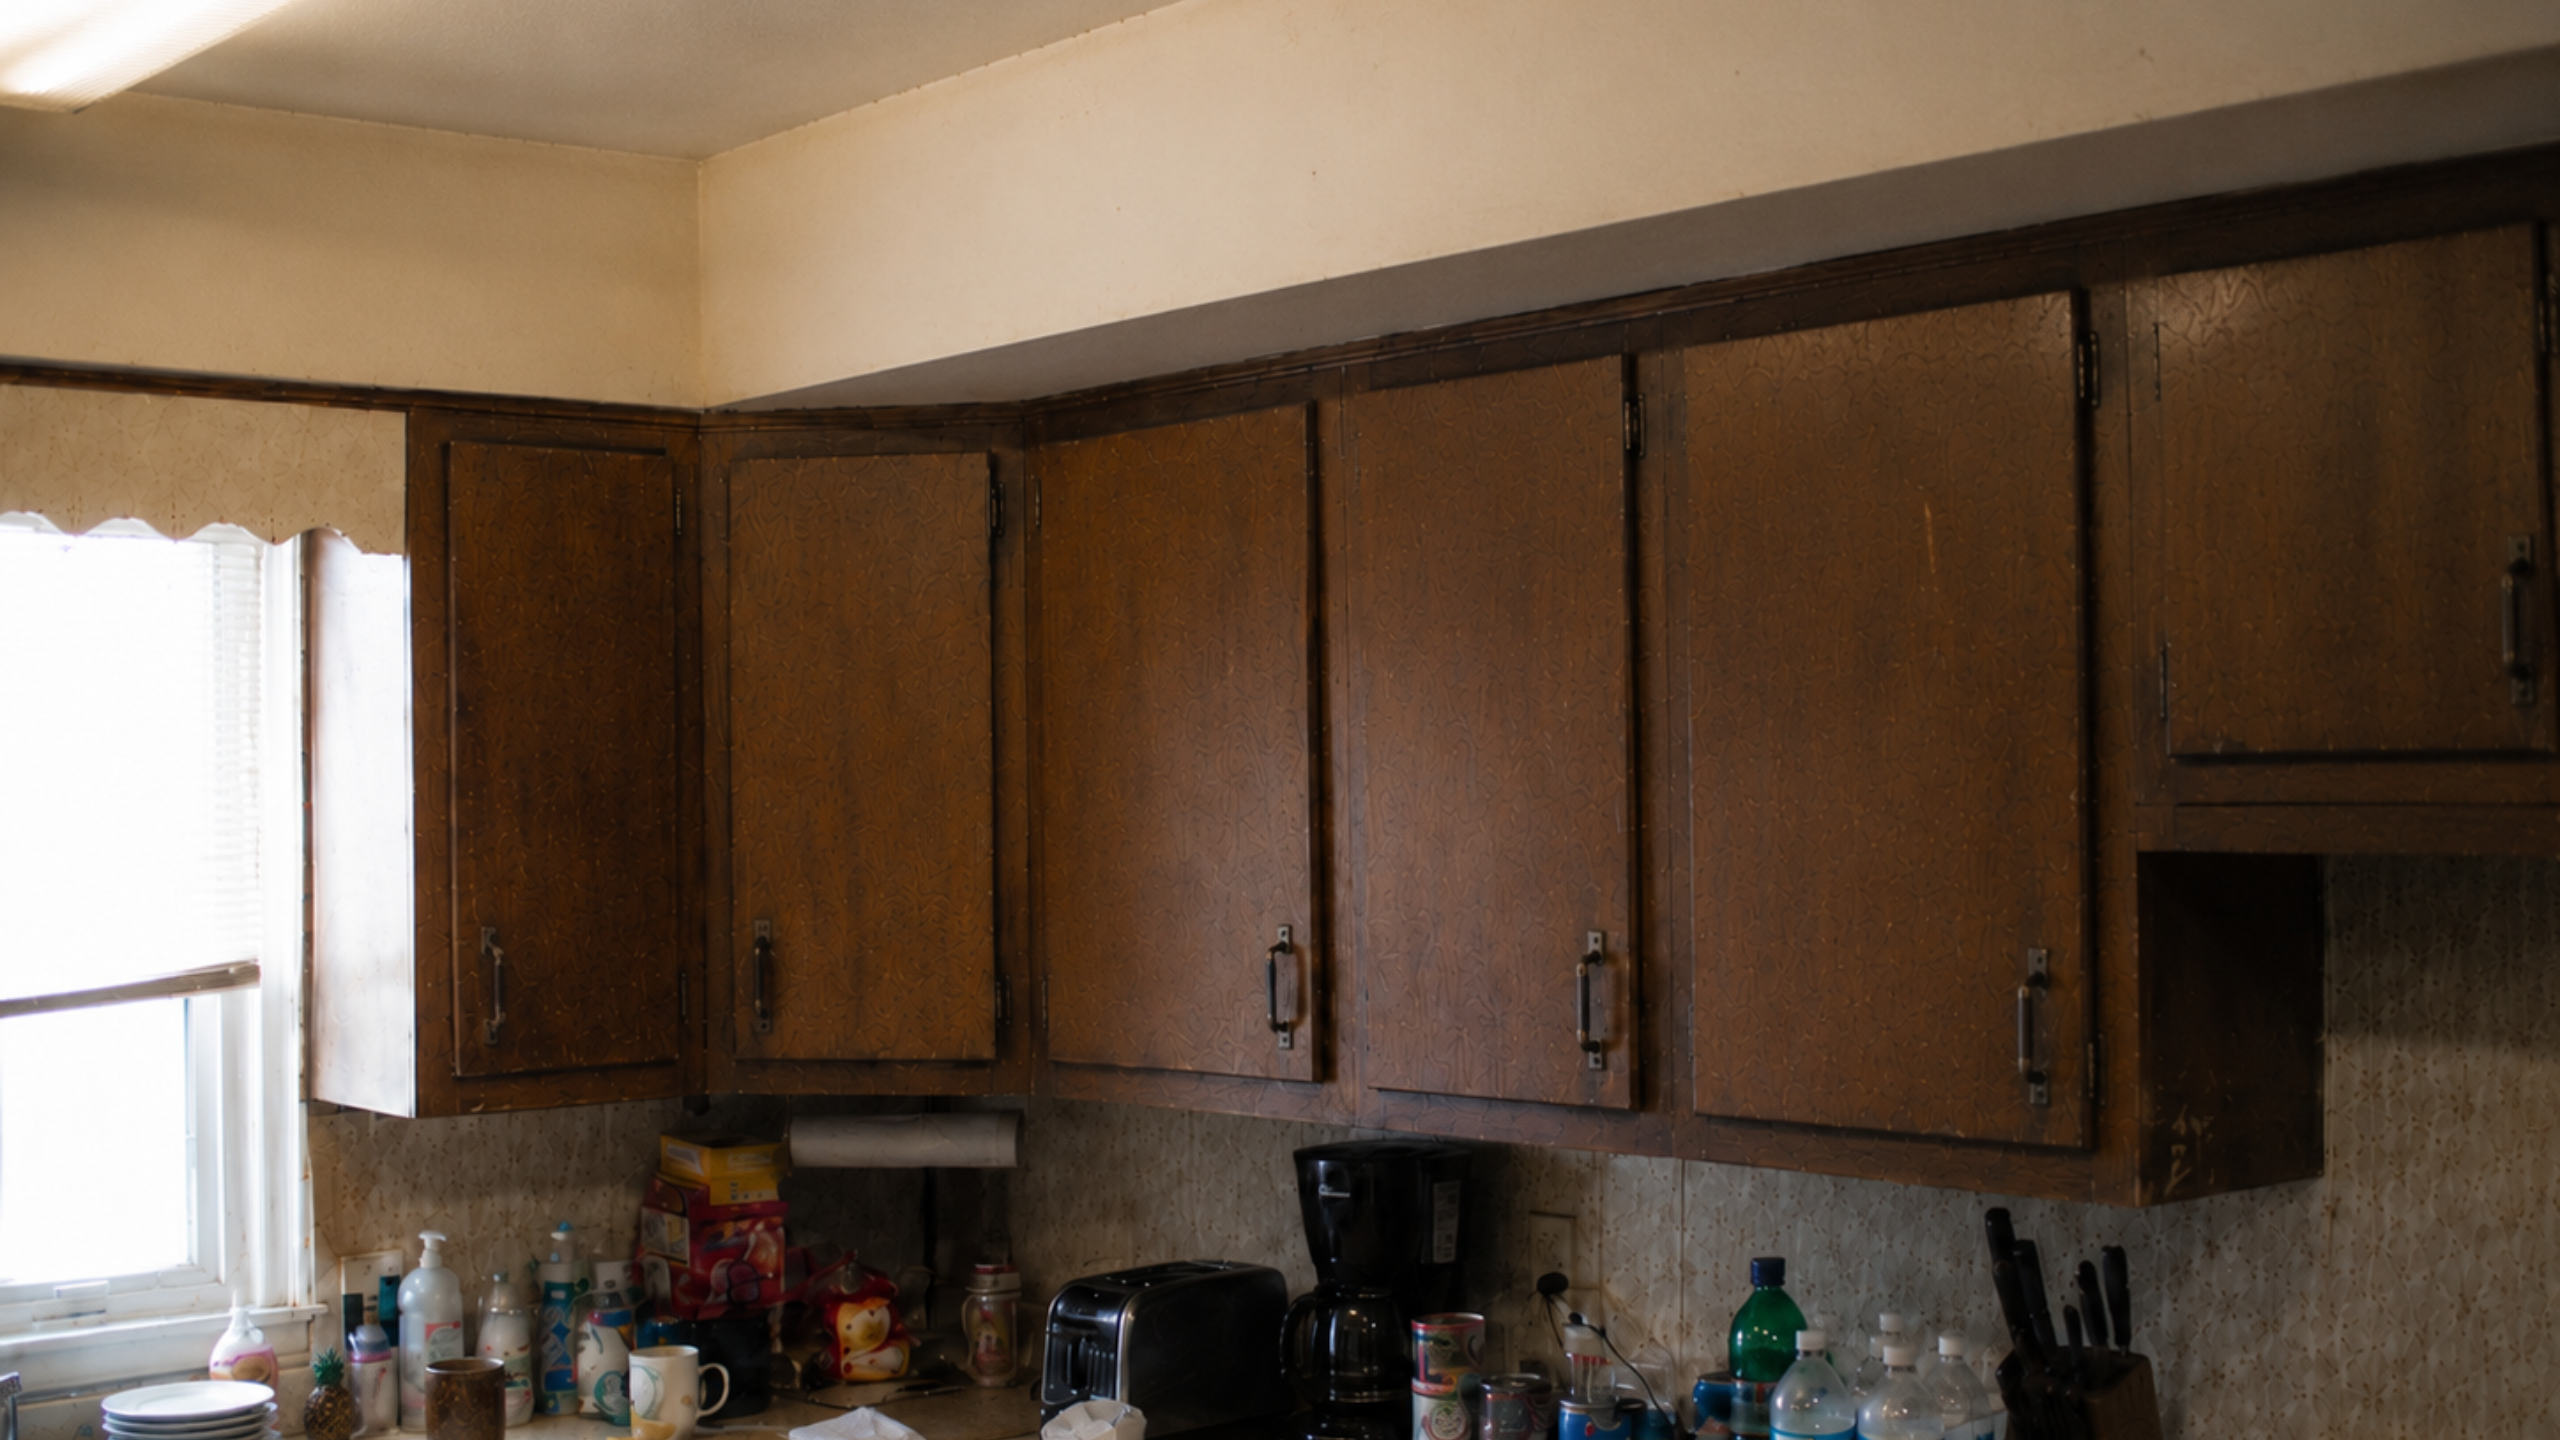
This 1970s kitchen was not a gut job. The layout stayed, the cabinet boxes stayed, the room stayed. The goal was to make it brighter, cleaner, and easier to use for well under $5,000, and to stay honest about where a budget like that runs out.
What Changed and What Did Not
The kitchen did not get a new layout. The sink stayed under the window, the stove stayed in the same zone, and the cabinet boxes, the soffit, and the old room shape all stayed put. That is the whole idea behind a budget update.
A budget update under $5,000 is a controlled edit, not a full kitchen renovation. Cabinet prep, paint, hardware, light, and one modest floor change can make a 1970s kitchen feel much better, but they do not fix a bad layout, failing boxes, unsafe wiring, hidden water damage, or a floor that should not be covered.
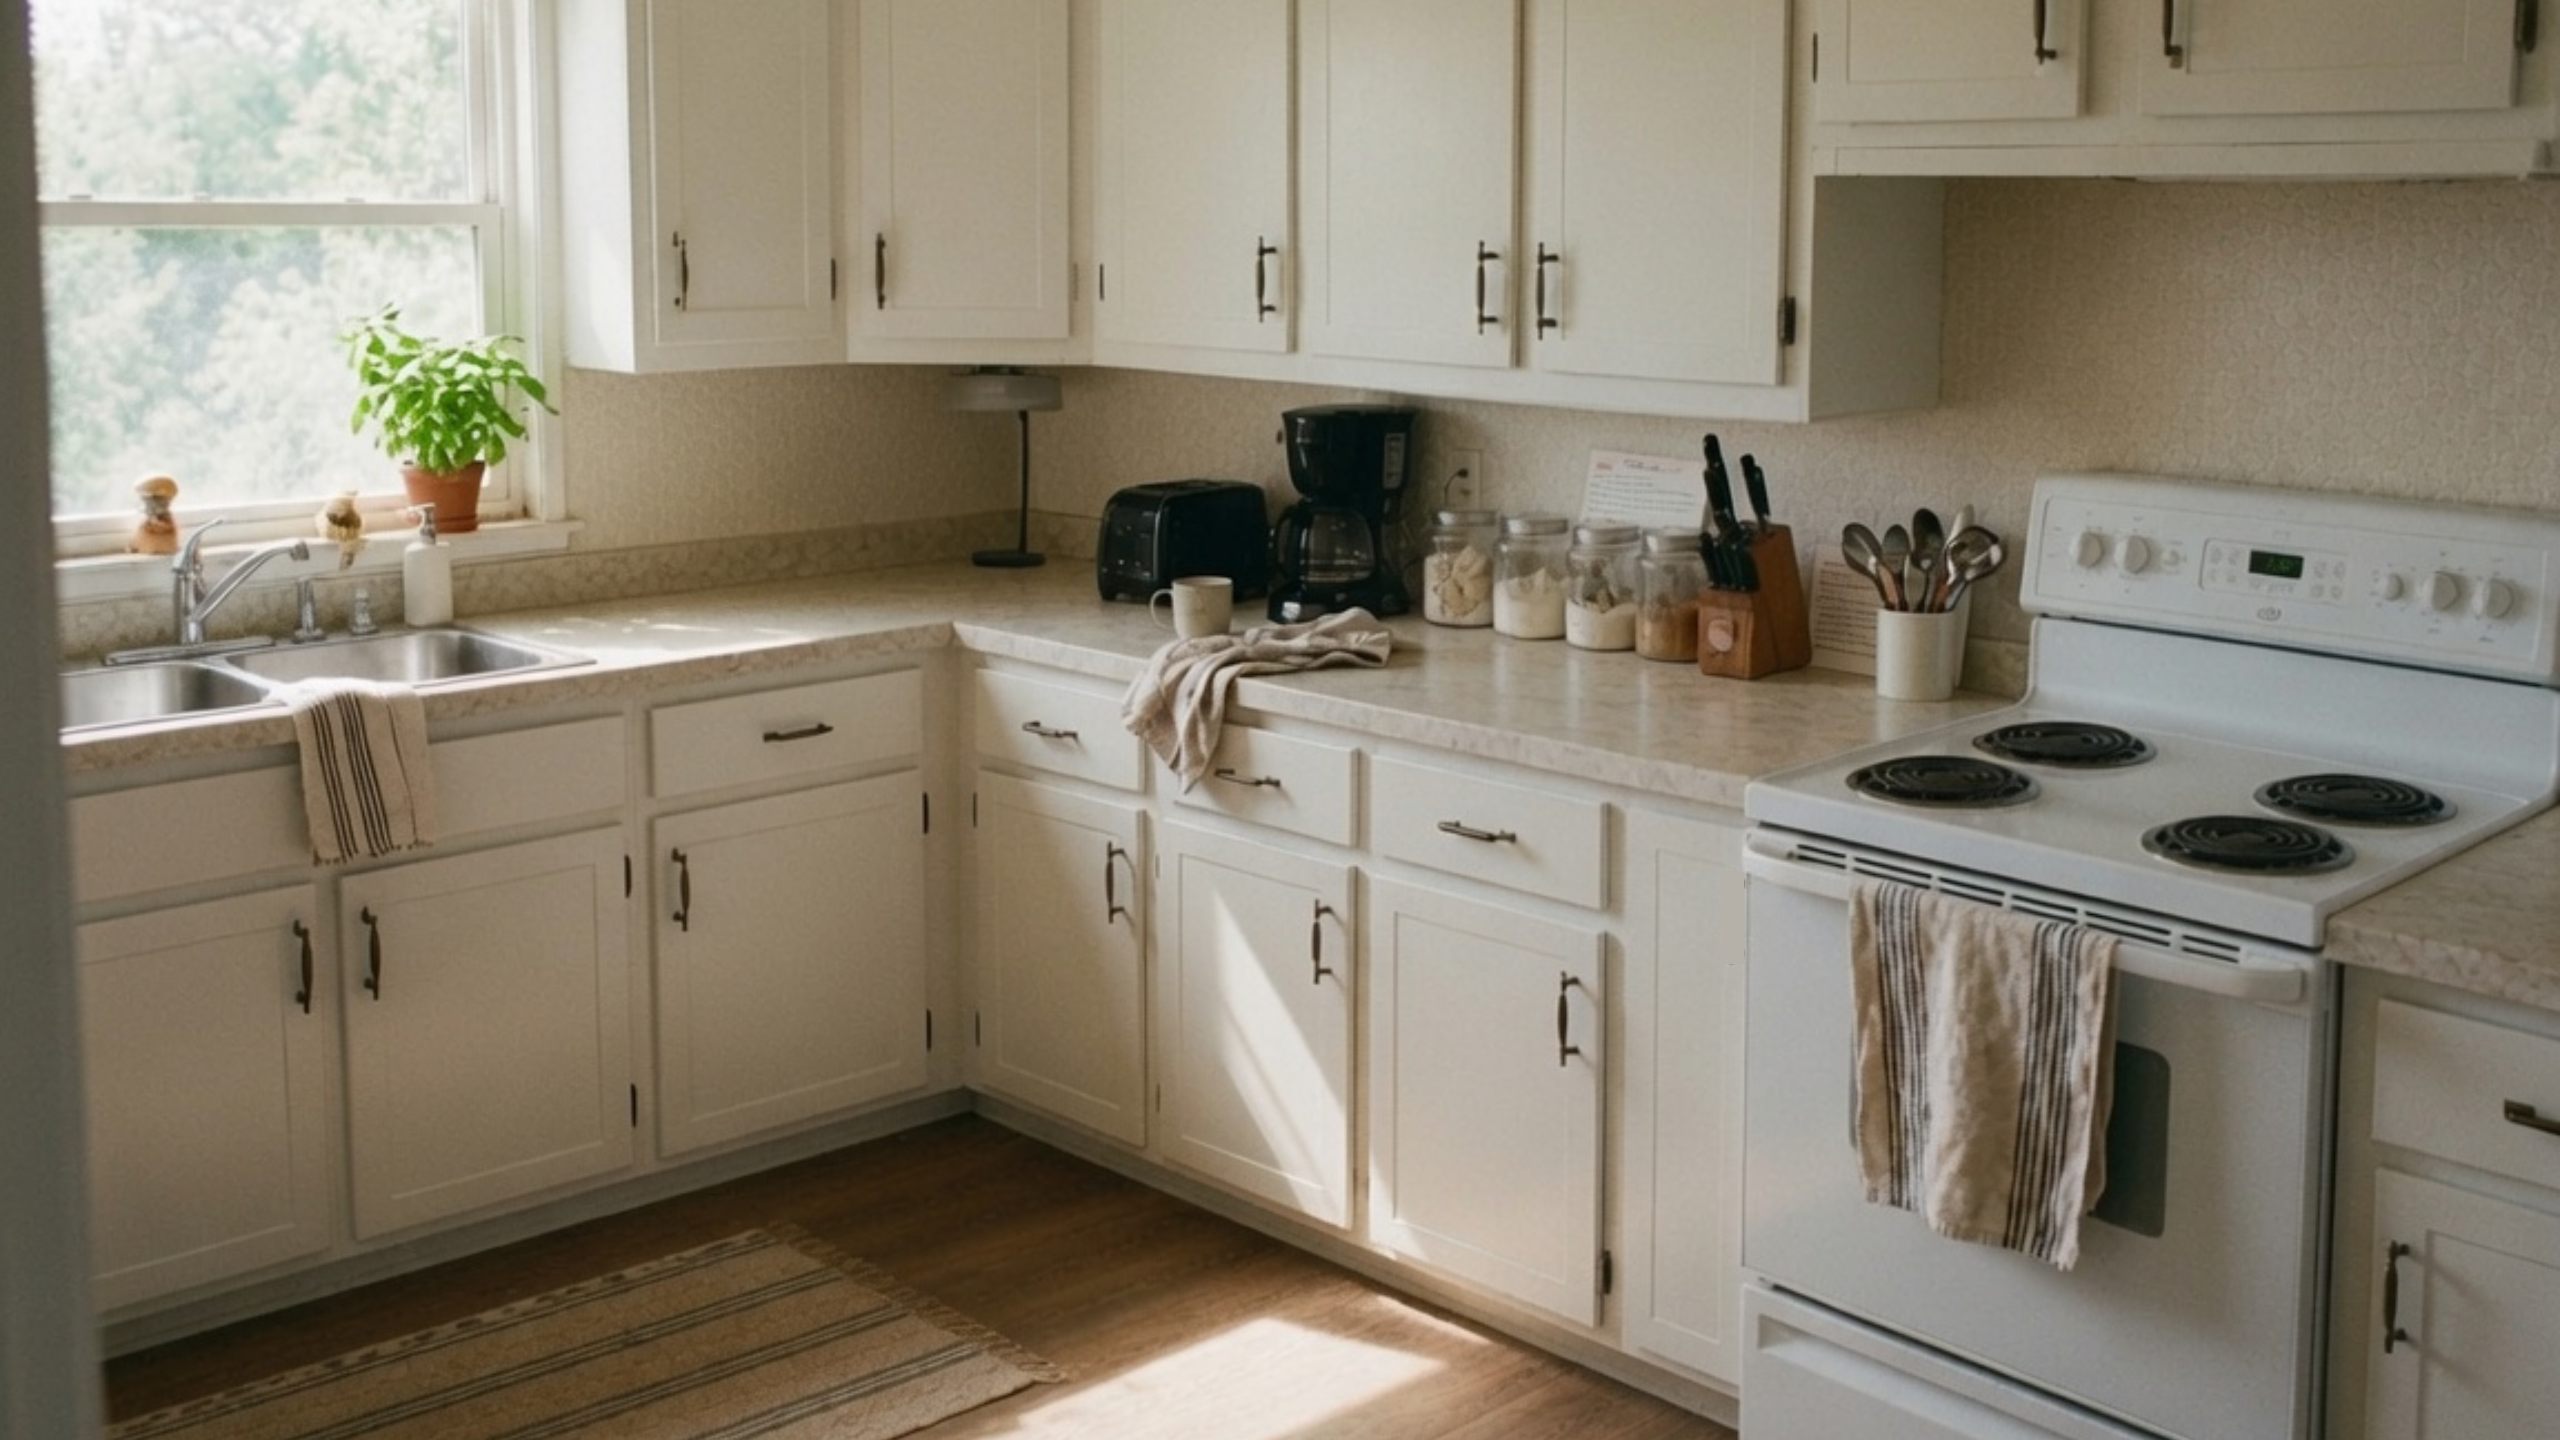
A good low-budget update does not pretend to be a luxury renovation. It fixes the parts that make the old room feel darker, dirtier, and more worn than it has to.
What Under $5,000 Can Actually Do
Under $5,000 can do real work when the room is basically sound. It can clean up tired cabinets, replace bad hardware, improve lighting, repair small damage, repaint or refinish cabinet surfaces, swap a dated faucet, and sometimes handle a modest floating floor. It can make the room feel less brown, less gloomy, and less stuck in the decade. What it cannot do is buy a new kitchen.
| Budget Level | What It Can Usually Handle | What It Should Not Promise |
|---|---|---|
| Under $1,000 | Deep clean, small repairs, new pulls, better bulbs, paint touch-ups, decluttering, simple window treatment | Full cabinet painting, new flooring, electrical work, or appliance replacement |
| $1,000 to $3,000 | DIY cabinet prep and paint, hardware, small lighting improvements, faucet, minor repairs | Major layout changes, new cabinets, soffit removal, or hidden repairs |
| $3,000 to $5,000 | Stronger cabinet refresh, hardware, selected lighting, modest floor update, small finish repairs | A true remodel with new cabinets, counters, appliances, electrical, plumbing, and layout changes |
Those are planning buckets, not promises. Labor, region, material choices, hidden damage, and how much work is DIY can move the number fast.
What This Kitchen Would Cost With Real Store Prices
This was not priced like a full remodel. The layout, the cabinet boxes, the sink, the stove, the soffit, and the basic room all stayed, so the cost came down to cabinet prep, paint, hardware, lighting, and a modest floating floor.
Using current big-box retail pricing, the material basket for a kitchen like this lands around $1,200 before tax when most of the work is DIY. That figure leaves out new counters, appliances, electrical rewiring, cabinet replacement, plumbing repairs, asbestos testing, lead-safe work, and paid labor for every step.
Pricing context: checked July 2026. Retail prices change by region, store, product line, and sale timing.
| Item | Planning Quantity | Price Used | Estimated Cost |
|---|---|---|---|
| Cabinet cleaner / degreaser | 1 quart concentrate plus spray cleaner | About $8 plus $4 | $12 |
| Shellac primer for stain blocking | 3 quarts | About $30 each | $90 |
| Cabinet, door, and trim paint | 2 gallons | About $53 each | $106 |
| Wood filler for holes and edge repairs | 1 tub | About $12 | $12 |
| Sanding sponges and sanding supplies | 2 packs plus small extras | About $13 per pack | $27 |
| Roller tray, roller frame, mini roller, and paint tools | 1 kit plus extras | About $26 plus allowance | $75 |
| Painter's tape, plastic, drop cloths, caulk, rags, and small supplies | Allowance | Varies | $120 |
| Cabinet pulls or knobs | 3 ten-packs | About $18 per 10-pack | $54 |
| Under-cabinet or task lighting | 2 simple fixtures | About $73 each | $146 |
| Basic kitchen faucet | 1 faucet | About $94 | $94 |
| Vinyl plank flooring | 120 sq. ft. plus 10 percent waste | About $2.98 per sq. ft. | $393 |
| Floor trim, transition, spacers, and small floor supplies | Allowance | Varies | $100 |
Estimated DIY material total: about $1,230 before tax.
A safer planning range is $1,250 to $1,600 before tax, because an older kitchen never uses materials perfectly. Extra sanding sheets, trim, tape, primer, damaged hinges, delivery, and small mistakes all move the number.
The labor is where the rest of a $5,000 budget would go. Hand the cabinet painting to a pro instead of doing it yourself and Angi puts that job alone at roughly $425 to $1,466, while Home Depot lists faucet installation around $195. That is the real reason this stays a budget project: the low number holds when the layout stays, the cabinets are sound, and the owner does most of the prep.
So "under $5,000" is a fair promise, just not a full-remodel one. A budget like this covers a serious same-layout update; it does not stretch to new cabinets, new counters, new appliances, soffit removal, major electrical work, plumbing repairs, or hidden floor repairs.
This is not a receipt for one exact kitchen. It is a price-checked material basket for this kind of same-layout 1970s update, using current retail prices and realistic quantities. What matters as much as the total is what the total leaves out: no new cabinets, no new counters, no appliances, no wall removal, no soffit demolition, and no hidden repair work.
Check the Cabinets Before You Spend Money
The first decision is not paint color. It is whether the old cabinets are worth saving, and that starts at the sink base, because water damage usually shows up there first. Open the doors, look at the cabinet floor, and push gently on any soft spots. Check for swelling, staining, loose hinges, broken shelves, and drawer boxes that do not move correctly.
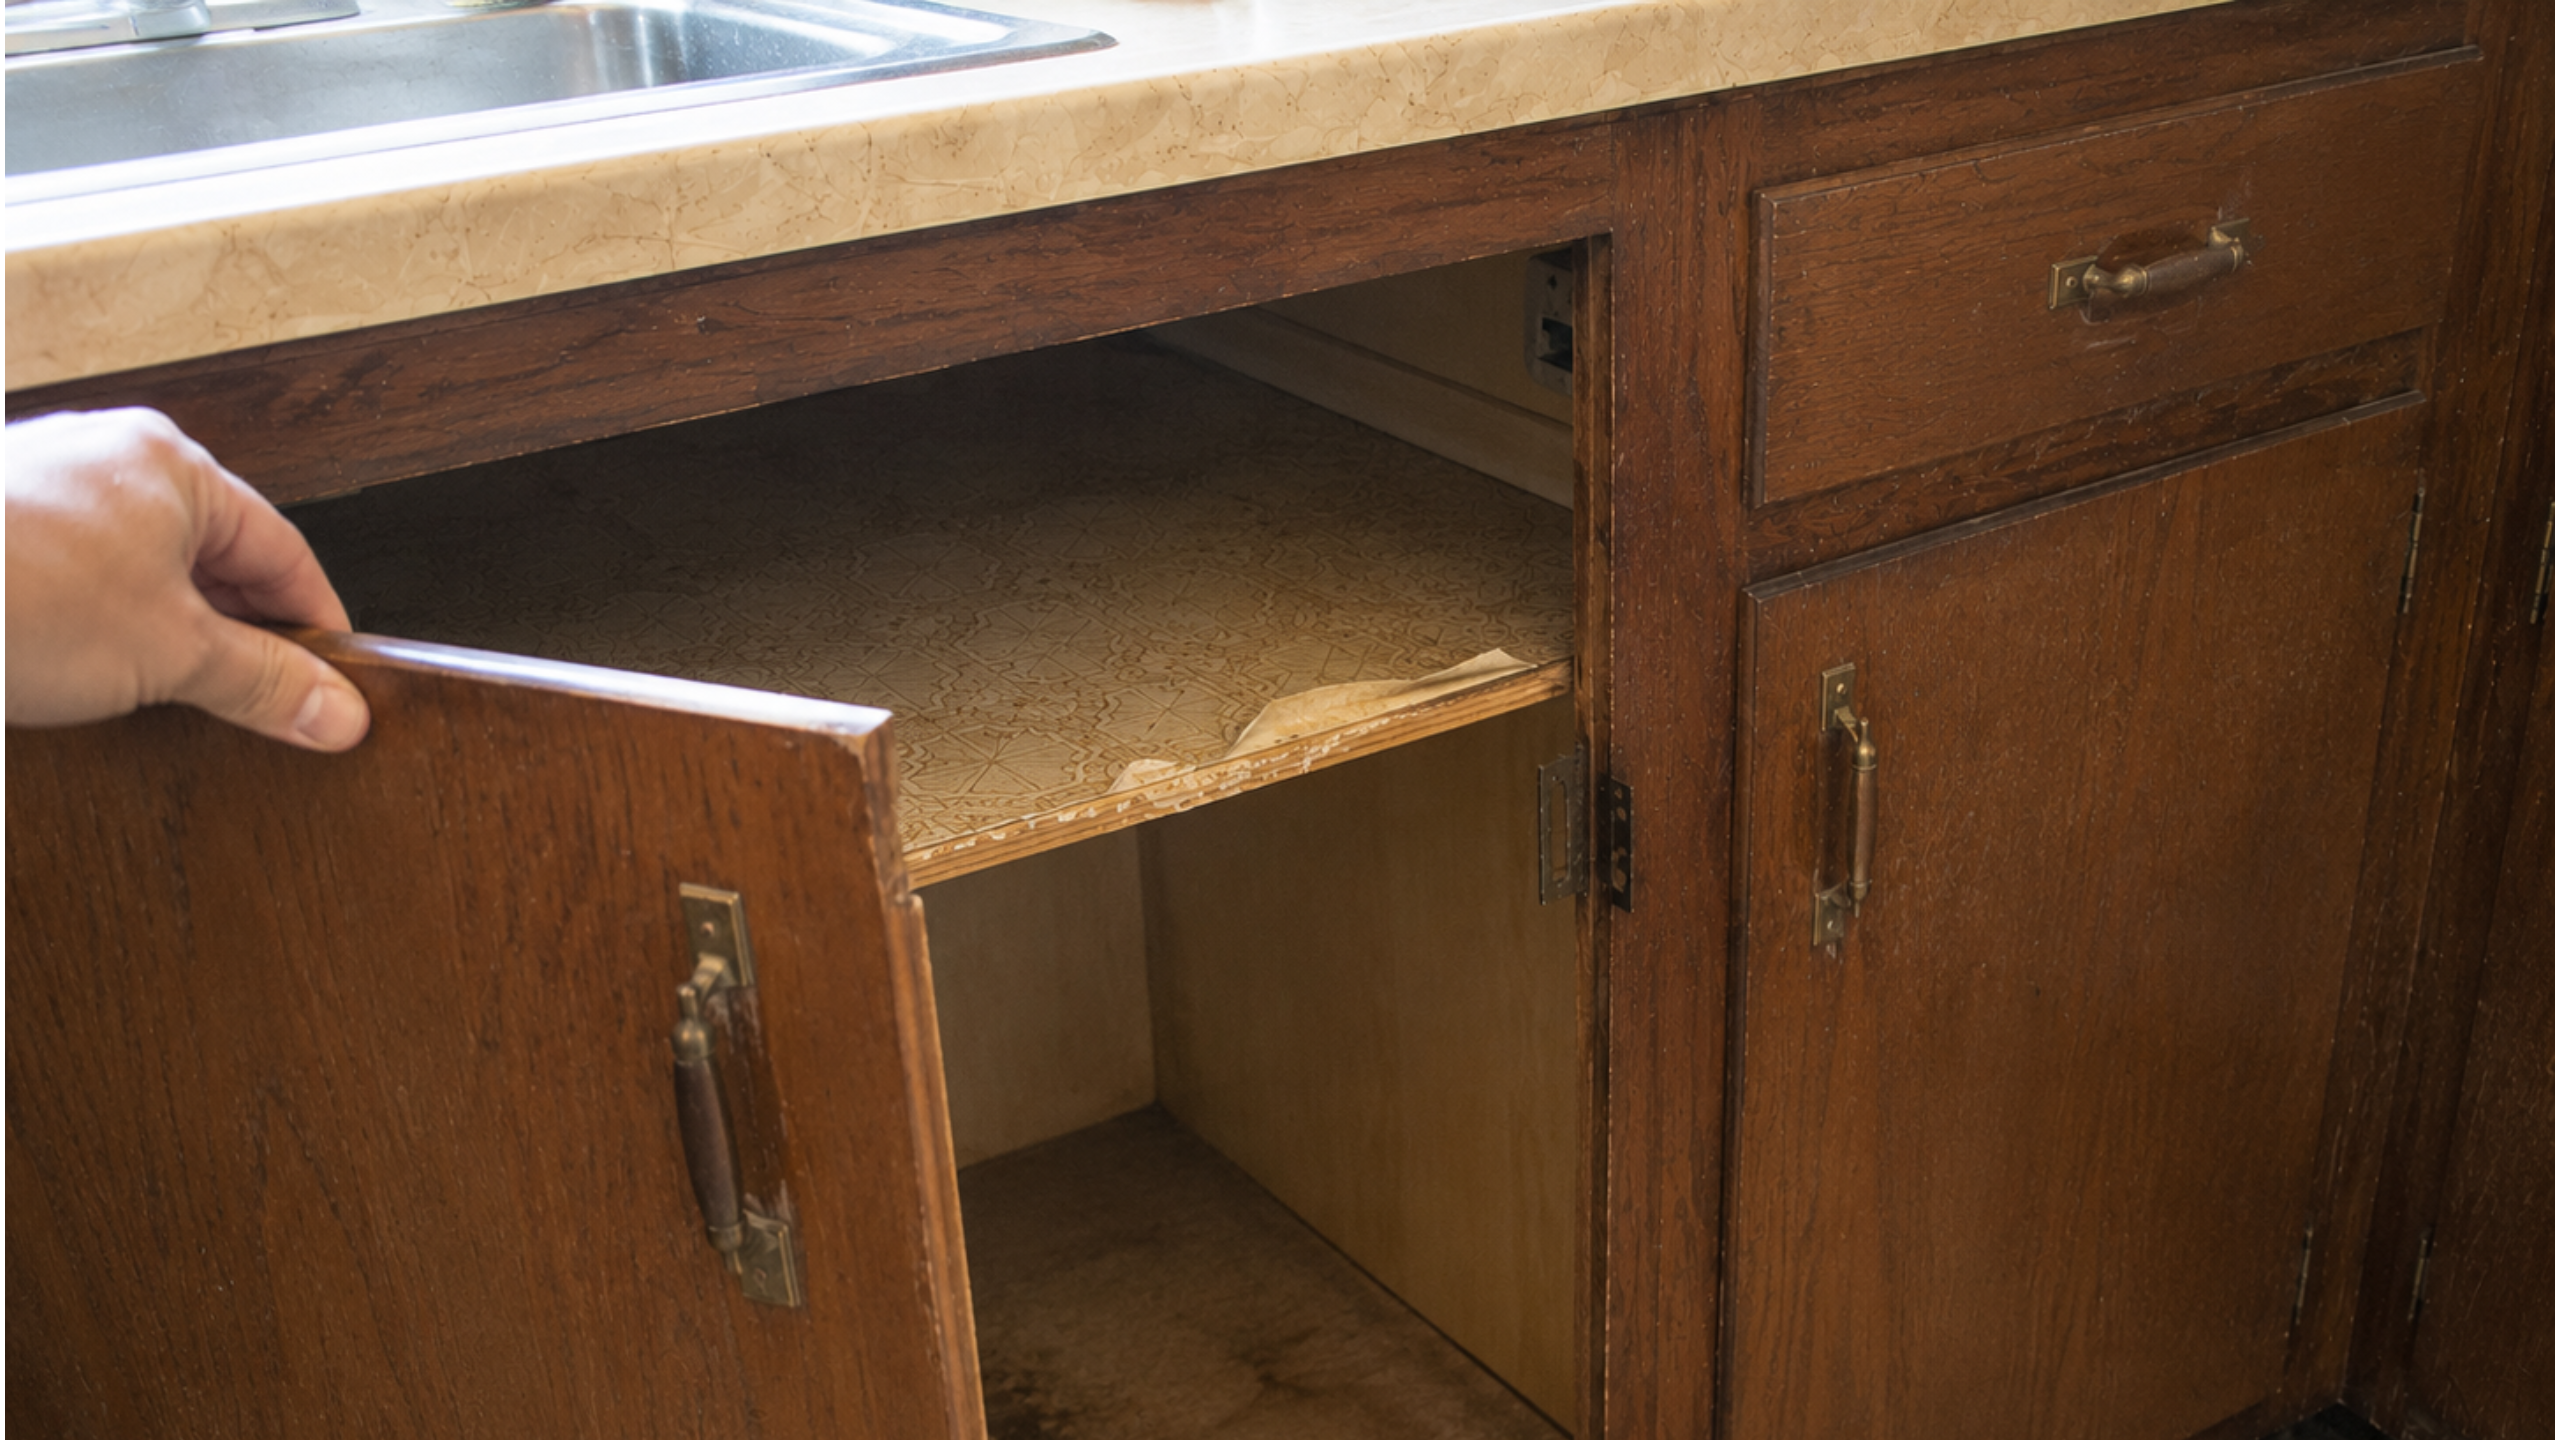
Paint works when the boxes are sound, dry, square enough, and still useful. It wastes money when the sink base is swollen, the shelves are failing, the face frames are loose, or the layout already makes the kitchen hard to use. If the boxes fail this check, stop calling it a paint project. It may be a cabinet repair, a partial replacement, or a full remodel.
What a 1970s Kitchen Can Be Hiding
This is the part most budget-makeover guides leave out, and it is the part that can turn a cheap update into a serious one. In a broader 1970s house renovation, the kitchen can hold three specific hazards that a coat of paint does not touch, and all three are worth knowing about before you start pulling up flooring or opening walls.
The first is asbestos. Old resilient flooring from this era, both the sheet vinyl and the 9-inch and 12-inch tiles, along with the black cutback adhesive under it, can contain asbestos, and it was still in use into about 1980. It is generally safe while it is intact and left alone; it becomes a problem when it is cut, sanded, scraped, or torn up, which is exactly what a floor swap does. You cannot tell by looking. If an old floor or its glue is suspect and you plan to disturb it, have it tested before anyone starts pulling, and follow the EPA's guidance on handling it.
The second is lead paint. Homes painted before 1978 can have lead in the old finishes, including on trim, walls, and sometimes the original cabinet coatings. Sanding and scraping those surfaces, which is exactly what a cabinet refinish involves, can release lead dust. If the house predates 1978, treat the old paint as suspect, contain the dust, and read the EPA's Renovation, Repair and Painting rules before you sand.
The third is aluminum wiring. A lot of houses wired in roughly 1965 to 1973 used aluminum branch circuits, which can loosen and overheat at outlets, switches, and connections over time. If you are adding lighting, changing switches, or touching outlets in a kitchen from this window, this is a job for a qualified electrician, and it is worth having the wiring type identified before any load gets added. Some 1970s kitchens are perfectly fine; the point is to find out rather than assume.
What Comes Off Before Anything Goes On
A cheap-looking cabinet update usually starts with a shortcut: the doors stay on, the hinges get painted, the pulls get worked around, grease sits in the corners, and dust gets trapped under primer. A few months later the paint chips around every handle.
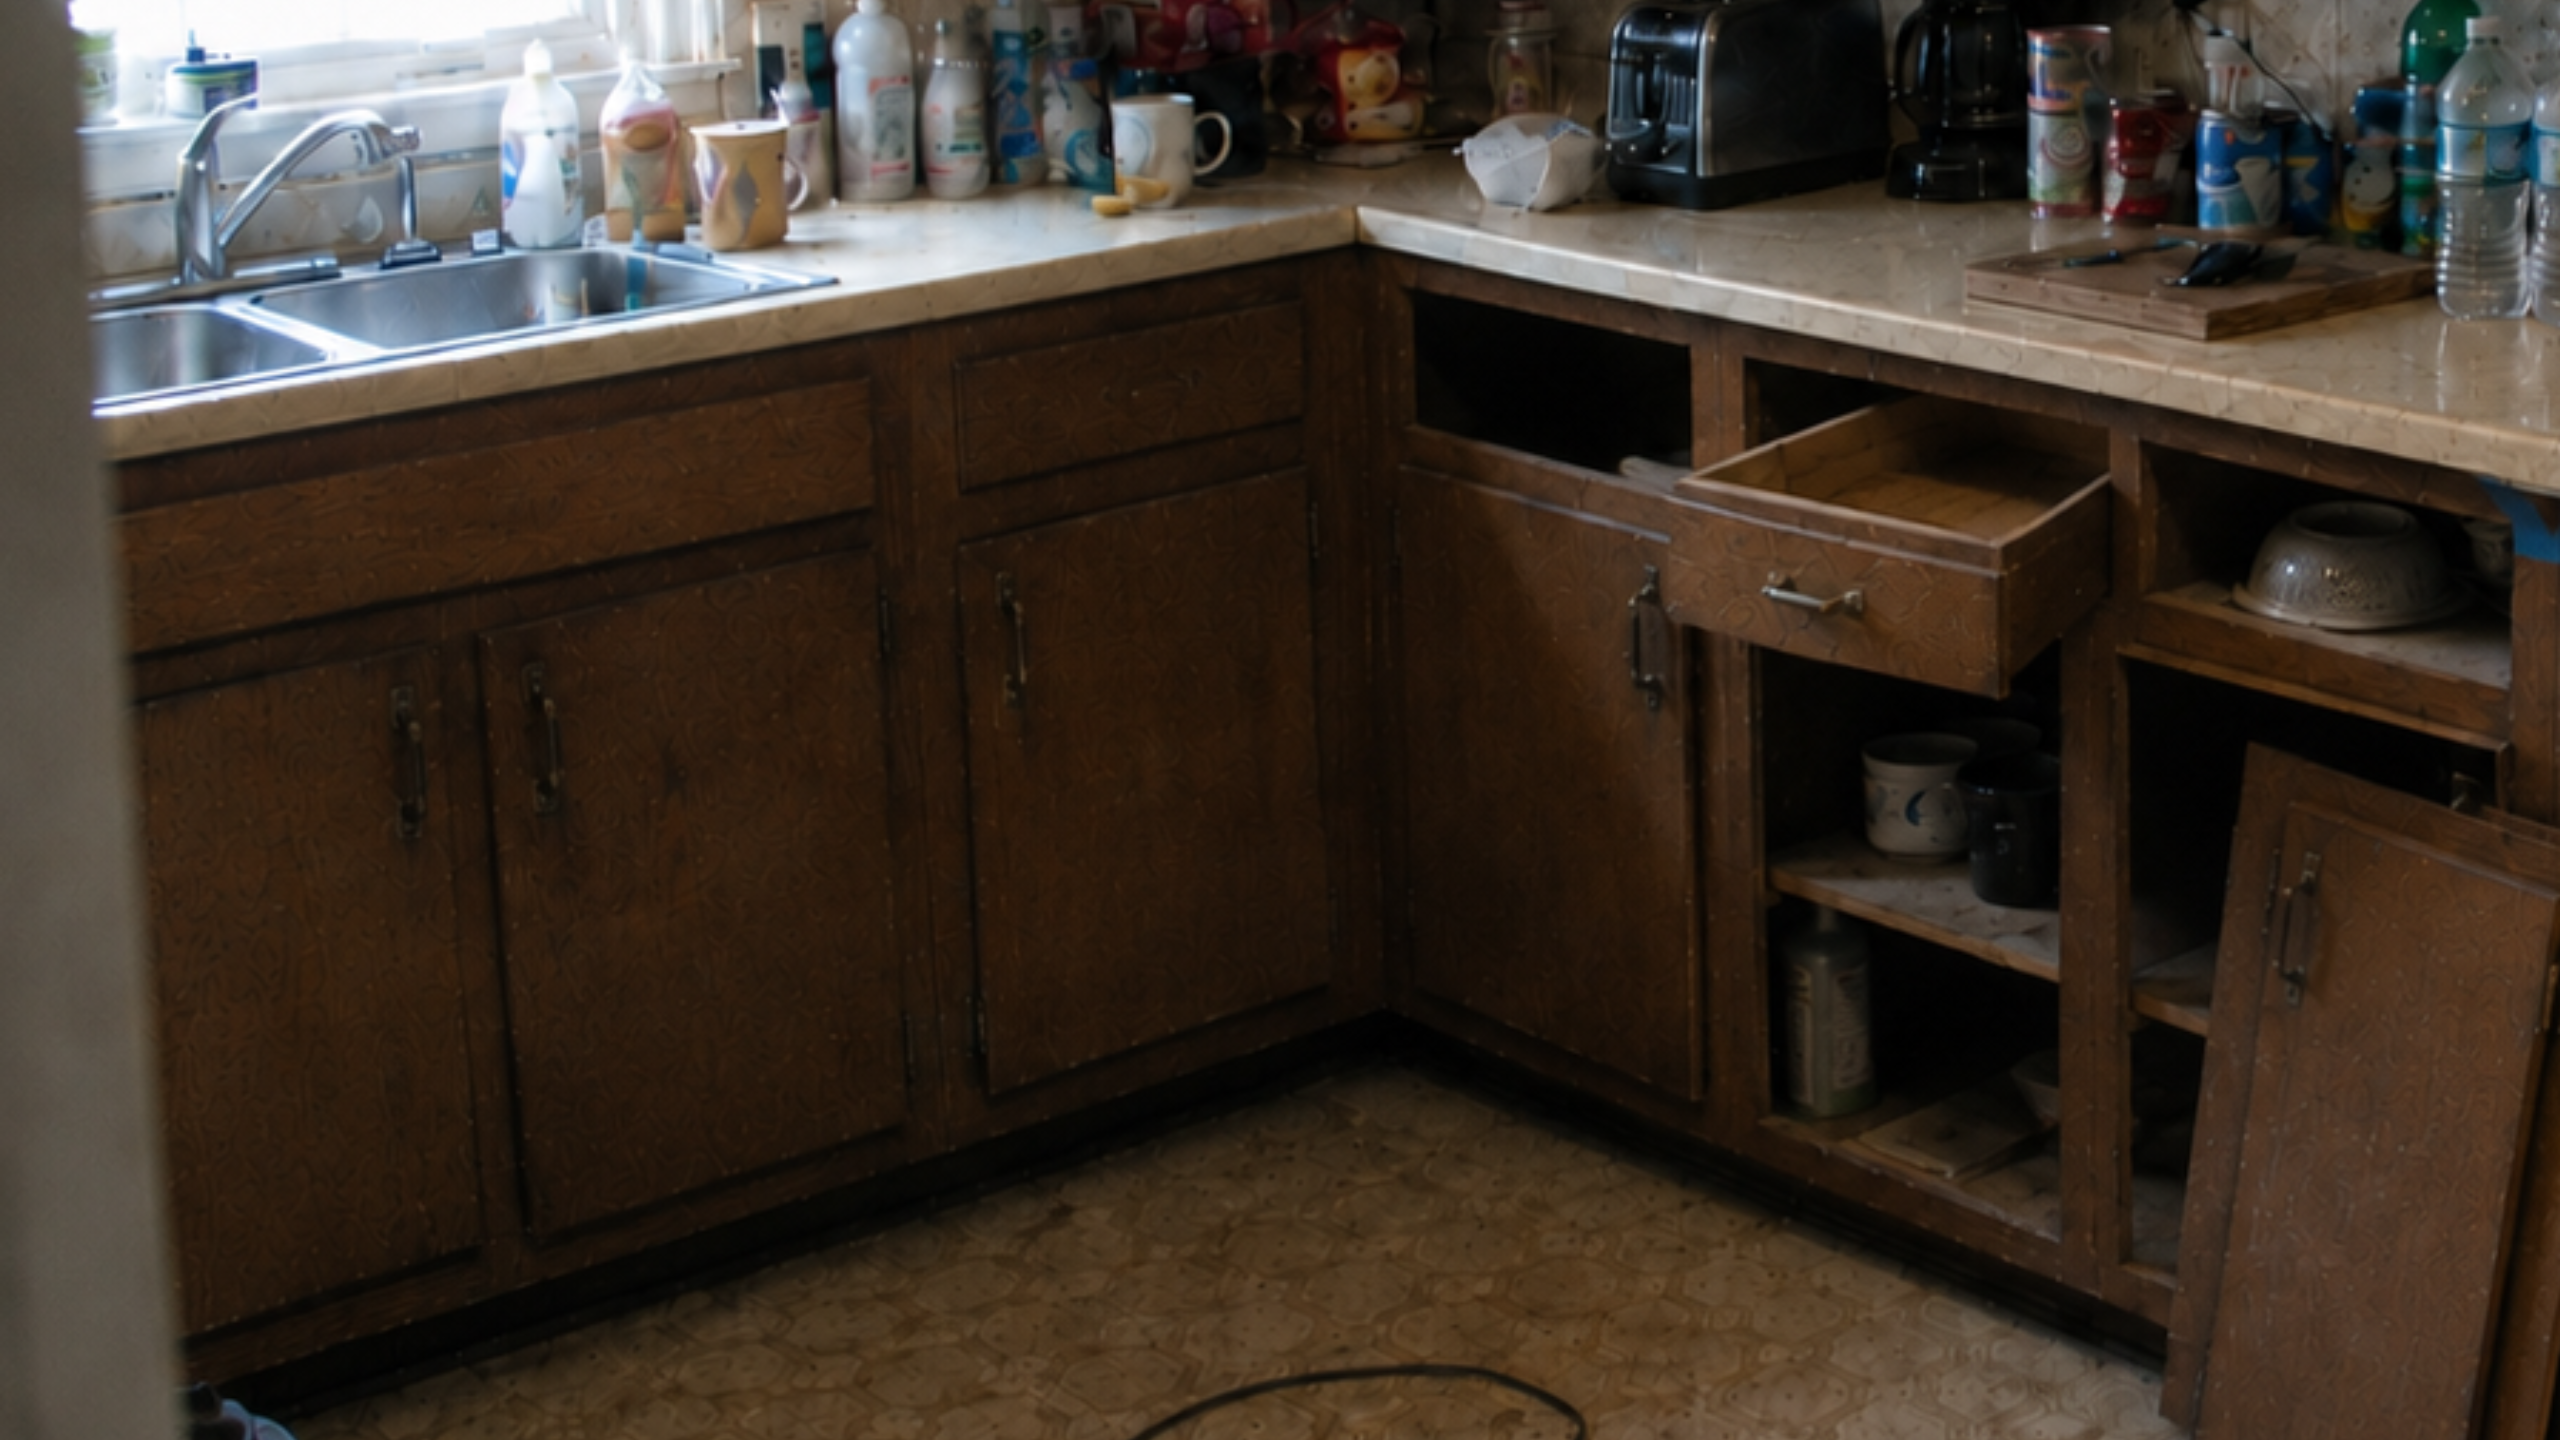
Take it apart instead. Remove the doors, drawers, pulls, knobs, and loose hardware in order, keep the screws and hinges grouped, and mark where each door came from. Check the drawer slides before deciding they are good enough to keep. This is the first point where the room looks worse before it gets better, which is normal.
Hardware Is Cheap Until the Holes Do Not Line Up
Cabinet pulls look like the easy win, and sometimes they are. Other times the old holes are in the wrong place, the new pulls are the wrong scale, the hinge type limits the door swing, or the old hardware left marks the new hardware cannot cover.
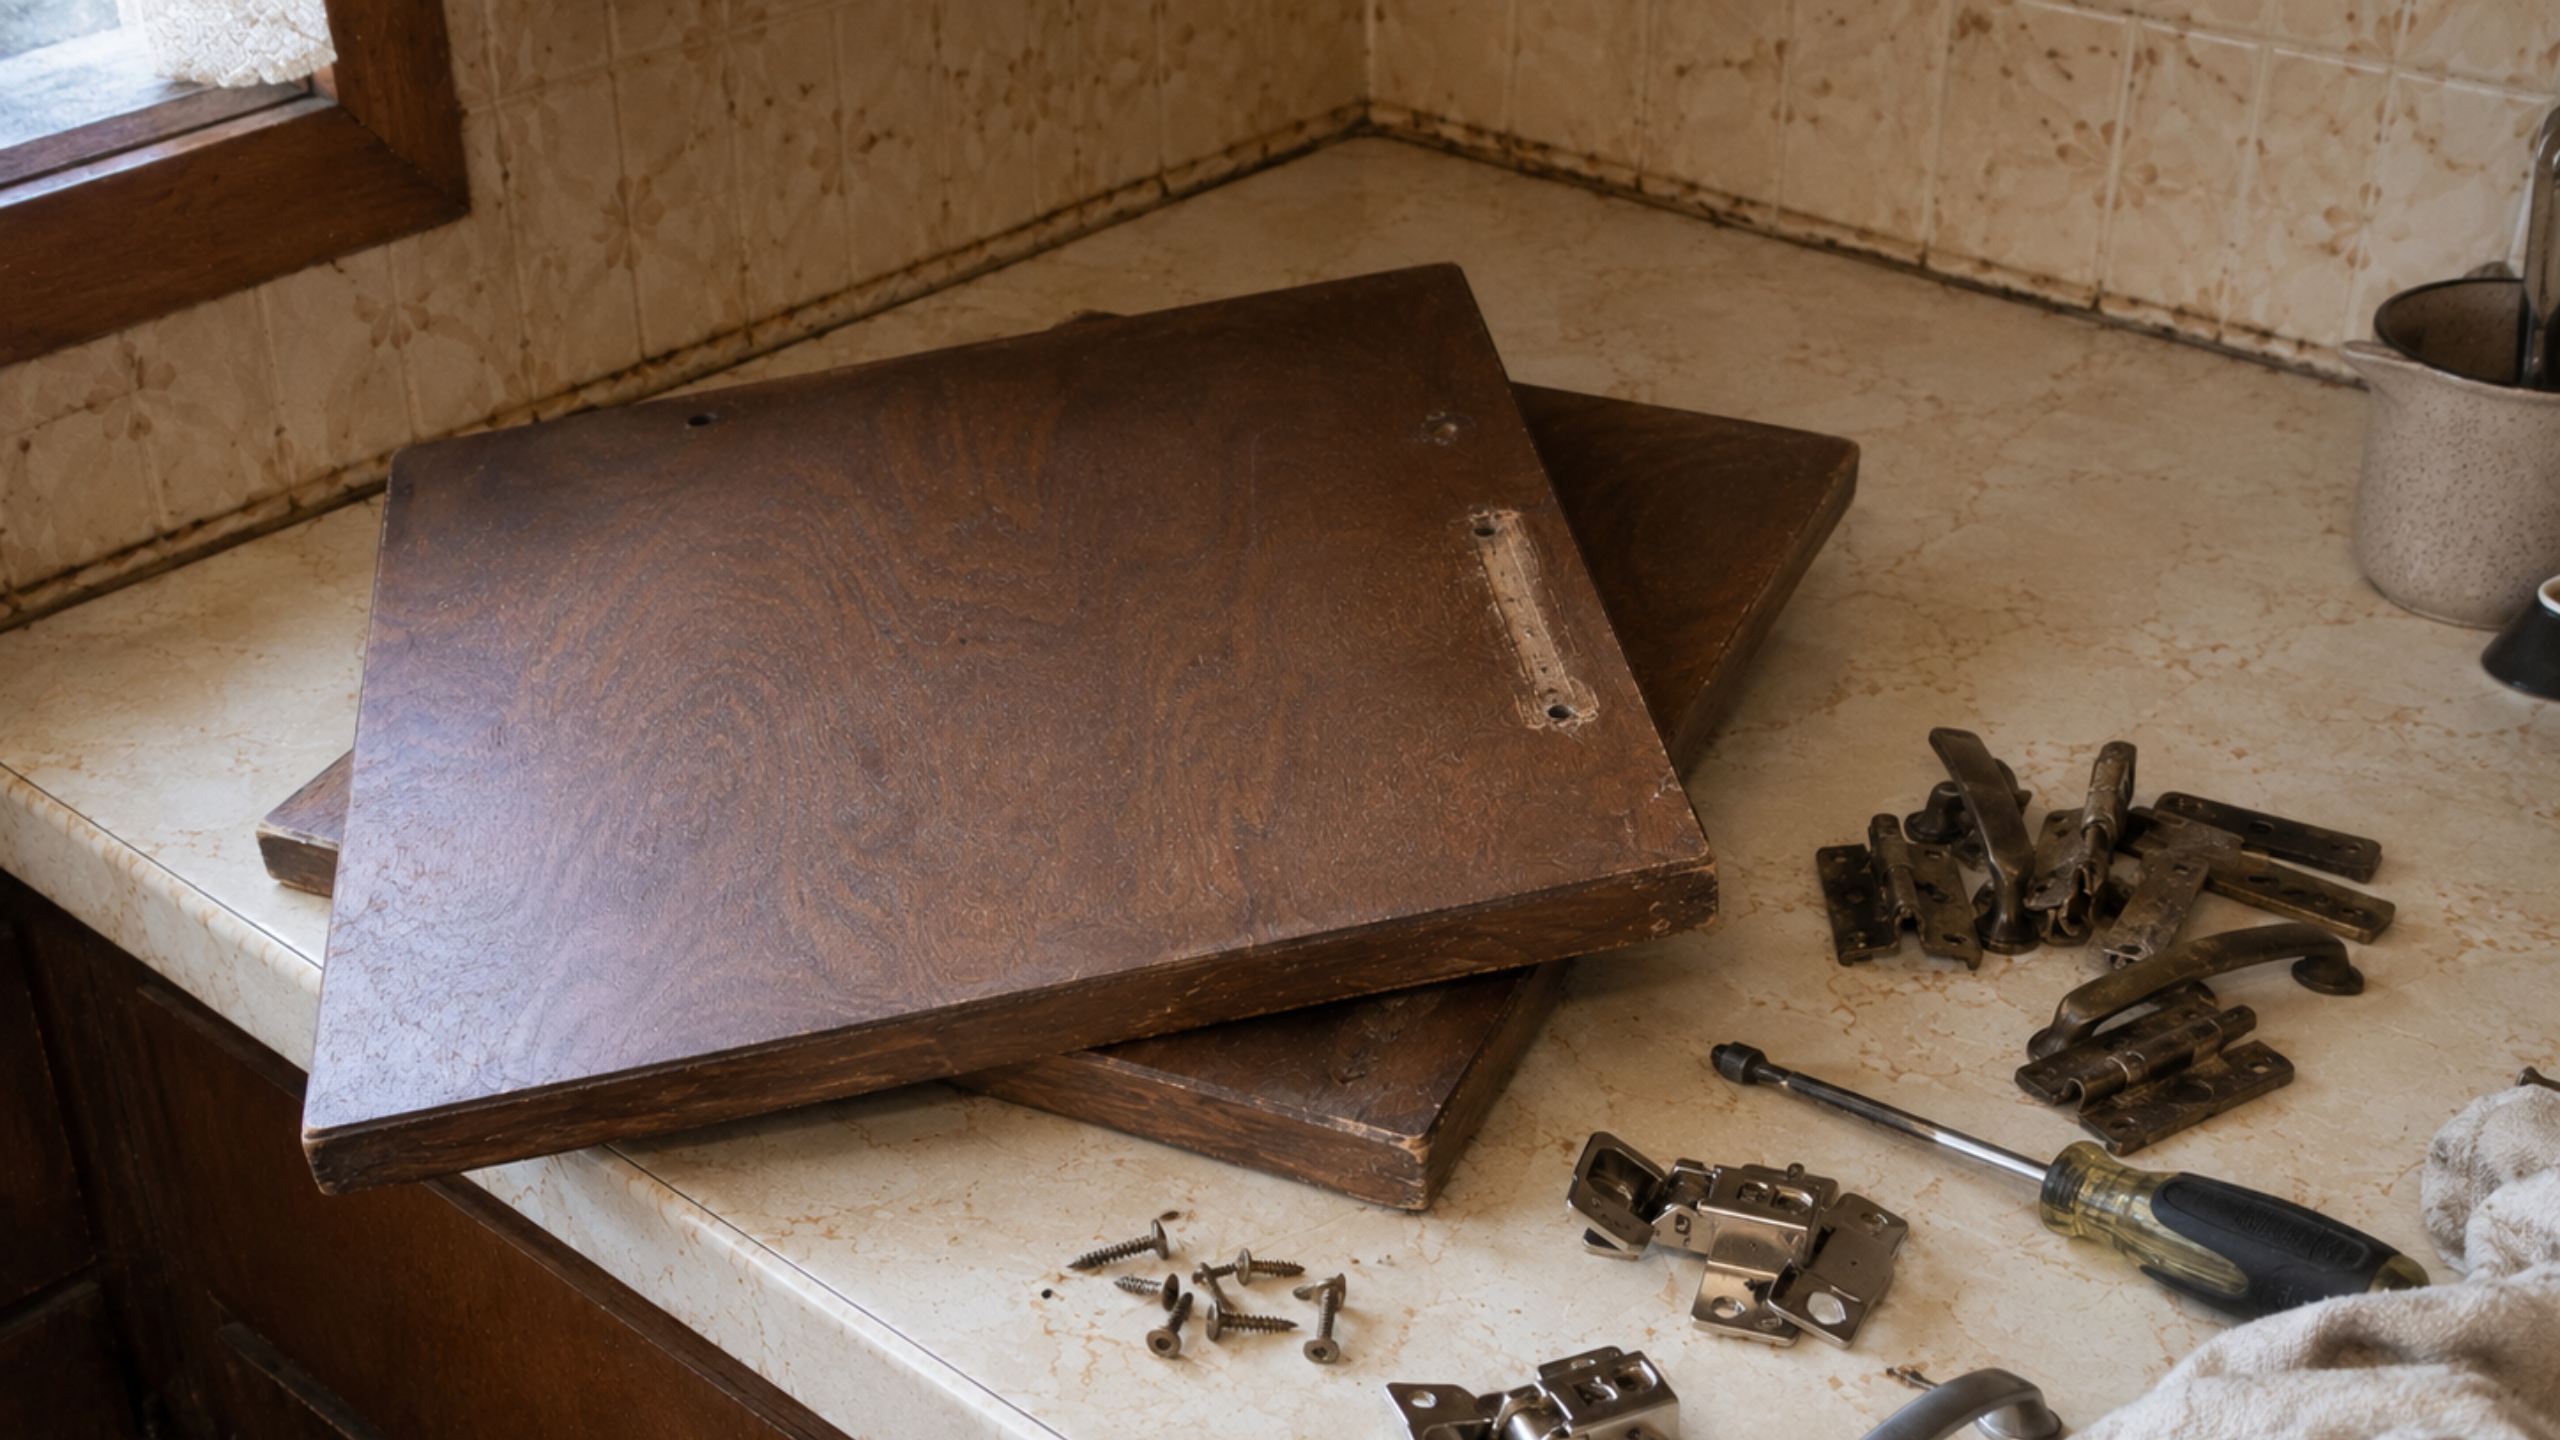
Measure before buying. Check the center-to-center spacing on the pulls, look at the old hinge overlay, and see whether the old pull left a shadow, chip, or dent in the finish. If new hardware will not cover the old damage, the door needs filling, sanding, and paint before it looks clean. That is why hardware belongs in the prep plan, not at the end of the shopping list.
Take the Doors Off Before You Paint Anything
The doors need their own work surface. Lay them flat, label them, and keep the top, bottom, hinge side, and room order clear, because a 1970s kitchen can have doors that look interchangeable but hang slightly differently after decades of use.

Clean before sanding. Grease, old polish, cooking residue, and hand oils all keep primer from bonding, so pay attention to the area around the pulls, the tops of the lower doors, the sink base, and the cabinet faces near the stove. A good cabinet paint job is mostly prep; the color is the easy part.
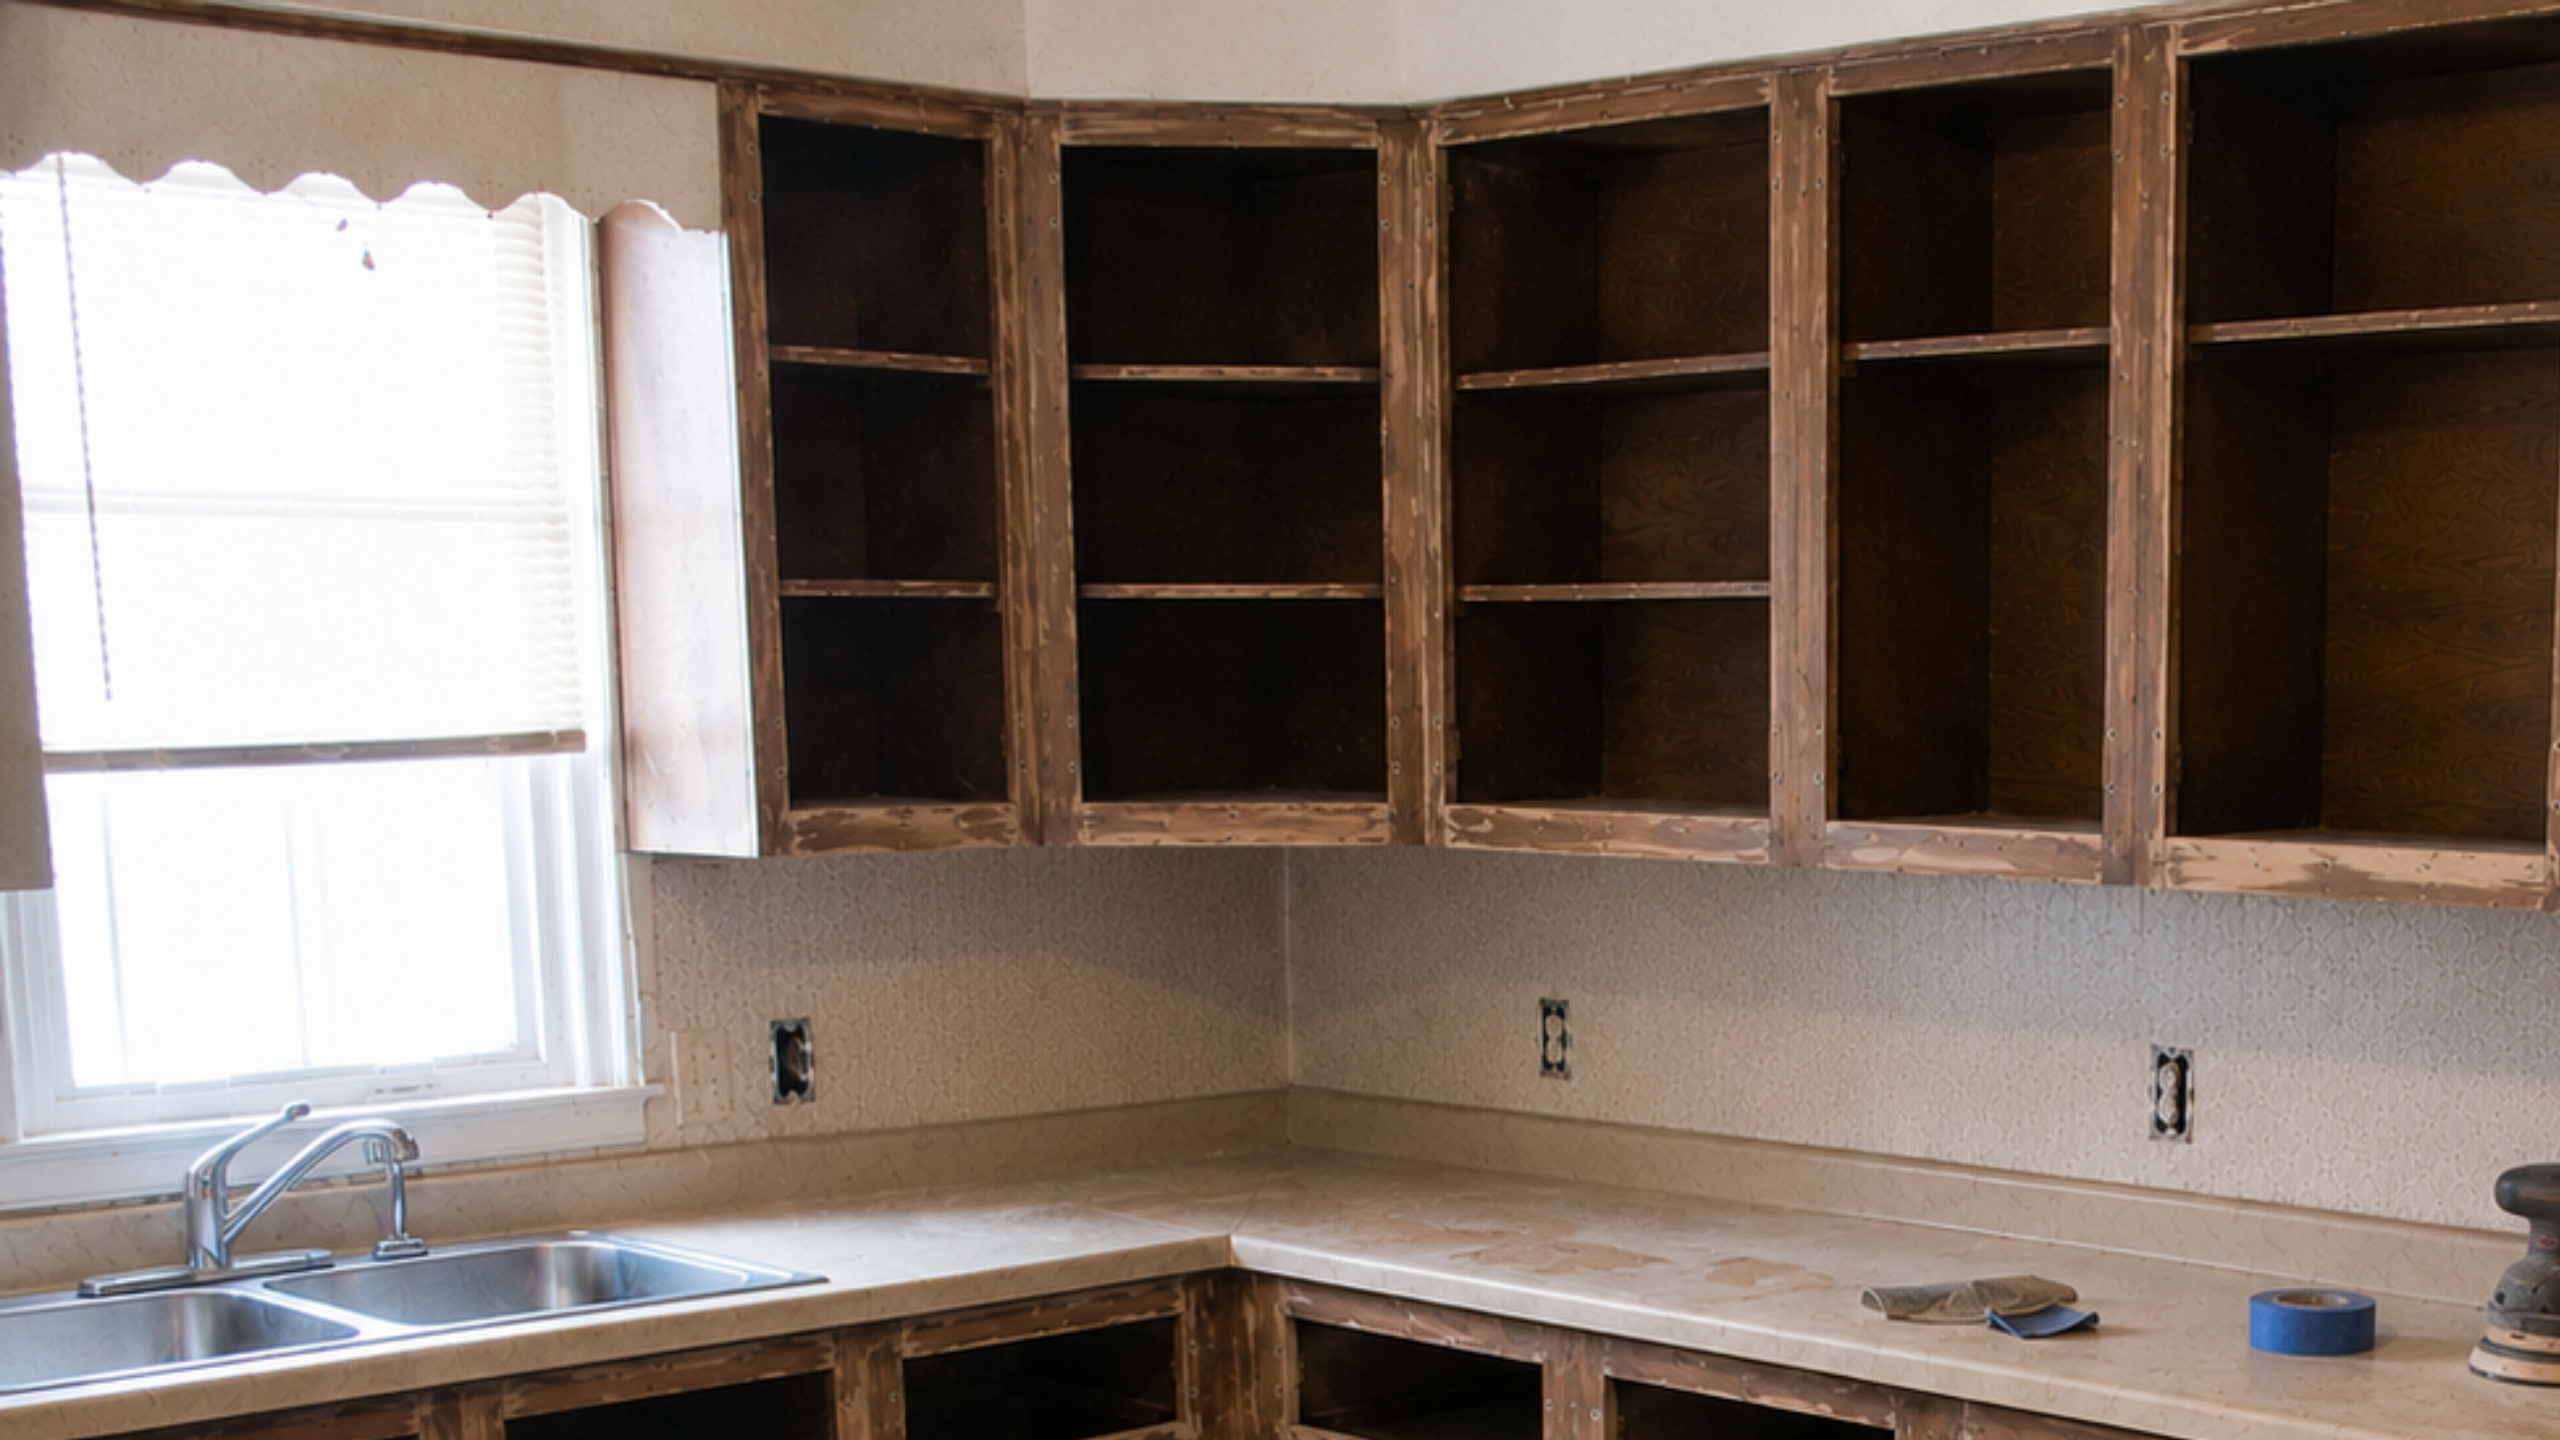
The Messy Middle Is Where the Job Succeeds or Fails
This is the part the clean before-and-after photos never show. The kitchen is dusty, the boxes are open, the doors are off, the counter has become a work surface, and the old floor is still there, so the room looks worse than when the project started. That is exactly where the good work happens.
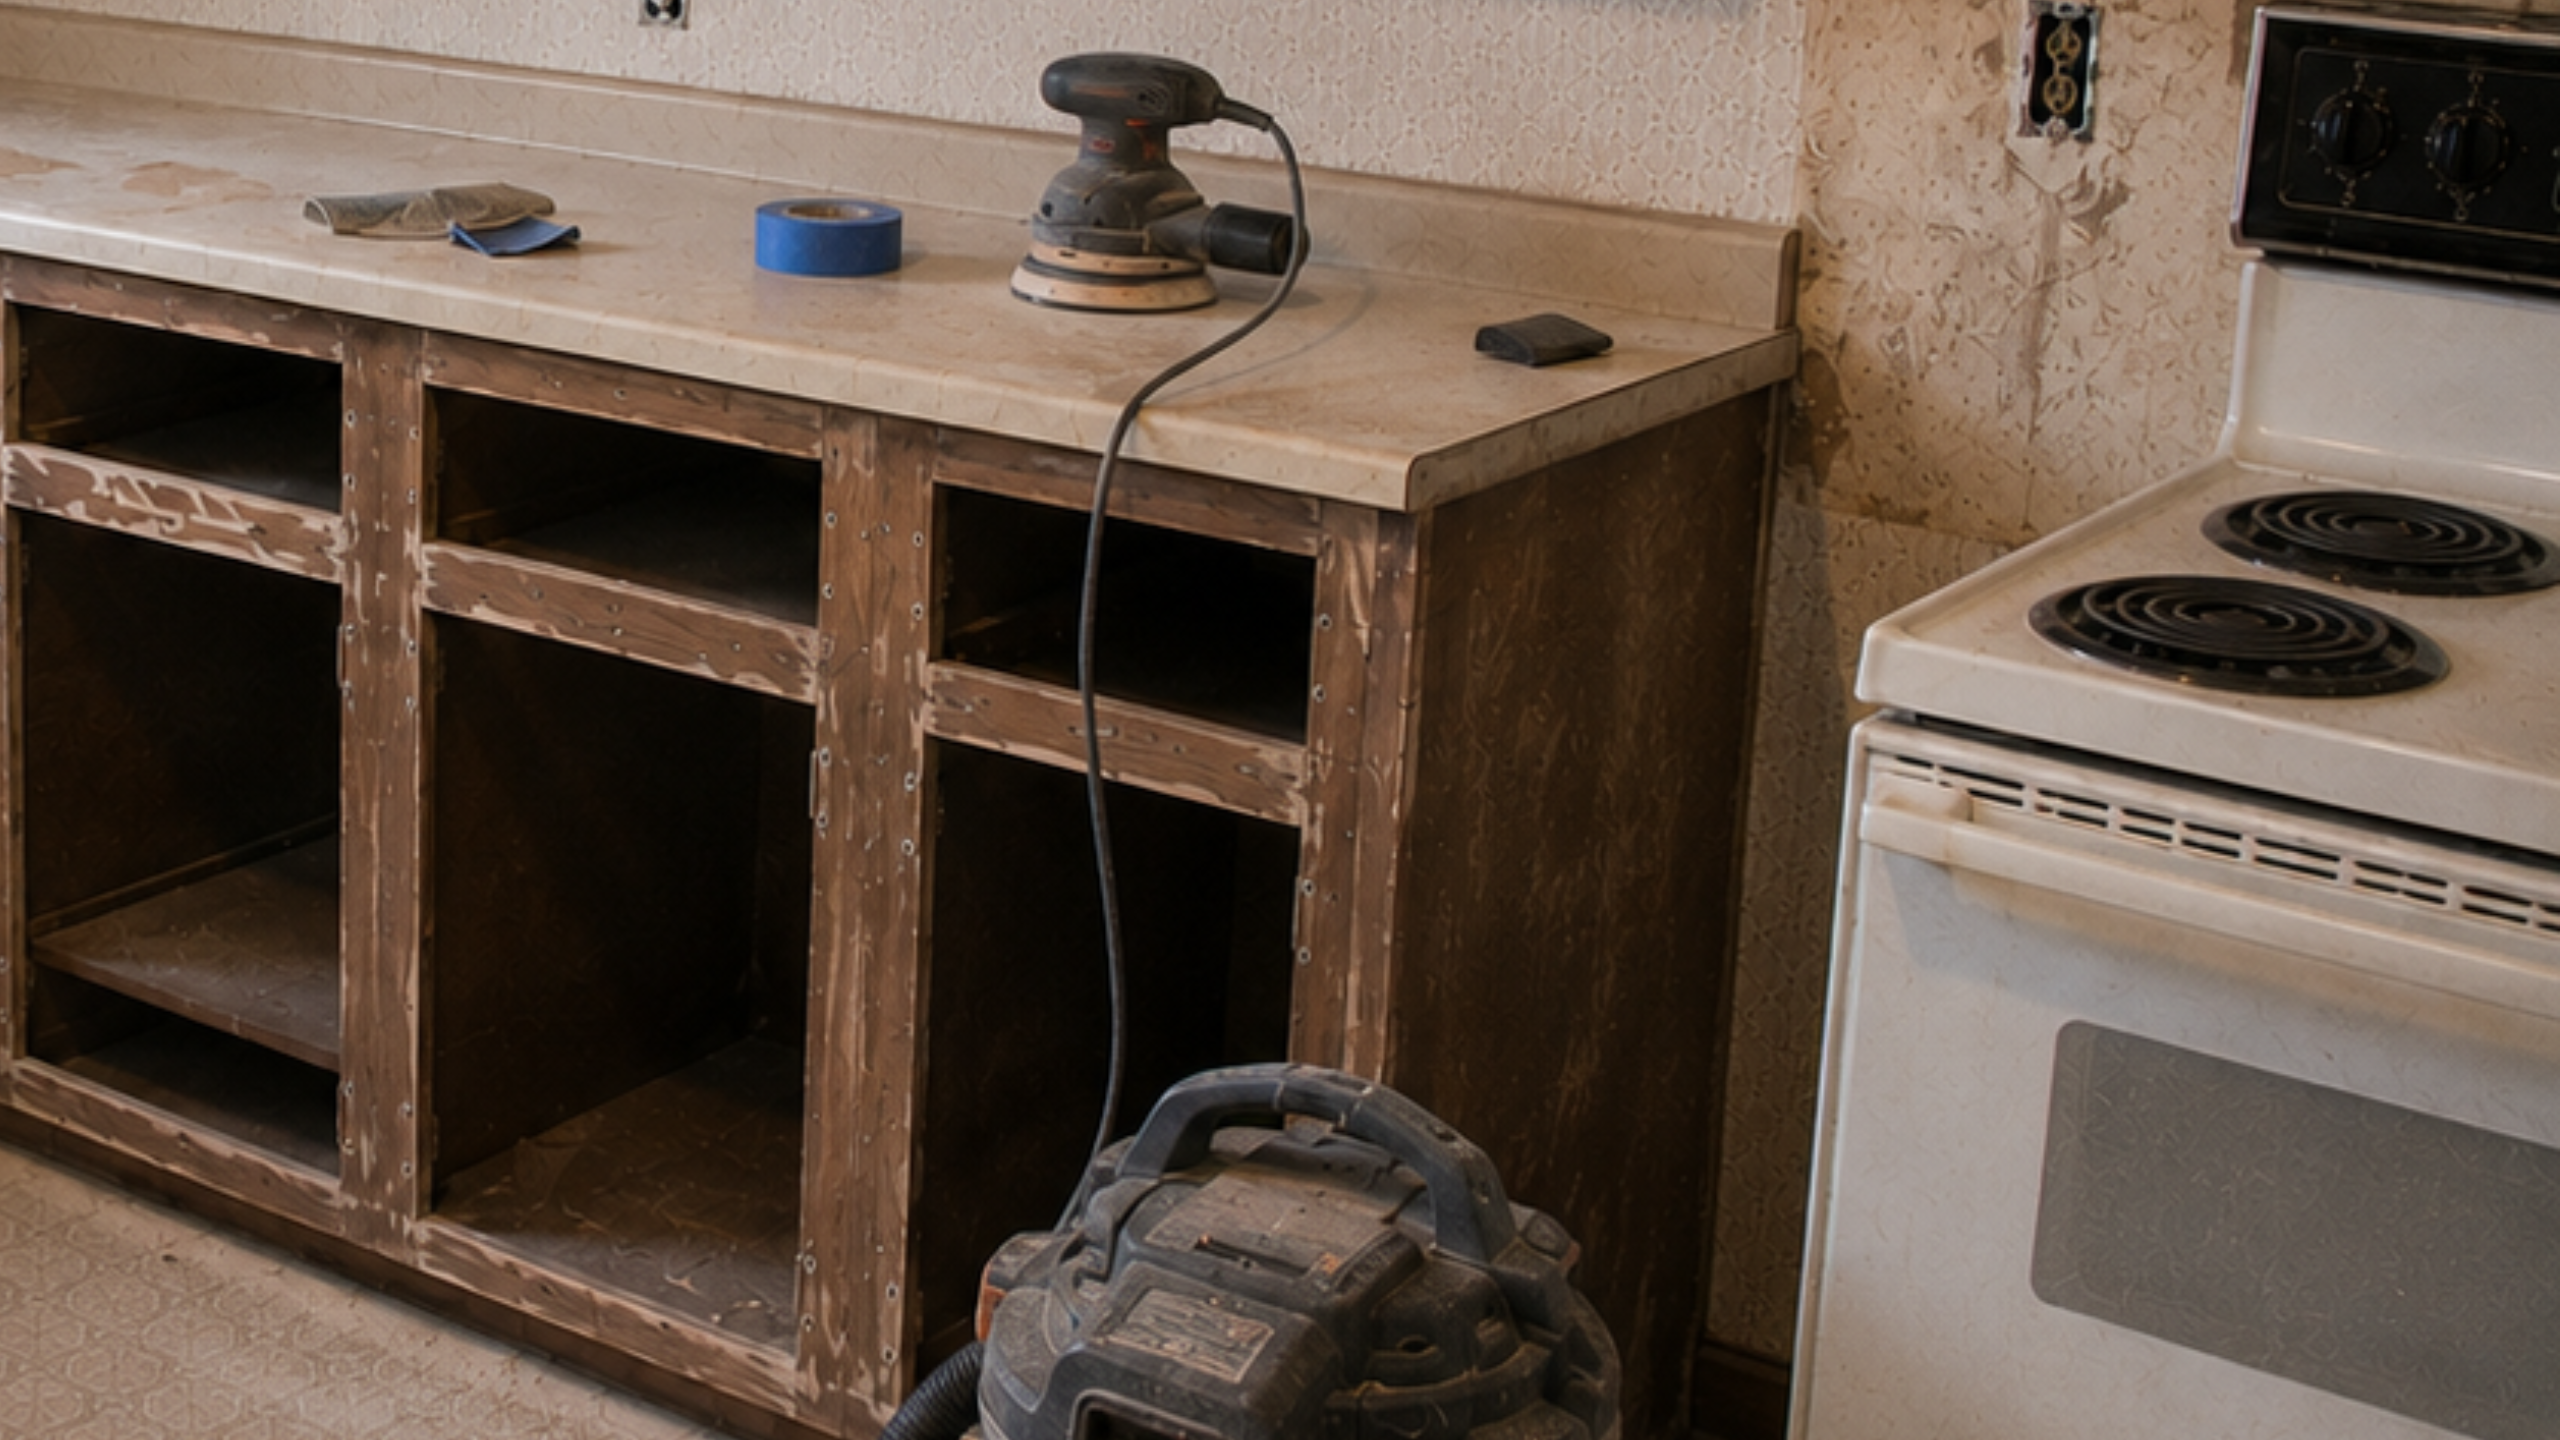
Sanding is not about making the old cabinets perfect. It dulls the glossy surfaces, smooths the repairs, knocks down rough edges, and gives primer something to grab. Then control the dust: vacuum, wipe, and check the edges again. The spots that get touched most often are the ones that fail first, so watch the pull areas, drawer fronts, hinge edges, sink base doors, and face frames.
Sanding Is About Adhesion, Not Perfection
Old 1970s cabinet doors tend to carry dents, old screw holes, worn edges, and finish damage, and trying to sand every mark away can leave the door looking worse. Controlled prep is the better move.
Fill the old holes only when the new hardware will not reuse them, and sand the filler flush after it dries. Keep the door edges crisp enough that they do not look rounded over and tired, then clean the dust again before primer. Primer over dust is not prep; it is a future chip.
Where Cheap Cabinet Paint Jobs Fail
The failure usually starts small: a chip around a pull, paint stuck to a hinge, brush marks at an edge, grease bleeding through near the stove, old dark finish showing through on a corner, or a screw head painted over because nobody wanted to remove the hardware.

That is why even a low-budget update needs a real sequence:
- Inspect the cabinet boxes.
- Remove doors, drawers, and hardware.
- Clean grease and residue.
- Repair holes and chips.
- Sand or degloss.
- Vacuum and wipe dust.
- Prime.
- Paint.
- Reinstall hardware carefully.
Skipping one step can make the whole job look cheap.
The Soffit May Keep the Kitchen Feeling Heavy
Painted cabinets can still look heavy if the soffit is doing most of the visual damage. A lot of 1970s kitchens have upper cabinets tucked under a low soffit, which boxes the room in even after the cabinet color improves, and it cuts off the wall visually when the cabinets, soffit, backsplash, and counter are all dated together.
Do not remove a soffit casually. It may hide ductwork, wiring, plumbing, framing, or ceiling problems, and on a budget under $5,000 that kind of surprise can break the plan fast. For a small update, the better move is often to paint cleanly, improve the lighting, reduce the clutter above the counter, and accept that the soffit stays for now.
The Floor Can Make or Break the Budget
The floor changes the room fast, and it also carries risk. An old 1970s floor may have several layers, old adhesive, moisture damage, uneven seams, or loose sheet goods. The old material and its glue can be exactly the kind that should be tested before it is disturbed. If the floor is suspect, damaged, or likely to be torn up, slow down and test before removal.
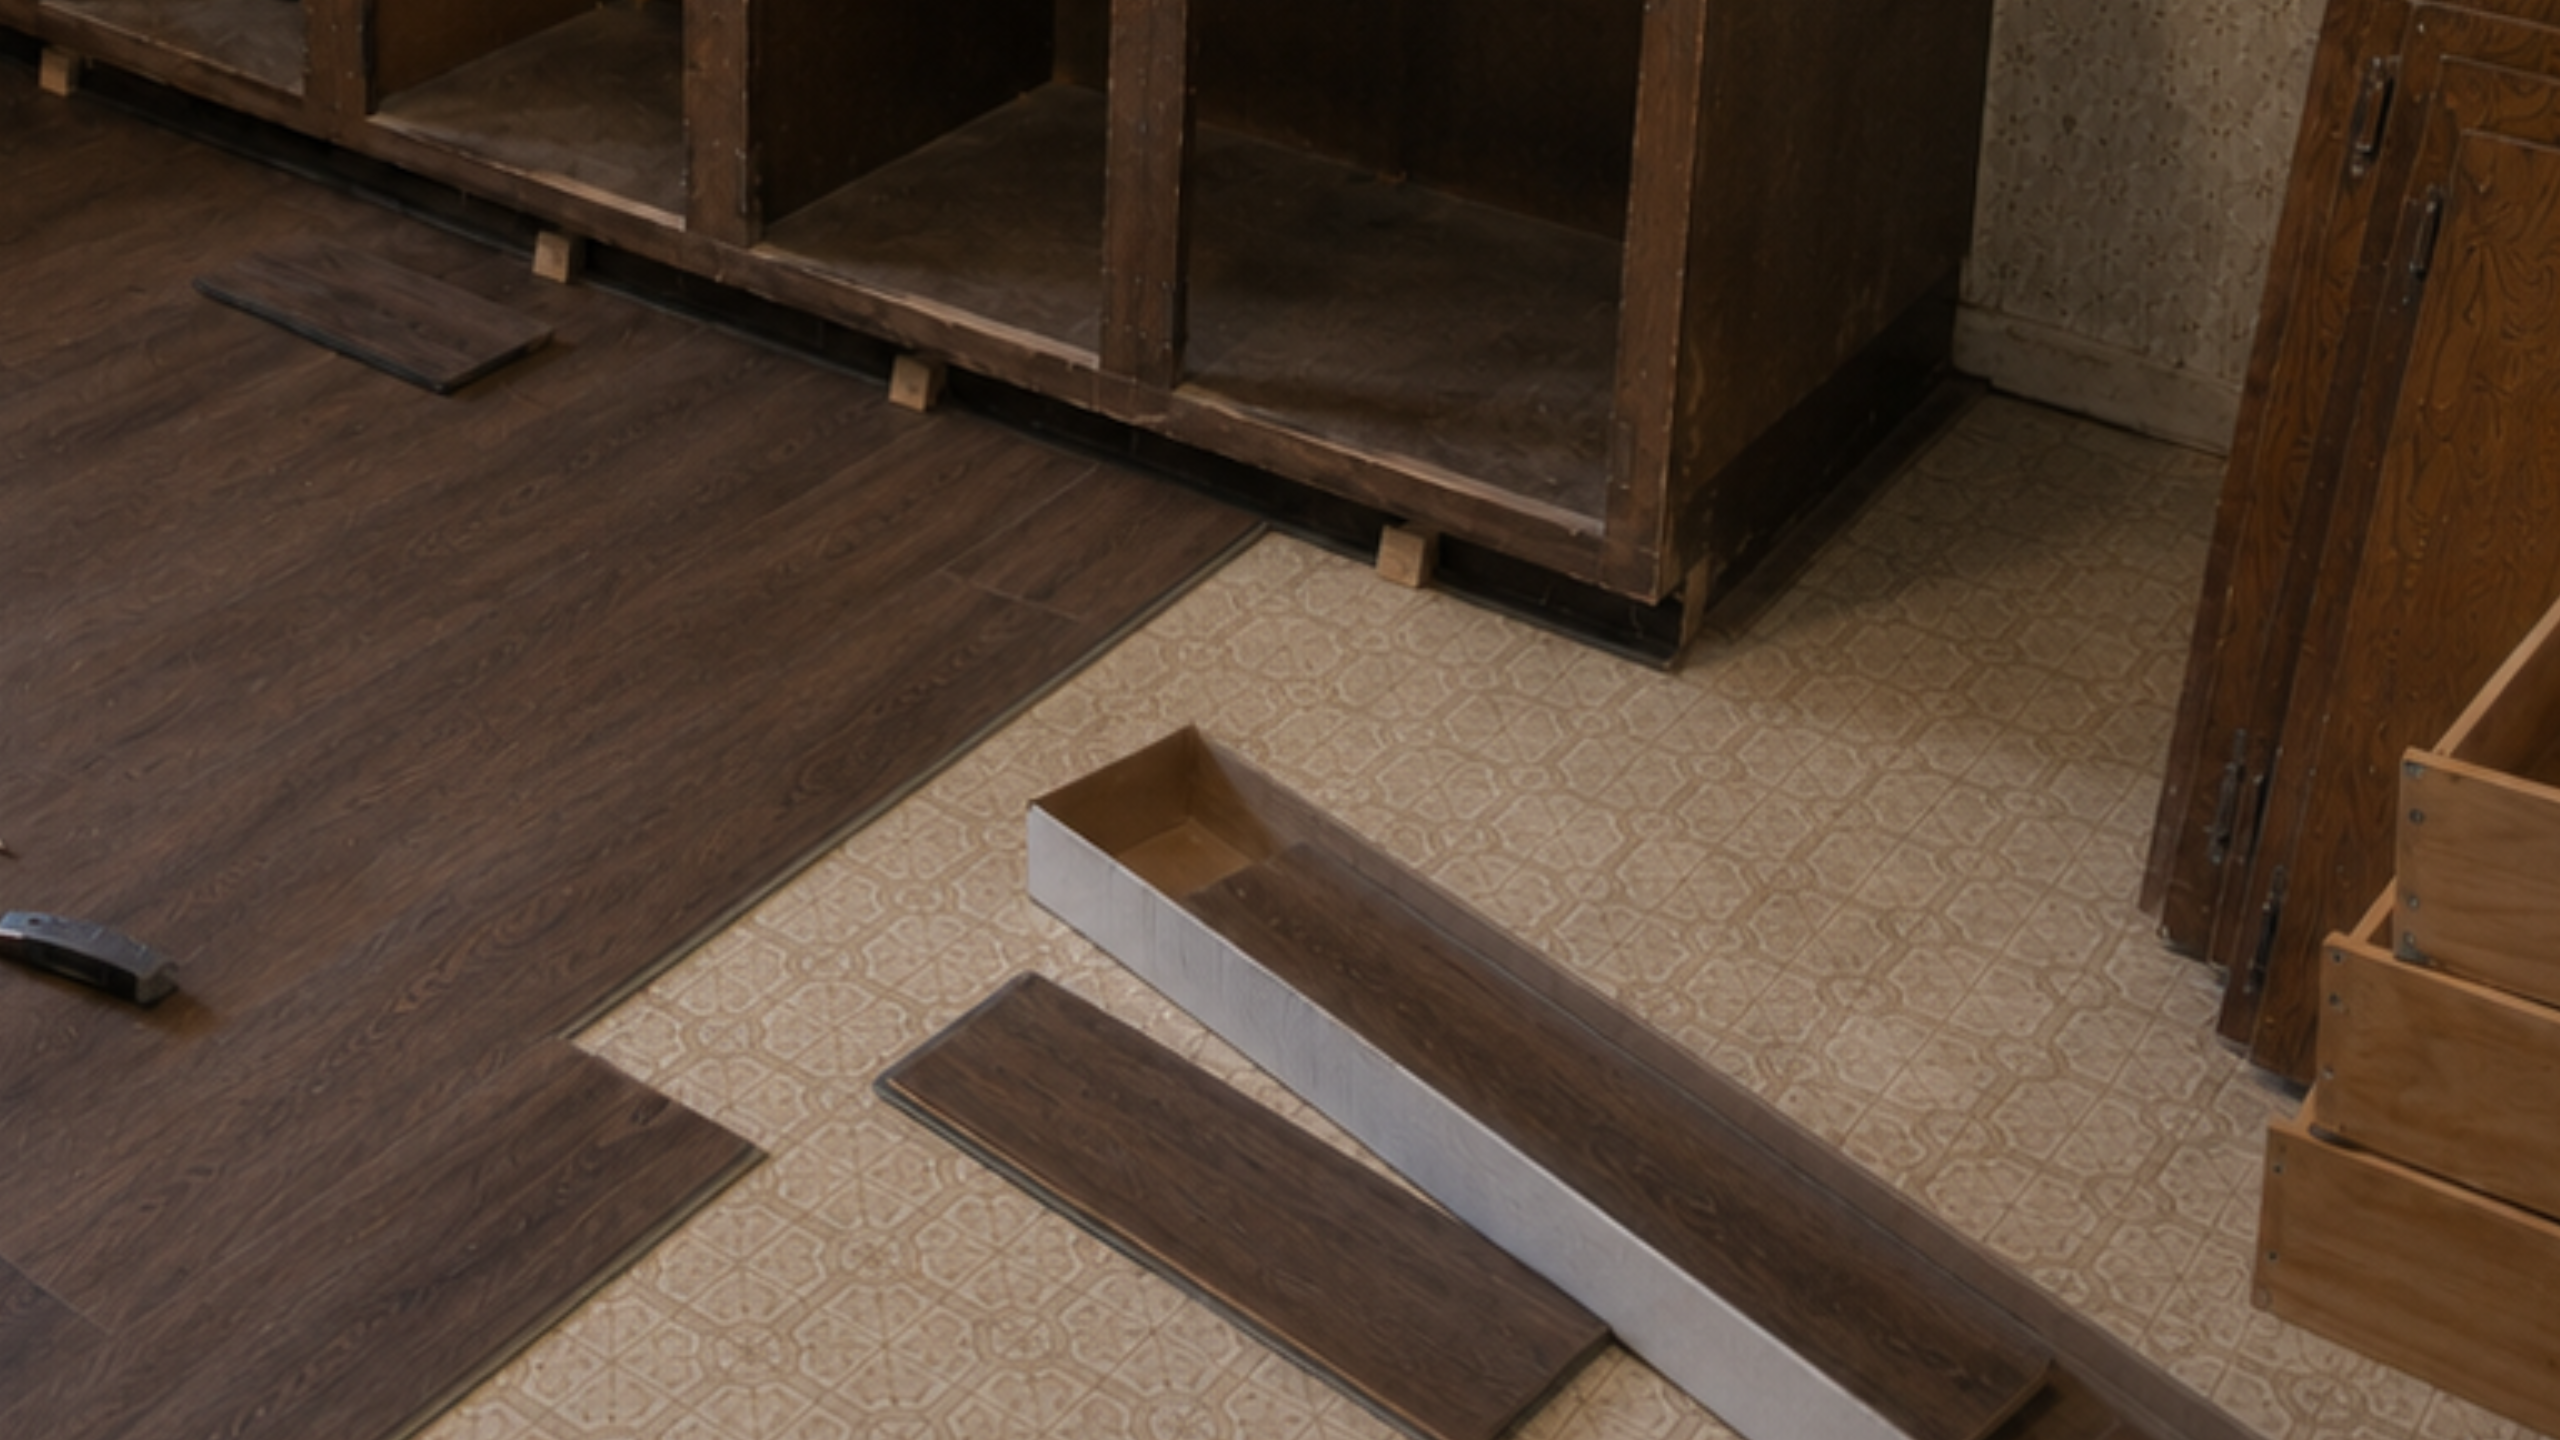
A floating vinyl plank floor can work in a budget update when the existing floor is stable, flat enough, dry, and allowed by the flooring manufacturer. It can also be the wrong move if it traps moisture, bridges loose flooring, covers a soft subfloor, or hides a problem that should have been repaired first. If there is water damage near the sink, the dishwasher, the refrigerator line, or an exterior door, handle that before new flooring, because a pretty surface over a soft floor is wasted money.
Lighting Does More Than People Expect
A dark 1970s kitchen usually has three problems at once: dark cabinets, weak ceiling light, and busy surfaces. Cabinet paint helps, and so does the floor, but lighting decides whether the work even shows up at night.
Start simple. Replace the weak bulbs with the right color temperature, add under-cabinet lighting where the prep work happens, and improve the sink light if the window area goes dark after sunset. Keep the light practical rather than theatrical. If new wiring, new switches, outlet changes, or fixture relocation are involved, use a qualified electrician, and keep in mind the aluminum-wiring caution above for a house of this age.
Where the Budget Usually Breaks
The budget usually breaks when the project changes from surface work to hidden work.
| Budget Breaker | Why It Happens | Best Move |
|---|---|---|
| Swollen sink base | Old leaks damaged the cabinet floor or side panels | Repair or replace that section before paint |
| Bad cabinet paint adhesion | Grease, gloss, dust, or skipped primer | Clean, degloss, sand, dust, and prime correctly |
| Hardware holes do not match | New pulls do not cover old marks or spacing | Measure first and test one door |
| Floor is not safe to cover | Loose layers, moisture, unevenness, or suspect materials | Fix, test, or choose a different flooring plan |
| Soffit removal | Hidden ducts, wiring, plumbing, or ceiling repairs | Leave it unless the budget includes investigation and repair |
The cheapest update is not the one that avoids every repair. It is the one that avoids opening the wrong problem at the wrong time.
What to Skip on a Small Budget
Skip anything that looks good for one photo and creates a bigger repair later.
- Do not remove flooring blindly. Test or verify old layers before disturbing suspect material.
- Do not paint over grease and gloss. The finish will chip around pulls and hinges.
- Do not buy hardware before measuring. Old holes and hinge types can control the choice.
- Do not tear into the soffit just to make the room look taller. It may hide work the budget cannot carry.
And skip the fantasy that every 1970s house needs its kitchen gutted. Some kitchens do. This one did not. For the larger design question, see 1970s house style.
What This Kitchen Proves
The old cabinets were not beautiful at the start. The room was dark, the hardware was dated, the counters were busy, and the floor was pulling the whole room down. But the basic kitchen still worked, and that is the difference between a budget update and a remodel. A remodel changes the room; a budget update improves what can be improved without pretending every old part has failed.
For this kitchen, the right work was not dramatic. It was practical: inspect, remove, label, clean, sand, repair, paint, improve the hardware, handle the floor carefully, and keep the room honest.
Common Questions
Can you really update a 1970s kitchen for under $5,000?
Yes, if the layout stays, the cabinet boxes are sound, the work is partly DIY, and hidden repairs do not take over. Under $5,000 is a budget update, not a full kitchen remodel.
Should I paint 1970s kitchen cabinets or replace them?
Paint can make sense when the cabinet boxes are dry, solid, square enough, and still useful. Replace or repair first when the sink base is swollen, the doors are failing, the drawer boxes are broken, or the layout does not work.
What is the cheapest change that helps a 1970s kitchen?
Cleaning, better lighting, and hardware can help fast, but only if the cabinets are not failing. Cabinet paint does more, but it needs prep.
Is vinyl plank flooring a good choice for an old 1970s kitchen?
It can be, but only when the existing floor is dry, flat, stable, and safe to cover. Do not cover moisture damage, loose flooring, or suspect materials without checking first.
Should I remove the soffit over 1970s kitchen cabinets?
Not as a small-budget guess. A soffit may hide ducts, wiring, plumbing, framing, or ceiling damage. Check first, then decide whether the cost belongs in this phase.
What should I do first in an old kitchen update?
Check the cabinet condition, floor condition, old materials, wiring limits, water damage, and lighting. Then decide what the budget can safely change.
Read This Next
- 1970s Kitchen Remodel — if the room needs layout, soffit, ventilation, electrical, or cabinet replacement decisions.
- 1970s House Renovation — for the larger order of repairs before finishes take over.
- 1970s House Style — for what to keep before flattening the decade.
Sources used for this article
- U.S. Environmental Protection Agency, Lead Renovation, Repair and Painting Program.
- U.S. Environmental Protection Agency, Protect Your Family from Exposures to Asbestos.
- U.S. Consumer Product Safety Commission, Repairing Aluminum Wiring.
- Angi, Cost to Paint Kitchen Cabinets (professional labor context).
- The Home Depot, Faucet Installation cost guidance. Retail material prices were used as a planning example and change over time.