
The first walk through a 1970s house can be discouraging.
Dark paneling. Low ceilings. Shag carpet over unknown flooring. A kitchen that feels cut off from the rest of the house. A bathroom with fixtures in a color that has no name anymore. An entry that does not announce itself.
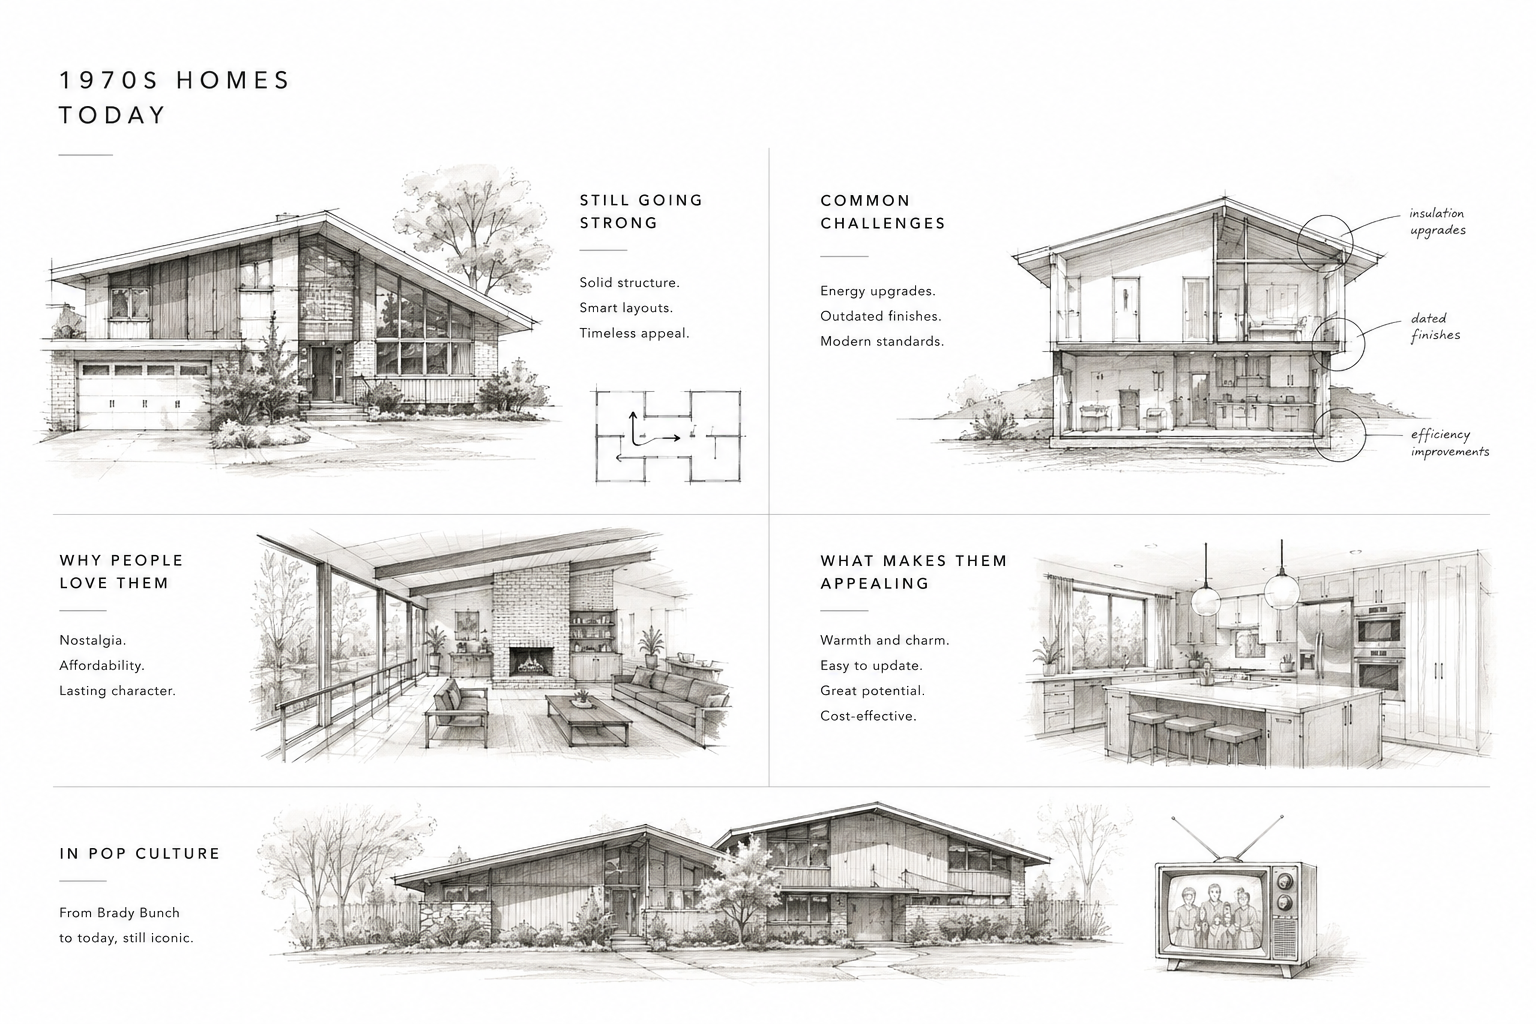
But look past the surfaces and the picture changes. These houses have useful room sizes, genuine connections to the yard, better light than the finishes suggest, and layouts that work for families in a way that older, more formal houses do not. A lot of people buy them and spend the first year fighting the decade. The better move is to understand what the house actually has before deciding what it needs.
What Defines a 1970s House
Not every 1970s house looks the same, but the decade leans in a few clear directions.
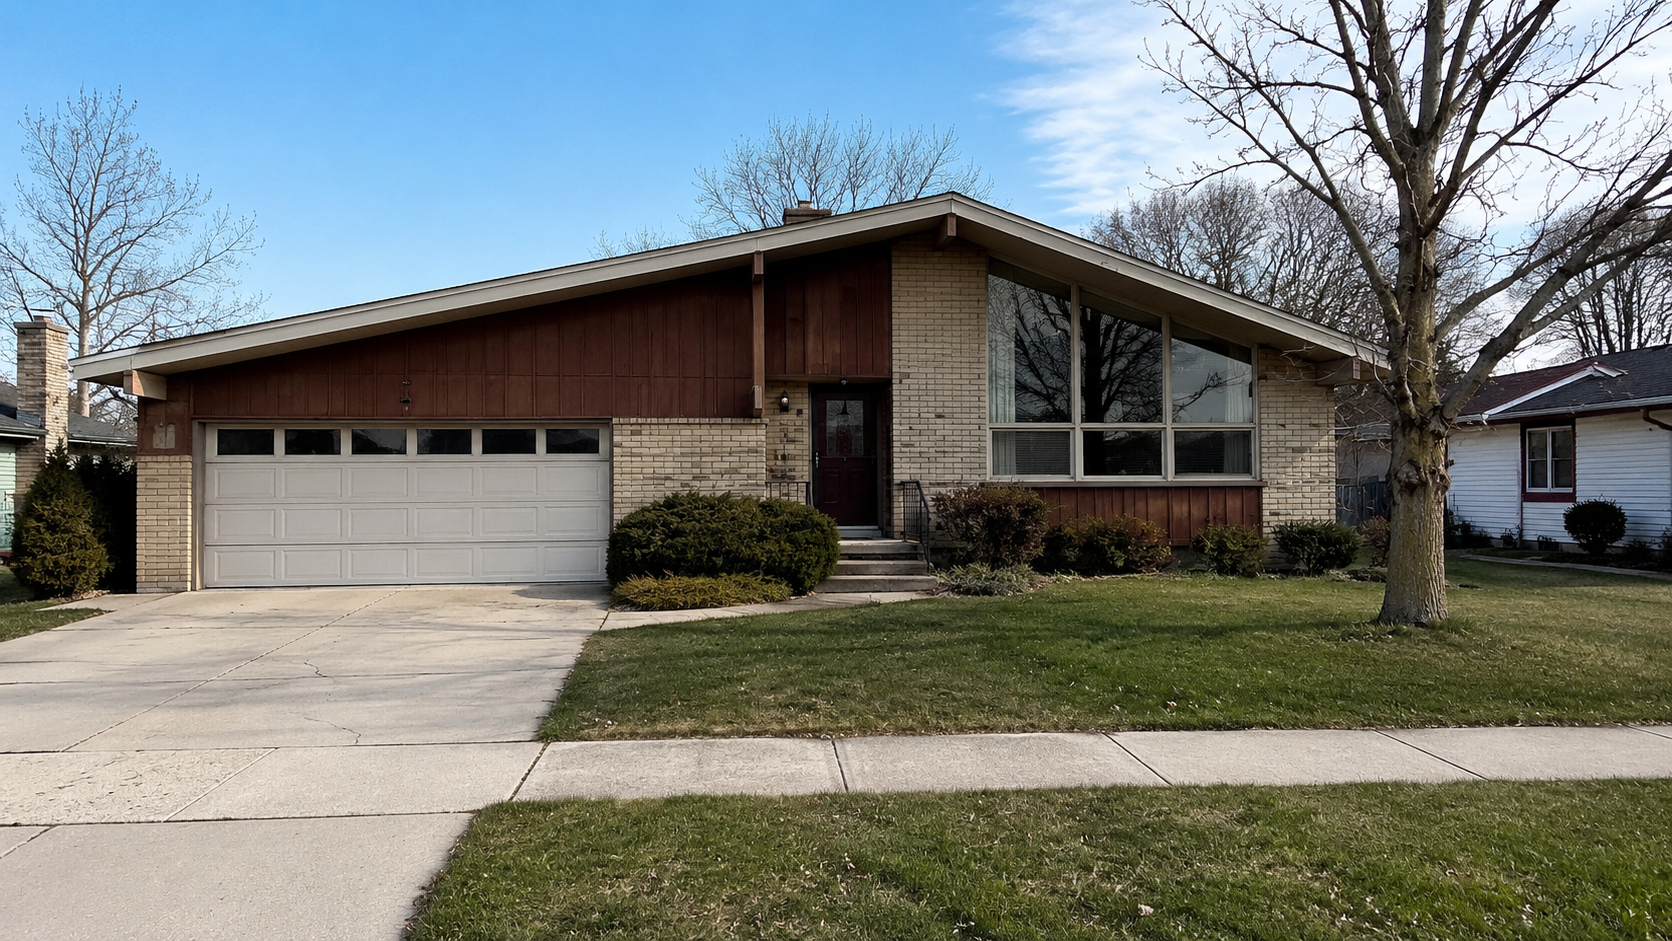
- Low rooflines: flatter profiles, wider eaves, and less formal street presence.
- Natural materials: brick, cedar, stone, rough wood, and textured finishes.
- Bigger glass: larger windows, sliders, and more contact with the yard.
- Looser planning: fewer rigid room boxes and more casual family space.
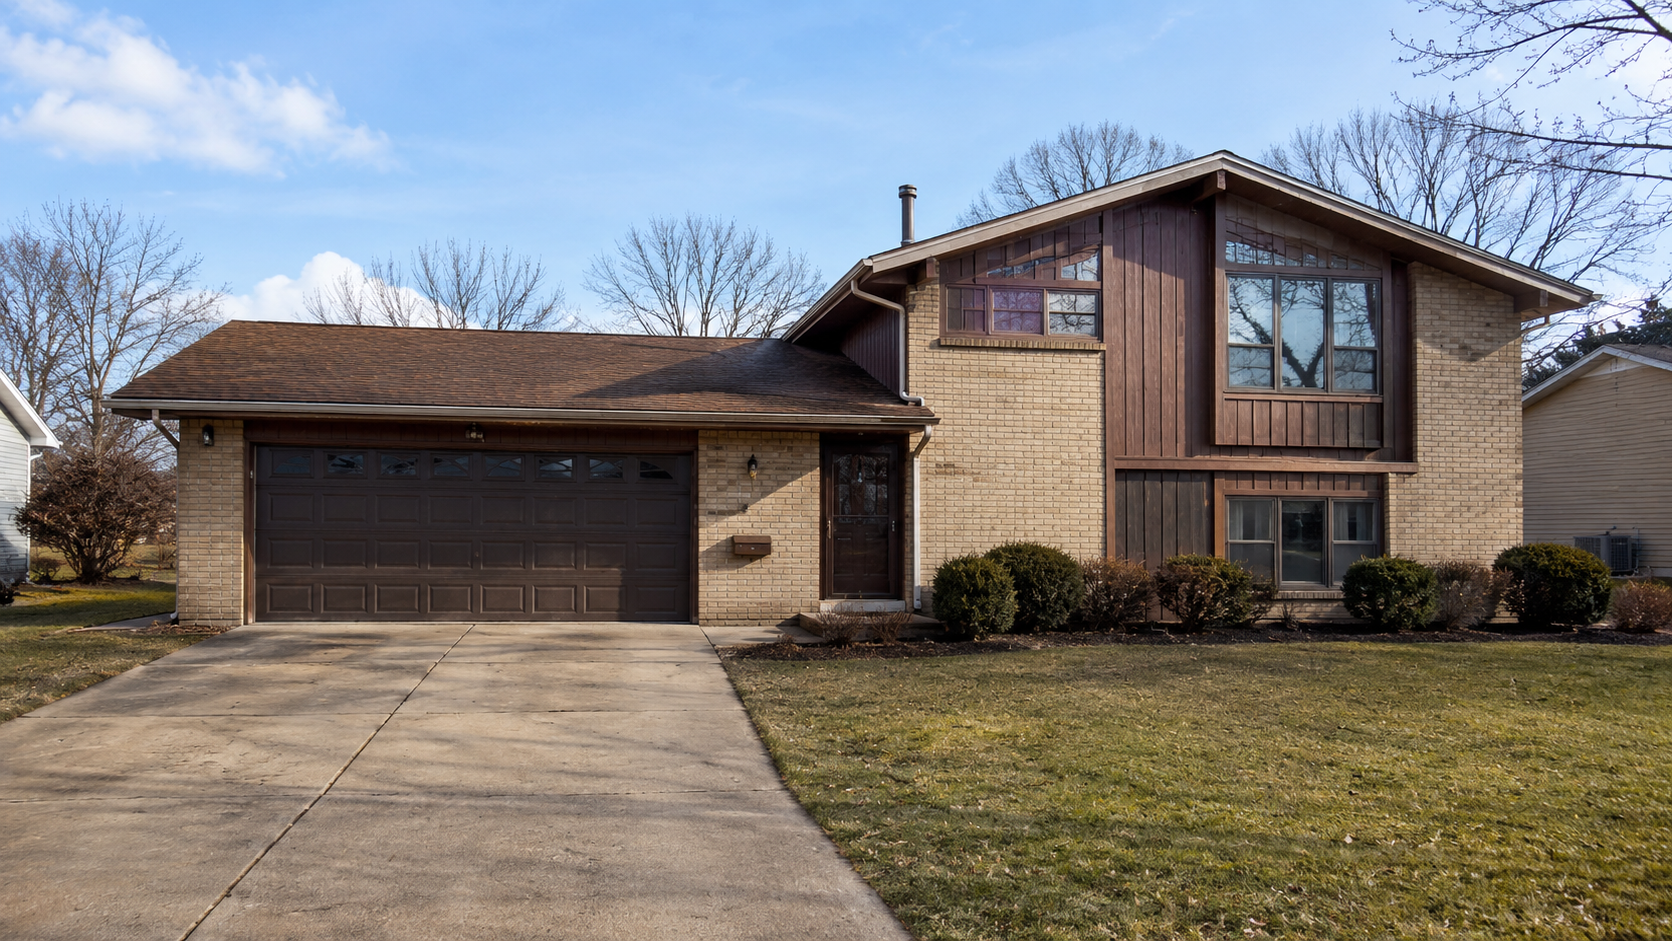
- Split-level and ranch logic: practical layouts built around suburban daily life.
- Heavier interiors: paneling, darker cabinets, shag carpet, bold tile, laminate, and strong color.
Those features are not automatically problems. The trouble starts when the house has too many heavy surfaces at once — dark paneling, dark carpet, dark cabinets, weak lighting, small entry lights, old sliders, and a fireplace wall that dominates the whole room. Fix one or two of those and the house often feels different before anything expensive happens.
| Common 1970s Type | What It Looks Like | What Is Worth Keeping | What Dates It Fast |
|---|---|---|---|
| Ranch | Long, low, one-story house with attached garage and bigger rear glass | Horizontal line, yard connection, simple plan | Overbuilt additions, fake trim, tiny replacement windows |
| Split-level | Short level changes, stair core, separated zones | Family zoning, useful landings, noise separation | Dark stair halls, heavy rails, blocked light |
| Cedar-and-brick suburban house | Mixed cladding, low roof, broad front, deep overhangs | Material texture, solid massing, roof silhouette | Painted-over brick, weak siding swaps, random façade edits |
| Late-1970s playful modern | Bolder shapes, bigger glass, stronger geometry | Clean form, unusual volume, statement windows | Trying to make it look traditional afterward |
How the Decade Changed the House
The 1970s did not invent open living, big glass, or suburban ranches. It pushed those ideas into a more relaxed, more lived-in house.
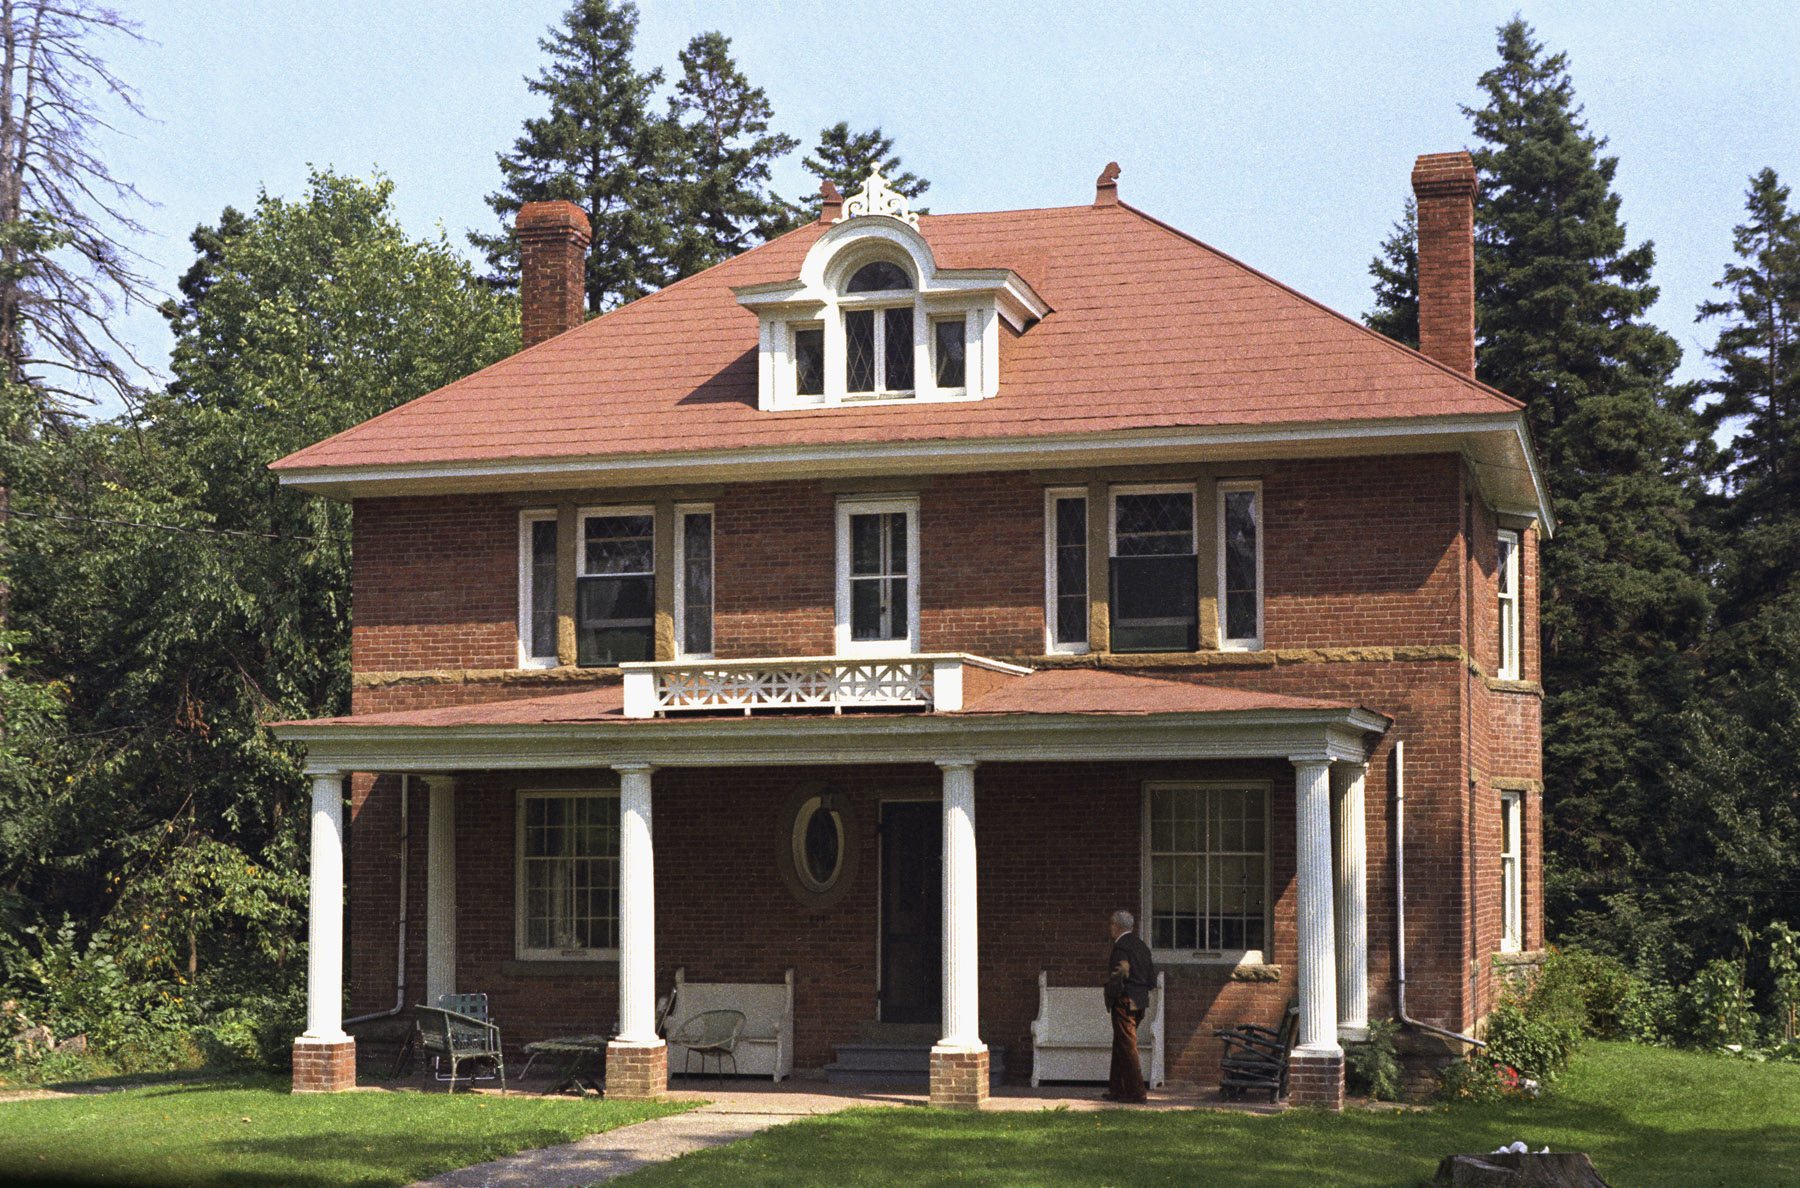
The 1960s still carried more mid-century discipline. Cleaner lines. Lighter interiors. More restraint. By the 1970s, the house became earthier, heavier, and more informal. Materials got rougher. Color got louder. Plans got more casual. You can see it in the brick choices, the way cedar siding gets used, the thickness of the fireplace walls.
That is why these houses split opinion now. Walk into one that has been handled well and it feels warm, easy, and genuinely comfortable. Walk into one that has not been touched in forty years and it can feel dark and heavy from the front door. Both reactions make sense. The house is not the problem — the pile-up of surfaces is.
Before You Move On: the decade before this one is covered in 1960s House Style, and the shift after it continues in 1980s House Style.
Why Some 1970s Houses Still Work
The good ones are genuinely easy to live in, which is not something you can say about every era of house building.
Many 1970s houses have better family flow than older houses with more formal rooms and dead-end corridors. Living rooms open up without being exposed. Kitchens connect better to dining and yard. Sliders lead to patios that actually get used. Split-levels separate the noisy parts of the house from the quiet ones without turning circulation into a maze.
The structure is often straightforward too — brick, wood framing, broad roofs, simple spans. Not precious. Not overworked. That makes these houses easier to understand when renovation starts, which matters when you are opening walls and finding out what is actually in them.
The mistake is assuming every tired finish means the house itself is bad. A worn surface is a surface problem. A bad layout, failing roof, unsafe wiring, or water-damaged wall is a different category of problem entirely. Knowing which one you have changes everything about the budget.
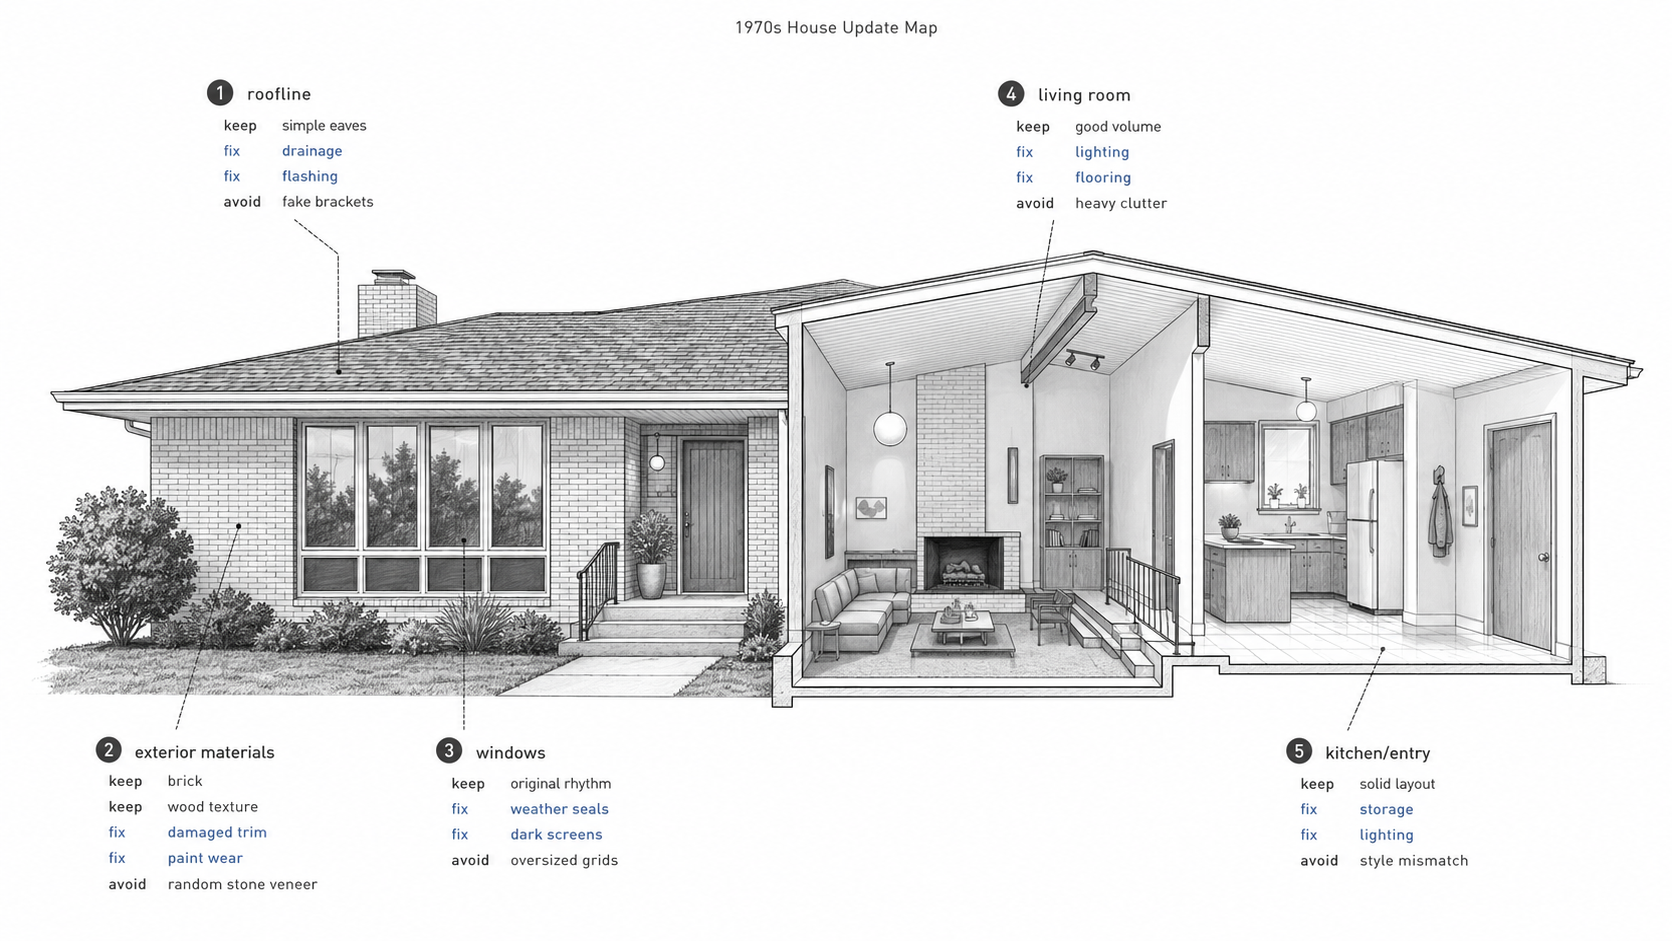
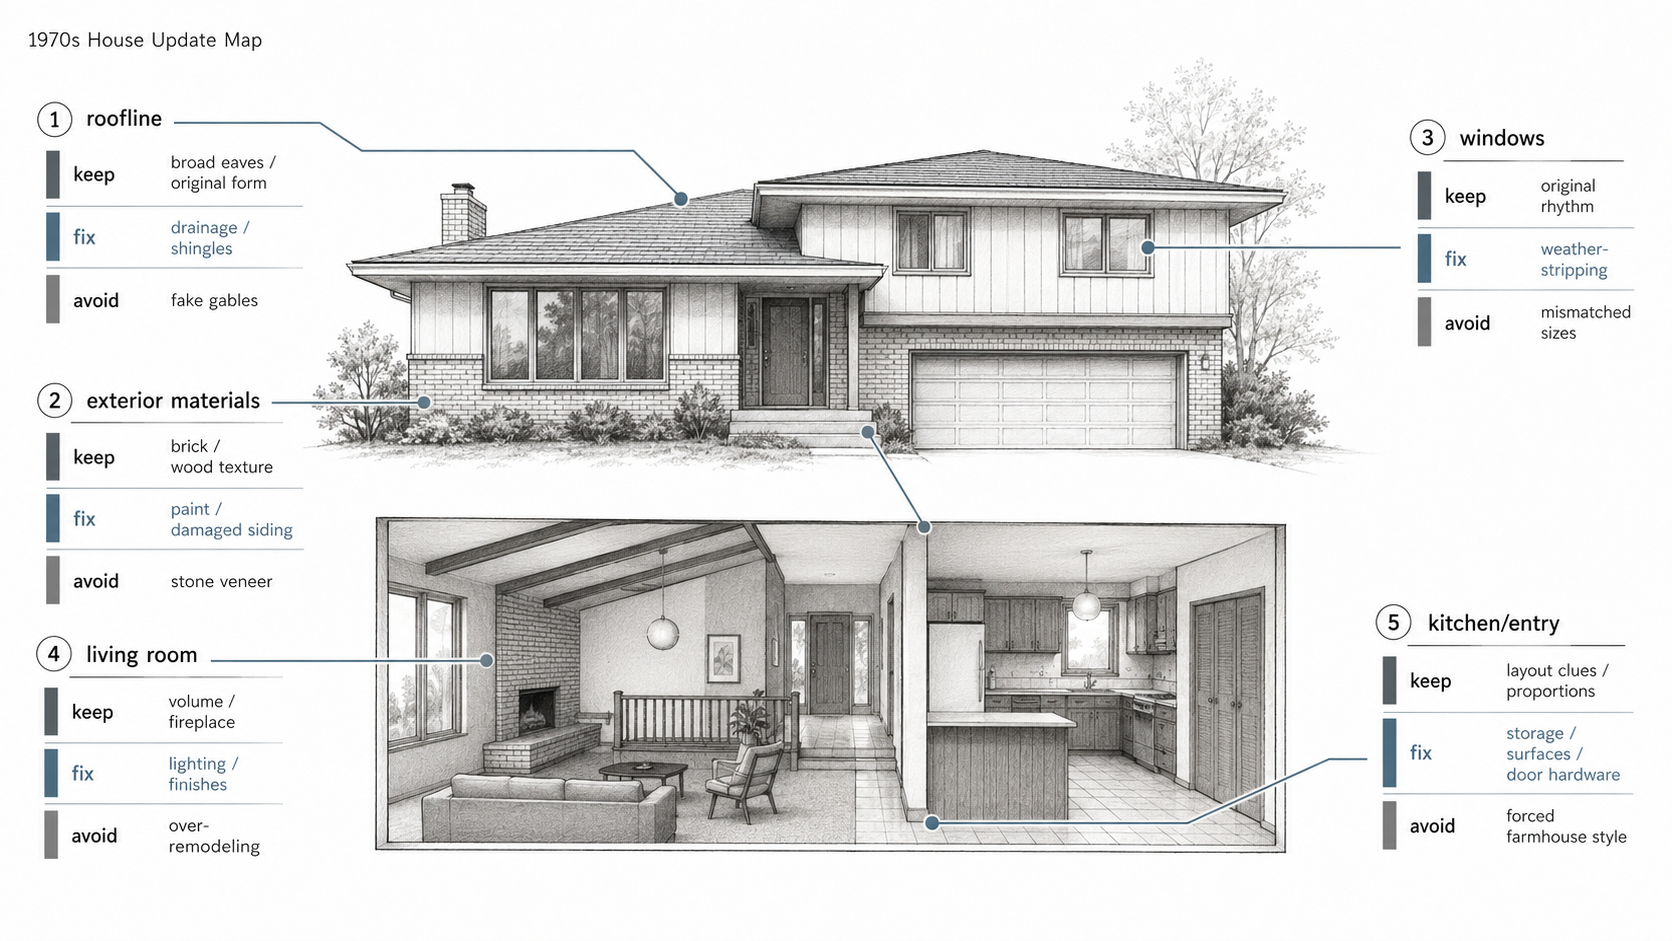
What to Keep, Change, and Avoid
| Keep | Change | Avoid |
|---|---|---|
| Strong roofline and low horizontal massing | Old insulation, bad windows, tired HVAC, outdated wiring | Top-heavy additions that wreck the original profile |
| Brick, cedar, stone, exposed beams, solid fireplaces | Dark stain, failing finishes, weak lighting | Painting or cladding over every textured material at once |
| Split-level zoning and good sightlines | Closed kitchens, awkward railings, dead stair landings | Flattening the whole layout just because it feels dated |
| Large rear glass and yard connection | Drafty sliders, failed seals, poor weatherstripping | Shrinking openings and making the house darker |
| One or two strong era details | Fixtures, flooring, wall finishes, tired hardware | Erasing every trace of the decade and ending up generic |
Fix performance first. Then fix the surfaces. Too many 1970s renovations do it backwards — paint the brick, cover the wood, change the light fixtures, buy new furniture — while the house still leaks air, has old windows, weak insulation, bath fans that vent into the ceiling, and wiring that nobody has looked at in thirty years.
Where Renovations Start Going Wrong
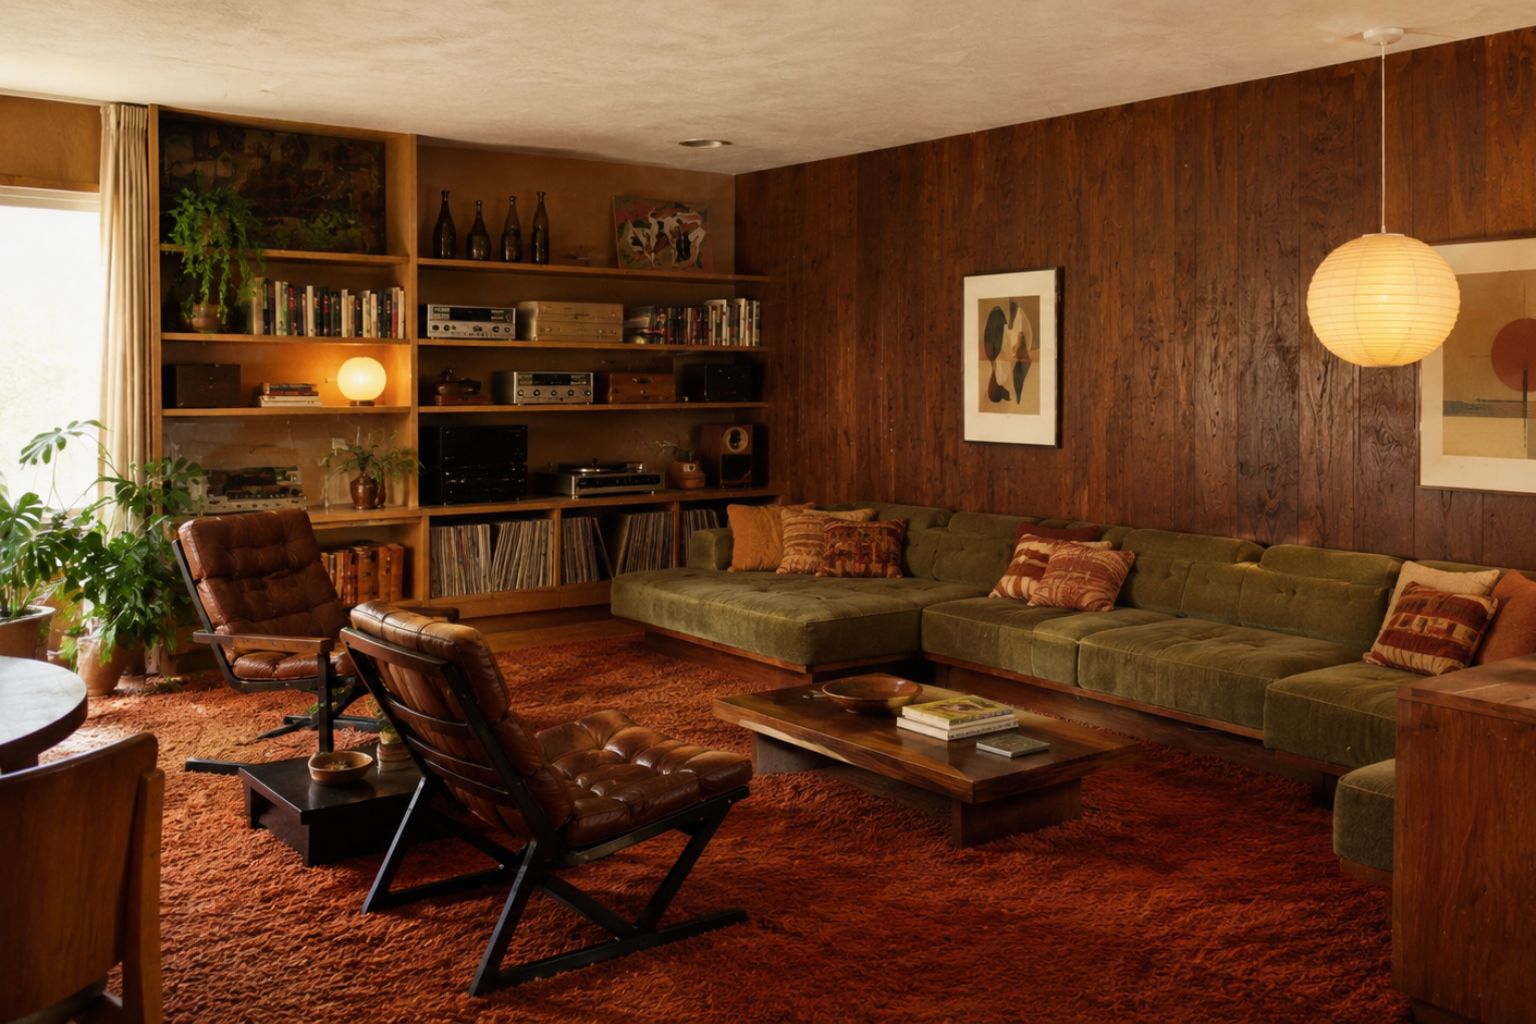
- They strip out all the texture. Brick gets painted. Cedar disappears. Beams get boxed in. The house loses depth and warmth fast, and neither is easy to get back.
- They over-brighten everything. Some 1970s houses need more light. They do not need to be bleached flat. White walls and recessed lights everywhere can make a warm house feel like a dentist's waiting room.
- They force farmhouse or fake Craftsman details onto the exterior. Most of these houses do not want that language and the mismatch shows immediately.
- They open every wall without reading the plan. Some layouts improve with one larger opening, not a full gut. Removing the wrong wall can take out storage, kill a furniture wall, or expose a ceiling line that nobody priced to fix.
- They treat every dated feature as a problem. A good fireplace wall, a strong level change, or even a sunken living room can still work when the rest of the room is handled properly.
The worst version of a 1970s renovation costs a lot and still looks uncertain. New finishes everywhere, but no clear decision about the roofline, windows, entry, living room, kitchen, or exterior materials. The house feels neither original nor resolved.
Inside the House: What Still Helps
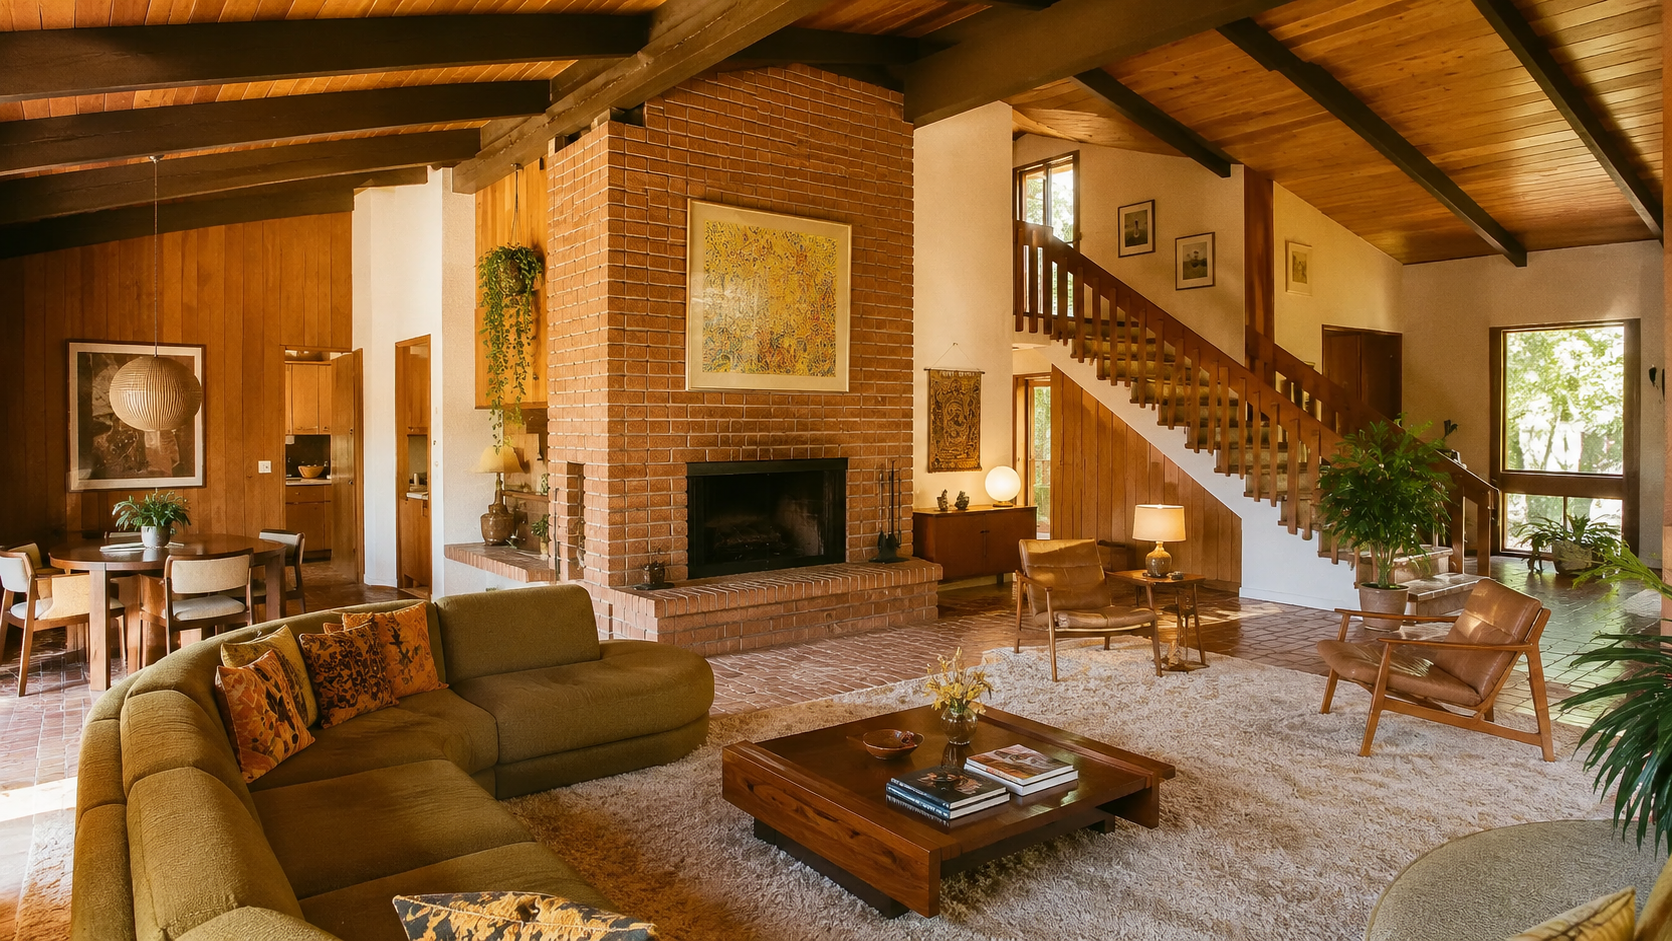
The best interiors from this decade still feel relaxed and easy to live in. Lower seating. Better connection between rooms. More texture. A willingness to be casual that earlier decades did not always allow.
The problem is not the whole decade. It is the pile-up: dark surfaces, low light, worn materials, and bad transitions between rooms that all arrived at once and never got sorted out separately.
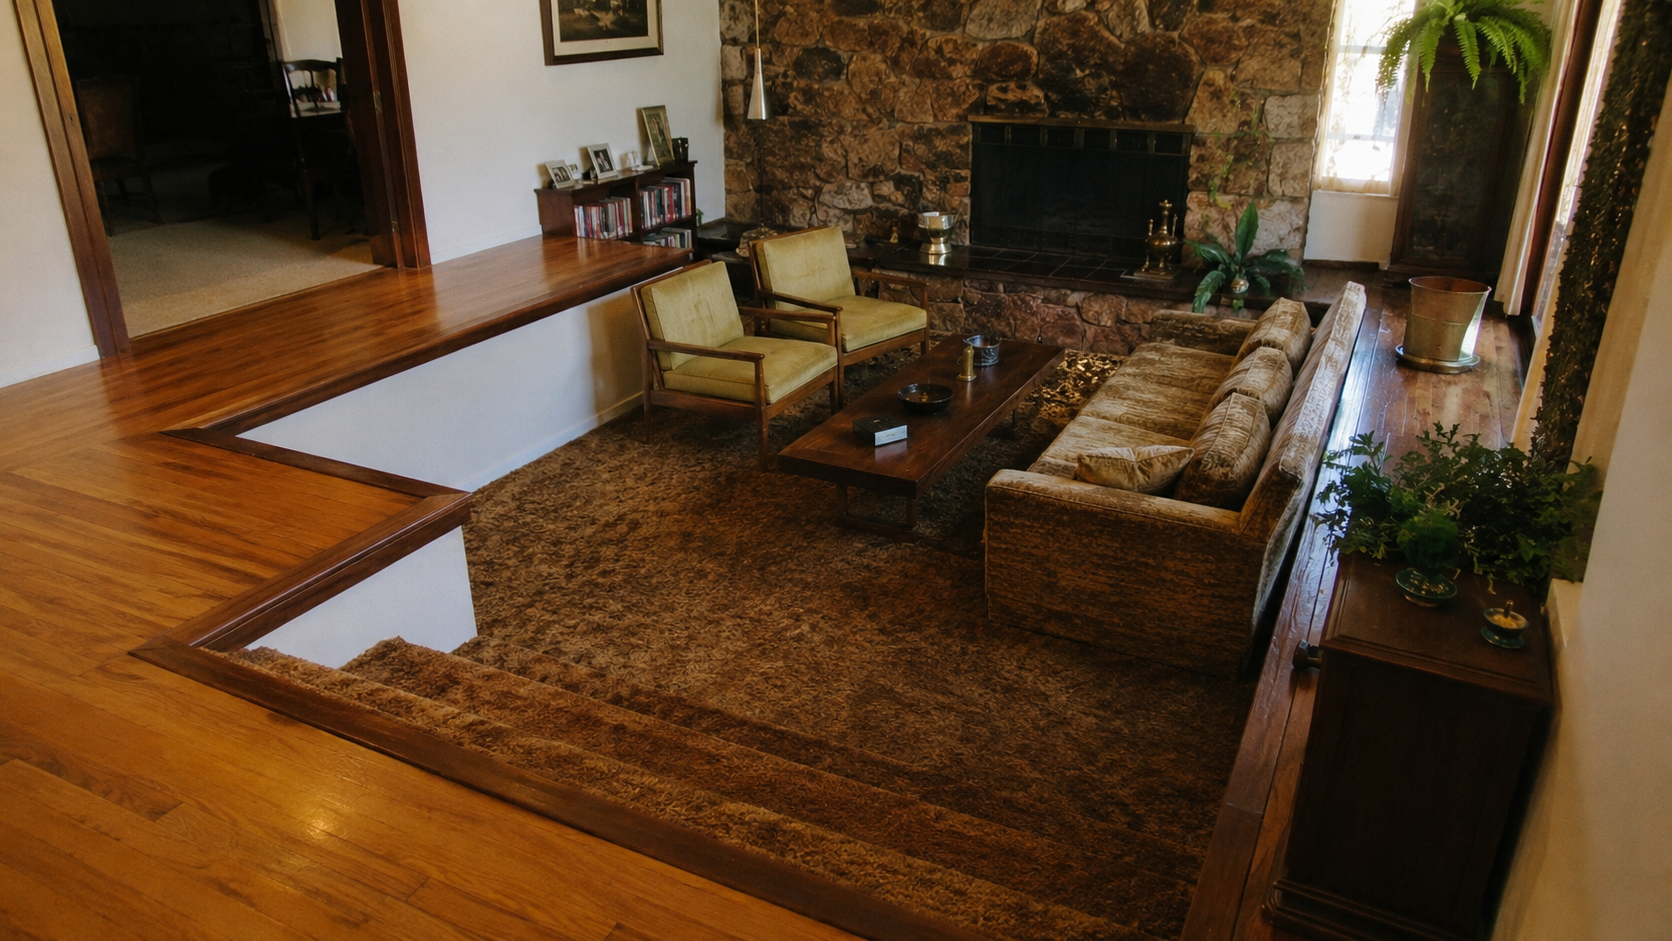
- Living rooms: conversation pits and lowered seating zones can still work well. The issue is usually poor lighting, worn carpet, and too much visual weight — not the level change itself.
- Kitchens: the layout is often more useful than the finishes suggest. Cabinets, laminate, soffits, and appliances may need work. The room logic sometimes does not.
- Bathrooms: bold tile and colored fixtures date the room fast, but the basic footprint is usually serviceable. Gut it when the room is failing behind the surface, not just because the color is wrong.
- Entries: many 1970s houses need a clearer arrival sequence, stronger lighting, and better floor materials right at the door. That alone changes how the house feels from the moment you walk in.
Keep one or two strong features. Fix the lighting. Replace worn flooring. Calm the wall finishes. Then decide what still looks dated. That sequence costs less and produces better results than tearing everything out at once.
Exterior Changes That Help Instead of Hurt

The outside of a 1970s house improves when you work with the massing instead of trying to disguise it. These are not houses that want to be something else. They want to be cleaner versions of themselves.
- Keep the roofline calm. Adding height or fake gables rarely improves a house that was designed to sit low.
- Preserve brick and good wood where they still have life. They give the house texture that replacement materials rarely match.
- Upgrade windows without changing the opening proportions. The glass size is part of what makes the house work from inside and outside.
- Simplify trim instead of adding more of it.
- Treat the front door as one strong move — the right door, the right light, the right path to it — not a collection of separate improvements.
If the entry is the weak spot, go to 1970s Front Door Update. That page treats the slab, sidelight, storm door, trim, threshold, paint, glass, and hardware as one entry assembly, which is the right way to think about it.
Performance Fixes Come Before Style
A 1970s house can look like a design problem when it is actually a performance problem.
Drafty windows, poor air sealing, thin attic insulation, old bath fans venting nowhere, weak weatherstripping, and tired HVAC can make the house feel uncomfortable even after the surfaces are updated. The rooms look better but still feel cold in winter, hot in summer, damp in the bathroom, and stale in the bedrooms. The finish work did not fix the house. It just covered it.
Before spending heavily on visible work, check:
- Attic insulation and air sealing.
- Window and door weatherstripping.
- Bath fan ventilation — where it actually goes.
- Leaky sliders and exterior doors.
- Water-damaged trim, siding, or roof edges.
This does not mean every window must be replaced before the kitchen gets touched. It means the house should be checked as a system before money goes into purely cosmetic work. The two budgets should not compete with each other mid-project.
Old Materials Need a Slower Demolition Plan
A lot of 1970s houses sit right on the line for hazardous-material caution, and most homeowners do not realize it until demo has already started.
If the house was built before 1978, painted surfaces may contain lead. That matters when sanding, scraping, cutting, drilling, or removing painted trim, doors, windows, cabinets, railings, or exterior siding. It is not a theoretical risk. It is a real one that changes how the work gets done and who is qualified to do it.
Some older flooring, adhesives, textured ceilings, patching compounds, duct materials, and fireplace-area materials may also need asbestos caution. You cannot tell by looking. A material can look completely harmless and still be a problem when it gets cut or sanded.
The mistake is treating the first weekend of demo as harmless. Pulling carpet, scraping ceilings, sanding trim, or cutting old flooring can spread dust through the house before anyone has figured out what the dust contains. Test suspect materials before the work starts, not after someone has already been breathing the dust for a week.
When to Keep the 1970s Character
Keep it when it is still doing useful work.
A brick fireplace can anchor a living room. A low roofline can make the house feel grounded and settled in a way that additions rarely replicate. A vertical-glass front door can fit the entry better than any generic replacement. A sunken living room can create a genuinely good sitting zone when the steps, lighting, and flooring are handled properly.
Do not keep a feature because it is old. Keep it because it still helps the house. The best 1970s updates keep the original shape and remove the fatigue around it. Better light. Cleaner floors. Repaired trim. Simpler hardware. Calmer paint. Stronger ventilation. Those changes cost less than gutting and they tend to last longer because they are working with the house, not against it.
When to Change More Aggressively
Some 1970s features do not deserve saving and holding onto them costs more than replacing them.
Change them when they make the house unsafe, uncomfortable, inefficient, or genuinely hard to use. A failing slider. Soft exterior trim that has been wet for years. A warped front door that does not seal. A kitchen wall that blocks the only useful light. A stair rail that moves when you touch it. Flooring that hides moisture damage underneath.
The test is simple: does the feature still improve the house once the basic problems are fixed? If the answer is no, let it go. Sentiment about original features is fine until it starts costing money every year to maintain something that is not working.
How to Update a 1970s House Without Flattening It
- Read the original house first. Roofline, windows, garage, entry, living room, kitchen, and yard connection usually explain the house better than the finishes do. Walk through it before you decide what to change.
- Check safety and performance. Wiring, moisture, ventilation, insulation, windows, doors, and old materials need attention before cosmetic demolition starts.
- Choose what stays. Roofline, brick, fireplace, wood, level change, glass, or layout features that still help the house should be decided before the skip arrives.
- Remove the tired layers. Worn carpet, bad lighting, weak trim, dated hardware, and damaged finishes can go without erasing the character of the house.
- Update in groups. Door, light, trim, threshold, and hardware belong together. Kitchen layout, lighting, cabinets, and flooring belong together. Scattered small updates rarely add up to a coherent result.
That sequence saves money because it avoids redoing finish work after bigger decisions finally get made. The homeowners who spend the most on 1970s renovations are usually the ones who made finish decisions before the structural and performance decisions were settled.
Who 1970s Houses Fit Best Now
These houses still work well for people who want space, light, and a house that does not feel over-formal or over-decorated. The layouts are practical. The room sizes are generous compared to what gets built now. The connection to the yard is real, not an afterthought.
They also work well for owners who can tell the difference between a bad finish and a bad house. That distinction matters more in a 1970s renovation than almost any other era. A lot of these homes look tired on the surface but respond very well once lighting, flooring, insulation, air sealing, and a few key openings are handled. The house was not the problem. The surfaces were.
The harder fit is for anyone trying to force the house into another decade entirely. That is where the budget goes and the house stops making sense.
FAQ
Are 1970s houses worth buying?
Yes, when the structure is sound and the layout still works. Many need updates, but a lot of them have strong bones, practical plans, and better flow than buyers expect on the first walkthrough.
What is the biggest mistake in a 1970s house remodel?
Trying to erase the decade before reading the house. That is how brick, wood, rooflines, fireplaces, level changes, and useful layouts get destroyed while the real problems — wiring, air sealing, ventilation, moisture — are left behind the new finishes.
Are 1970s houses energy efficient?
Usually not by current standards. Air sealing, insulation, windows, doors, ventilation, and HVAC condition often all need attention. The exact scope depends on climate, construction type, and what previous owners already changed.
Should you keep 1970s features like sunken living rooms?
Sometimes. Keep them when they still help the room and can be made safe. Remove or fill them in when they create trip risk, accessibility problems, bad circulation, or finish conflicts that cost more to solve than the feature is worth.
What exterior change helps a 1970s house most?
Entry cleanup, better lighting, window repair or careful replacement, trim repair, and restrained material work usually help more than forcing a new style onto the façade. The house improves most when the changes work with its shape, not against it.
Do 1970s houses have lead paint or asbestos?
Some do. Homes built before 1978 can have lead-based paint in painted surfaces. Some older flooring, adhesives, textured ceilings, patching compounds, and other materials may contain asbestos. Test or use qualified help before disturbing suspect materials — especially before any sanding, scraping, or demolition work.
Read This Next
- 1960s House Style — to see what the decade before this one carried forward.
- 1970s Sunken Living Room — if that one feature is driving the remodel decision.
- 1970s Front Door Update — if the façade needs one cleaner move at the entry.
- 1980s House Style — to follow the shift into the next decade.
- How to Update a 1980s House Exterior — if you are comparing decade-specific exterior fixes.
References
- U.S. Environmental Protection Agency, Lead Renovation, Repair and Painting Program.
- U.S. Environmental Protection Agency, I'm remodeling my home. Do I need to be concerned about asbestos in building materials?
- U.S. Department of Energy, Air Sealing Your Home.
- U.S. Department of Energy, Update or Replace Windows.