How to Build a Saltbox Roof from Start to Finish
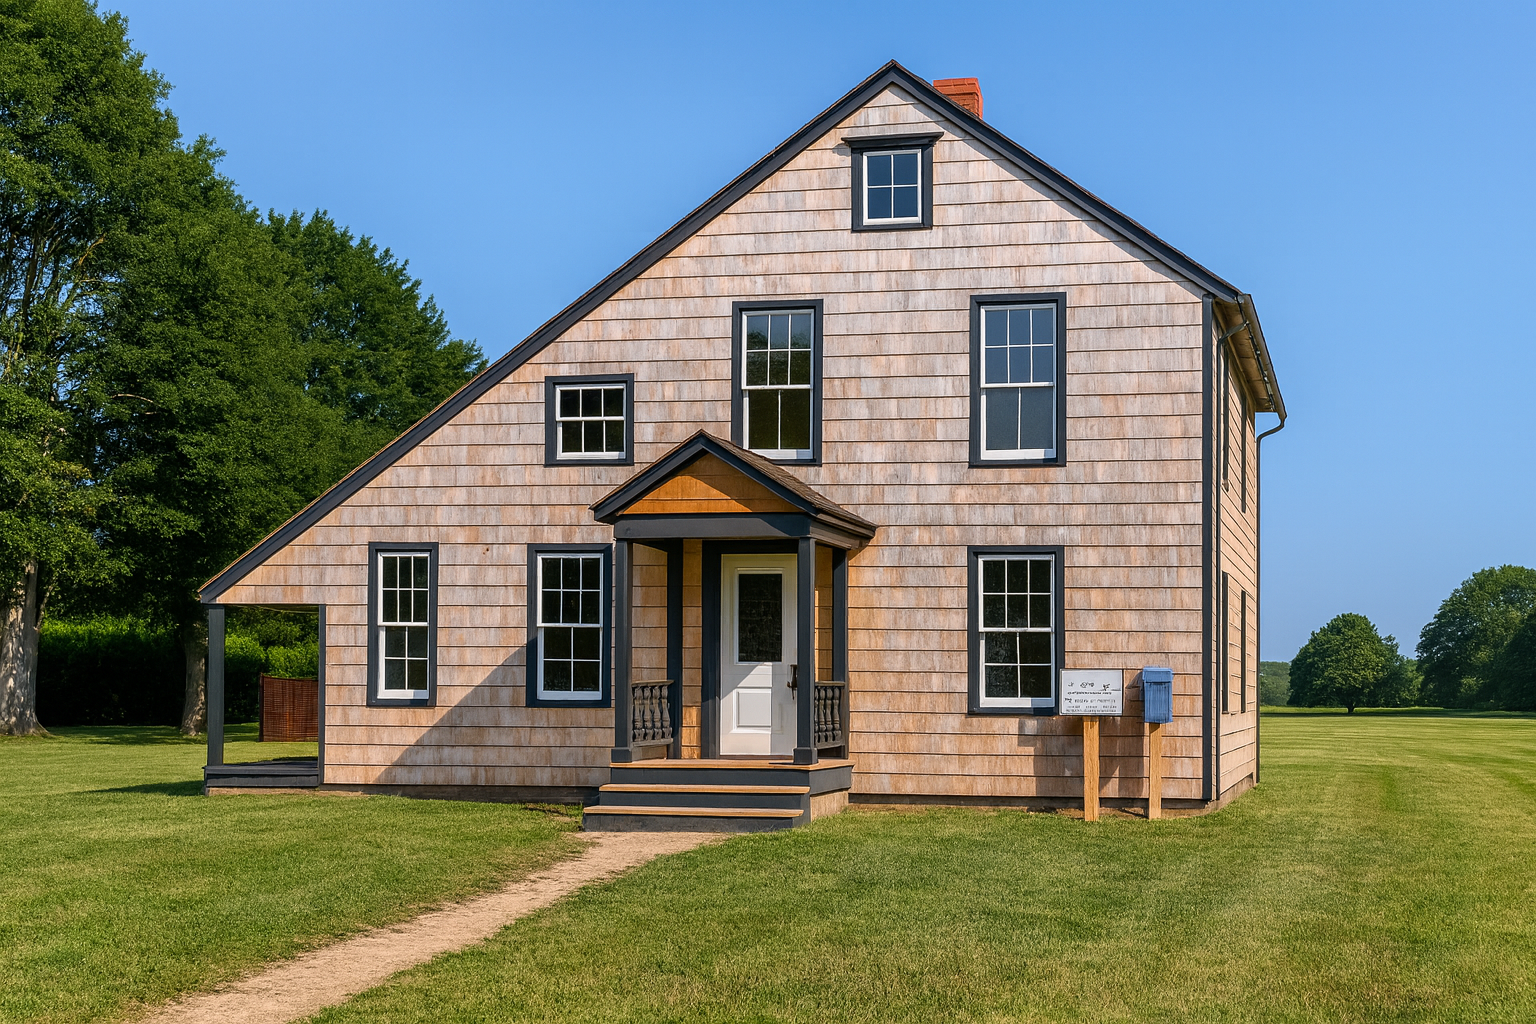
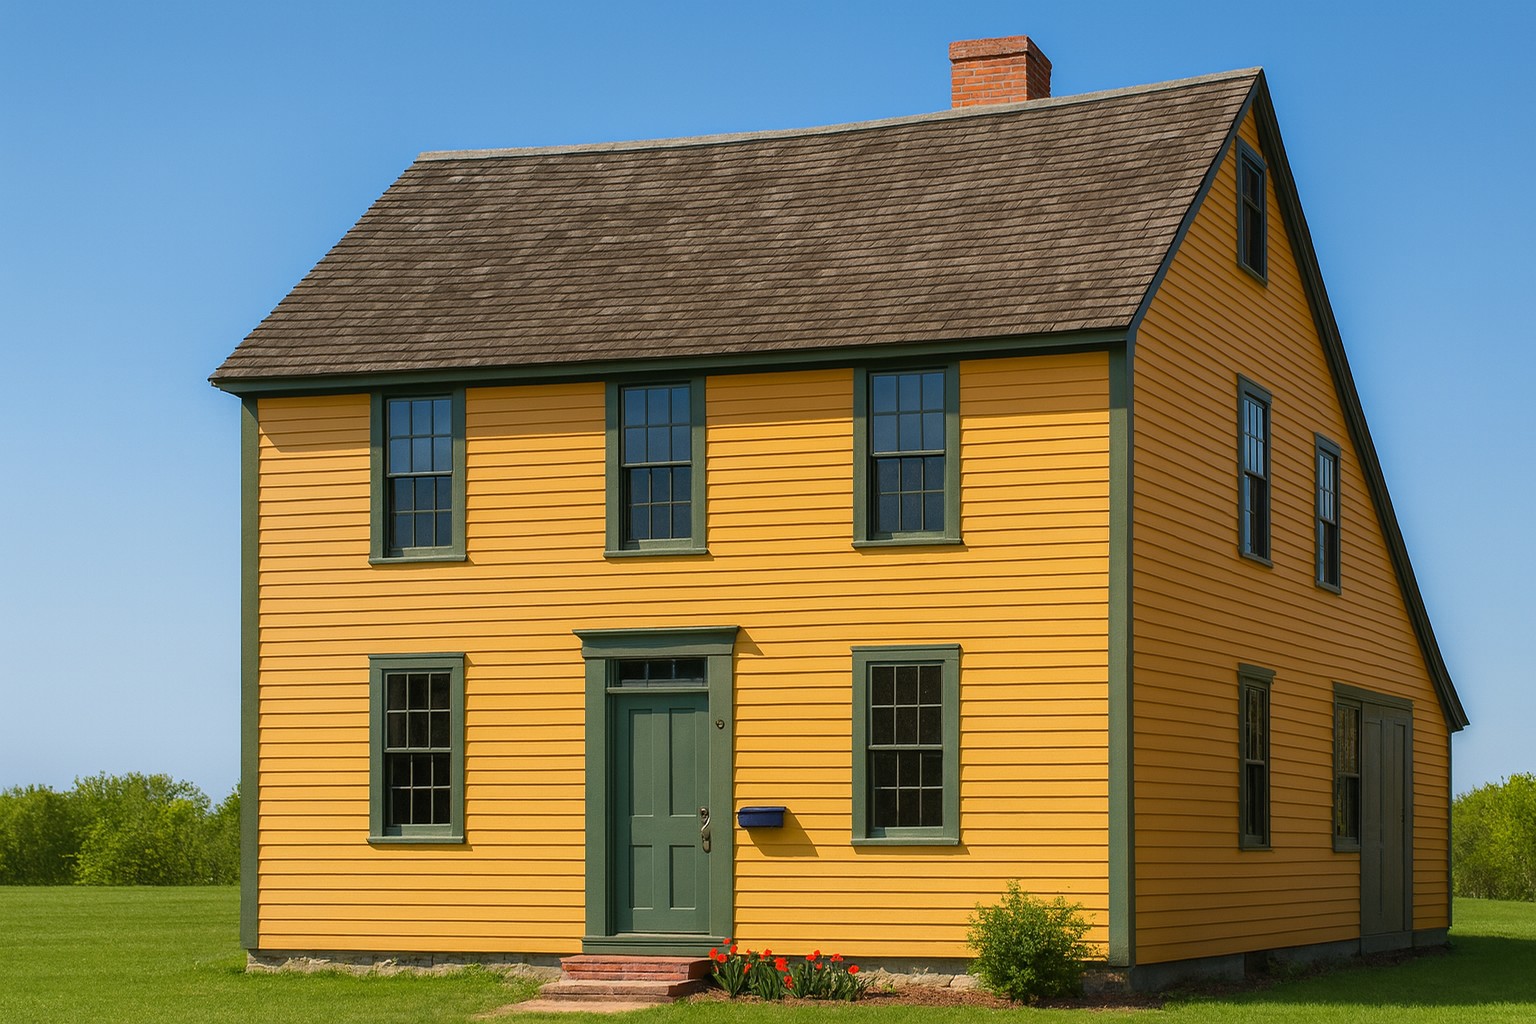
Saltbox roofs are easy to recognize. One side has a long slope. The other side is shorter. They began as a practical way to add space without rebuilding an entire house. Now they show up on historic homes, barns, sheds, and even modern glass and timber builds.
This guide focuses on what matters most. How to frame it so it stays square and strong. How to choose the right materials. How to avoid mistakes that waste time or weaken the structure.
We will cover:

-
Framing methods that keep the roof solid and aligned
-
Materials that balance cost and long-term strength
-
How to spot and fix common problems like uneven rafters or poor cuts
FIELD PICK
IRWIN Tools Universal Handsaw – sharp, accurate, and good for cutting framing lumber cleanly.
→ Buy on Amazon
By the end you will know how to build a saltbox roof that stands straight, sheds water properly, and looks right from the street. Whether you are adding to an existing house or starting fresh, the same rules apply.
Saltbox Roof: What It Is and Why Builders Still Use It

Where It Came From
The saltbox roof showed up in colonial America for one reason. People needed more space but did not want to rebuild an entire house. They added a lean-to at the back and stretched the roof over it. That gave the house a long slope in the back and a short slope in the front. Simple fix. Strong result.
How to Spot One

-
Long slope at the back
-
Shorter slope at the front
-
Clean, stretched profile that stands out from other roof types
This design solved a problem and ended up being one of the most weather-resistant roof shapes you can build.
Why It Still Works
A saltbox roof is not just about looks. It earns its place.
-
The steep slope drains water fast and keeps leaks away
-
Snow slides off before it can build up and cause damage
-
The long slope can cover an attic that is easy to insulate and keeps the house warmer in winter
-
The shape works on old homes and modern glass-and-timber builds
FIELD PICK
DEWALT 20V MAX Circular Saw – dependable for cutting rafters and roof sheathing cleanly.
→ Buy on Amazon
Saltbox roofs have lasted for centuries because they work. They protect, they look good, and they adapt to almost any style of building.
Saltbox Roof Pros and Cons

The Good Stuff
Sheds Water and Snow Fast
The steep side throws rain and snow right off. Less chance of leaks or rot.
Example: In Seattle, I’ve seen these roofs stay dry while flat and low-pitch roofs end up with puddles.
Tip: Put in a solid gutter system so all that water goes where you want it.
Gives You More Room

That long back slope often means more headroom or storage in the attic.
Example: One Vermont build had an attic turned into a reading spot with a mountain view.
Tip: If you want it as living space, insulate it right and keep it ventilated.
Holds Up in Strong Winds
The sloped shape helps push wind up and over.
Example: A Florida garage with a saltbox roof took a hurricane hit better than a gable roof nearby.
Tip: Use hurricane clips and solid framing.
Looks Different in a Good Way
It works on old houses, barns, or modern designs.
Example: Built a saltbox shed in the suburbs that matched the main house and still stood out.
Tip: Cedar siding or brick makes it look sharp.
Can Save on Energy
Steep slope helps airflow and keeps the house cooler in summer, warmer in winter.
Example: Did one in Colorado that caught winter sun but shaded the windows in summer.
Tip: Steep side is perfect for solar panels.
The Drawbacks
Trickier to Build
Uneven sides mean more cutting, more measuring, and more time.
Example: A shed we built took an extra day just to get the framing right.
Tip: Get a builder who knows saltbox roofs.
Wastes More Material
Odd angles can leave you with a lot of scrap.
Example: In upstate New York, we had piles of plywood offcuts that couldn’t be used anywhere else.
Tip: Plan cuts so scraps fit smaller jobs.
Costs More
Takes more wood, more shingles, and more hours than a gable.
Example: Added about ten percent to the roofing budget on a 1,500-square-foot house.
Tip: Use engineered wood or composites to save money.
Harder to Work On
That steep side is no fun to climb, especially in snow or ice.
Example: In Maine, one homeowner had to call us just to clear snow.
Tip: Add snow guards and leave the steep-side work to pros.
Limits Some Interior Layouts
The slope cuts into upstairs wall height.
Example: In a cabin, we had to change the bedroom plan to fit the furniture.
Tip: Built-in shelving works well with the slope.
A saltbox roof gives you strong weather protection, extra room, and a style that stands out. It will cost more and can be harder to maintain, but if it is built right, it will last for decades.
Saltbox Roof Construction and Framing

Materials
-
Timber for framing. Strong and easy to cut.
-
Asphalt shingles for a classic look with durability.
-
Modern composites for low maintenance and weather resistance.
Pro tip: Use treated timber in wet or termite-prone areas.
Tools
-
Power saws and drills for cutting and fastening.
-
Tape measure, level, and framing square for accuracy.
-
Nail gun and fasteners for quick assembly.
Step-by-Step Framing
1. Plan the build
Draw it to scale or use framing software. The long and short slopes need separate measurements.
2. Frame walls first
High wall and low wall must be plumb and square. Check with a string line before moving on.
3. Cut rafters for each side
Shorter rafters with a steeper angle for the front slope. Longer rafters with a shallower angle for the back slope. Mark clearly.
4. Set ridge beam and joints
Keep it straight and secure with proper connectors and nails. This beam ties both slopes together.
5. Install sheathing and overhangs
Start at the ridge. Stagger sheet joints. Keep overhangs even so the roof looks balanced.
6. Weatherproof
Lay underlayment from the bottom up. Overlap each row. Flash all vents and chimneys. The low slope needs extra care to stop water pooling.
7. Install roofing
Shingles for traditional builds. Metal for faster installation on steep slopes and better snow shedding.
Modern Updates

-
Engineered wood or light steel for more strength.
-
CAD or 3D modeling to catch problems before cutting.
-
Eco-friendly materials like bamboo composites or recycled metal.
-
Solar panels can be added to the long slope without changing the look.
Common Problems and Fixes
Structural imbalance – Add extra bracing to the longer slope.
Material waste – Use pre-cut trusses for the saltbox profile.
Ventilation – Add ridge vents or soffit vents.
Lighting – Add skylights to the long slope for daylight.
Why Saltbox Roofs Last
They shed water and snow fast. They hold up in strong winds. They offer more usable attic space. With modern materials and proper framing, they will last for decades.
CASE STUDY
Saltbox Roof Shed Build – Lessons From the Jobsite

IMAGE: A cstep-by-step guide to building a saltbox roof, from planning and framing to installing rafters, sheathing, and roofing.
Building a Saltbox Roof Shed from Start to Finish
This guide walks through the build of a 10x14 foot saltbox roof shed from planning to finishing. The design blends the traditional long-slope, short-slope profile with materials and methods that last.
1. Plan and Prepare
Dimensions
-
Front wall height: 10 feet
-
Rear wall height: 7 feet
-
Roof pitch: 6:12 front slope, 4:12 rear slope
Materials
-
Pressure-treated 2x4 timber for framing and rafters
-
Ridge beam: 14-foot timber or engineered wood
-
Sheathing: OSB or plywood sheets
-
Roofing: asphalt shingles
-
Nails, screws, flashing, underlayment membrane
Tools
Framing square, circular saw, hammer or nail gun, tape measure, chalk line
2. Build the Walls
Front wall – Frame to 10 feet to fit the longer roof slope.
Rear wall – Frame to 7 feet for the shorter side of the roof.
Add openings for windows and doors. Use header beams for support. Brace walls diagonally to keep them square before raising.
3. Frame the Roof
Ridge beam – Set the 14-foot beam at the correct height using temporary supports. Keep it centered.
Rafters
-
Front slope: 12-foot rafters for the steep side
-
Rear slope: 8-foot rafters for the low side
-
Space rafters 16 inches apart
Fasten rafters to the ridge beam with galvanized steel gusset plates. Check alignment before locking them in.
4. Sheathing and Roofing
Sheathing – Install plywood or OSB from the eaves upward. Stagger seams and leave small gaps for expansion.
Roofing –
-
Roll out underlayment from bottom to top.
-
Install shingles starting at the eaves, overlapping as you move up.
-
Add flashing to edges and seams.
Pro tip: Architectural shingles last longer and look better than standard three-tab.
5. Finish the Shed
Insulation and interior – For all-season use, insulate walls and roof. Cover with drywall or plywood.
Exterior – Paint or stain with weather-resistant finish. Install trim around windows and doors.
Cost and Timeline
Estimated cost
-
Materials: $800 to $1,200
-
Tools if needed: $150 to $200
Timeline
-
Framing and roof: 2 to 3 days
-
Sheathing and roofing: 1 to 2 days
-
Finishing: 1 to 2 days
Result
The finished shed has the classic saltbox profile, sheds water quickly, and adds usable loft space. Built with treated timber, quality roofing, and weather protection, it will hold up for decades with minimal upkeep.
Residential Applications of Saltbox Roofs
Saltbox roofs work across both traditional and modern homes. The steep front slope and shorter rear slope create a shape that is visually distinctive and functionally smart.
Key benefits:
● The asymmetrical roofline adds instant character and makes a property stand out.
● The design connects to early colonial architecture while fitting comfortably into modern building trends.
● The steeper front slope increases usable attic or loft space, which is valuable in smaller homes.
Energy efficiency advantages:
● A steep front slope improves insulation performance in cold climates by reducing the surface area exposed to snow and ice buildup.
● The longer rear slope often faces south in North America, making it a natural surface for solar panels.
● The roof angle supports passive heating and cooling by controlling sunlight exposure and airflow.
Real example: A Vermont family retrofitted their colonial Saltbox home with triple-glazed windows and a 24-panel solar array mounted on the rear slope. The result was a 40% annual reduction in heating and electricity costs.
Pitch details: A common layout is a 6:12 pitch on the front and a 4:12 pitch on the rear. The steeper front sheds snow and rain efficiently, while the gentler back slope reduces wind load and supports solar panel installation. Correct pitch selection also prevents structural strain over time.
Sheds and Small Structures
Saltbox roofs are just as effective on smaller buildings. They provide extra headroom on one side, efficient drainage, and a visual upgrade over flat or single-slope designs.
Why it works:
● The taller side is ideal for installing shelves, cabinets, or a full-height workbench.
● The shorter side can be used for storage that requires less clearance.
● The sloped roof prevents standing water and reduces the risk of leaks.
Material choices: Pressure-treated timber for framing, weather-resistant shingles or metal for roofing, and raised wooden floors to keep moisture from seeping up from the ground.
Creative uses: Beyond simple storage, Saltbox sheds can be adapted into garden pavilions, backyard studios, or even small living spaces. A popular example is converting the design into a tiny home with a lofted sleeping area.
Real example: One homeowner converted a Saltbox shed into a home office with skylights on the taller slope, spray foam insulation in the roof, and a built-in desk along the rear wall.
Build tips:
● Plan the internal layout before construction to make the most of the taller side.
● Add vents or small windows to improve airflow and reduce condensation.
● Use a high-quality weatherproof paint or sealant to extend the structure’s lifespan.
Technical and Visual Considerations
A Saltbox roof’s success starts in the planning stage. Detailed drawings ensure the correct pitch, structure, and load capacity.
Why accurate drawings matter: Without precise dimensions, the roof may have uneven slopes, poor drainage, or weak structural points.
Key structural parts: Rafters form the angled framework. Joists connect and support the rafters. A ridge beam runs horizontally along the peak where the rafters meet. Fasteners such as galvanized nails, screws, and gusset plates hold the structure together.
Common measurements: A 6:12 pitch on the front and 4:12 on the rear is a proven combination for drainage and structural balance.
Visualization tools: Software such as SketchUp or AutoCAD can simulate the finished structure, allow quick pitch adjustments, and analyze sun angles for energy planning.
Pro tips:
● Start with a basic outline before adding complex features.
● Double-check all measurements before cutting materials.
● Use pre-designed Saltbox templates if available to avoid calculation errors.
Seasonal Maintenance
Saltbox roofs are durable, but consistent maintenance is essential for long-term performance.
Inspection schedule: Twice a year—once after winter and once before summer—plus after major storms.
What to check:
● Water stains on ceilings or walls that could indicate a leak.
● Sagging rooflines that may point to structural stress.
● Missing, cracked, or curled shingles that need replacement.
Seasonal tasks:
-
Spring/Summer: Remove leaves and branches from the roof and gutters. Check flashing and joints for gaps. Ensure attic ventilation is working.
-
Fall/Winter: Clean gutters and downspouts. Remove heavy snow with a roof rake to prevent excess load.
Lifespan tips: Install a waterproof underlayment beneath shingles, paint or seal any exposed wood, and use high-grade fasteners and flashing to withstand extreme weather.
With these steps, a Saltbox roof can remain both a visual feature and a reliable shield for decades.
Why the Saltbox Roof Still Turns Heads
A well-built Saltbox roof doesn’t just sit there. It changes the feel of a property the second you see it. That sharp drop from the tall front to the low back pulls your eye. It makes a home or shed look balanced and dynamic at the same time.
In person, the height difference plays tricks. Walk inside and the space opens up on one side, wraps close on the other. Light pours differently into each part of the room. That’s why architects keep using the form—it creates movement without moving parts.
And it’s not just style. Stand under a long rear slope in a heavy rain. You’ll hear water rush off in clean sheets, away from the structure. In winter, snow slides off before it can pile up and crush the frame.
The wow factor isn’t about being flashy. It’s about the combination of old logic and modern precision. A Saltbox roof can look like a 1700s farmhouse or a minimalist studio, depending on how you finish it. Few roof designs can pull off that range without losing their identity.
Real-world example: A modern build in Maine used charred cedar cladding under a standing seam metal Saltbox roof. The result? A home that stops traffic on a road lined with new construction—because it feels fresh and familiar in the same glance.
Conclusion
A Saltbox roof delivers more than style. Its slope sheds water fast, adds usable space, and stands up to harsh weather. Build it right, and it works as well on a small shed as on a full-sized home. Pairing its proven form with modern materials gives you a roof that lasts, performs, and carries character.
FAQs
Basics and Design
1. What is a Saltbox roof?
A Saltbox roof is an asymmetrical pitched roof with one long slope at the back and a shorter slope at the front. It originated in colonial New England for extra space without adding another story.
2. Why is it called a Saltbox roof?
The name comes from old wooden salt storage boxes, which had the same long-and-short sloped shape.
3. What’s the main advantage of a Saltbox roof?
It increases interior headroom on one side while keeping construction costs and material use lower than a full second story.
4. What style of house works best with a Saltbox roof?
Colonial and Cape Cod homes are traditional fits, but modern minimalist builds also use the design for visual contrast.
5. Does the roof shape affect interior layout?
Yes. The tall side allows lofts, high windows, or mezzanine space. The low side is better for storage or secondary rooms.
Structural and Engineering
6. What is the ideal pitch for a Saltbox roof?
A common ratio is 6:12 on the front slope and 4:12 on the back. It balances runoff, load capacity, and visual proportion.
7. Can you build a Saltbox roof with trusses?
Yes. Pre-fabricated trusses can be designed for asymmetrical spans, which speeds up construction.
8. Is extra support needed for the long slope?
Often, yes. Additional rafters or thicker decking may be required depending on span length and snow load.
9. What’s the best rafter spacing for a Saltbox roof?
Typically 16 inches on center, but heavy snow or tile roofing may require 12 inches.
10. Can a Saltbox roof handle heavy snow?
Yes, if pitched steep enough. The long slope must be reinforced and designed to shed snow effectively.
Materials and Finishes
11. What roofing material lasts longest on a Saltbox roof?
Standing seam metal. It sheds water fast, resists wind, and lasts 40–70 years.
12. Are asphalt shingles good for Saltbox roofs?
Yes for budget builds, but they require more maintenance and last 20–30 years.
13. Can you use clay tiles on a Saltbox roof?
Only if the framing can support the extra weight. Tiles work best in warm, dry climates.
14. Should the back slope and front slope have the same material?
Usually yes for consistency, but some modern builds use different materials for contrast.
15. Is it worth adding an underlayment?
Absolutely. A waterproof membrane under the roofing extends lifespan and prevents leaks.
Energy and Climate Performance
16. Are Saltbox roofs energy efficient?
They can be. The long slope often faces south, making it ideal for solar panels. The design also improves passive heat control.
17. How do Saltbox roofs perform in hot climates?
Light-colored roofing, good ventilation, and radiant barriers help reduce heat gain.
18. Do Saltbox roofs need extra insulation?
Yes. The asymmetrical framing can create uneven heat loss without properly fitted insulation.
19. Is it easier to install solar panels on a Saltbox roof?
Yes, if the long slope faces the right direction and has minimal shading.
20. Can you add skylights to a Saltbox roof?
Yes, but they should be placed on the tall slope for more headroom and light.
Building and Renovation
21. How much does it cost to build a Saltbox roof?
For a typical home, expect $18–$30 per square foot including framing and roofing. Sheds cost much less.
22. Can you convert a gable roof to a Saltbox roof?
Yes, but it often means reframing one side entirely, which can be costly.
23. How long does it take to build?
A house-sized Saltbox roof can be framed and sheathed in 1–2 weeks by a professional crew.
24. Do building codes allow Saltbox roofs everywhere?
Yes, but snow load, wind rating, and slope rules vary by region.
25. Should you hire a specialist to design one?
For houses, yes. For sheds or small builds, detailed plans are often enough.
Maintenance and Repairs
26. How often should you inspect a Saltbox roof?
At least twice a year—after winter and before summer.
27. What’s the most common problem with Saltbox roofs?
Leaks along the ridge beam and flashing where the long slope meets additions.
28. How do you remove snow from a Saltbox roof?
Use a roof rake from the ground. Never stand on an icy slope.
29. How do you replace shingles on the steep side?
Use roof jacks or hire a roofer. The pitch can be dangerous without proper footing.
30. How long does a Saltbox roof last?
20–30 years with shingles, 50+ years with metal or tile.
Sheds and Small Structures
31. Why is a Saltbox roof good for a shed?
It gives more headroom for storage or a workbench on one side and better water runoff.
32. Can you build a Saltbox shed without a ridge beam?
Yes for small spans under 8 feet, but most builds benefit from one for strength.
33. What’s the cheapest way to roof a Saltbox shed?
Three-tab asphalt shingles over plywood sheathing with felt underlayment.
34. How do you keep a Saltbox shed dry inside?
Raise the floor, add vents, and seal all joints with exterior caulk.
35. Can a Saltbox shed be turned into a tiny home?
Yes. Insulate, add electricity, and finish the interior. The high side works well for a loft.