
Think of basement insulation as more than a comfort upgrade, and definitely more than some “investment play.” It’s a moisture-control project that happens to save energy.
Concrete is cold. Basement air is humid. Put those together with the wrong wall assembly and you get condensation where you can’t see it. That’s how “finished basement” turns into “mold smell and ripped-out walls.”
And yeah—if you’re planning to rent the basement later (Airbnb, long-term, whatever), getting the moisture side right is what keeps the place rentable. After all that work, watching it actually perform—and actually earn—feels worth it.
What works, what backfires, and what to do first
- Which insulation types actually make sense on concrete and block
- Why foam-first wins in most basements (and when it doesn’t)
- How to avoid the classic fiberglass-on-concrete failure
- Where code and fire safety usually show up (thermal barriers, foam rules)
- DIY paths that are realistic for a homeowner (not fantasy assemblies)
- Checklist + FAQ based on the questions people keep asking
The main mistake
(Treating basement walls like above-grade walls)
A concrete basement wall is not a normal exterior wall. It’s colder. It’s often damp. And it doesn’t dry the same way.
The common DIY trap is simple: frame a wall tight to concrete, stuff batts, staple poly, and call it done. It can look perfect on day one. Then the smell starts, or the insulation sags and clumps, or you open it later and find black staining you didn’t earn.
The better mental model: your first job is to keep warm, humid interior air from touching cold concrete. That’s condensation control. Insulation is the tool, but air control is the win.
Quick picks
(The “best insulation” answer, depending on your basement)
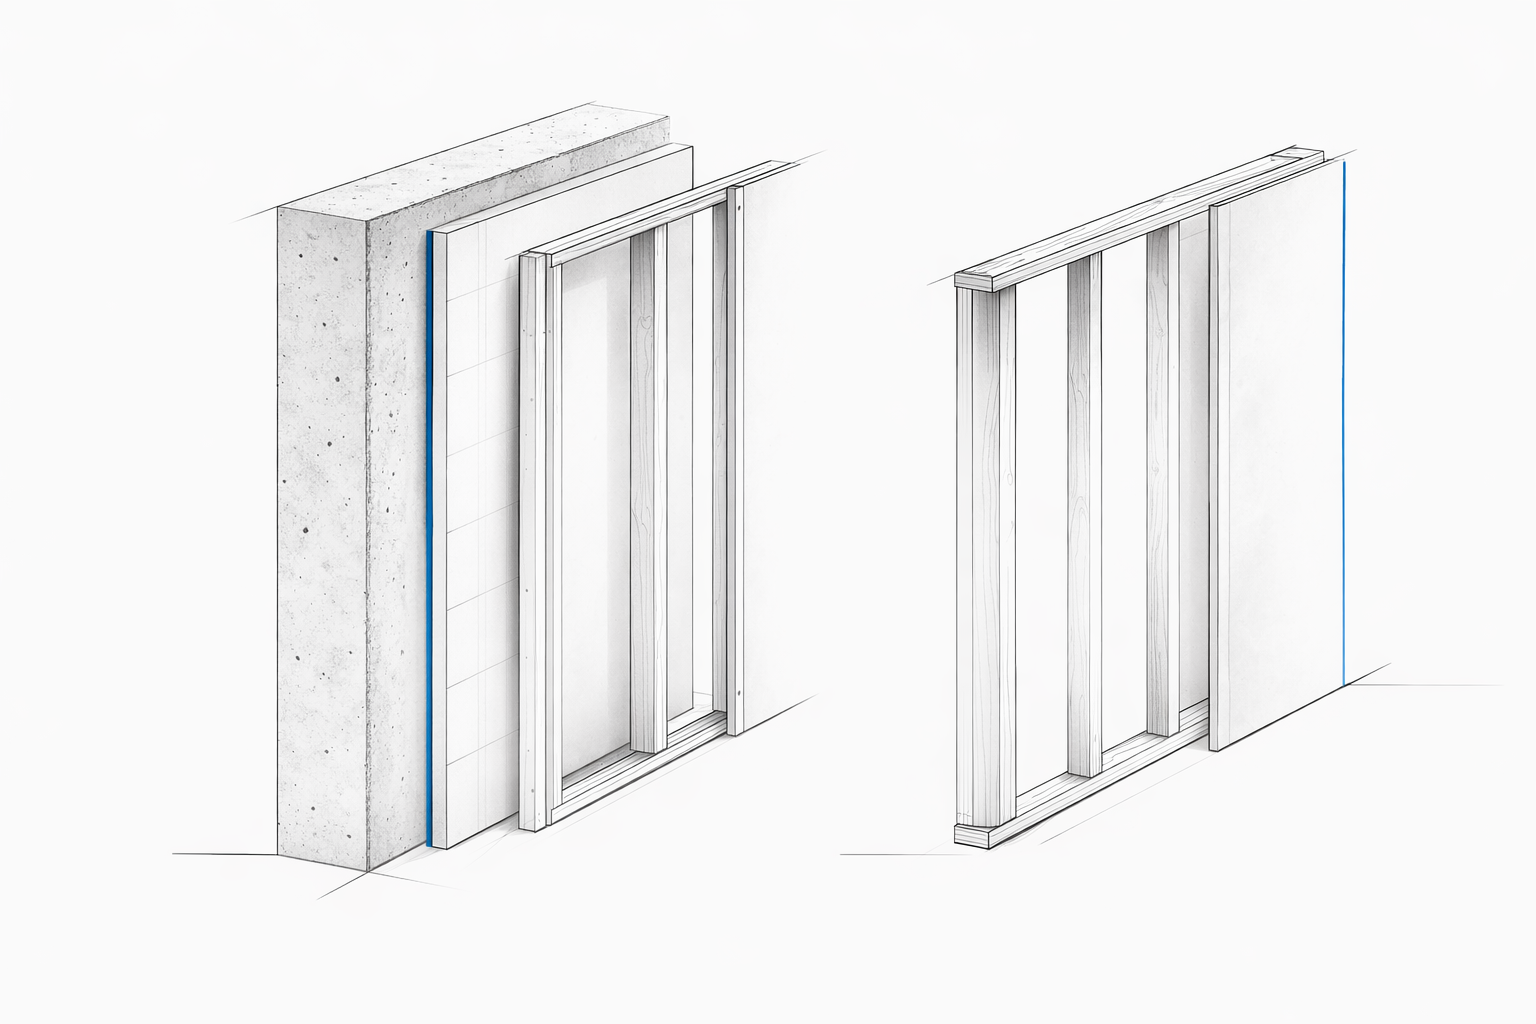
If you want one default that works in a lot of real basements: sealed rigid foam against the concrete, then a framed wall inboard with optional cavity insulation, then a code-friendly interior finish.
- Best all-around (DIY-friendly): rigid foam board (EPS/XPS/polyiso) sealed at seams + edges, then stud wall
- Best performance (contractor-grade): closed-cell spray foam directly on concrete (then framing as needed)
- Best “safer materials” approach: foam layer for the thermal break + mineral wool in the stud cavity
- Best budget move: thinner foam done carefully (continuous, sealed) beats thicker batts done badly
If your walls actively leak in storms: insulation is not the first step. Fix bulk water first. Then insulate. Otherwise you’re just hiding evidence.
Before insulation
(Two questions you answer first)
1) Do you have bulk water? Leaks, wet streaks, puddles, efflorescence that keeps coming back, damp patches after rain. If yes, pause. Handle water management first. A finished wall should never be your first line of defense.
2) Do you have a humidity problem? Condensation on pipes, musty smell, rusty tools, damp cardboard. If yes, plan dehumidification and air sealing. Basements don’t need “fresh air” as much as they need controlled air.
If you want a clean sequence for the whole basement (insulation is not step 1), this is worth keeping open while you plan: the basement finishing order that prevents rework.
What “best insulation” means in a basement
(It’s not only R-value)
People fixate on R-value because it’s an easy number. In basements, “best” is a bundle of things:
- Condensation control: does the assembly keep warm air off the cold concrete?
- Moisture tolerance: if something gets damp, does it recover or rot?
- Air sealing: can you actually make it continuous and tight?
- Repairability: can you open a section later without demolition?
- Code compliance: foam fire rules, required thermal barriers, electrical details
A basement wall can be “high R” and still be wrong if it creates a wet cavity. That’s the failure mode to avoid.
Option 1
(Rigid foam board on concrete: the standard move for a reason)
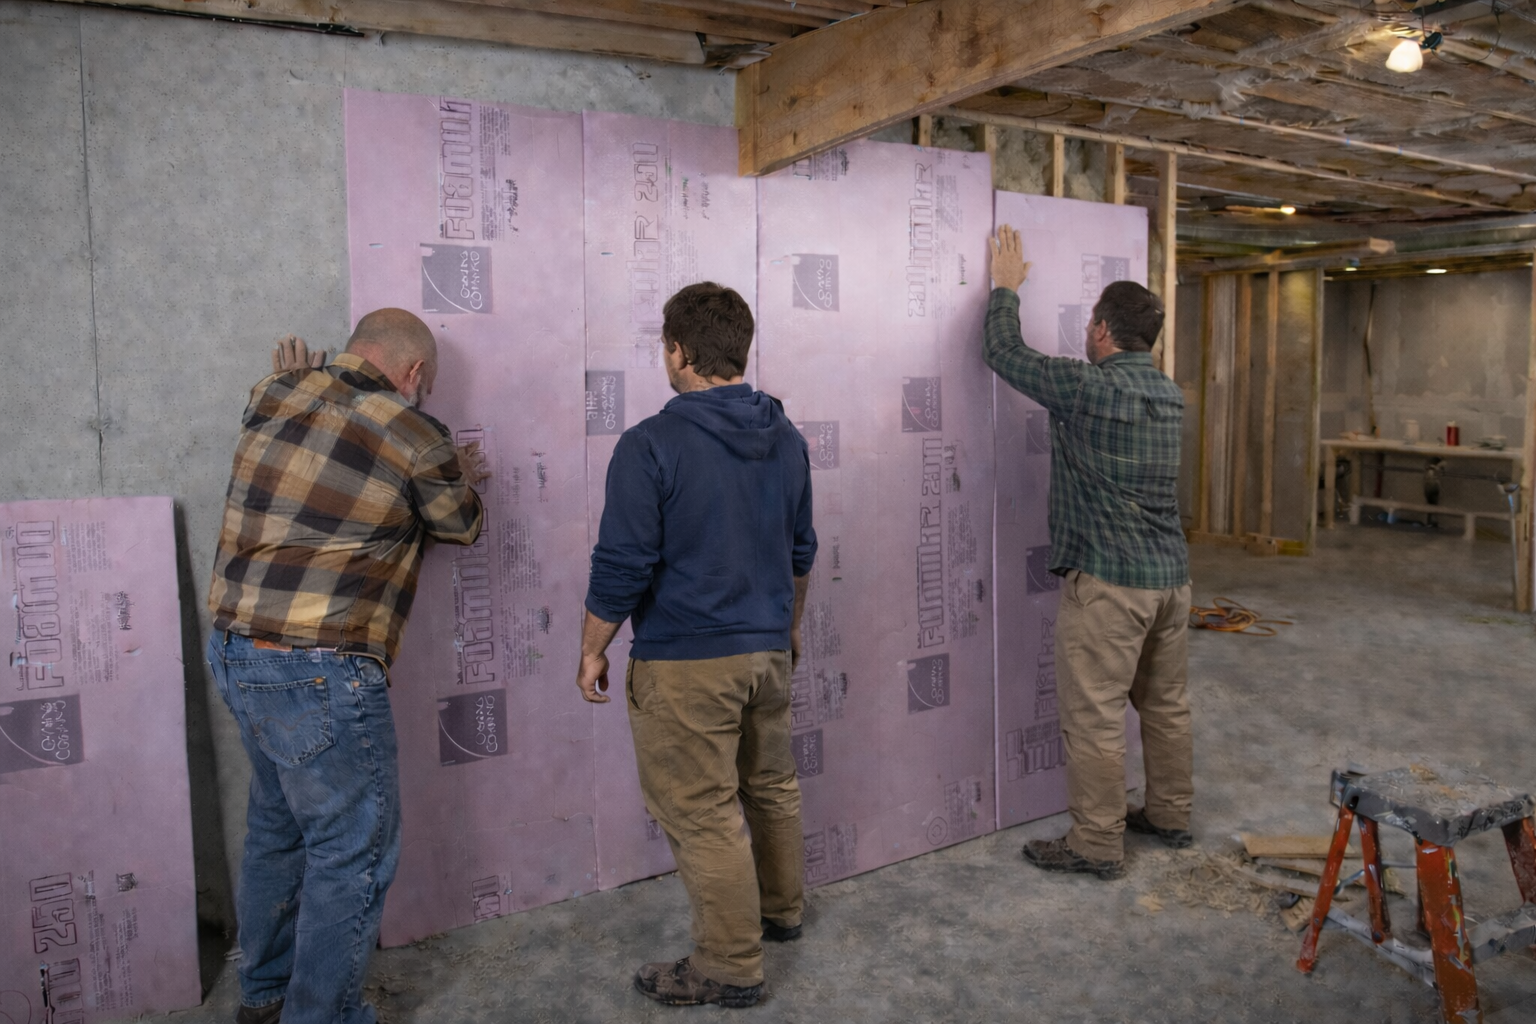
Rigid foam is popular in basements because it does two jobs at once:
- It insulates, so the interior face stays warmer.
- It can be detailed as an air barrier, so humid indoor air doesn’t reach the cold concrete.
Foam types you’ll see:
- EPS (expanded polystyrene): usually cheaper, available in different densities, can work well on interior basement walls when detailed correctly.
- XPS (extruded polystyrene): tougher, more moisture-resistant, common choice for below-grade applications and slabs.
- Polyiso: often higher R per inch, but pay attention to where it’s used and how it performs in colder conditions; details matter.
Why foam-first works: it creates a continuous thermal break. That means your studs and interior finish are less likely to see condensation.
What people mess up: they install foam like it’s “just insulation” and skip the sealing. In a basement, unsealed foam seams are basically an invitation for humid air to find cold concrete.
Foam-first, done right (the baseline):
- Foam tight to the wall (or with compatible adhesive where needed)
- Seams taped with a tape designed for foam or the specific product system
- Edges sealed (top, bottom, corners) with foam-compatible sealant or spray foam
- No organic materials (paper-faced products, wood) directly against concrete
Option 2
(Closed-cell spray foam: fast performance, higher cost)
Closed-cell spray foam is the “one step” solution people reach for when they want insulation and air sealing in one shot.
Why it works well: it adheres to irregular concrete, fills gaps, and becomes a strong air barrier. It also handles moisture better than fluffy insulation because it doesn’t become a wet sponge the same way.
Trade-offs:
- Cost: usually higher than board foam + DIY labor.
- Quality control: install quality matters. Bad spray foam jobs exist, and they’re painful to fix.
- Future access: once it’s sprayed, you’re not “removing it cleanly.”
This option is strongest when walls are irregular, space is tight, or you want the simplest condensation-control strategy with fewer joints to detail.
Option 3
(Stud wall + mineral wool: good second layer, not a first layer)
Mineral wool (rock wool) is popular because it’s mold-resistant and handles moisture better than fiberglass. It also has good sound control and is fire-friendly compared to foam.
But here’s the catch: mineral wool is not an air barrier. If you put mineral wool in a stud cavity against concrete with no foam or spray foam thermal break, you still risk condensation on the cold wall behind it.
The smarter pattern: foam layer against the concrete first (sealed), then a stud wall with mineral wool as the second layer. This gives you the thermal break plus a forgiving cavity insulation.
When this combo shines: you want a warmer, quieter basement and you want materials that don’t freak out when humidity swings.
Option 4
(Fiberglass batts: can work, but this is where people get burned)
Fiberglass is cheap and familiar. It’s also the insulation most likely to become a damp mess in basements when installed like an above-grade wall.
The failure pattern: fiberglass batts against concrete (or in a stud wall tight to concrete) + poly vapor barrier + small air leaks. Warm, humid basement air gets behind the poly through outlets, seams, penetrations. It hits cold surfaces. Condenses. The batts get wet. The smell shows up later.
Can fiberglass work? Yes, but usually as part of a system where the concrete is already separated from interior air by a continuous foam layer, and the assembly is detailed for the climate. In other words, fiberglass can be a secondary layer, not your first line of defense.
If you’re framing a wall, the spacing and gap details matter more than people expect. This helps frame that decision properly: how much gap to leave between framing and concrete.
Interior vs exterior insulation
(The part most DIYers can’t control, but should understand)
Exterior foundation insulation is often the best building-science answer because it keeps the concrete warmer and reduces condensation risk inside. It also helps with moisture management because the wall is less likely to be a cold condensing surface.
Interior insulation is what most people actually do because exterior work is expensive and disruptive. Interior is fine. It just has to be done with a moisture-aware assembly.
The rule of thumb: interior basement insulation needs a thermal break and air control more than it needs “more fluffy stuff.”
What about vapor barriers?
(This is where advice gets loud and wrong)
People love blanket rules: “Always use poly.” “Never use poly.” The truth is messier because basements live in different climates and different foundation types.
The useful concept: walls need a drying direction. Below grade, drying to the exterior is limited. That means your interior layers shouldn’t trap moisture in a way that prevents drying to the inside.
Why foam is different than poly: a sealed foam layer can act as an air barrier and reduce vapor movement, but it also changes where condensation can occur. The goal is to keep the condensing surface warm enough that you don’t hit dew point.
Practical basement-safe guidance:
- If you’re doing foam against concrete, focus on continuity and sealing rather than adding interior poly “just because.”
- If you’re in doubt, avoid creating a double-trap where moisture can’t dry in either direction.
- When jurisdiction matters (and it does), treat the inspector’s interpretation as a real constraint.
If you want to keep your code references clean and defensible, it helps to work from recognized standards and official manuals, not just internet lore. This library is a good home base: standards and official building manuals.
Rim joists and band boards
(The cold leak zone people forget)
Even if you insulate the concrete wall perfectly, the rim joist area can still dump cold air and create condensation problems. It’s a common source of “mystery drafts” and cold corners.
Typical good approaches:
- Cut-and-cobble rigid foam sealed at edges (careful, consistent work)
- Closed-cell spray foam (fast and effective, higher cost)
- Hybrid approach: foam board + sealed edges + attention to penetrations
This is also where DIY air sealing pays back immediately. Basements don’t need more insulation if air is still moving through cracks at the top.
Common assemblies
(Pick one and build it clean)
Assembly A: Foam + stud wall + optional cavity insulation
- Rigid foam sealed to concrete
- Stud wall inboard (kept off the concrete)
- Optional mineral wool or fiberglass in the stud cavity
- Interior finish layer that meets code requirements
Assembly B: Closed-cell spray foam + stud wall
- Spray foam directly on concrete (air + thermal break)
- Stud wall inboard for wiring and finish
- Interior finish layer per code
Assembly C: Thin foam + furring + panel finish
- Foam board sealed to concrete
- Furring strips fastened through foam
- Plywood/panels as finish
Assembly C is popular in utility basements where you want a clean look and quick install. It’s also easy to make removable for access. The key is still the same: sealed foam first.
See: Wall Panels for Basement Do It Yourself: Prep, Adhesives, and Seams That Don’t Pop
Materials comparison
(What’s “best” depends on your constraints)
Rigid foam board
- Pros: DIY-friendly, strong thermal break, can be a good air barrier when sealed, predictable thickness
- Cons: fire protection requirements, detailing takes patience, joints are potential failure points if sloppy
Closed-cell spray foam
- Pros: excellent air seal, good on irregular walls, high performance per inch, less joint detailing
- Cons: cost, installer dependence, harder to reverse, still has fire protection rules
Mineral wool (as a cavity layer)
- Pros: handles moisture better than fiberglass, good sound control, fire-friendly
- Cons: not an air barrier, usually not sufficient alone against concrete, needs a thermal break strategy
Fiberglass batts
- Pros: cheap, easy to find, easy to install in a stud cavity
- Cons: sensitive to moisture events, easy to install wrong in basements, performance collapses when wet
Fire and code basics
(Why foam can’t just be left exposed)
This is the part people “forget” until inspection, or until they realize they’ve left foam board exposed in a living space.
In many jurisdictions, foam plastics require a thermal barrier (often drywall) when used on interior walls. Some areas allow alternative ignition barriers in specific conditions. It varies. But the concept is consistent: exposed foam is usually not acceptable in habitable spaces.
Practical advice: decide early whether your finished wall will be drywall, panels over a code-acceptable barrier, or a listed system designed for interior exposure. Don’t build an assembly that requires you to demo later to pass inspection.
If you’re unsure how framing and finishing layers should sequence with foundation work, this framing overview helps ground the process: basement wall framing options and what to do first.
DIY steps
(Foam-first wall, built like you mean it)
Step 1: Surface prep
Remove loose paint, dust, and obvious failure points. You don’t need perfection, but you do need adhesion and clean sealing surfaces. Fix bulk water problems first.
Step 2: Install rigid foam
Fit boards tight. Treat corners and penetrations seriously. The goal is continuity.
Step 3: Seal seams and edges
Tape seams with appropriate tape. Seal top and bottom edges. Seal around pipes and irregularities. If you can feel air moving behind the foam later, you’ll regret it.
Step 4: Frame the inboard wall
Keep wood off concrete and slab moisture paths. Leave a controlled gap where appropriate. Plan electrical layout before you close anything.
Step 5: Add cavity insulation (optional)
If you want more comfort and you have the space, add mineral wool or fiberglass in the cavity. But do not skip the foam layer because you “added batts.” That’s backwards.
Step 6: Finish with a code-friendly layer
Drywall is common for a reason. It’s cheap, consistent, and it solves the foam fire-protection requirement in most places.
Common failures
(The stuff people keep learning the hard way)
- “I insulated but it still feels damp.” Usually an air sealing or humidity control problem, not “not enough R.”
- “My fiberglass is wet at the bottom.” Often slab moisture events, bottom plates too tight to slab, or vapor/air leakage paths behind a plastic layer.
- “The wall smells even though it looks fine.” Hidden condensation behind the finish. This is why foam-first and sealing matter.
- “I used foam but the seams weren’t taped.” The foam became decoration, not an air barrier.
- “I didn’t think I needed rim-joist work.” Then the top of the basement stays cold and drafts never stop.
Basement insulation problems are usually quiet at first. They show up later. That’s why being conservative on moisture control is not overkill.
Cheap insulation strategy
(Save money without building a problem)
If budget is tight, don’t chase exotic products. Chase a clean assembly.
- Prioritize continuous thermal break: even thinner foam, installed continuously and sealed, beats thick batts with air leaks.
- Buy fewer materials, install them better: seams, edges, corners, penetrations.
- Use salvage carefully: avoid water-damaged foam and anything with unknown contamination. Basement work is not where you gamble on mystery materials.
- Plan access: build a removable section near utilities. That saves future demolition costs.
If you want to spend money in one place, spend it on air sealing and dehumidification. That’s what makes basements feel good long term.
Checklist
(The basement insulation sanity list)
- Confirm no bulk water issues (or fix them first)
- Plan humidity control (dehumidifier, drainage improvements, air sealing)
- Choose a foam-first or spray-foam-first strategy for condensation control
- Seal foam seams and edges like you mean it (no “close enough”)
- Keep wood and paper-faced materials off concrete
- Detail the rim joist area (drafts and condensation start there)
- Plan wiring and outlets before walls are closed
- Confirm foam fire protection requirements for your jurisdiction
- Build at least one access zone for future repairs
- Don’t trap moisture with a random interior poly layer unless you’re sure it’s appropriate
FAQ
(Direct answers to the questions people keep asking)
What is the best insulation for concrete basement walls?
In many basements, the best-performing and most forgiving approach is a sealed rigid foam layer against the concrete (continuous thermal break + air control), with a framed wall inboard for wiring and finish. Closed-cell spray foam is also excellent when budget allows or walls are irregular.
Is fiberglass OK for basement walls?
It can be, but it’s the easiest to install wrong. Fiberglass against concrete without a thermal break is a common failure path because it doesn’t stop air movement and it can become wet. If fiberglass is used, it usually performs better as a secondary cavity layer behind a sealed foam layer.
Do I need a vapor barrier on basement walls?
Be careful with blanket rules. Basements need a drying direction, and below-grade walls don’t dry outward easily. Many successful basement assemblies rely on a sealed foam layer for air/thermal control rather than an interior polyethylene sheet. Local code and climate matter here.
Should insulation touch the concrete wall?
Foam or spray foam can go directly on concrete and perform well. Organic materials should not. A common goal is to keep warm interior air from reaching cold concrete, which is why foam-first assemblies are popular.
What insulation is best if my concrete wall is uneven?
Closed-cell spray foam handles irregular surfaces well. If you’re using rigid foam, you can still make it work, but you’ll spend more time fitting and sealing. The priority is continuity of the air/thermal layer.
Can I use mineral wool against concrete?
Mineral wool is great in a stud cavity, but it’s not an air barrier and it doesn’t create a continuous thermal break by itself. It’s usually best as a second layer after foam or spray foam is used against the concrete.
Do I need to insulate basement walls if I’m not finishing the basement?
If the basement is within the conditioned envelope (heated/cooled, or indirectly warmed by the house), insulating the walls can still improve comfort and reduce condensation risk. If it’s an unconditioned storage basement, priorities shift toward air sealing, humidity control, and targeted insulation (like rim joists).
What’s the biggest mistake DIYers make with basement insulation?
Assuming R-value alone solves basement comfort. The real failures come from air leakage and condensation. A clean, sealed thermal break is usually worth more than adding more fluffy insulation.
Conclusion
(Foam-first isn’t trendy. It’s just the failure-proof pattern.)
The “best” insulation for concrete basement walls is the one that controls condensation and survives real basement conditions. In most cases, that means a continuous, sealed thermal break (rigid foam or closed-cell spray foam), then whatever framing and finish you need for the space. Do the air and moisture layers first. Everything else is cosmetic.
If you want the sequence that avoids rework, follow the right order of operations for basement finishing.
If you’re framing new walls, start with basement wall framing options and layout. If you’re unsure about the clearance detail, see how much gap to leave between concrete and framing.
And if you’re still fighting storm leaks, fix that first: why basement walls leak when it rains (and what to do).