
You bought the 1920s house for the trim, the plaster, the floors, the way the rooms are sized. Fair enough — those are why it's worth saving, and they're hard to replace. But the real money usually goes somewhere you can't see: old wiring, tired plumbing, soft floors, a damp basement, cracked plaster, or past remodels that buried problems instead of fixing them.
Most people start with finishes anyway. New cabinets, new tile, fresh paint. It looks great for a few weeks. Then the problems start showing up. Doors stick. Floors dip. The bathroom fan doesn't really vent. The kitchen looks done but doesn't work.
So before you pick anything out, this article helps you sort out what matters first: what the house already has, what's failing behind the walls, and what you shouldn't touch.
Start With What the House Already Has
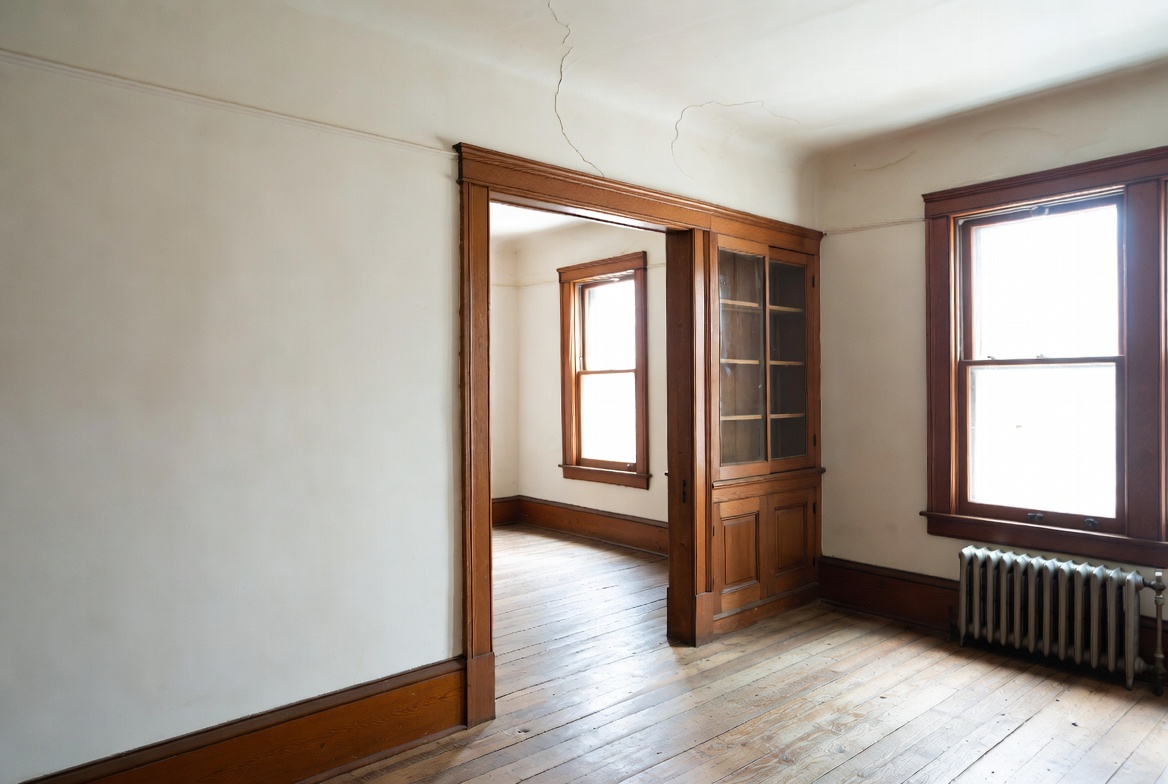
Many 1920s houses were built with details that cost real money to recreate today. Original wood casing, solid doors, stair parts, built-ins, plaster walls, wood floors, and old tile can carry more value than a room full of new finishes. That does not mean every old thing is precious. Some parts are worn out. Some were changed badly in the 1970s, 1980s, or during a quick flip. Some hidden systems are unsafe or near the end of their life.
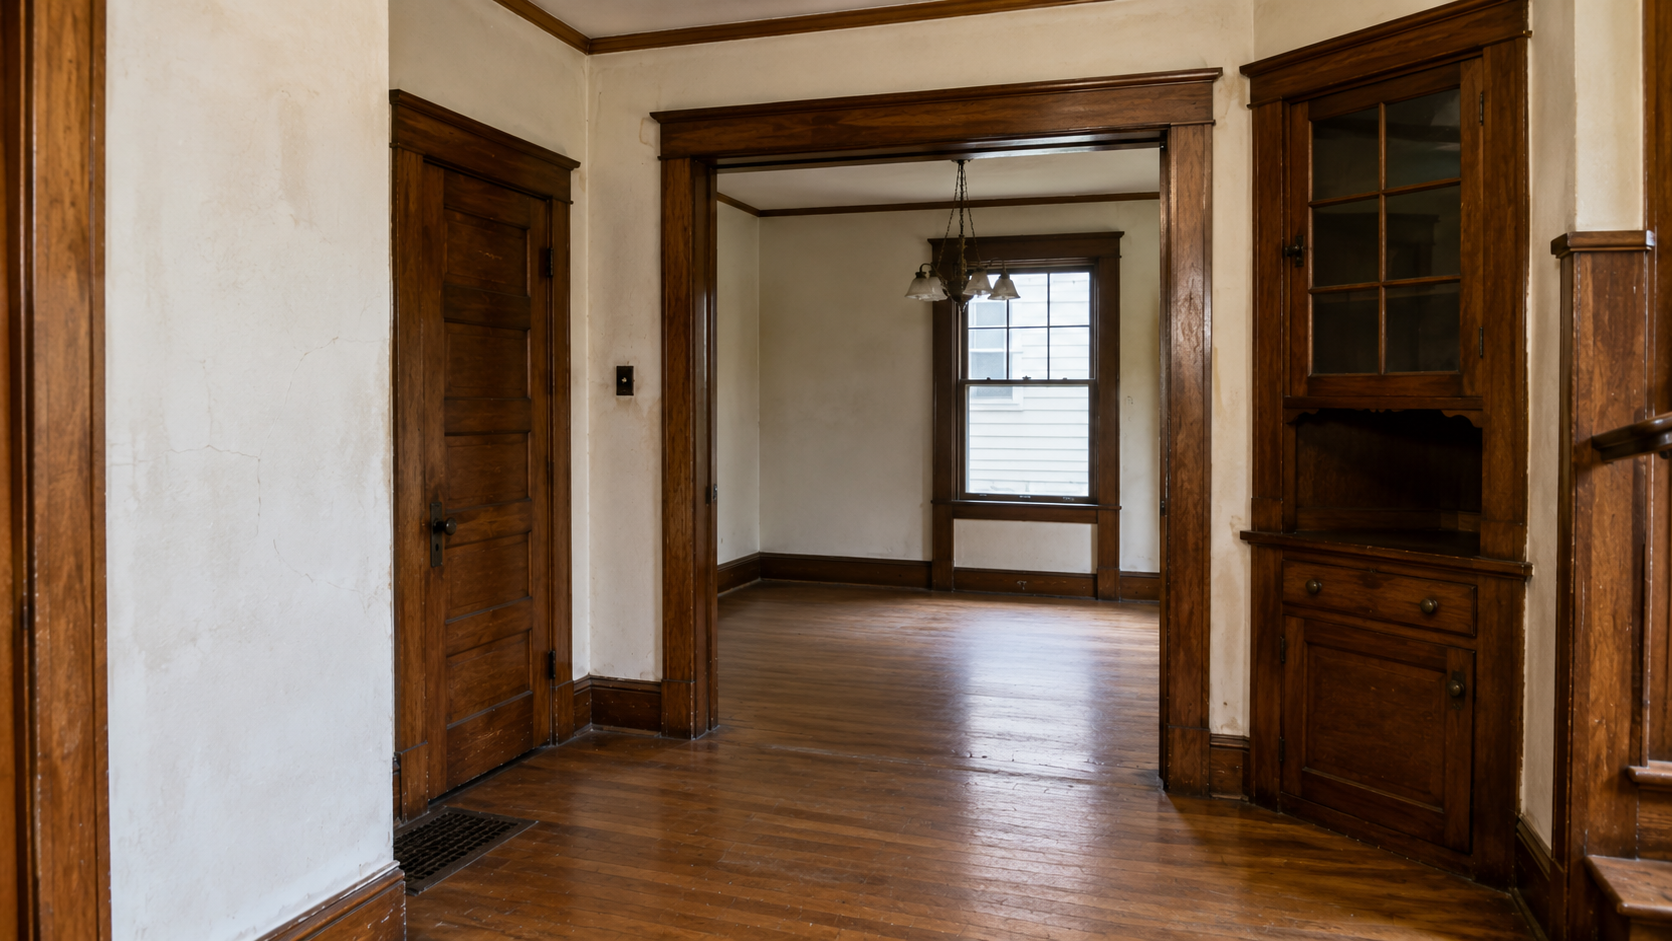
Before demolition, walk the house slowly. Look at the trim profiles. Check how the doors meet the casing. Notice whether the floors are original, patched, or replaced. Study the plaster texture, the stair rail, the built-ins, the window stools, the baseboards, and the room openings. These quiet parts often control whether the finished renovation feels like a 1920s house or a generic remodel inside an old shell. For a broader style check, use the existing 1920s house styles page to understand the difference between bungalow, Craftsman, Tudor, Colonial Revival, Spanish Revival, and Art Deco-era houses before starting work.
Fix These Before You Touch the Pretty Stuff
The most expensive mistake in a 1920s house is cosmetic-first renovation. Paint, cabinets, tile, flooring, and lighting are visible. The real budget risk is hidden behind, below, and above them. Start with the parts that can ruin finished work later: electrical wiring, service panel, grounding, and outlet locations; old plumbing supply lines, drain lines, leaks, and fixture locations; basement moisture, grading, gutters, drainage, and foundation movement; soft floors, sagging joists, cut framing, and old floor layers; roof leaks, attic ventilation, insulation gaps, and old flashing; plaster cracks, failing keys, loose lath, and patched wall areas; bathroom venting, waterproofing, tile condition, and floor structure; and kitchen appliance fit, cabinet clearances, and plumbing paths.
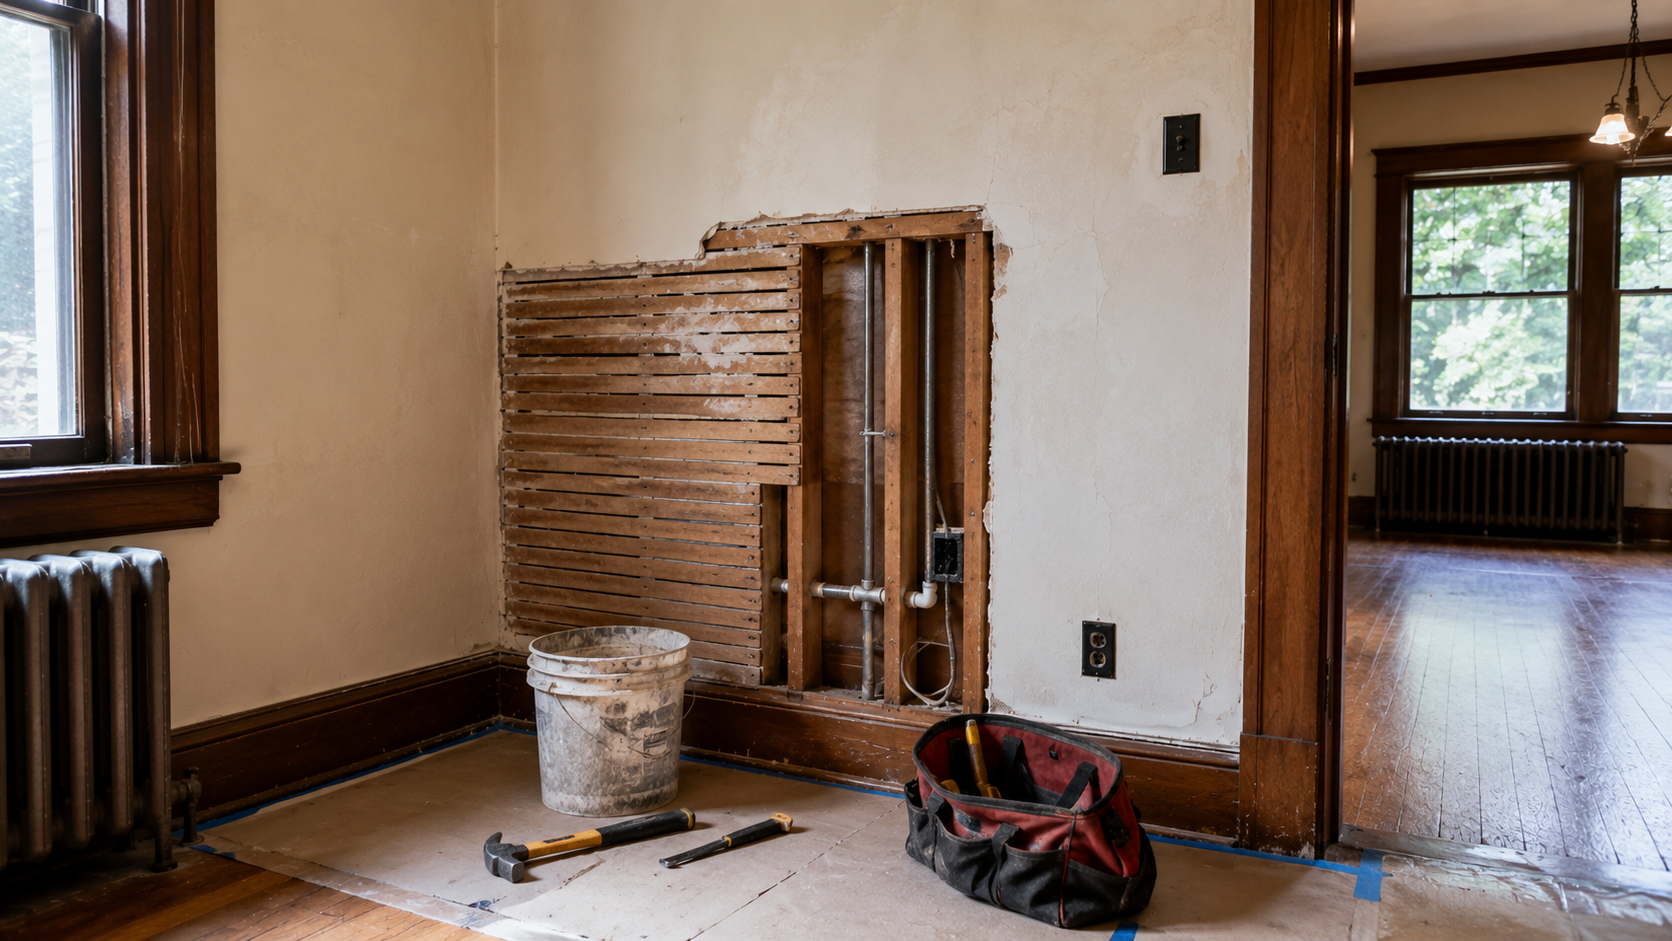
A small inspection opening can save a large mistake. It may show old lath, patched framing, a pipe path, a hidden leak, floor layers, or wiring that changes the plan entirely. That does not mean gutting the whole house — it means understanding the walls and floors before covering them with new work.
The Previous Owner's Renovation Is Often the Real Problem
Most people assume the hard part of a 1920s renovation is the original old-house problems. In practice, the harder part is usually what someone else already did to it.
A typical 1920s house has been renovated at least once, and often twice or three times. There was probably a kitchen update sometime in the 1960s or 1970s. A bathroom was likely reworked in the 1980s. Vinyl replacement windows may have gone in during the 1990s. Someone may have added circuits on top of knob-and-tube wiring without removing the old system — which means the house has both running in the walls simultaneously, and the original circuits may still be live. Someone may have patched plaster with drywall in a way that matches no original profile. Someone may have painted all the woodwork in the 1980s, then painted it again, and the trim profiles are now soft and indistinct under four layers. Someone may have carpet-covered original floors in a way that left the edges exposed to decades of humidity change.
These past renovations are often more disruptive to deal with than straight original old-house conditions, because they are unpredictable. You cannot plan around them until you find them. A 1920s house that has never been touched since it was built is actually easier to work on than one that has had three previous owners each doing their own layer of updates.
Before assuming the house has original systems, check what era each visible element belongs to. Old supply pipes may be galvanized steel behind a cosmetically updated kitchen. An apparently modern panel may be a new box bolted next to an old fuse box that no one removed. A "renovated bathroom" from 1987 may have no proper waterproofing behind the tile. These are not hypotheticals — they appear in 1920s houses routinely, and they change the scope before any design decisions are made.
The Wiring and Plumbing Reality
Knob-and-tube wiring was standard in 1920s houses. So was galvanized steel plumbing. Both are past their useful life, and most lenders and insurers will not issue policies on a house with active knob-and-tube wiring — so if the house still has it, budget for full replacement, not a partial fix.
The cost range is wide. A minor rewiring job can run a few hundred dollars. Removing an entire knob-and-tube system from a 1920s house can reach into the mid-five figures depending on access, wall material, and house size. Plumbing follows the same spread: a local pipe patch costs very little, but a full repipe runs thousands, and the access problem — cutting through original plaster to reach old galvanized runs — is what drives the price up in an old house specifically.
The plaster is the cost amplifier that most estimates miss. Cutting into plaster to reach wiring or plumbing is not the same as cutting into drywall. Plaster repair requires skill that drywall repair does not. If the house has original plaster-and-lath walls, every penetration for electrical, HVAC, or plumbing access is a potential plaster repair cost. That should be in the budget before walls open, not after.
The 1920s Kitchen Renovation Problem
A 1920s kitchen is often the room where homeowners want the biggest change, and that makes sense — many original kitchens are small, narrow, poorly lit, short on storage, or damaged by earlier remodels. But a 1920s kitchen should not be treated like a blank new-build kitchen. The room may have old plumbing paths, a chimney or former service wall, narrow doorways, low windows, radiator locations, basement access, or walls that affect structure and circulation.
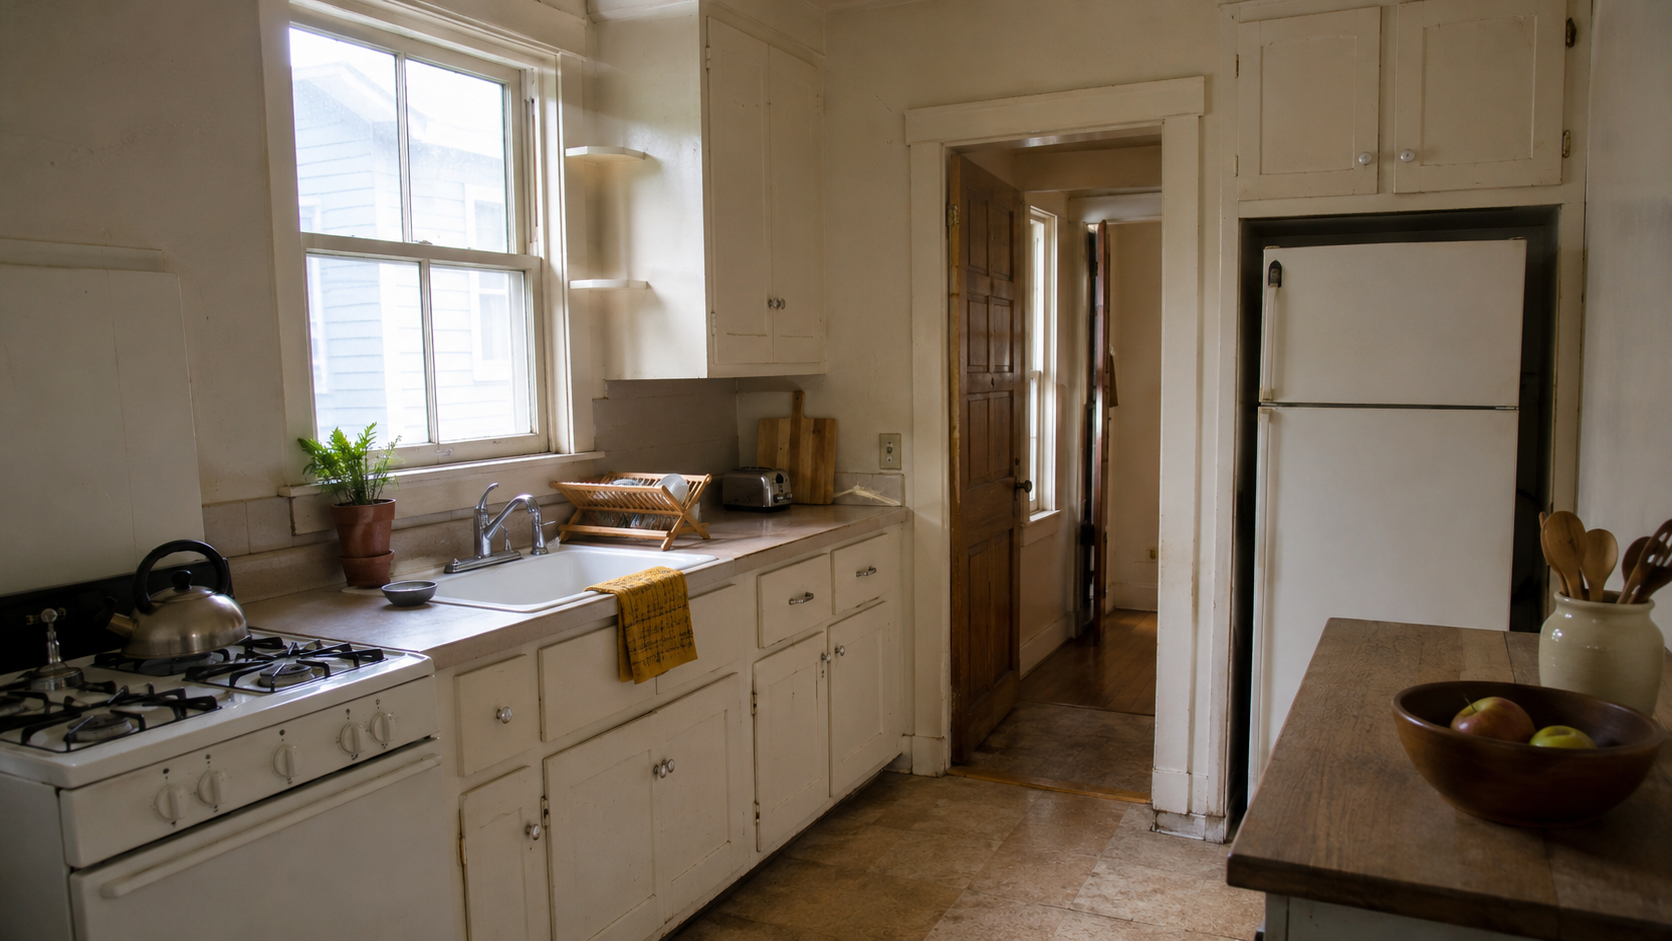
The kitchen plan should solve function before finishes: whether the refrigerator door can open without blocking the main path; whether the stove has safe side clearance; whether the sink location ties to a practical plumbing path; whether cabinet doors and appliance doors conflict; whether the room needs more light or just better cabinet planning; and whether the kitchen can improve without forcing a giant opening or island that damages the house's proportions. Many 1920s kitchens work better with a compact, well-planned layout than with an oversized island or a wall removal that changes the house's room rhythm in ways the rest of the plan cannot absorb.
The 1920s Bathroom Renovation Problem
Bathrooms in 1920s houses can be charming and frustrating at the same time. The tile may be worth saving. The room may also have weak ventilation, old plumbing, a tired subfloor, poor waterproofing, or fixture clearances that no longer meet modern expectations. The danger is judging the bathroom only by what you can see.
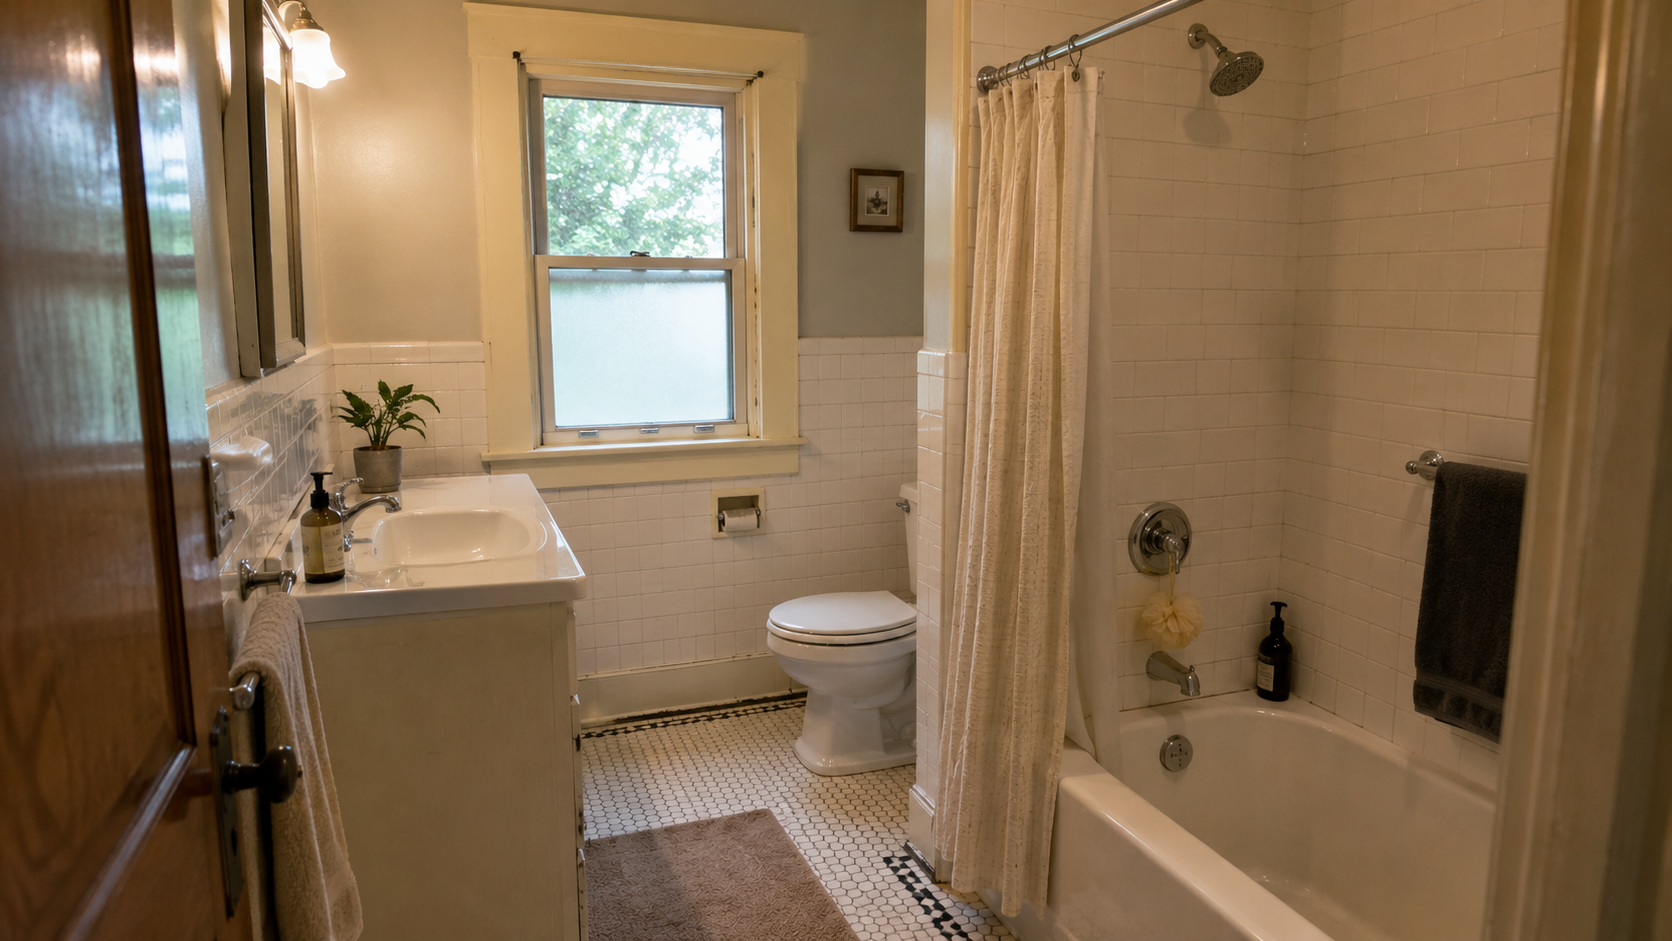
Before choosing tile or fixtures, check whether the floor is level, soft, or patched; whether the tub area has proper waterproofing behind it; whether the fan vents outdoors rather than into an attic or cavity; whether old supply and drain lines should be replaced while walls are open; and whether the toilet, sink, tub, and door clearances actually work. A small 1920s bathroom does not need to become a spa. It needs to be dry, vented, functional, and respectful of the house — oversized modern fixtures can make the room worse, not better.
The Correct Order for Renovating a 1920s House
The order matters more in an old house than in a new one, because the discoveries that come early change every decision that comes after. A 1920s renovation should not begin with the rooms that photograph best.
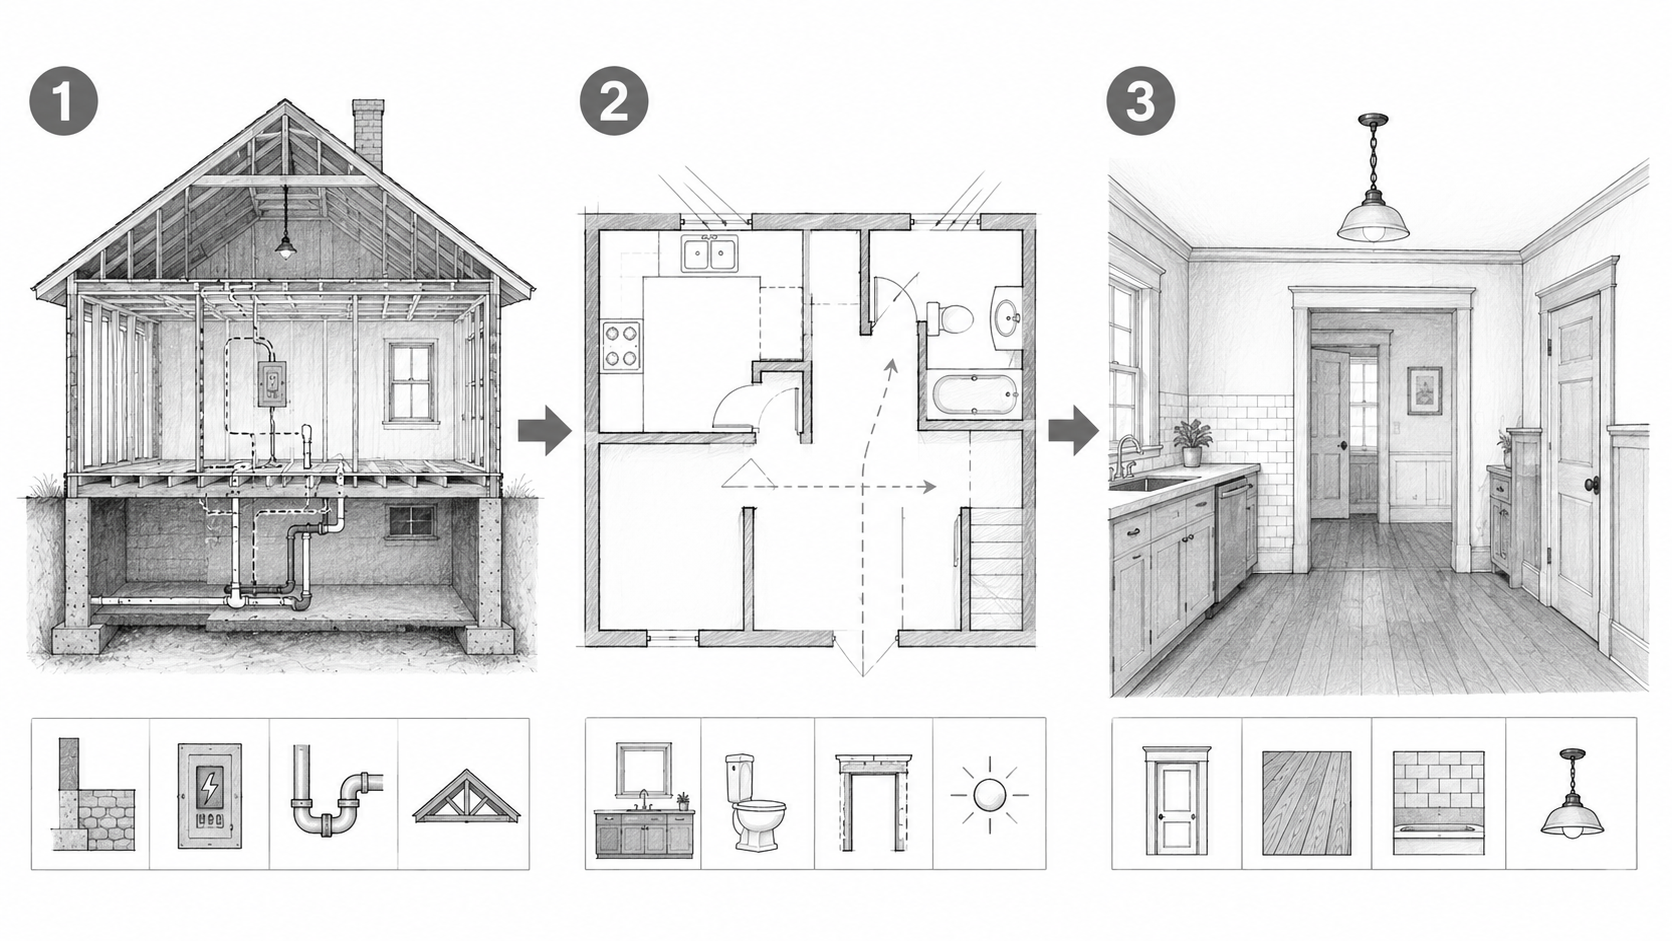
| Renovation stage | What to check | Why it matters |
|---|---|---|
| Structure and water | Foundation, basement, roof, gutters, drainage, sagging floors | Water and movement can damage everything added later. |
| Systems | Electrical, plumbing, heating, ventilation, insulation gaps | These are expensive to change after walls and finishes are closed. |
| Room planning | Kitchen layout, bathroom layout, circulation, wall openings, light | The layout must work before cabinets, tile, and fixtures are ordered. |
| Repair and preservation | Plaster, trim, floors, windows, doors, built-ins, stairs | Original character should be protected before replacement decisions are made. |
| Finishes | Paint, lighting, cabinets, tile, flooring, hardware | Finishes last longer when the house beneath them is stable. |
This order is not glamorous, but it prevents the most common old-house mistake: spending the visible budget before finding the hidden problems.
What to Keep, Repair, or Replace
A good 1920s renovation does not keep everything, and it does not replace everything. The strongest projects make careful decisions feature by feature.
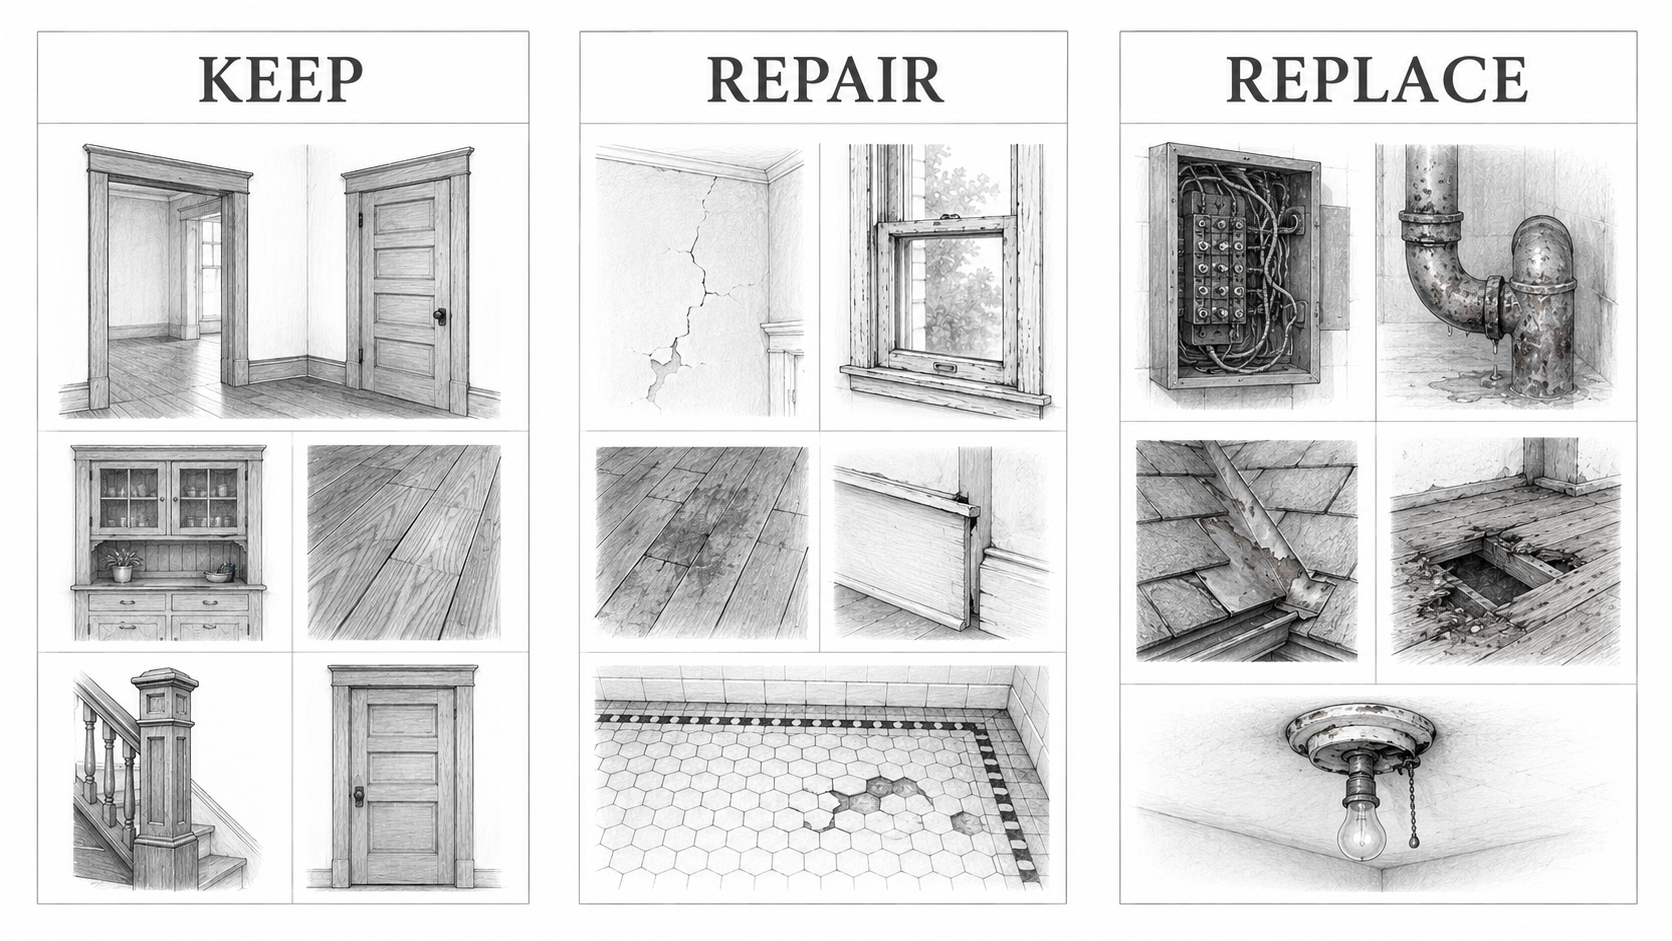
| Keep when possible | Repair when practical | Replace when needed |
|---|---|---|
| Original trim, doors, built-ins, wood floors, stair parts | Cracked plaster, sticky windows, loose trim, worn floor areas | Unsafe wiring, leaking pipes, failed waterproofing, rotten framing |
| Old tile with good bond and character | Small plaster cracks and surface damage | Bad past remodels that damaged function or safety |
| Room proportions, cased openings, simple old-house details | Original windows where repair makes sense | Nonworking fixtures, failed roof flashings, damaged subfloor |
The hard part is not knowing whether something is old. It is knowing whether it is still doing its job. Original wood trim may be worth saving even if it has scratches — but old wiring behind that trim may need replacement. Original tile may be worth repairing, but failed waterproofing behind it may change the decision. Old floors may be beautiful, but a sagging area may need structural attention before refinishing.
What Gets Expensive in a 1920s House Renovation
The visible room is rarely the full cost story. A kitchen cabinet budget can grow because plumbing has to move. A bathroom tile budget can grow because the subfloor is soft. A flooring budget can grow because old layers must be removed. A wall-opening budget can grow because structure, plaster repair, floor patching, electrical work, and trim rebuilding all show up together.
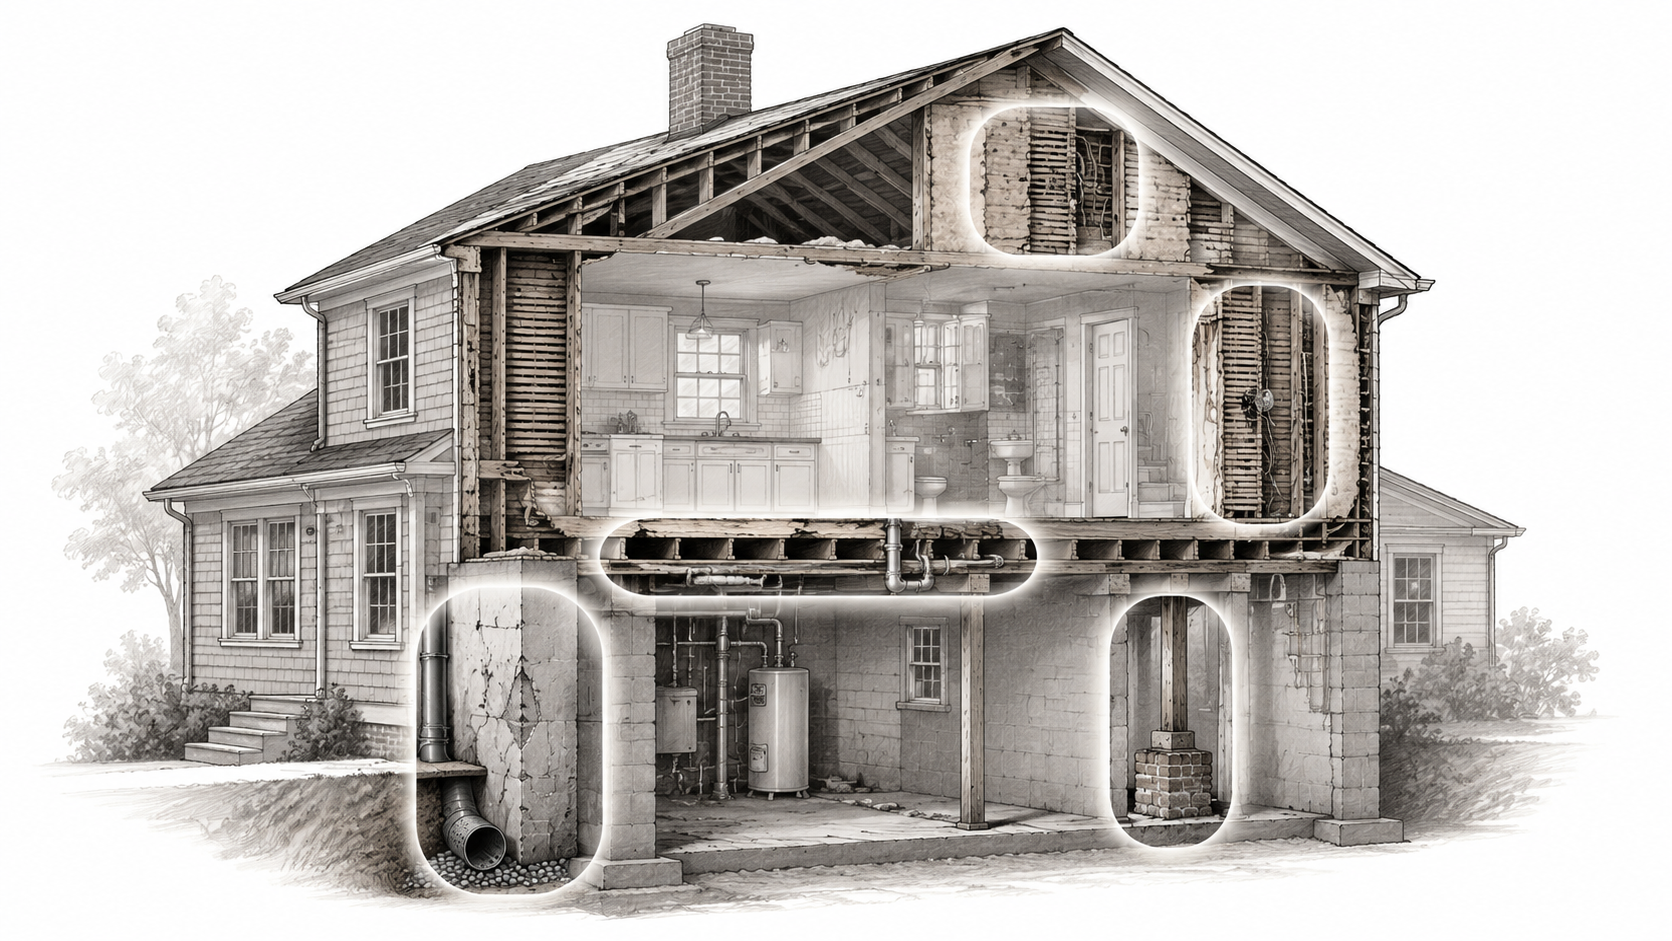
The cost zones that matter: basement and foundation, where water, cracks, movement, drainage, old masonry, and settlement signs all live; floors, with their sagging joists, old patches, uneven transitions, damaged subfloor, and multiple floor layers; walls, carrying plaster repair, lath, insulation gaps, hidden wiring, and old pipe paths; kitchens and baths, with plumbing, venting, waterproofing, appliance fit, fixture layout, and electrical updates; attic and roof, with leaks, insulation, ventilation, old flashing, and roof framing issues; and windows and trim, with repair, weatherstripping, paint layers, rot, and finish carpentry. A 1920s house can still be a smart buy and a beautiful renovation — but the budget must include discovery. Old houses punish budgets that assume every wall and floor is simple.
The Three-Week Problem
The first week of a renovation is exciting. The old carpet comes out. The cabinets are removed. Paint samples go on the wall. The house feels full of possibility. By week three, the real project has usually arrived.
A wall that looked flat needs plaster repair. The kitchen floor has old layers that affect cabinet height. A bathroom vent is not venting outdoors. The electrician needs more access than expected. A doorway opening changes the floor patch. A simple cabinet layout no longer works because the window, radiator, plumbing, or door swing controls the room. I have watched homeowners who budgeted for a kitchen renovation end up replumbing the back half of the house because every time the contractor opened the next wall, there was more galvanized pipe that simply could not be left.
This is why a 1920s renovation needs both a discovery budget and a sequence. Build at least 15 to 20 percent contingency into the estimate before any walls open, not as a buffer for overruns, but as a line item for findings. In an old house that line will get spent.
What Not to Do in a 1920s House Renovation
The worst 1920s renovations are not always the most expensive ones. They are the ones that make the house feel confused — removing original trim while keeping awkward old layouts, opening walls without respecting ceiling height or room proportion, installing new cabinets while ignoring appliance clearance, covering old floors without checking the subfloor, replacing character with flat gray finishes and wondering why the house feels cheaper afterward.
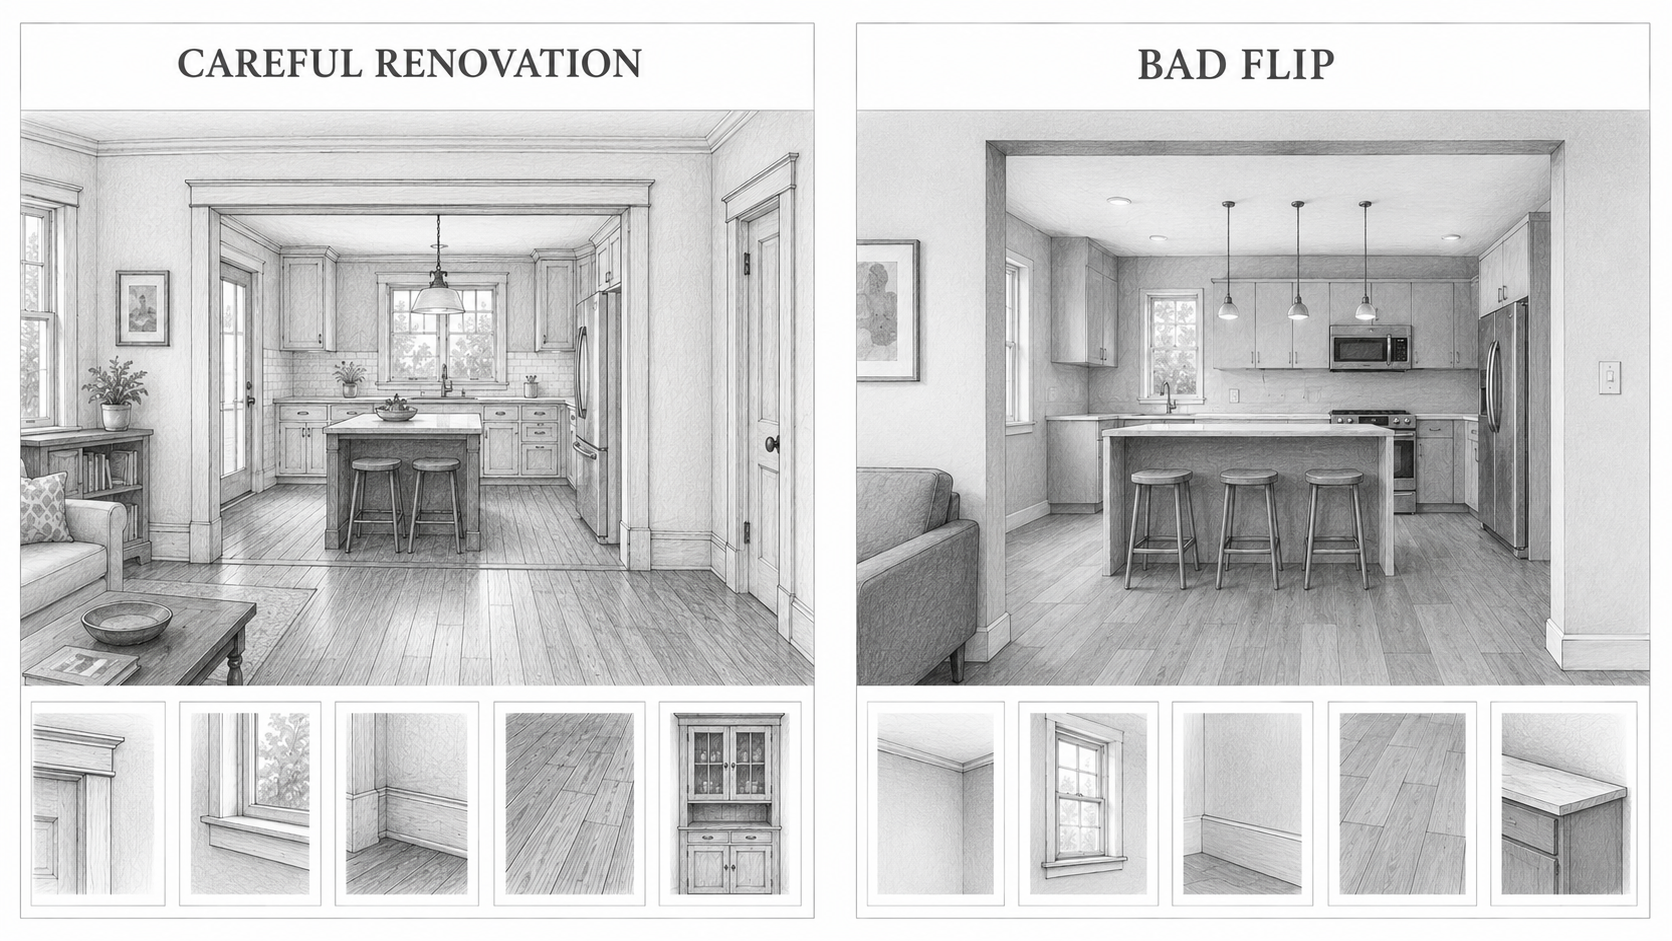
Avoid starting with finishes before structure, water, wiring, and plumbing are checked. Avoid removing original trim, doors, floors, or built-ins without a clear reason — these take decades to earn and minutes to lose. Avoid forcing a large island into a kitchen that needs better circulation instead. Avoid opening walls too widely and destroying the house's room rhythm. Avoid choosing oversized bathroom fixtures for a compact old bathroom. Avoid covering plaster, floors, or tile problems without understanding the cause. The goal is not to freeze the house in 1925. It is to let the house work now without erasing why it was worth renovating in the first place.
How to Plan the First Phase
Start with a short first phase instead of a giant wish list. Photograph every room before work starts. List original details worth saving. Check water, roof, basement, and drainage before touching anything inside. Review electrical and plumbing before opening walls. Decide which rooms need layout changes and which only need repair. Price kitchens and bathrooms after hidden systems are understood. And keep a contingency for old-house discoveries — not because something will necessarily go wrong, but because something will certainly be found.
Then separate the work into three groups: first, water, structure, wiring, plumbing, safety, and access; second, kitchens, bathrooms, layout, plaster, floors, and windows; third, paint, lighting, hardware, final finishes, and decoration. This keeps the renovation from becoming a finish project before it becomes a sound building.
How This Connects to 1920s Style
Not every 1920s house should be renovated the same way. A Craftsman bungalow, Tudor Revival house, Colonial Revival house, Spanish Revival house, and Art Deco-influenced house have different details and different mistakes. A Craftsman renovation may depend on woodwork, built-ins, low rooflines, porch details, and simple material honesty. A Tudor house may depend on steep roofs, masonry, leaded glass, arched openings, and heavy trim. The style should guide the renovation — it should not turn the house into a theme set. The strongest work often looks simple because the proportions, materials, and details are right.
Use the existing style pages to support the renovation decisions:
- 1920s Craftsman house style
- 1920s interior design style
- 1920s decor style
- 1920s Art Deco
- Art Deco house
Read This Next
- 1920s House Styles: How to Read the House Before Renovating
- 1920s Craftsman House Style
- 1920s Interior Design Style
- 1920s Decor Style
- 1920s Art Deco
- Art Deco House
References
- EPA: Lead Renovation, Repair and Painting Program
- EPA: Protect Your Family from Exposures to Asbestos
- NFPA 70: National Electrical Code
- InterNACHI: Knob-and-Tube Wiring
- Carson Dunlop: Knob-and-Tube Wiring and Home Insurance
- ElectricSafe: Cost to Replace Knob-and-Tube Wiring
- InterNACHI: Plumbing in Older Homes